
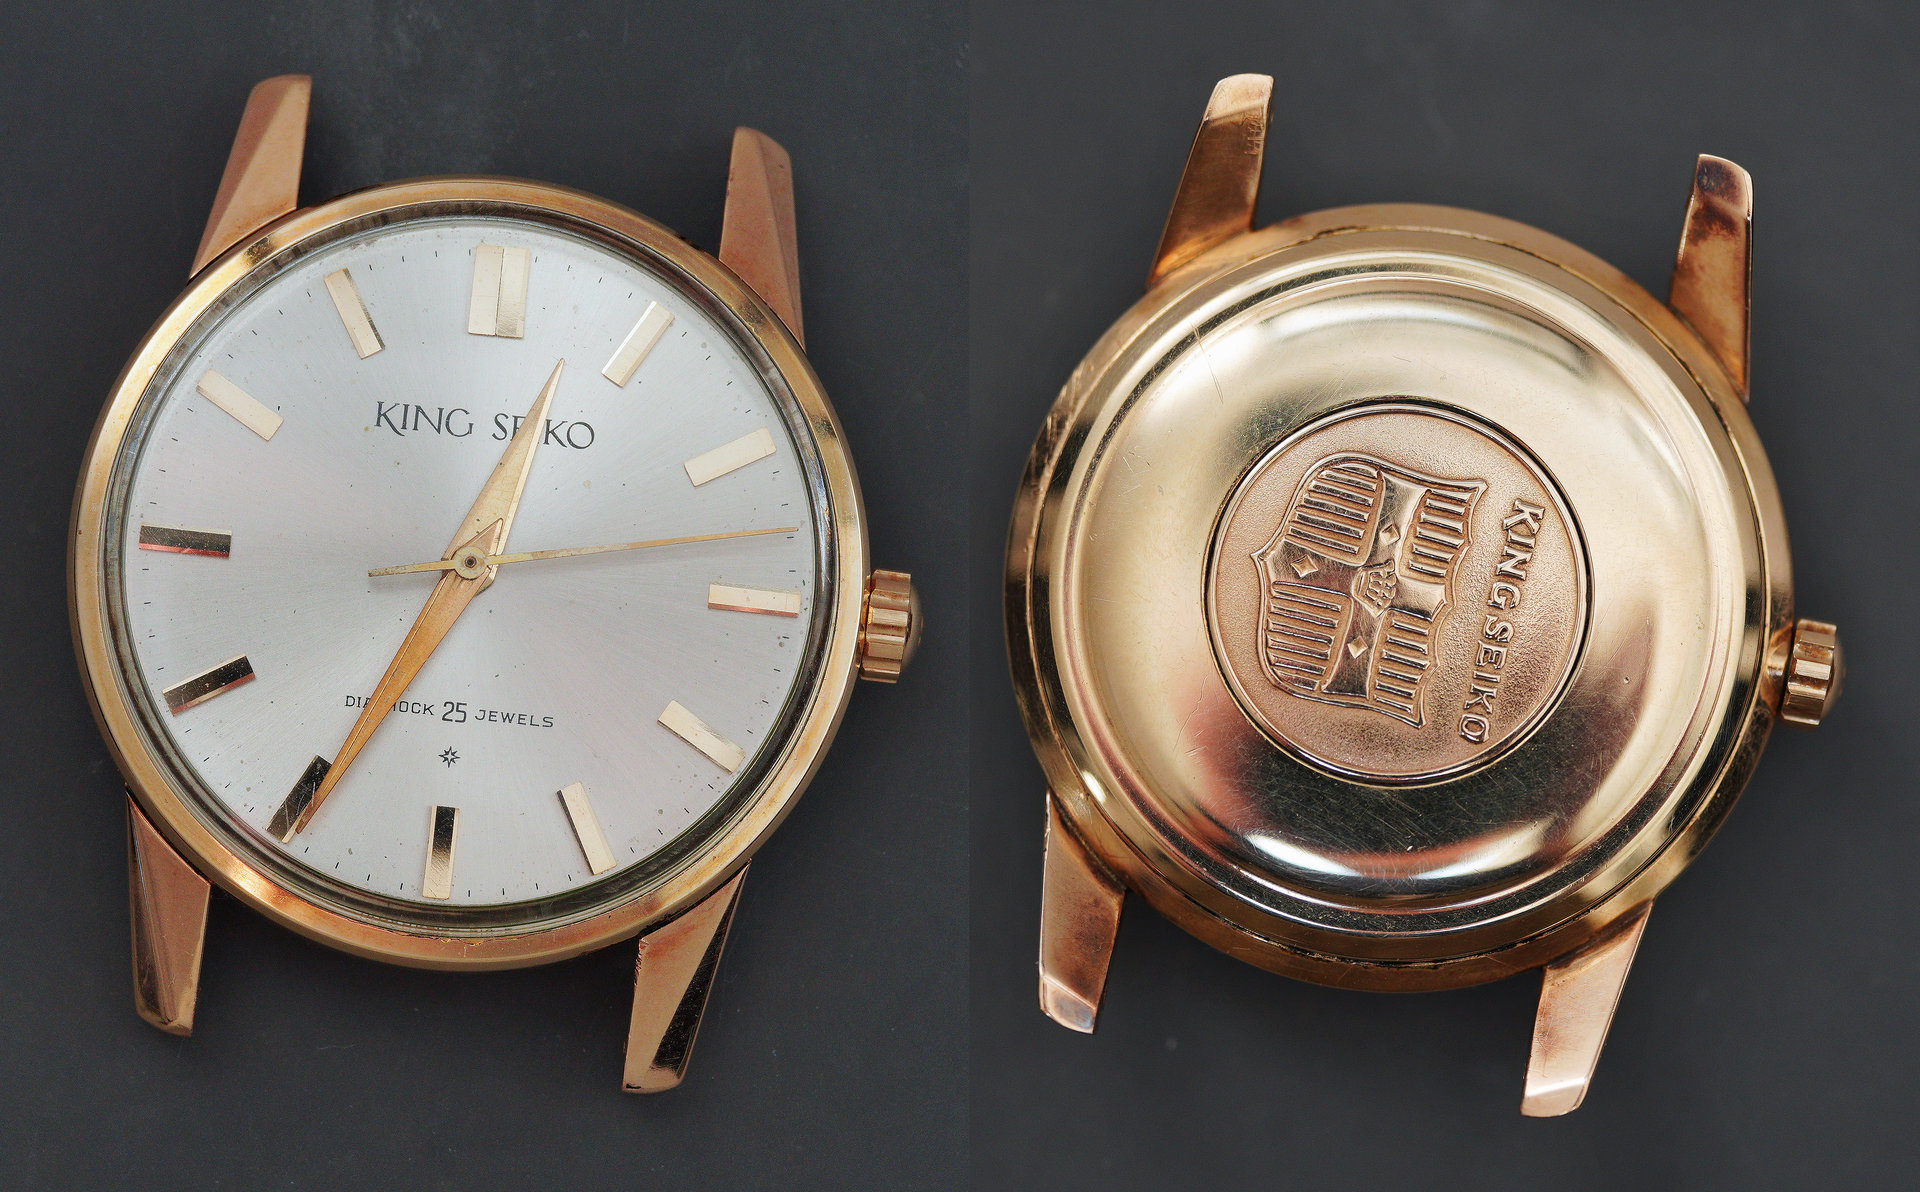
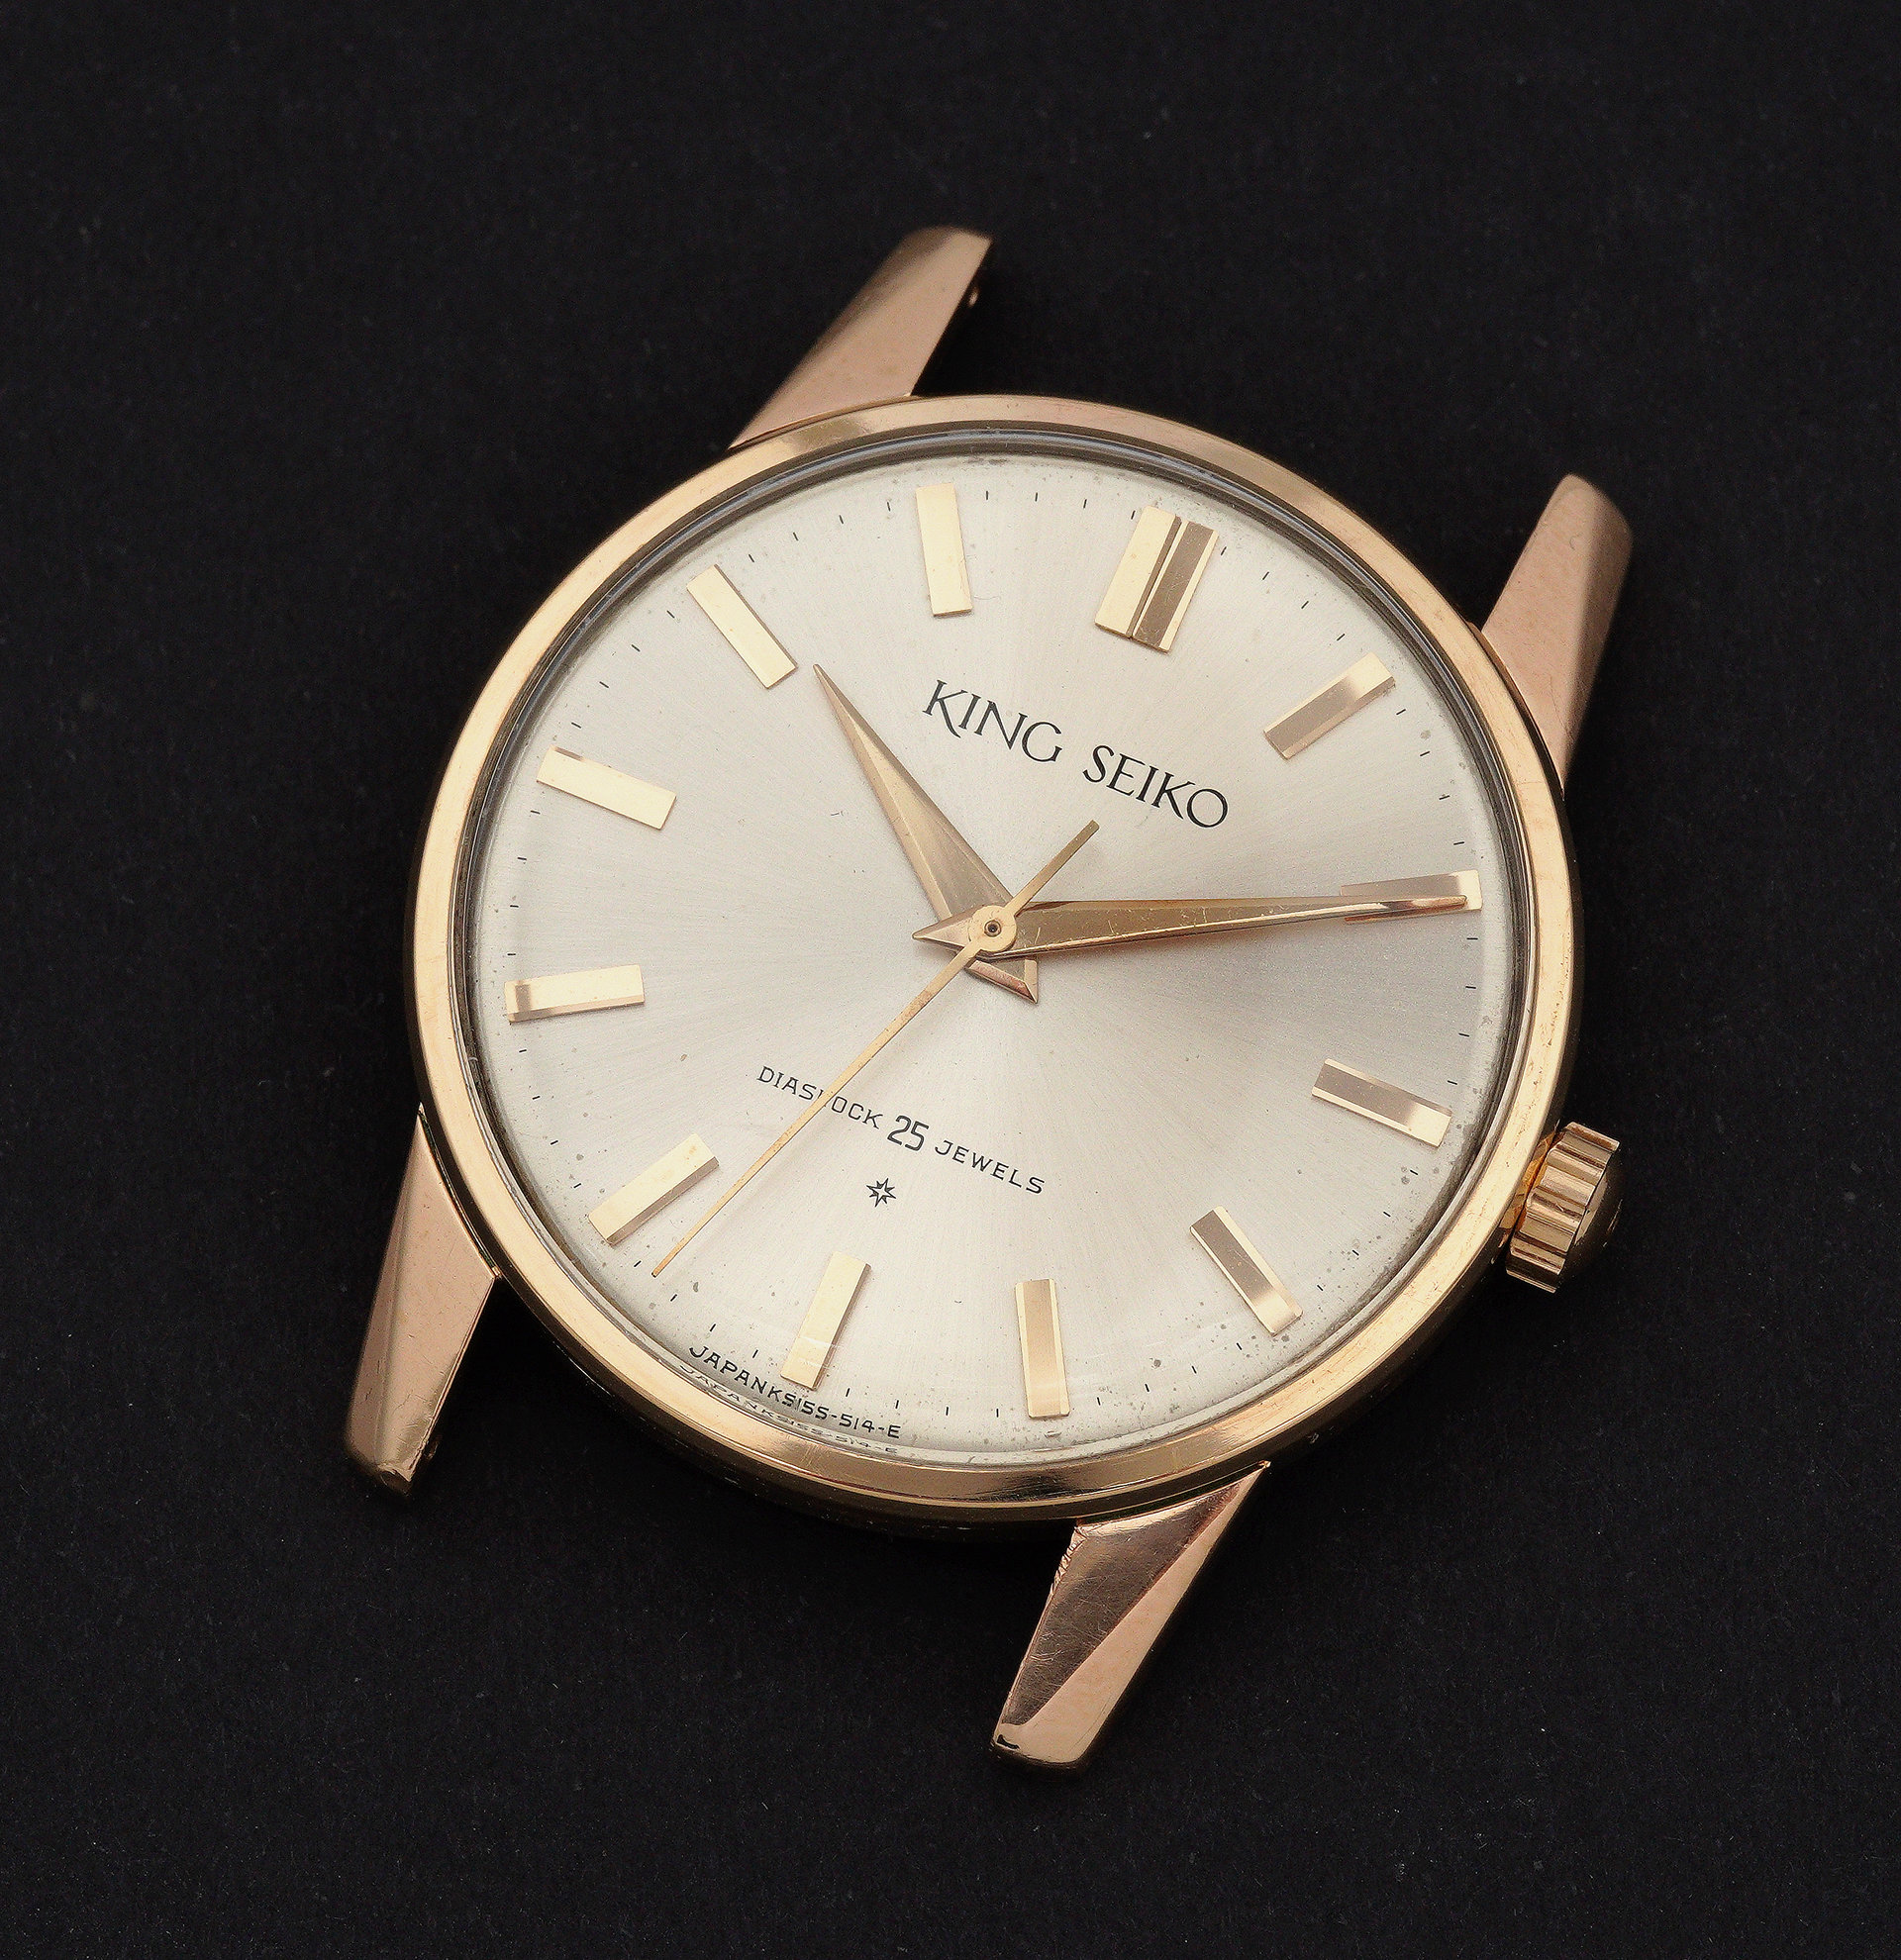
The early evolution of the King Seiko product line saw a number of slightly dislocated yet entangled strands emerging in a development strategy that looked rather improvised compared to the seemingly more deliberate, linear step-by-step development of Grand Seiko. The first version of the King Seiko, the J14102E, began production in June 1961 and continued until August 1963. Initially it was available in a 100 micron thick gold-filled case, with a stainless steel version released in May of the following year.
Production of that first gold-filled version stopped in September 1962, to be replaced by a slightly down-graded 80 micron gold-filled model with the ‘E’ dropped from the model number. The J14102 and stainless steel J14102E were produced in parallel for another year or so, with the gold version lasting a month longer. All variants of the J14102(E) were 34.8 mm in diameter, about the same as the Grand Seiko 3180 released a year earlier, but the thinner lugs of the King Seiko made it look a little dainty by comparison.
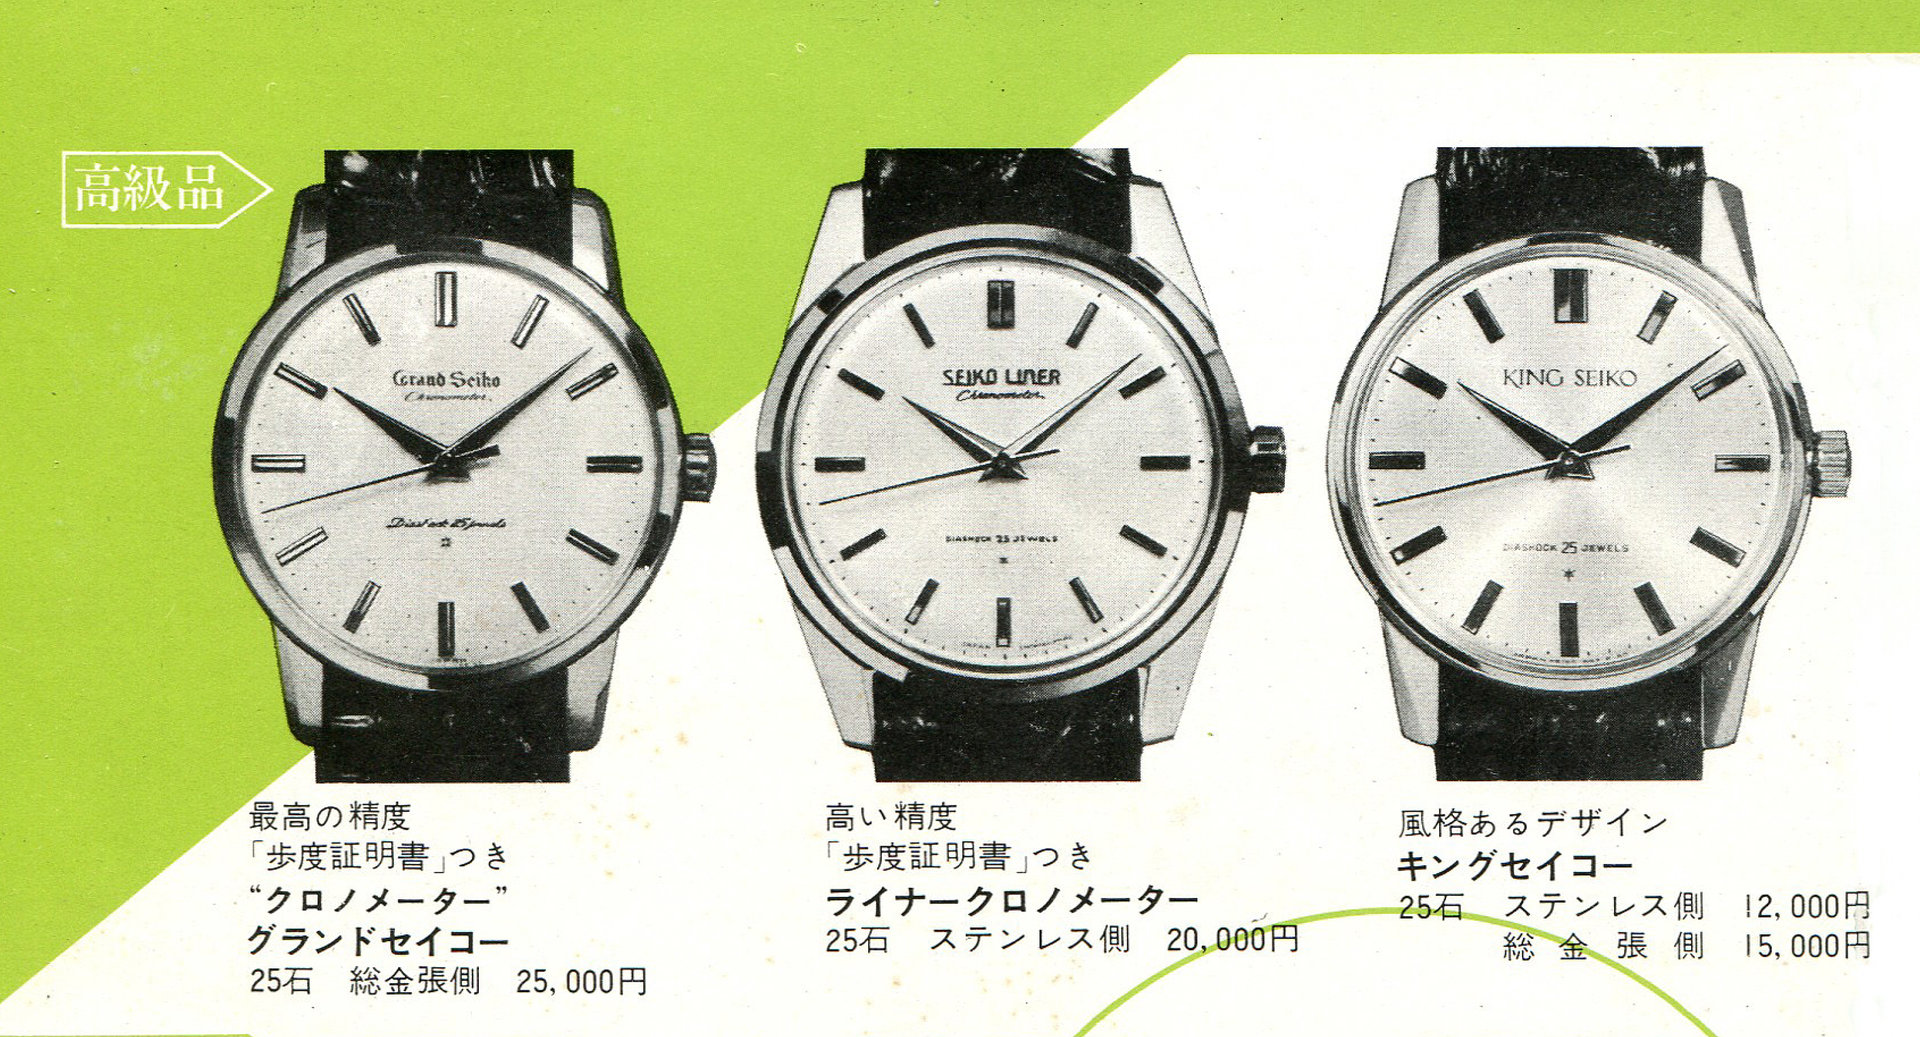
In September 1962, a second version of the King Seiko appeared, this one housed in a larger case, of 35.8mm diameter, and with thicker, more emphatically faceted lugs. The model number of this new watch was 15034 which arguably classifies it as the second King Seiko rather than a variation of the first, although in matters other than dimensions and a mild tweak to the lugs, there is not a lot to distinguish the two in terms of technical specifications. The 15 of the model number is a reference to the enlargement of the dial diameter to 15 lignes (33.8 mm), compared to the 14.5 lignes (32.7 mm) diameter of the 14102 models. In the flesh, this modest increase does provide the 15034 with a presence that flexes its credentials a little more overtly in the company of the imperious Grand Seiko 3180 (see the catalogue image above). The gold-filled version of the 15034 was produced for just a year until September 1963, at which point production of the steel version paused, with a final short production run lasting from May 1964 until July 1964.
Since working on a pair of the first-generation King Seiko J14102(E) a little over a year ago, I had resolved to use that as a reference point to then work through the KS line-up in a chronological progression. However, I had been baulked in moving to step two by the inconvenience of not having an example of the 15034 to work on. In July this year though, an early example dating from October 1962 found its way temporarily into my hands and the following is an account of its experiences with me.
Externally, the watch presented very well, the case lines still crisp and even, the dial and hands clean and relatively unblemished. The crystal was in good condition too although it creaked when pressed, suggesting its fit was not entirely snug. However, the positive external condition was not endorsed as emphatically by the cosmetic condition of the movement: generally, it looked complete and tidy but there was very significant corrosion to the crown wheel, setting screw, click and ratchet wheel, all of which suggesting that water had made its way into the case at some point via the crown tube.
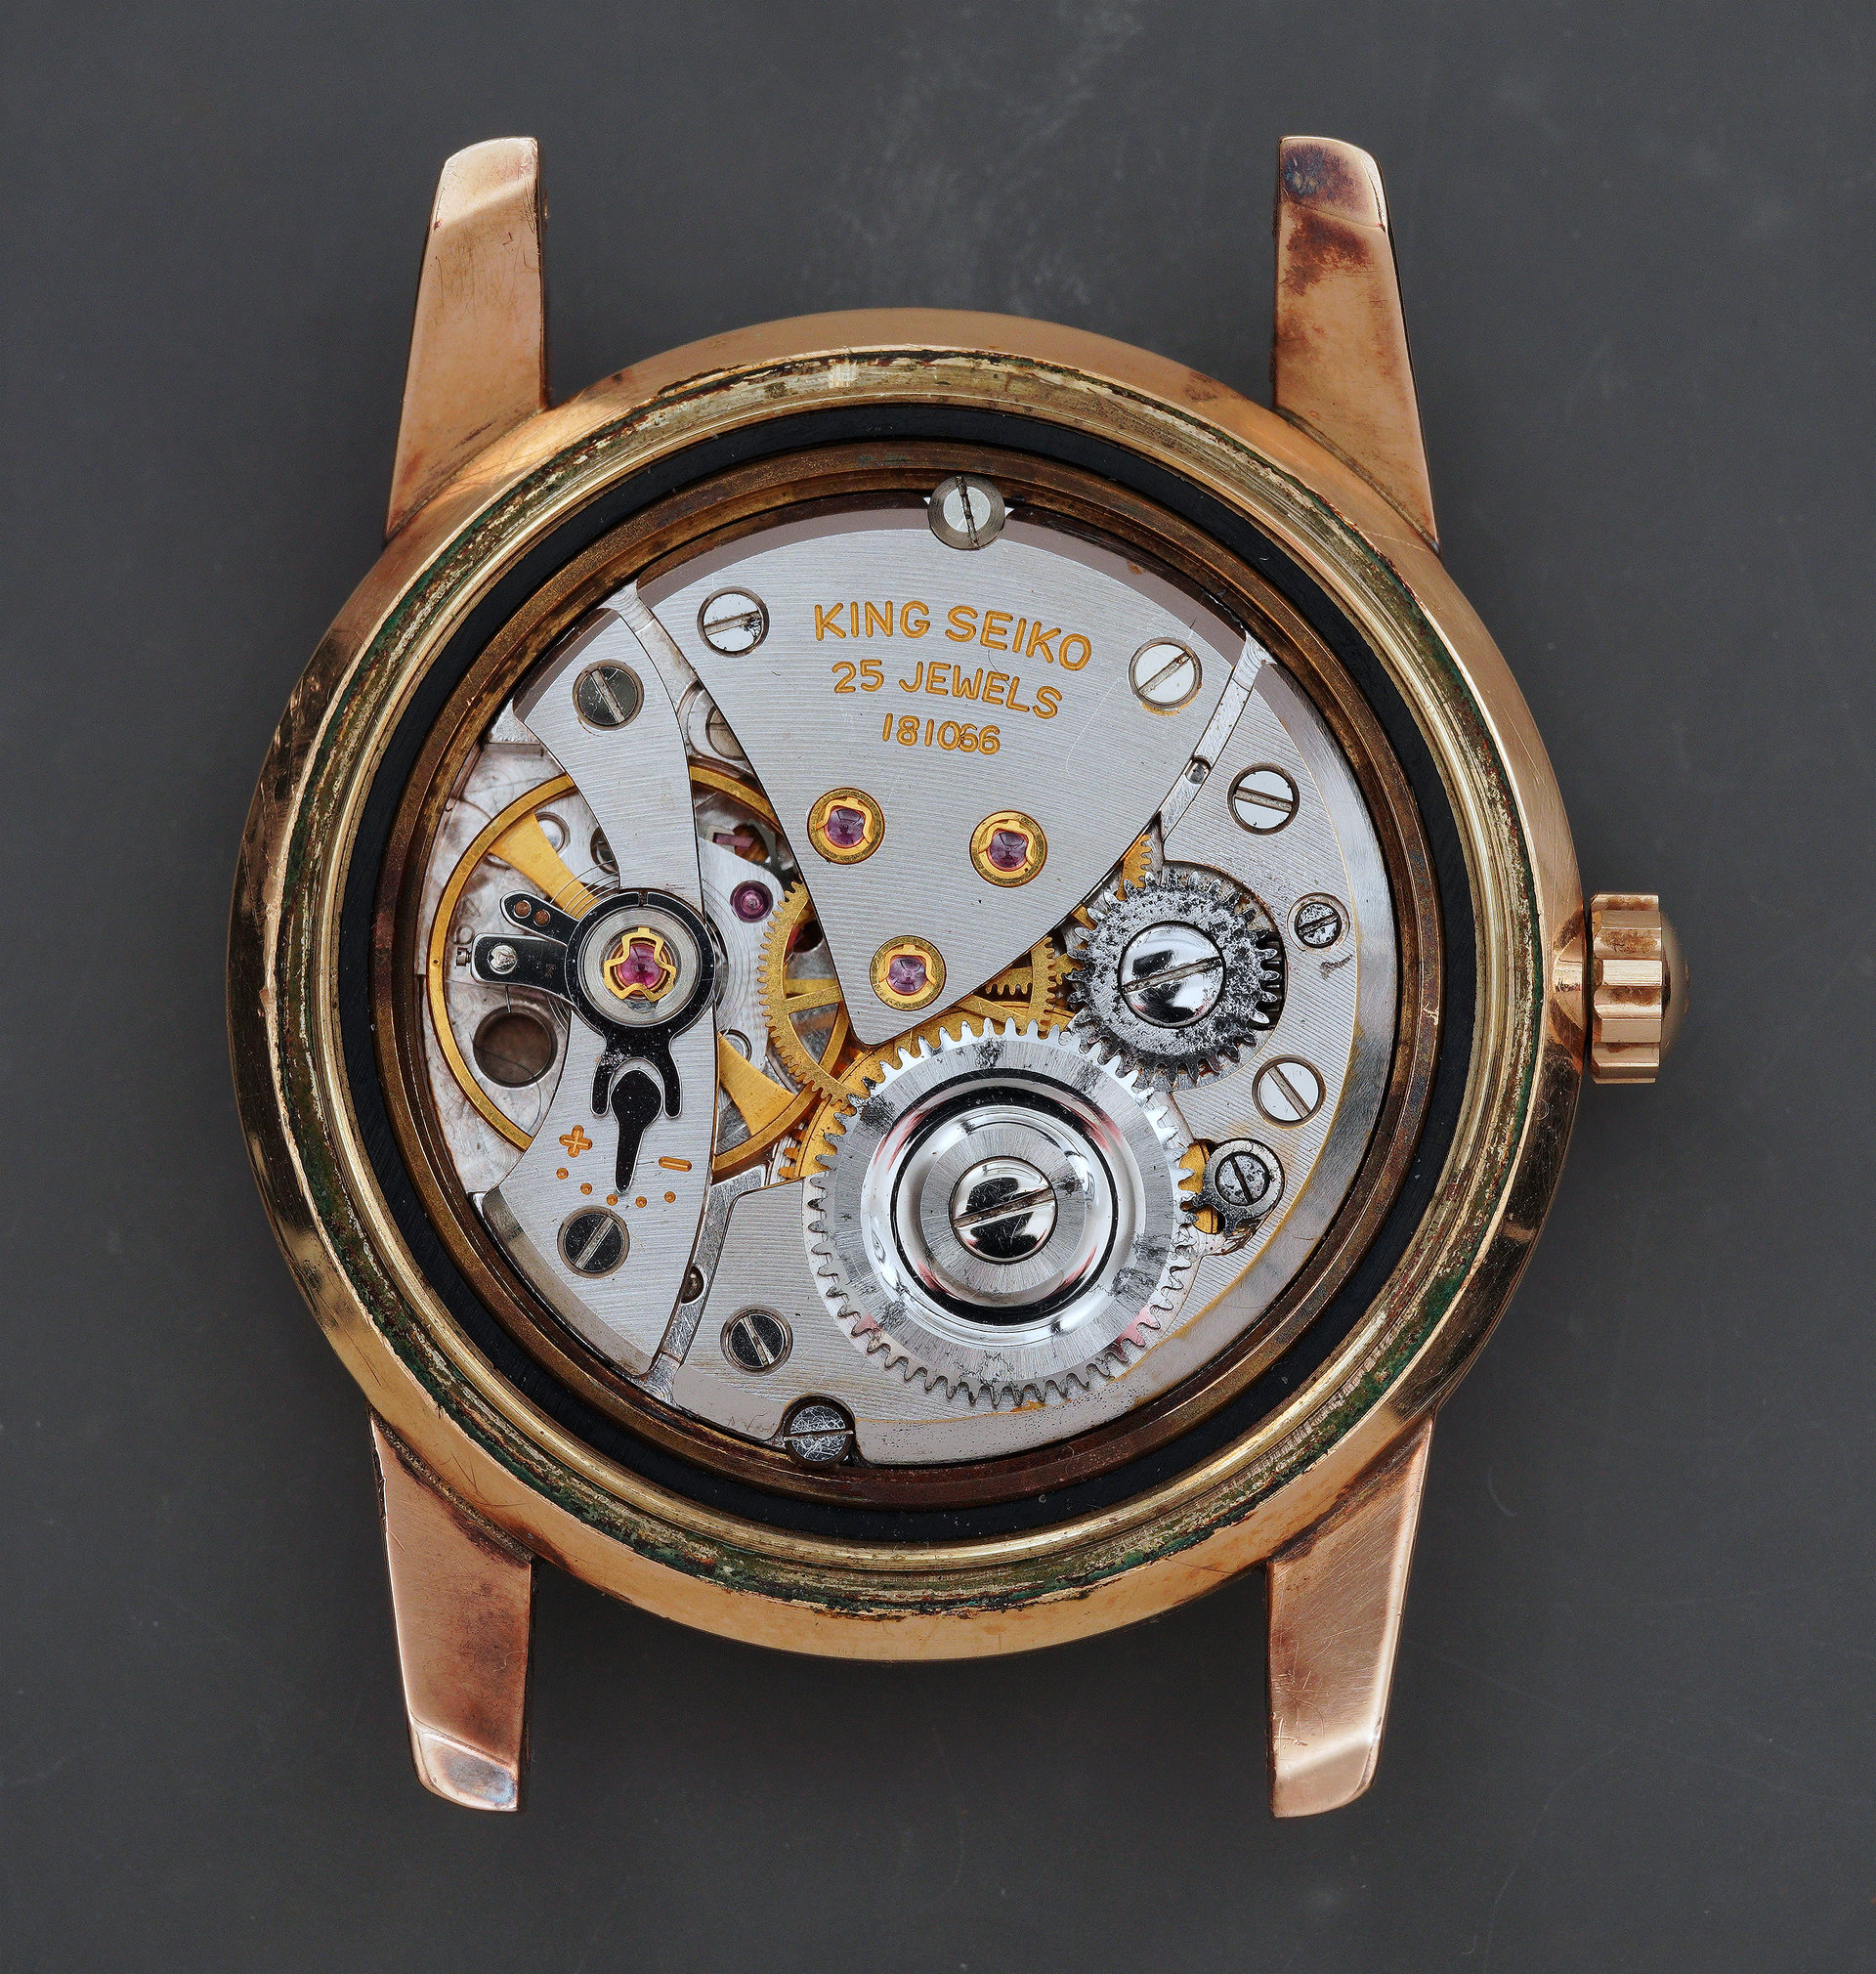
The only other immediate point of concern was the close proximity between the stud holder and regulator arm on the balance cock. This would suggest that the watch had been running fast and the only way to get it to run acceptably close to even was to move the regulator arm as far as it could go to increase the effective length of the hairspring, thus slowing the rate. We will investigate further in due course.
This being an old-school traditional three-part case, movement extraction first requires the case back, mid-case and bezel/crystal assembly to be separated into three.

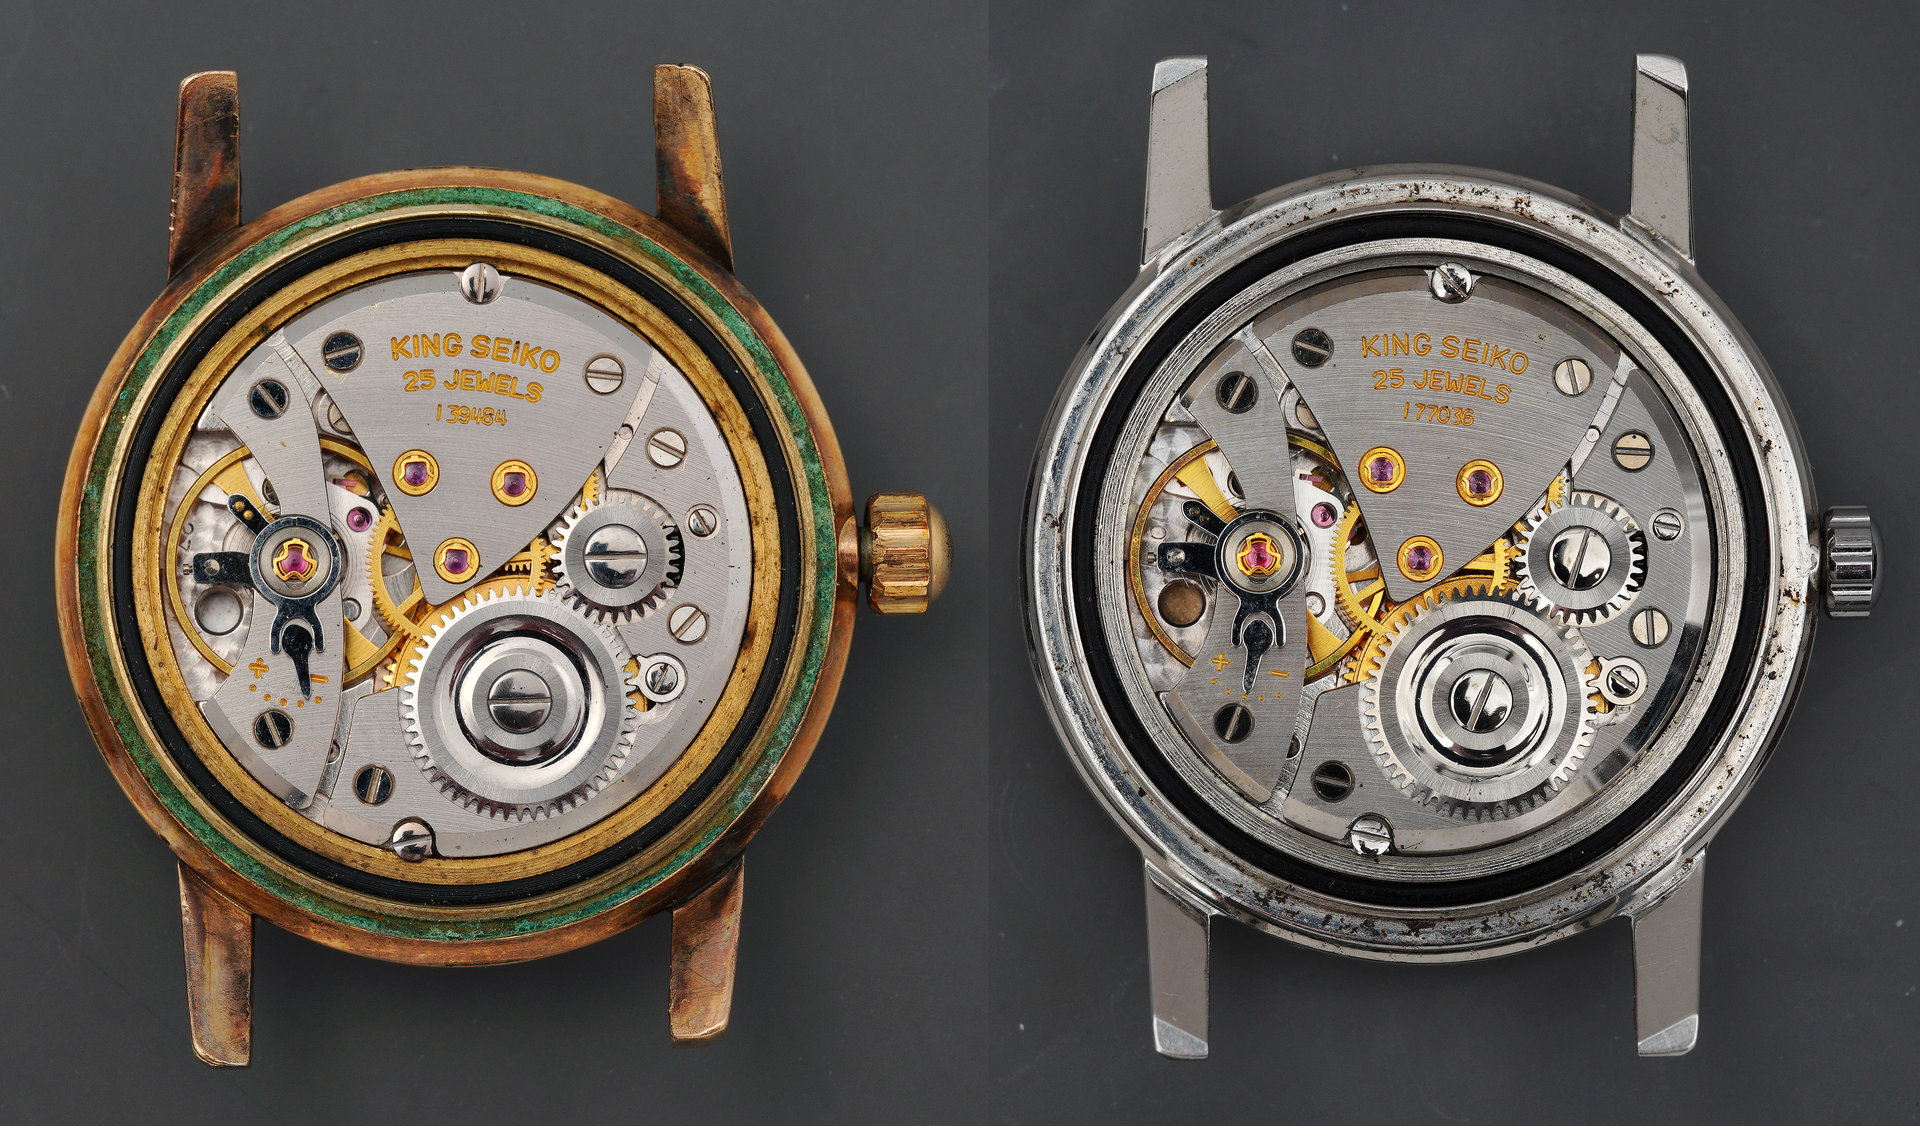
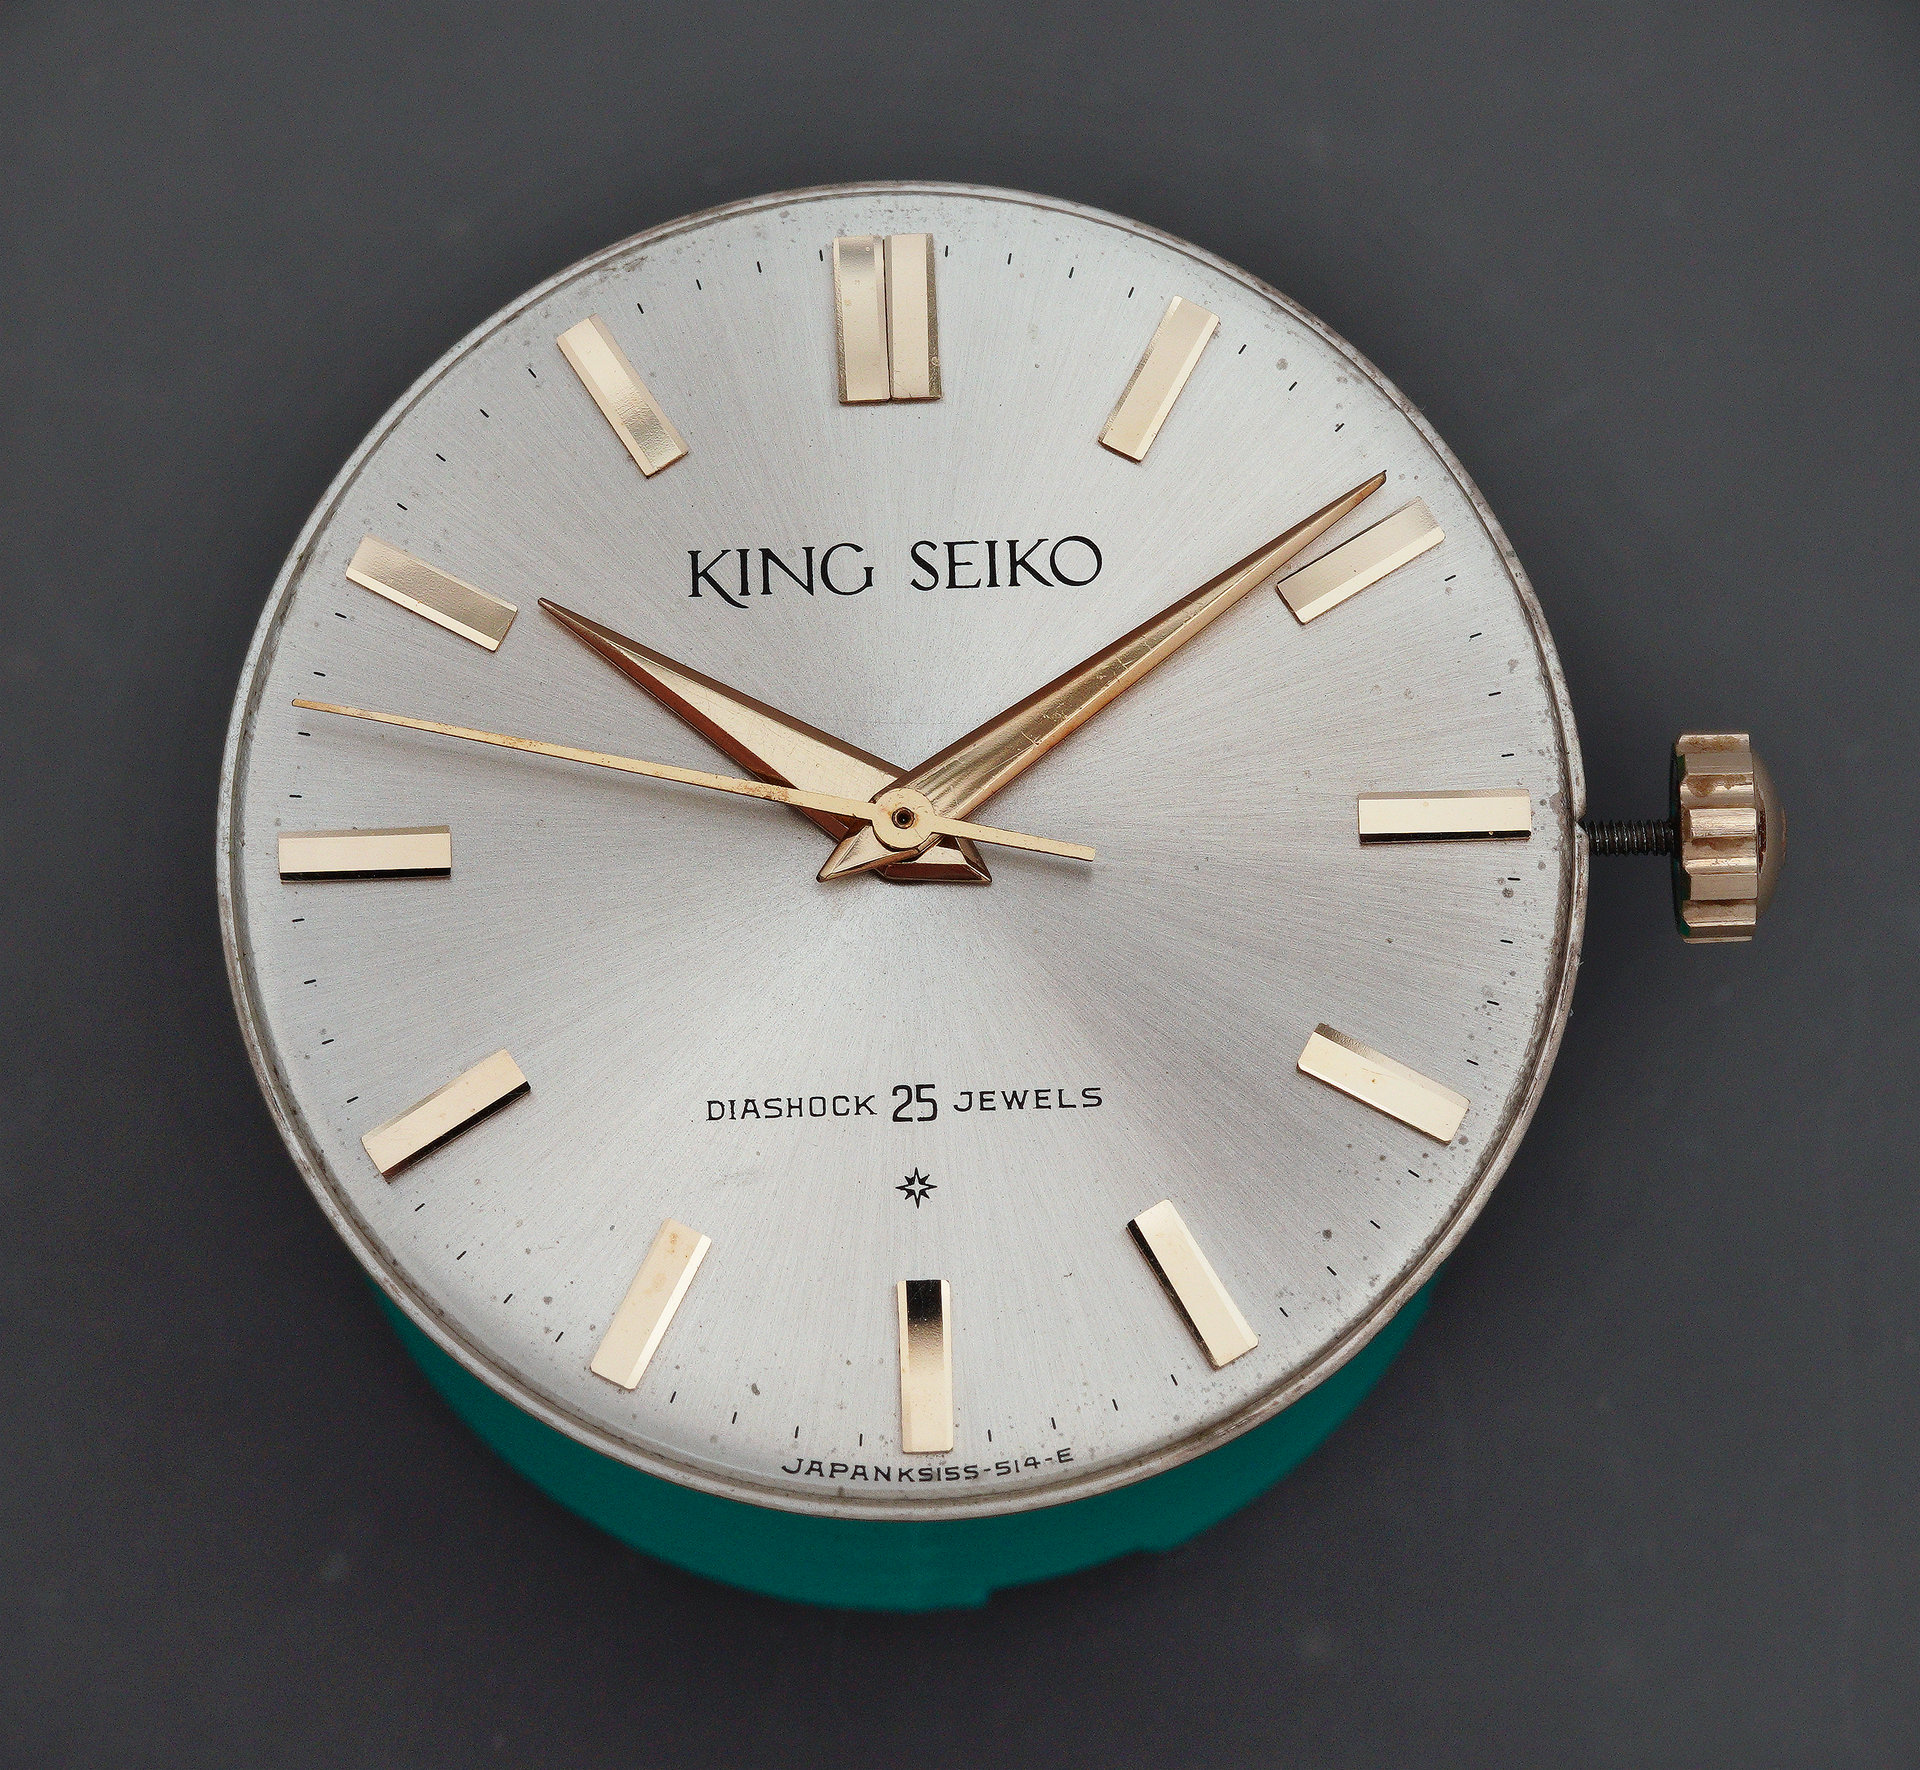
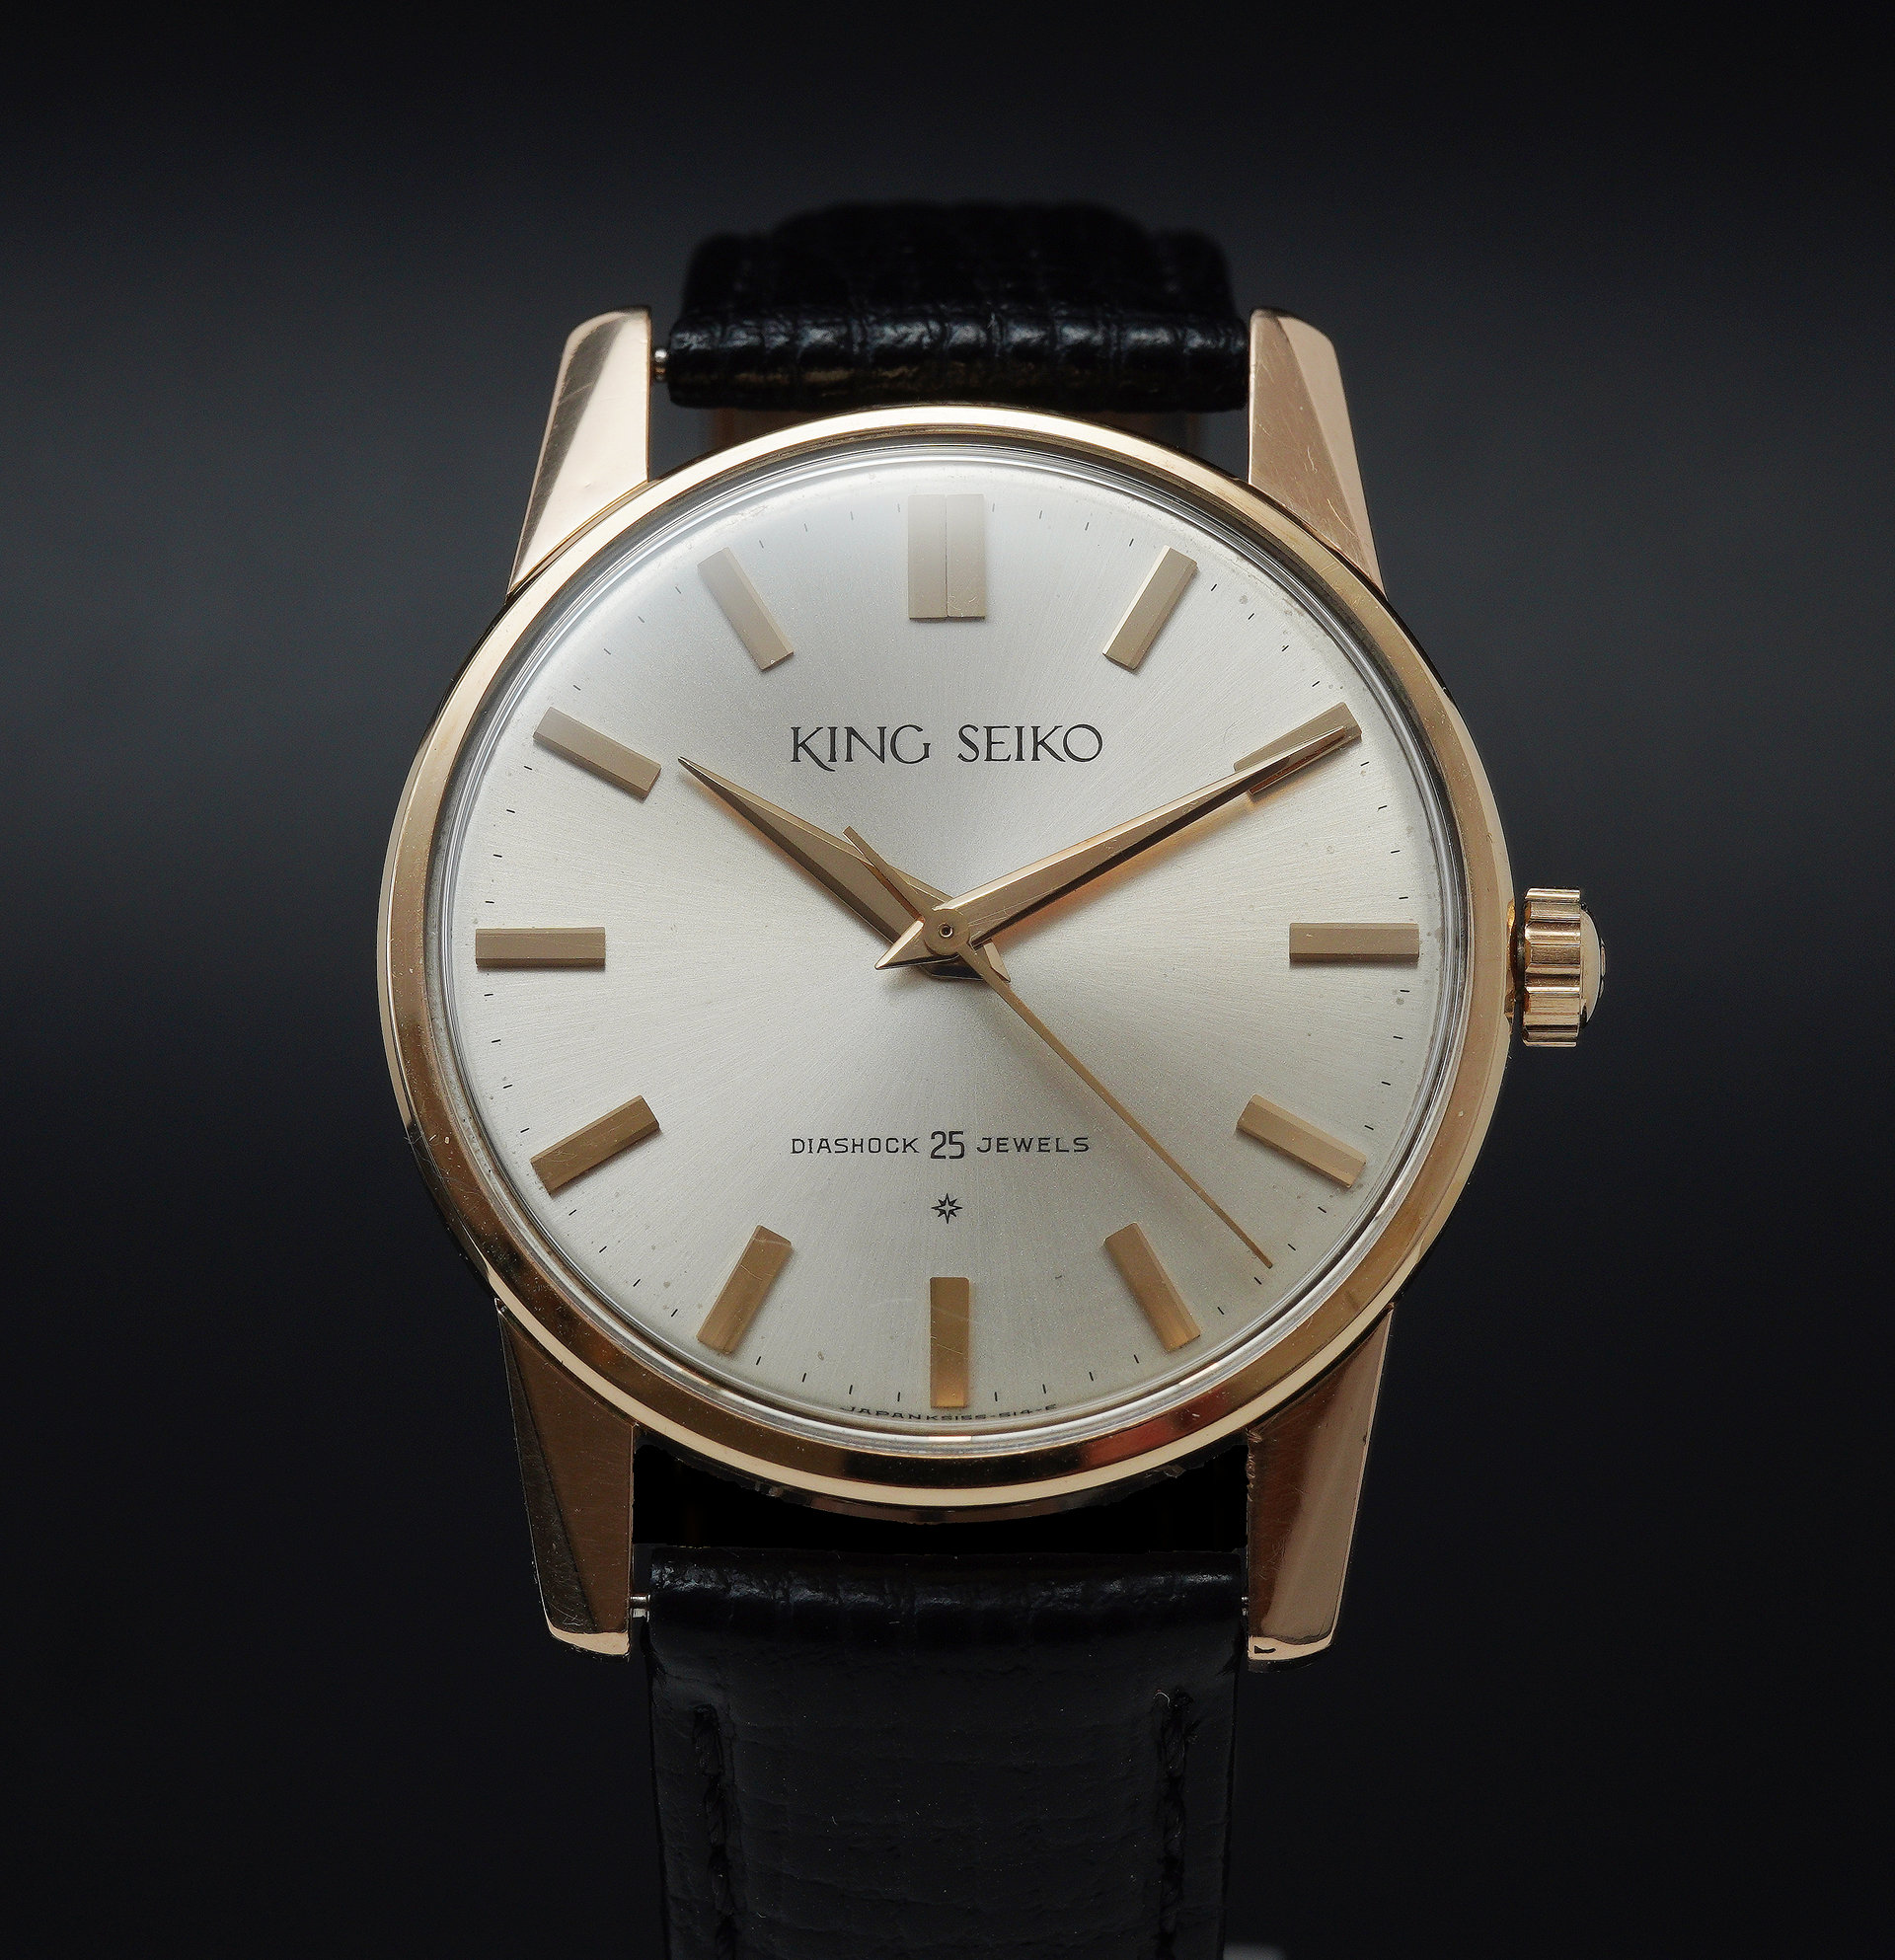
The unobstructed view of the dial that this provides allows us to note one distinguishing characteristic of the 15034 dial (right, below) compared to the slightly smaller dials fitted to the 14102(E) (left, below). The marginally greater area provided by the larger dial allows for a fourth minute hash mark to be included between the 11 and 12 marker and between the 12 and 1 marker on the 15034 dial. Note the absence of the 1 minute and 59 minute markers on the 14102 dial.
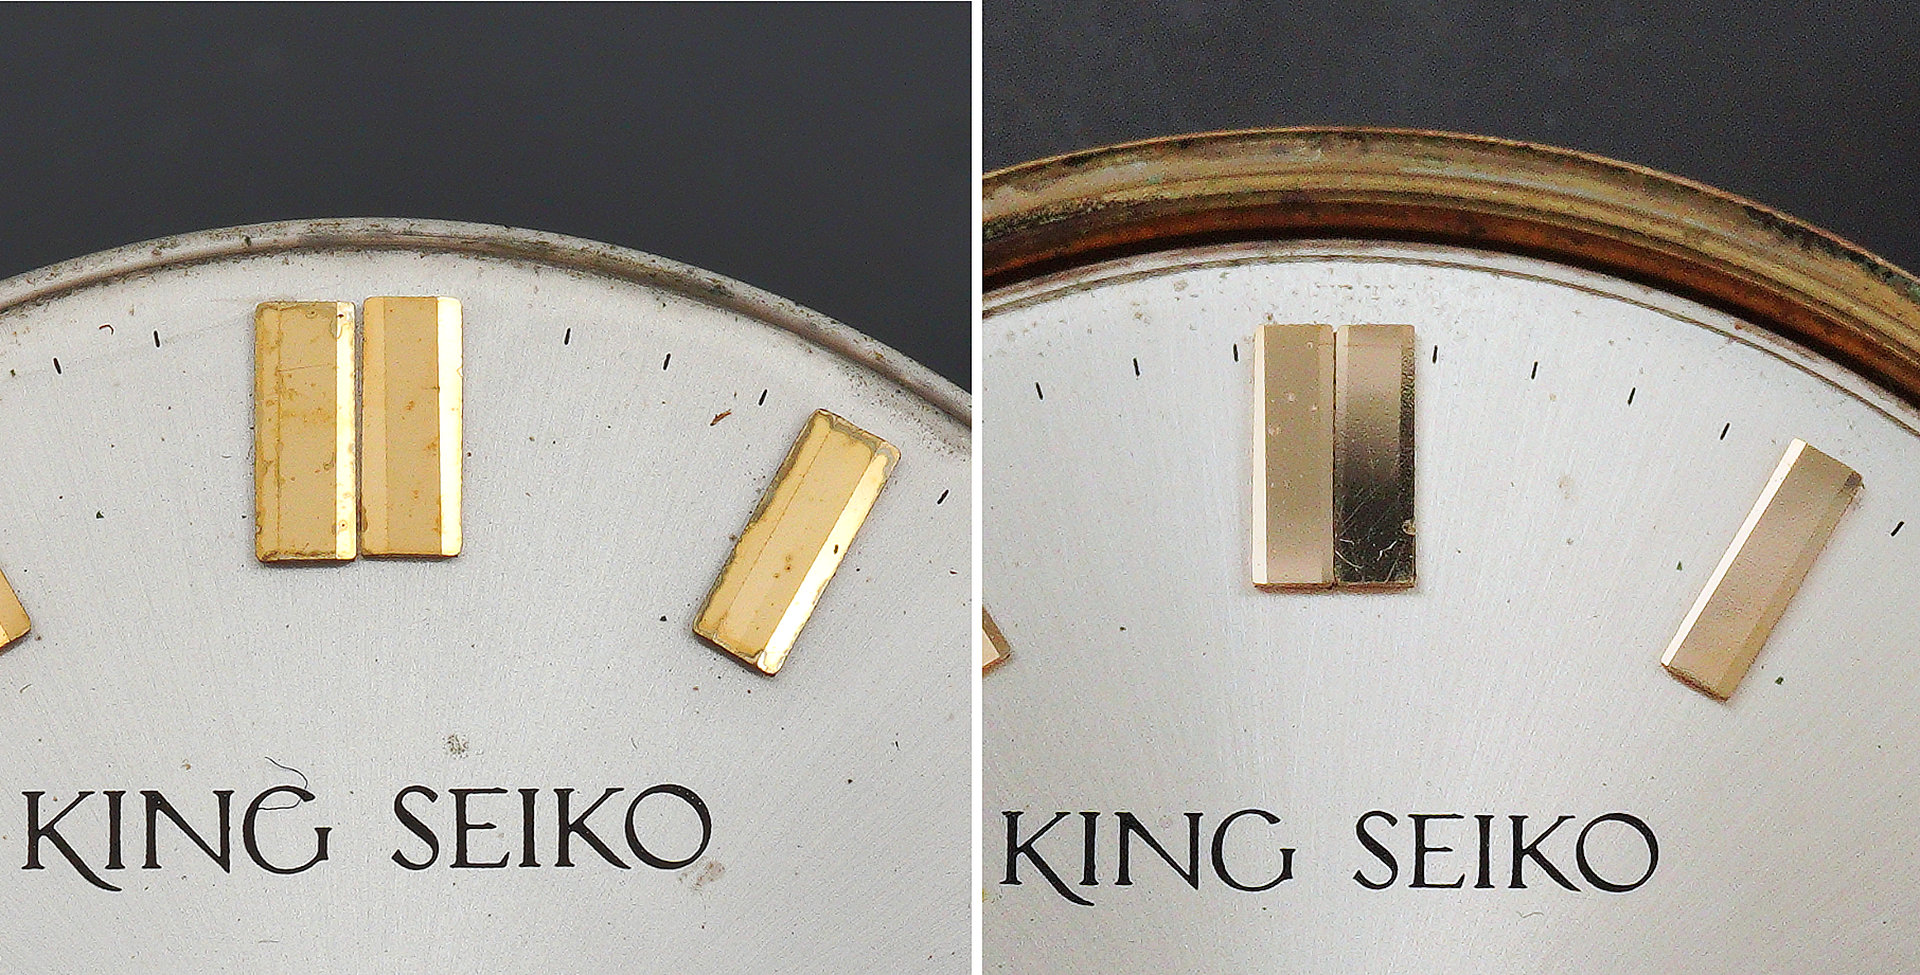
The dial code sitting beneath the 6 marker, KS15S-514-E, tells us that this is an SD dial (Special Dial) with solid yellow gold applied markers. This designation is affirmed by the eight-pointed Special Dial marker sitting directly above the 6-marker.

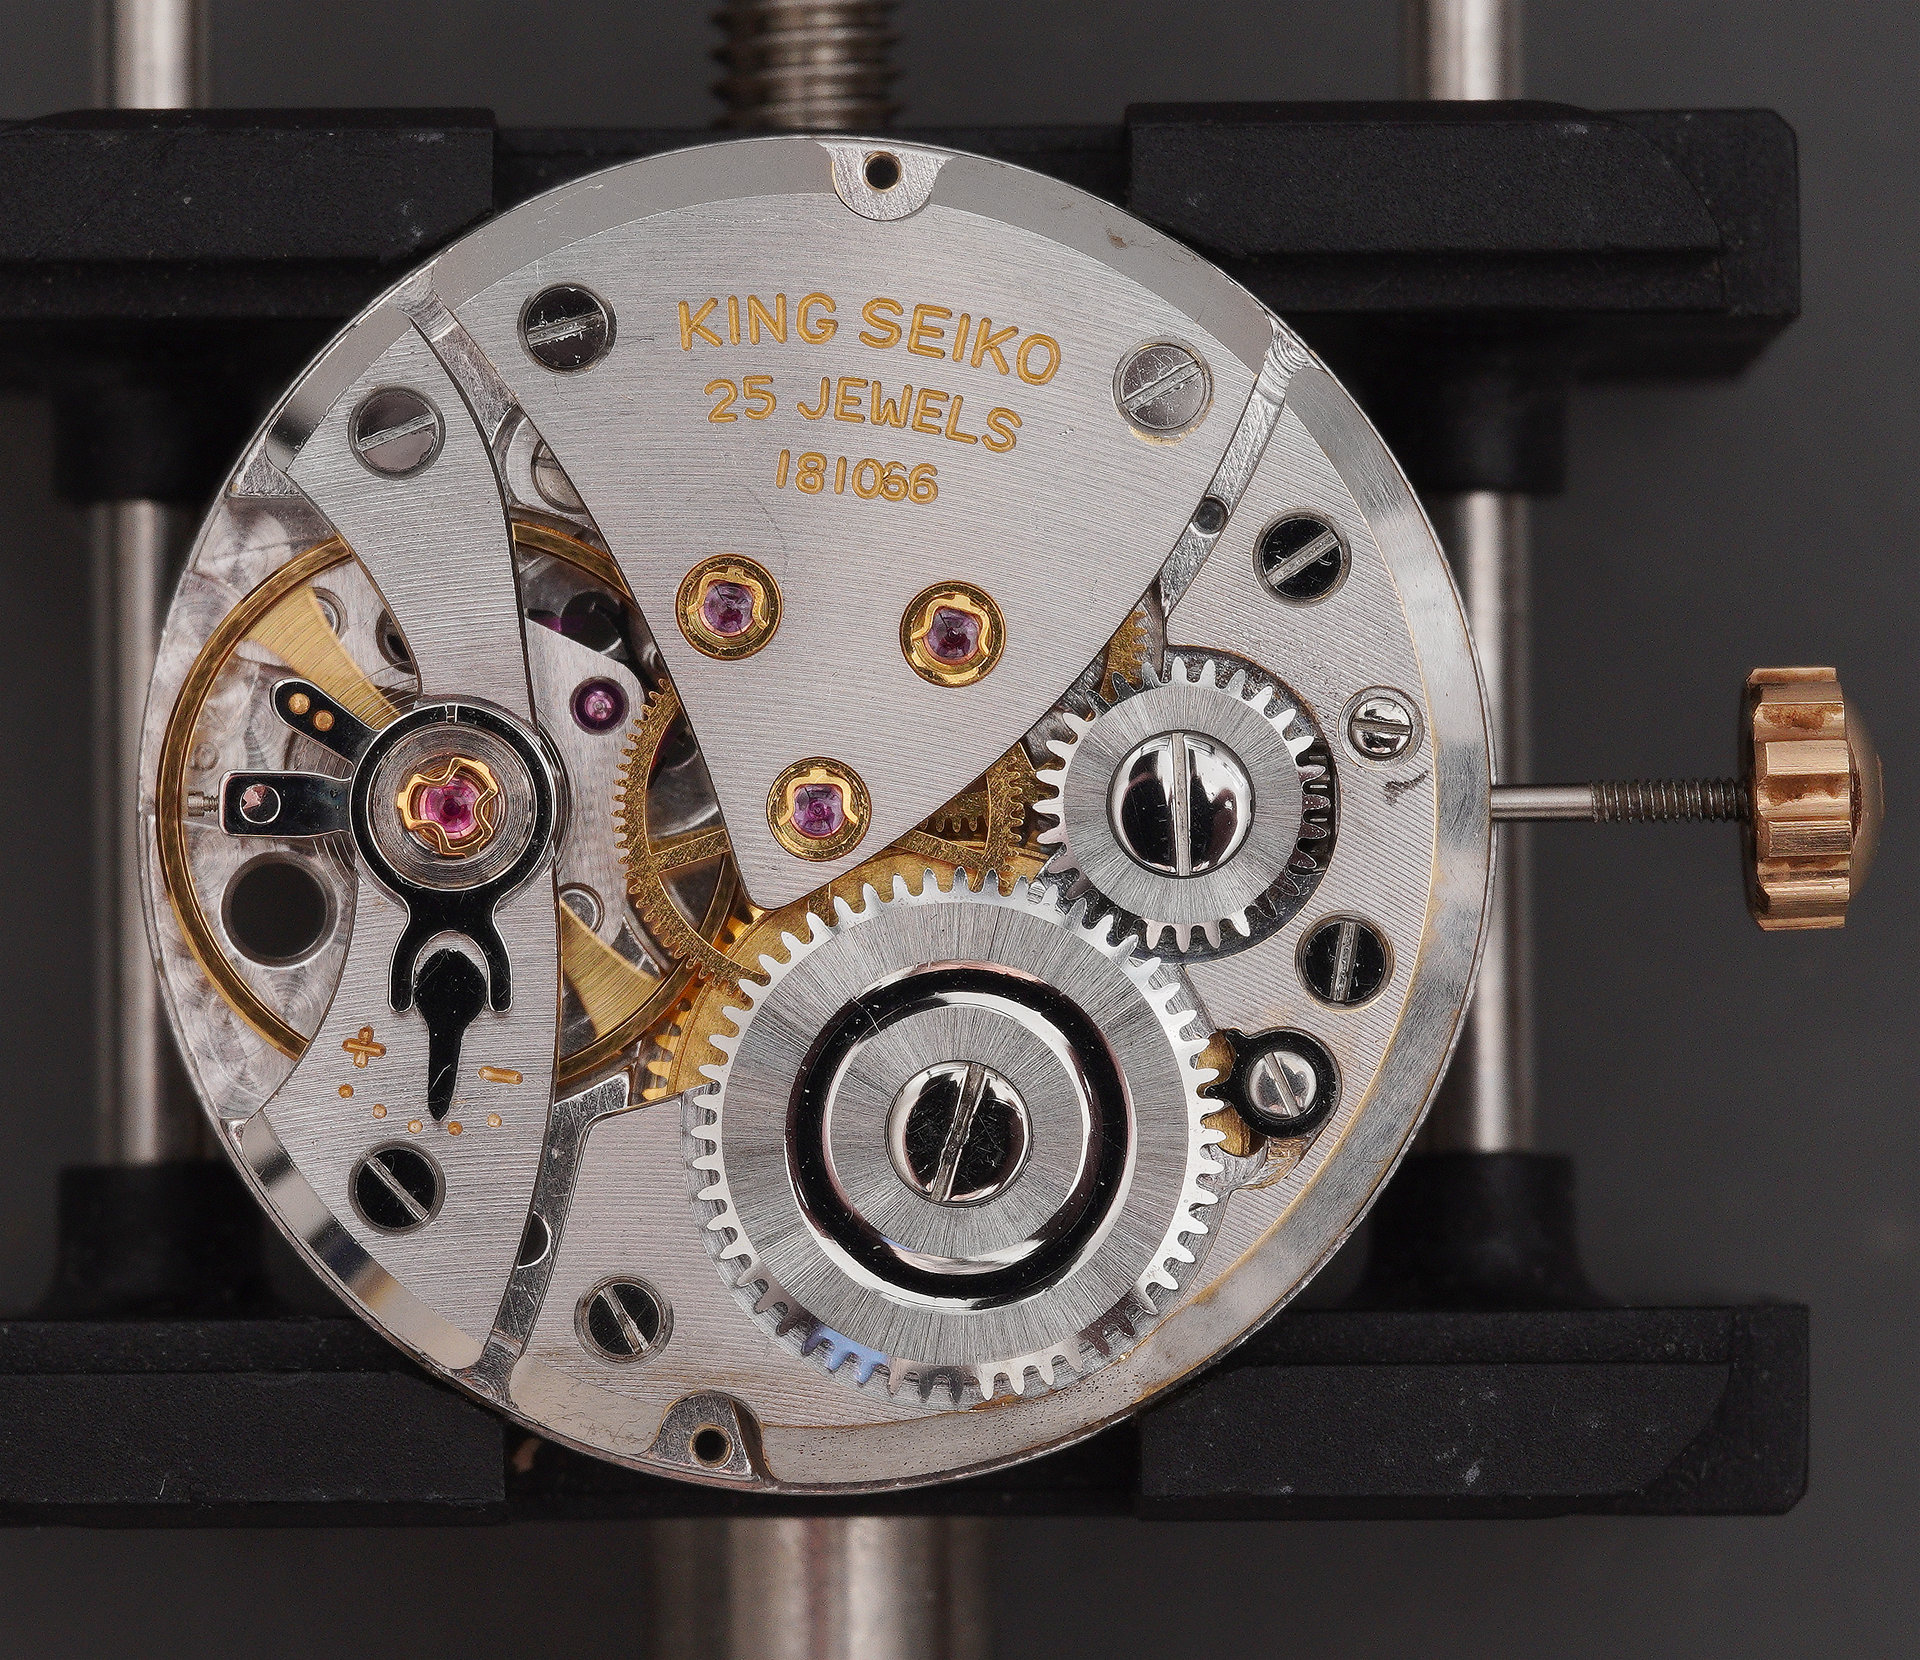
The movement is secured to the case using a pair of casing screws and with these removed, the movement and dial can be lifted out of the mid-case through the dial aperture. With the movement free of the case, but still attached to its dial, we can get a clearer view of its somewhat patinated condition.

Some of the patina is really lovely, in particular the brassing along the edge transition of the barrel and train wheel bridge.
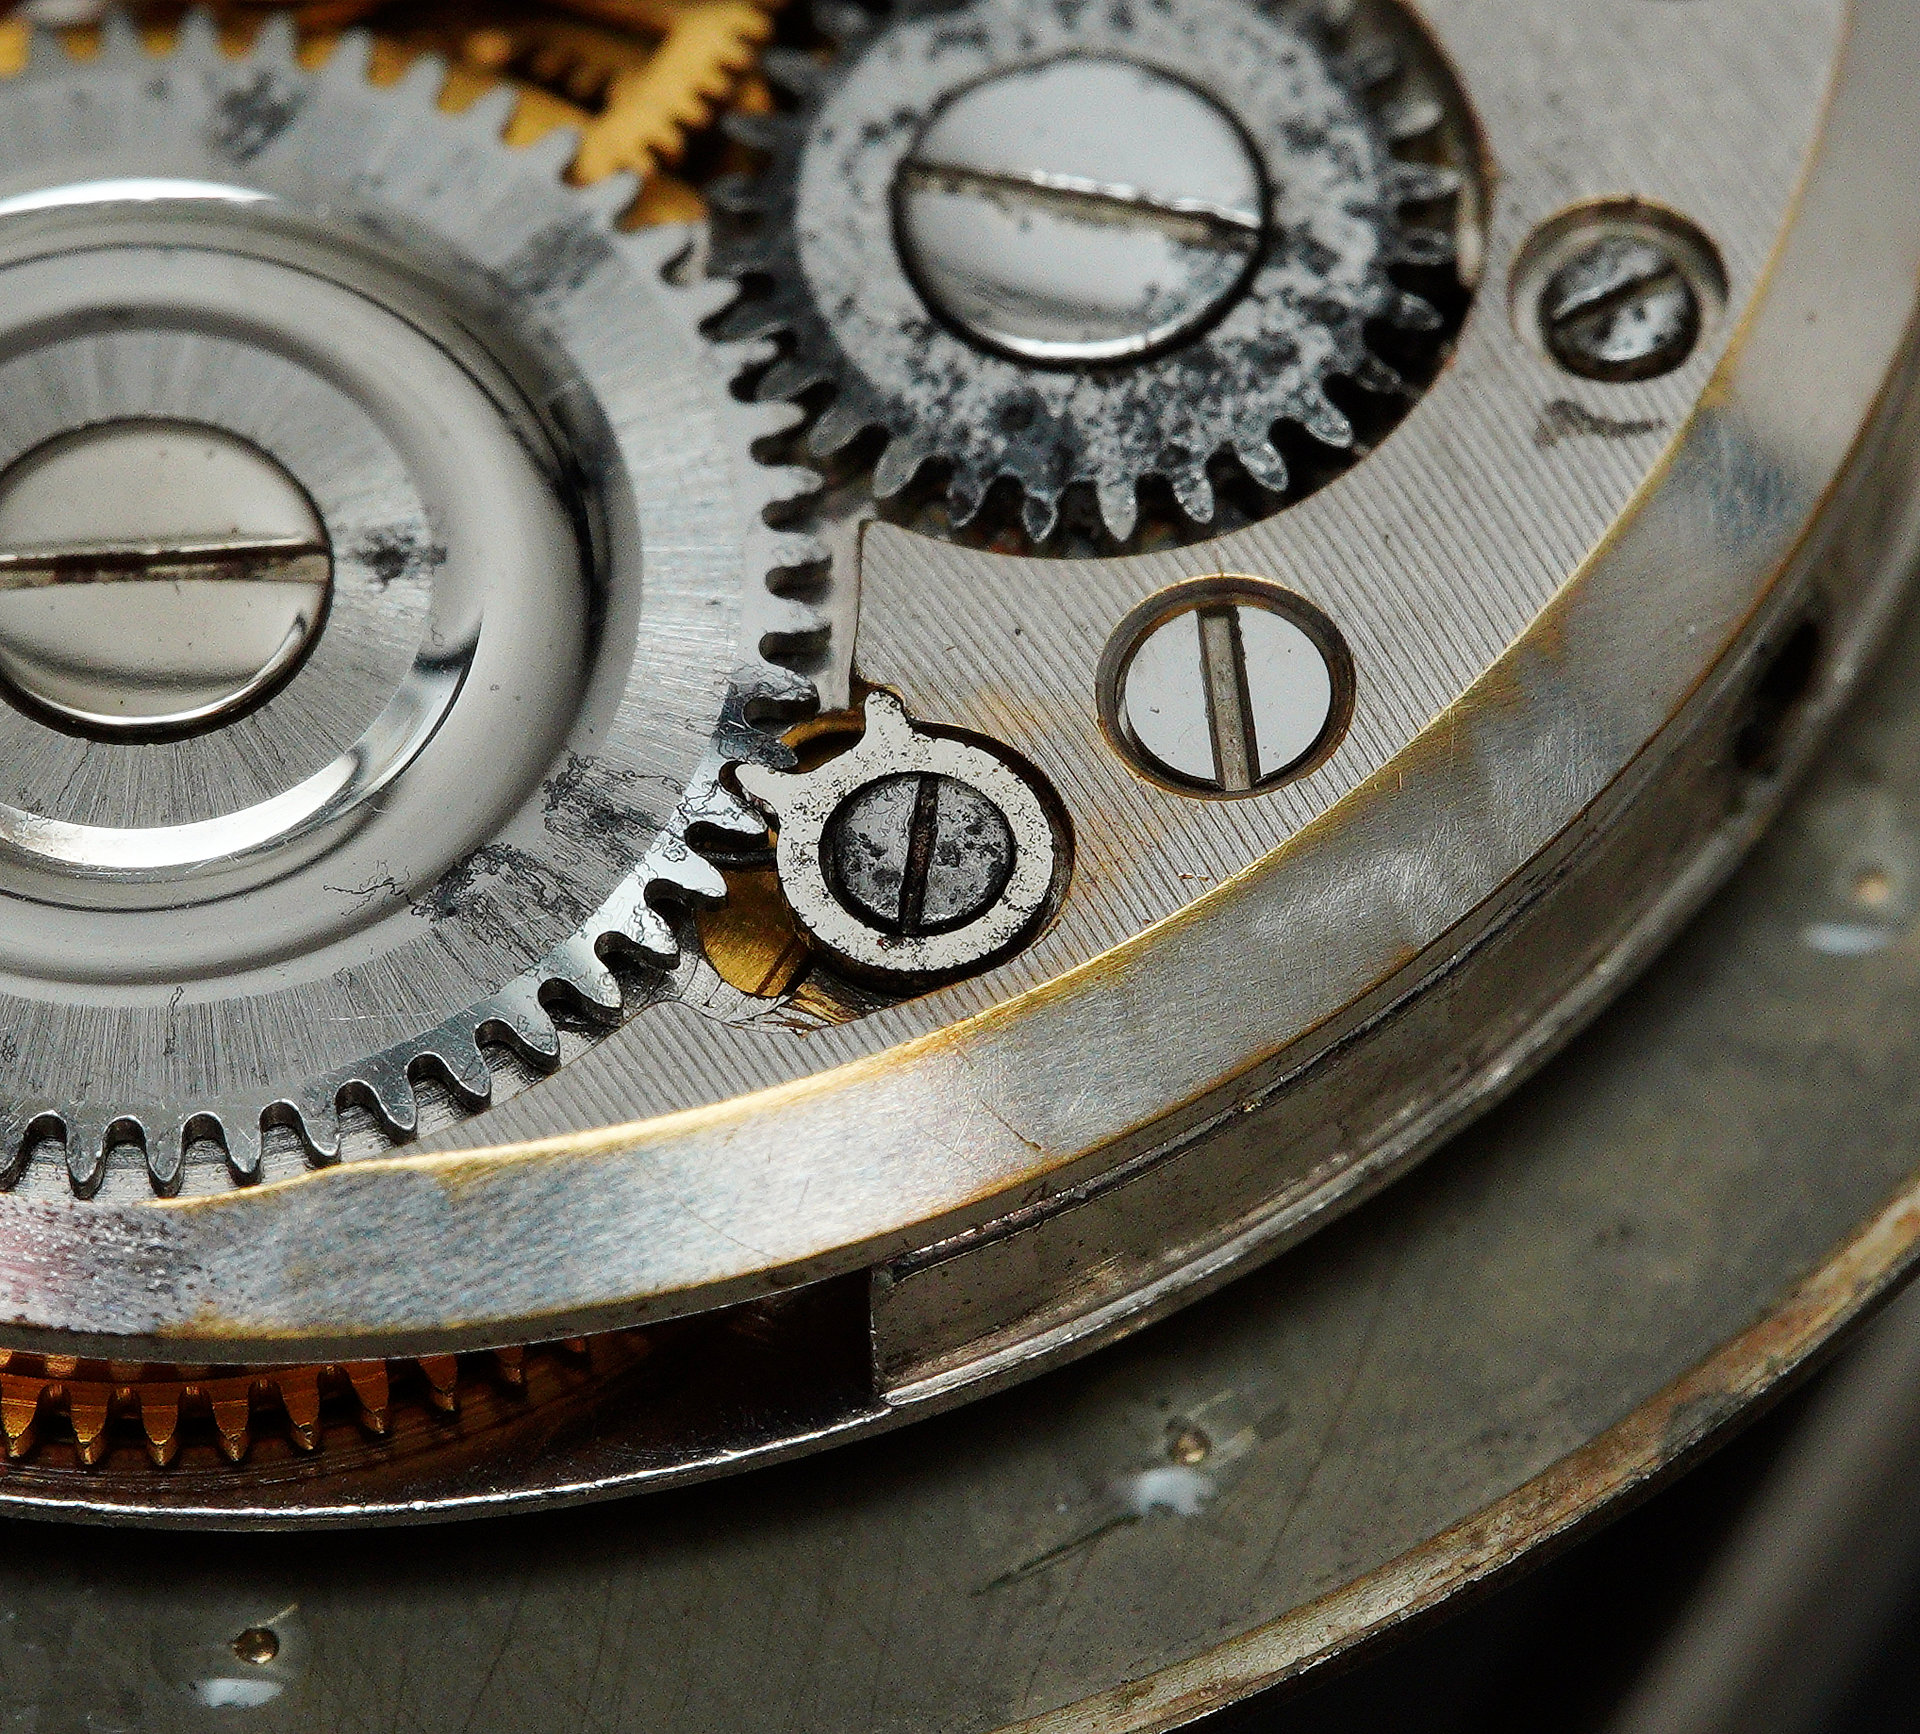
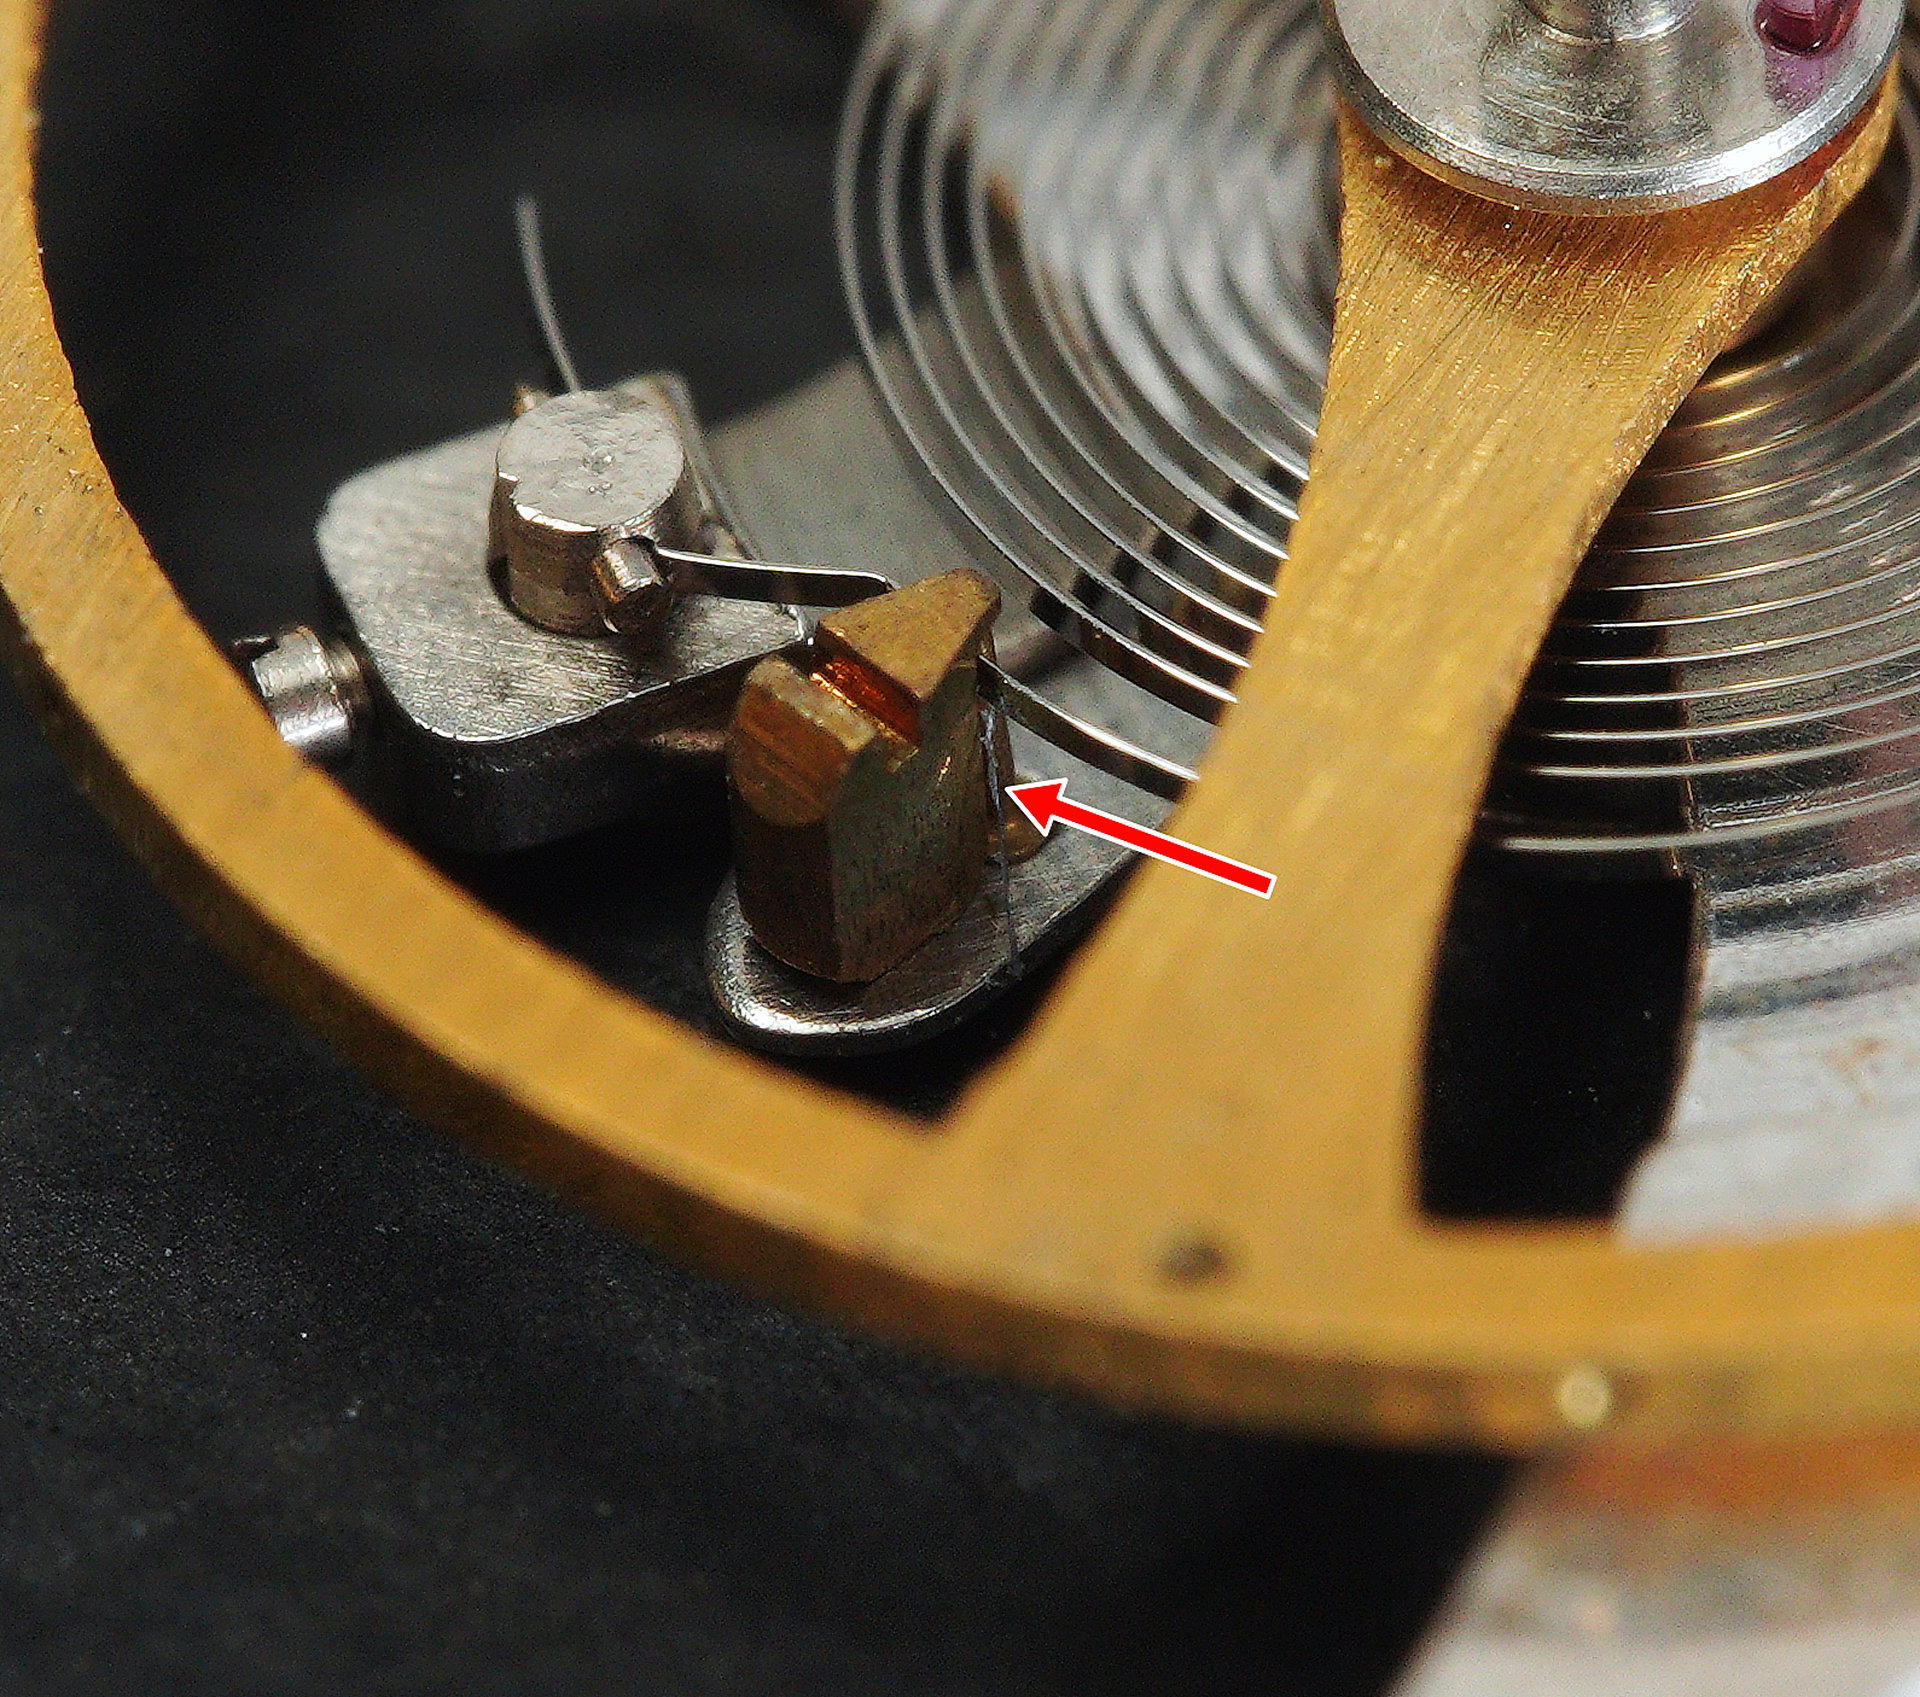
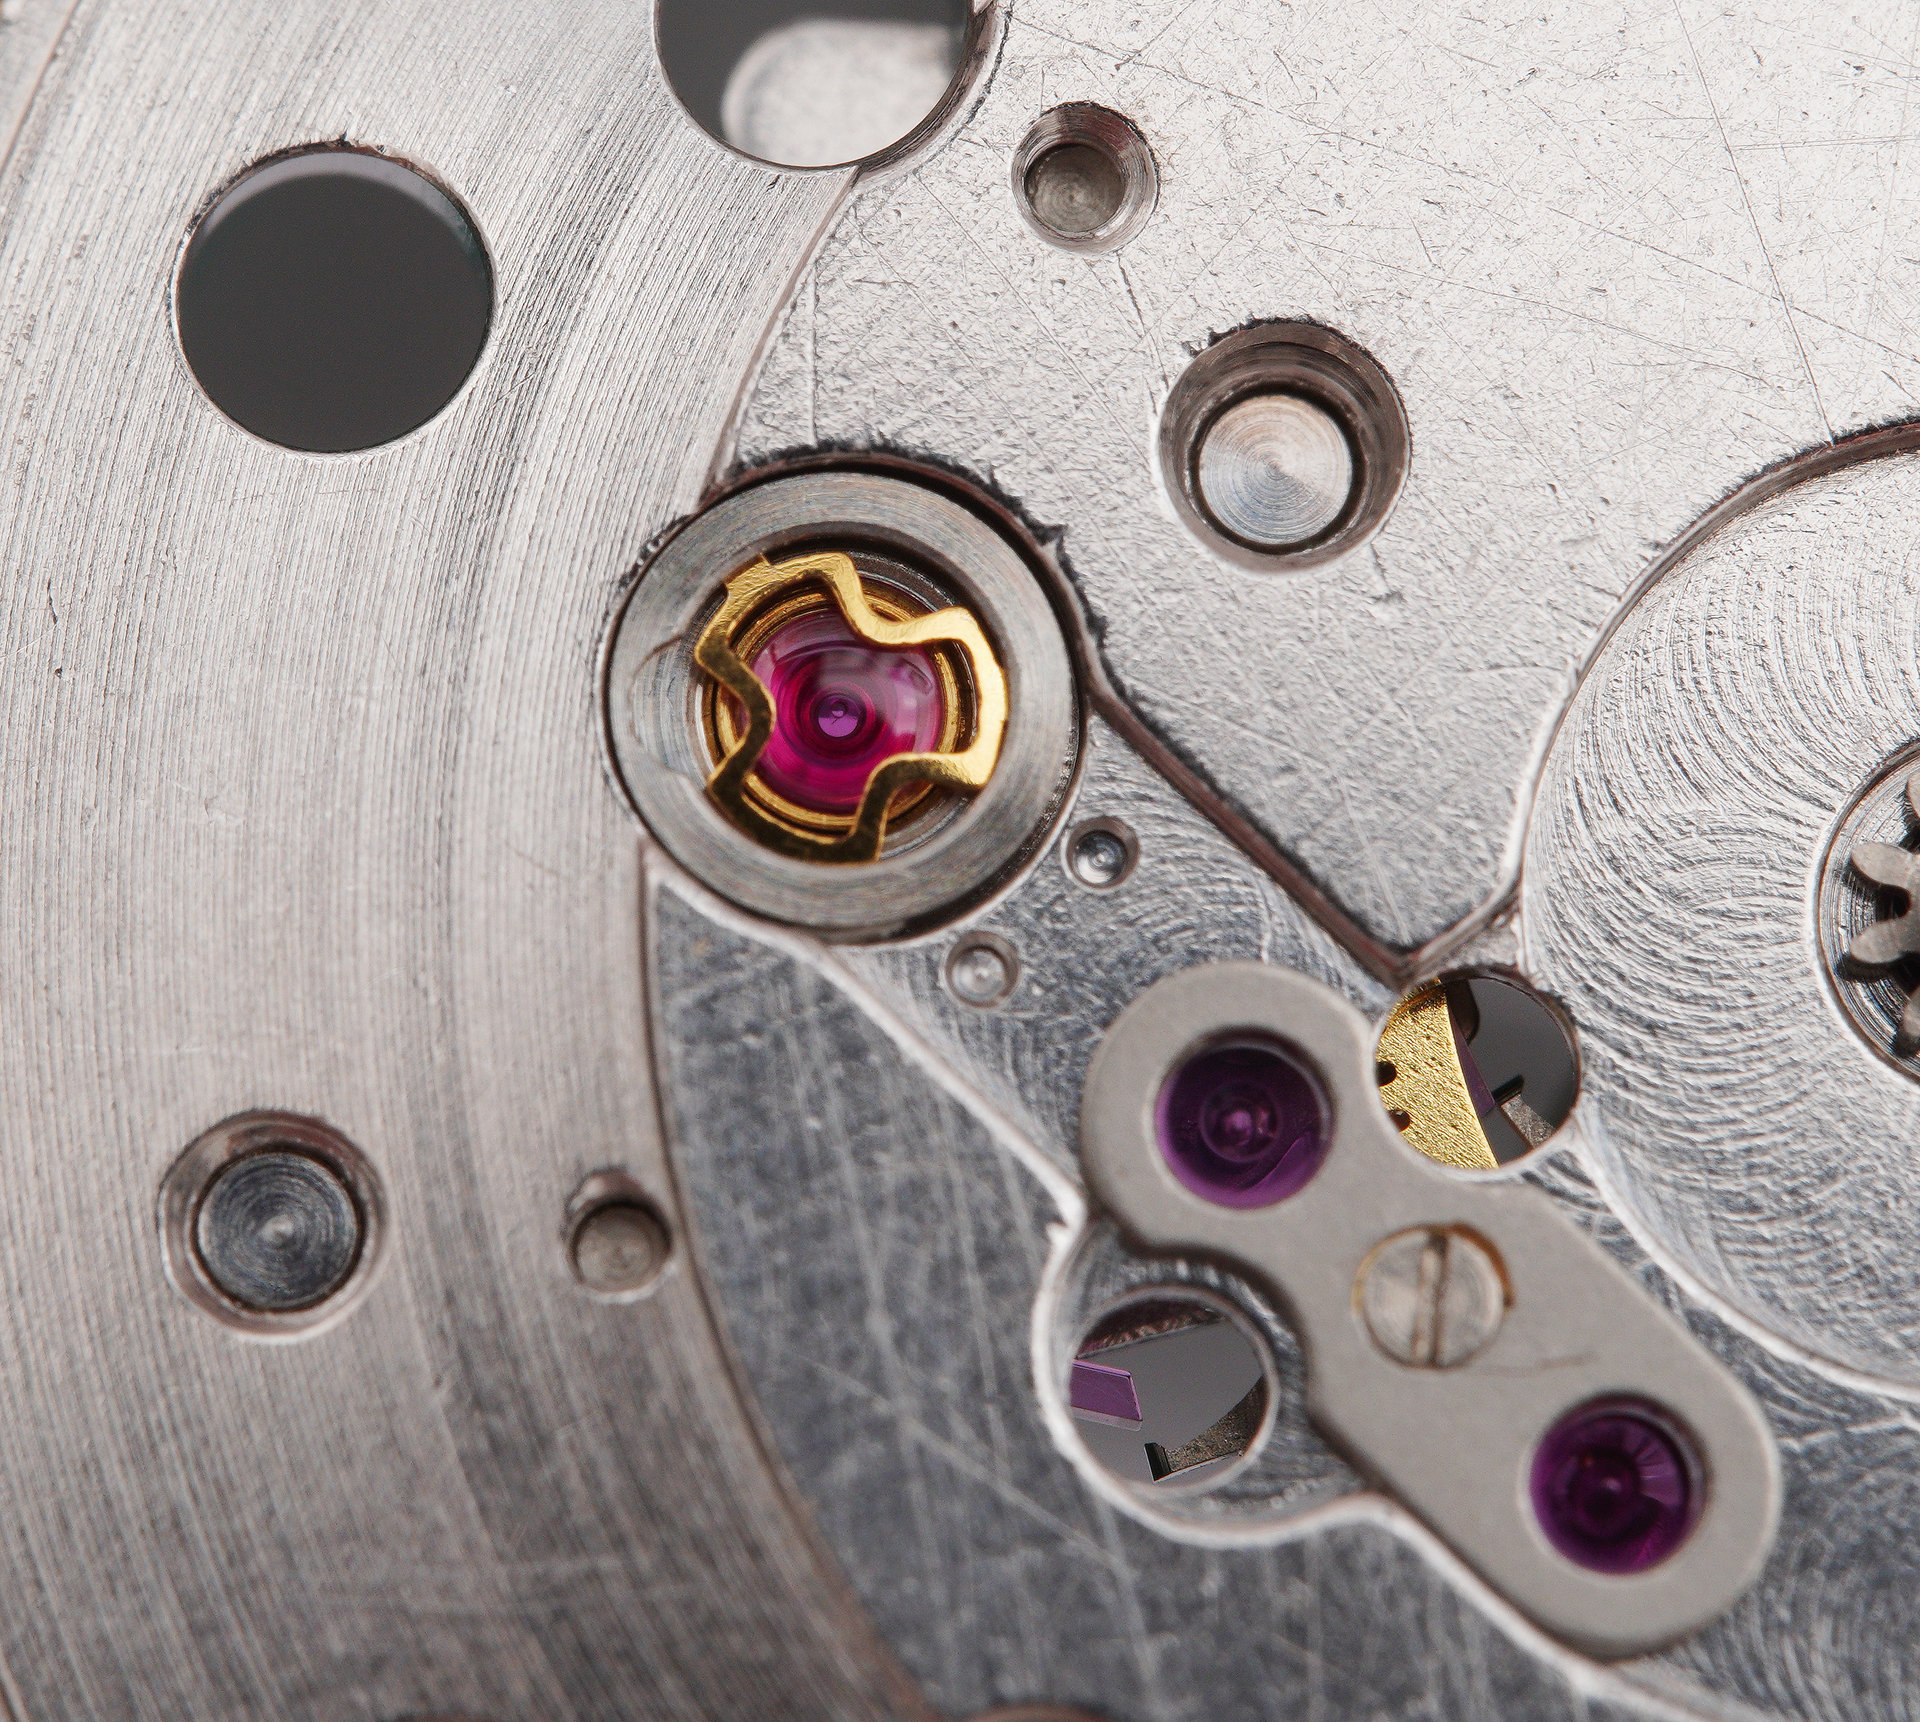
But this close-up also reveals the very poor condition of most of the winding components, all of which suffering from varying degrees of corrosion. A discussion at this point with the owner of the watch confirms a preference to replace as many of these parts as can be sourced with new components. These will include: the ratchet wheel, the click and its screw, the setting lever screw and the crown wheel and its screw. Of greater concern to me was the condition of the balance. Closer inspection of the hairspring terminal curve as it passes through the pin on the stud suggests perhaps that it has been re-seated with rather more of the hairspring then protruding through the pin than would normally be the case. If this is a sign of a previous watchmaker intervention rather than just a factory variation, then I wonder if this is why the watch was running so fast: with more of the hairspring threaded through the stud, its length is effectively shortened and the watch will run at an accelerated rate.

The performance of the movement was also not helped by the fact that the hairspring was sitting at a tilt, also suggesting some previous inexpert adjustments. Aside from the corrosion and wonky balance, the main call to action was the preponderance of fluff plaguing much of the interior of the movement. Here, for example, a fibre ensnared in the index pins:
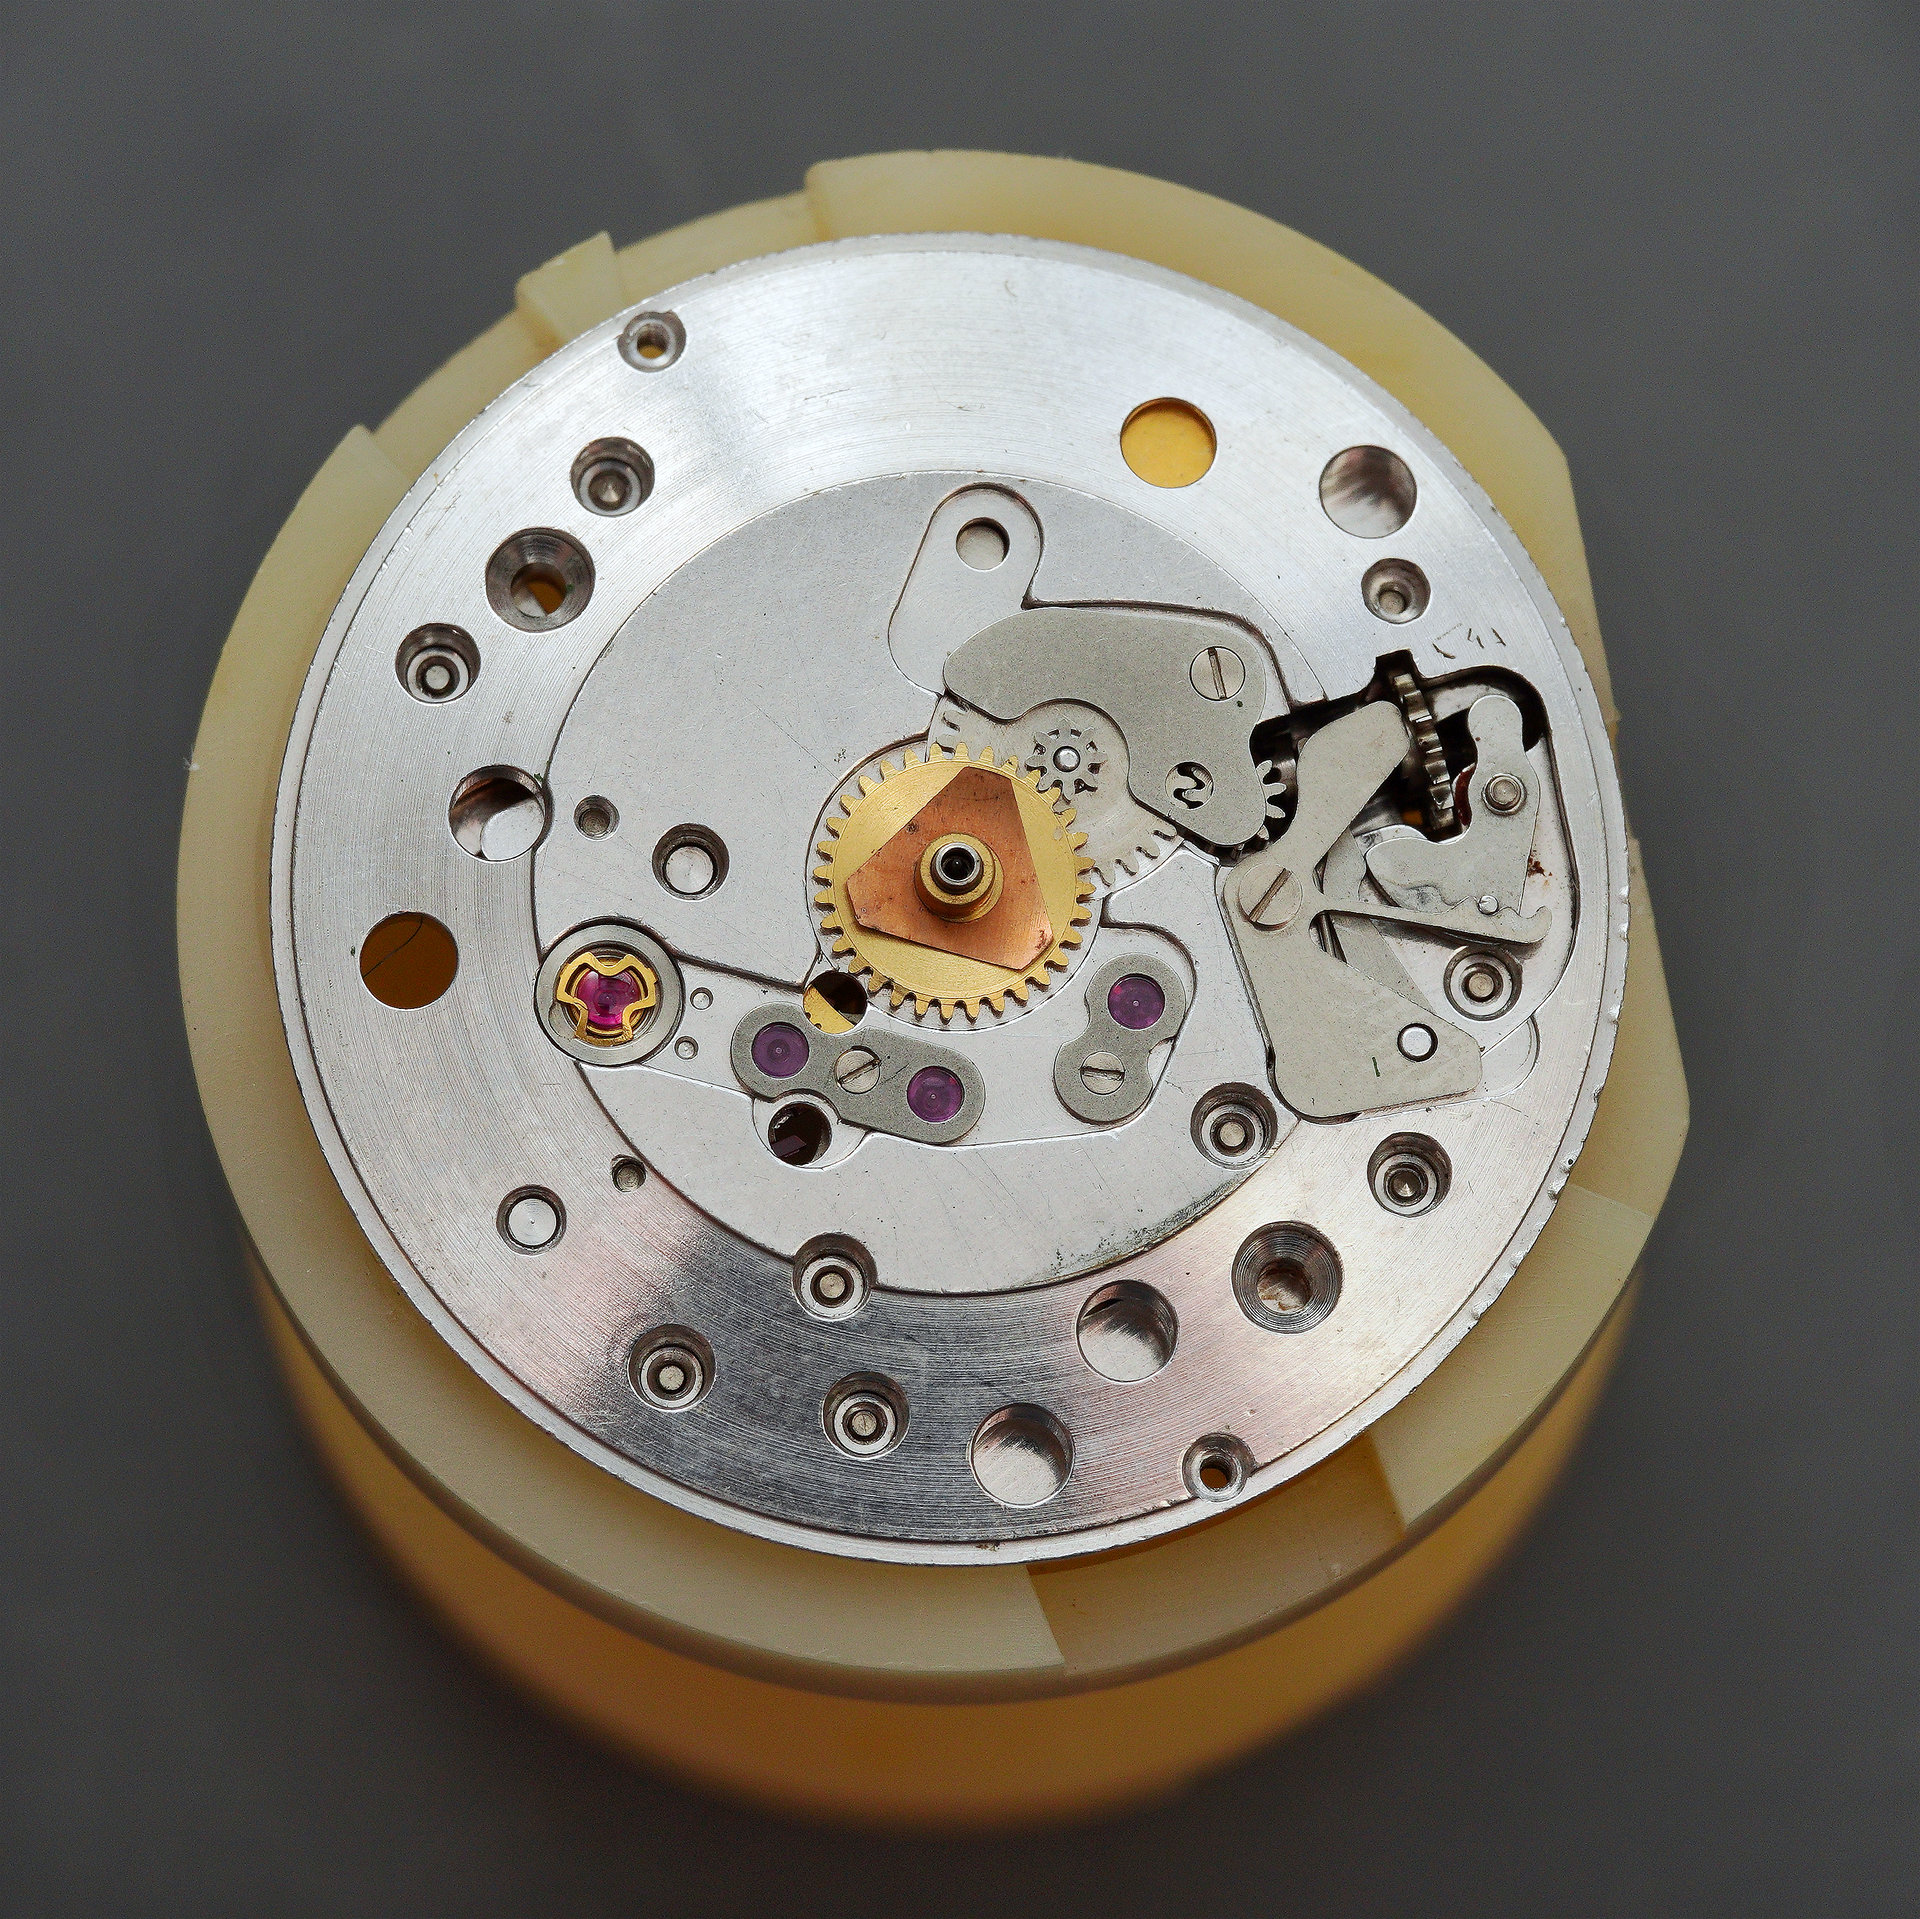
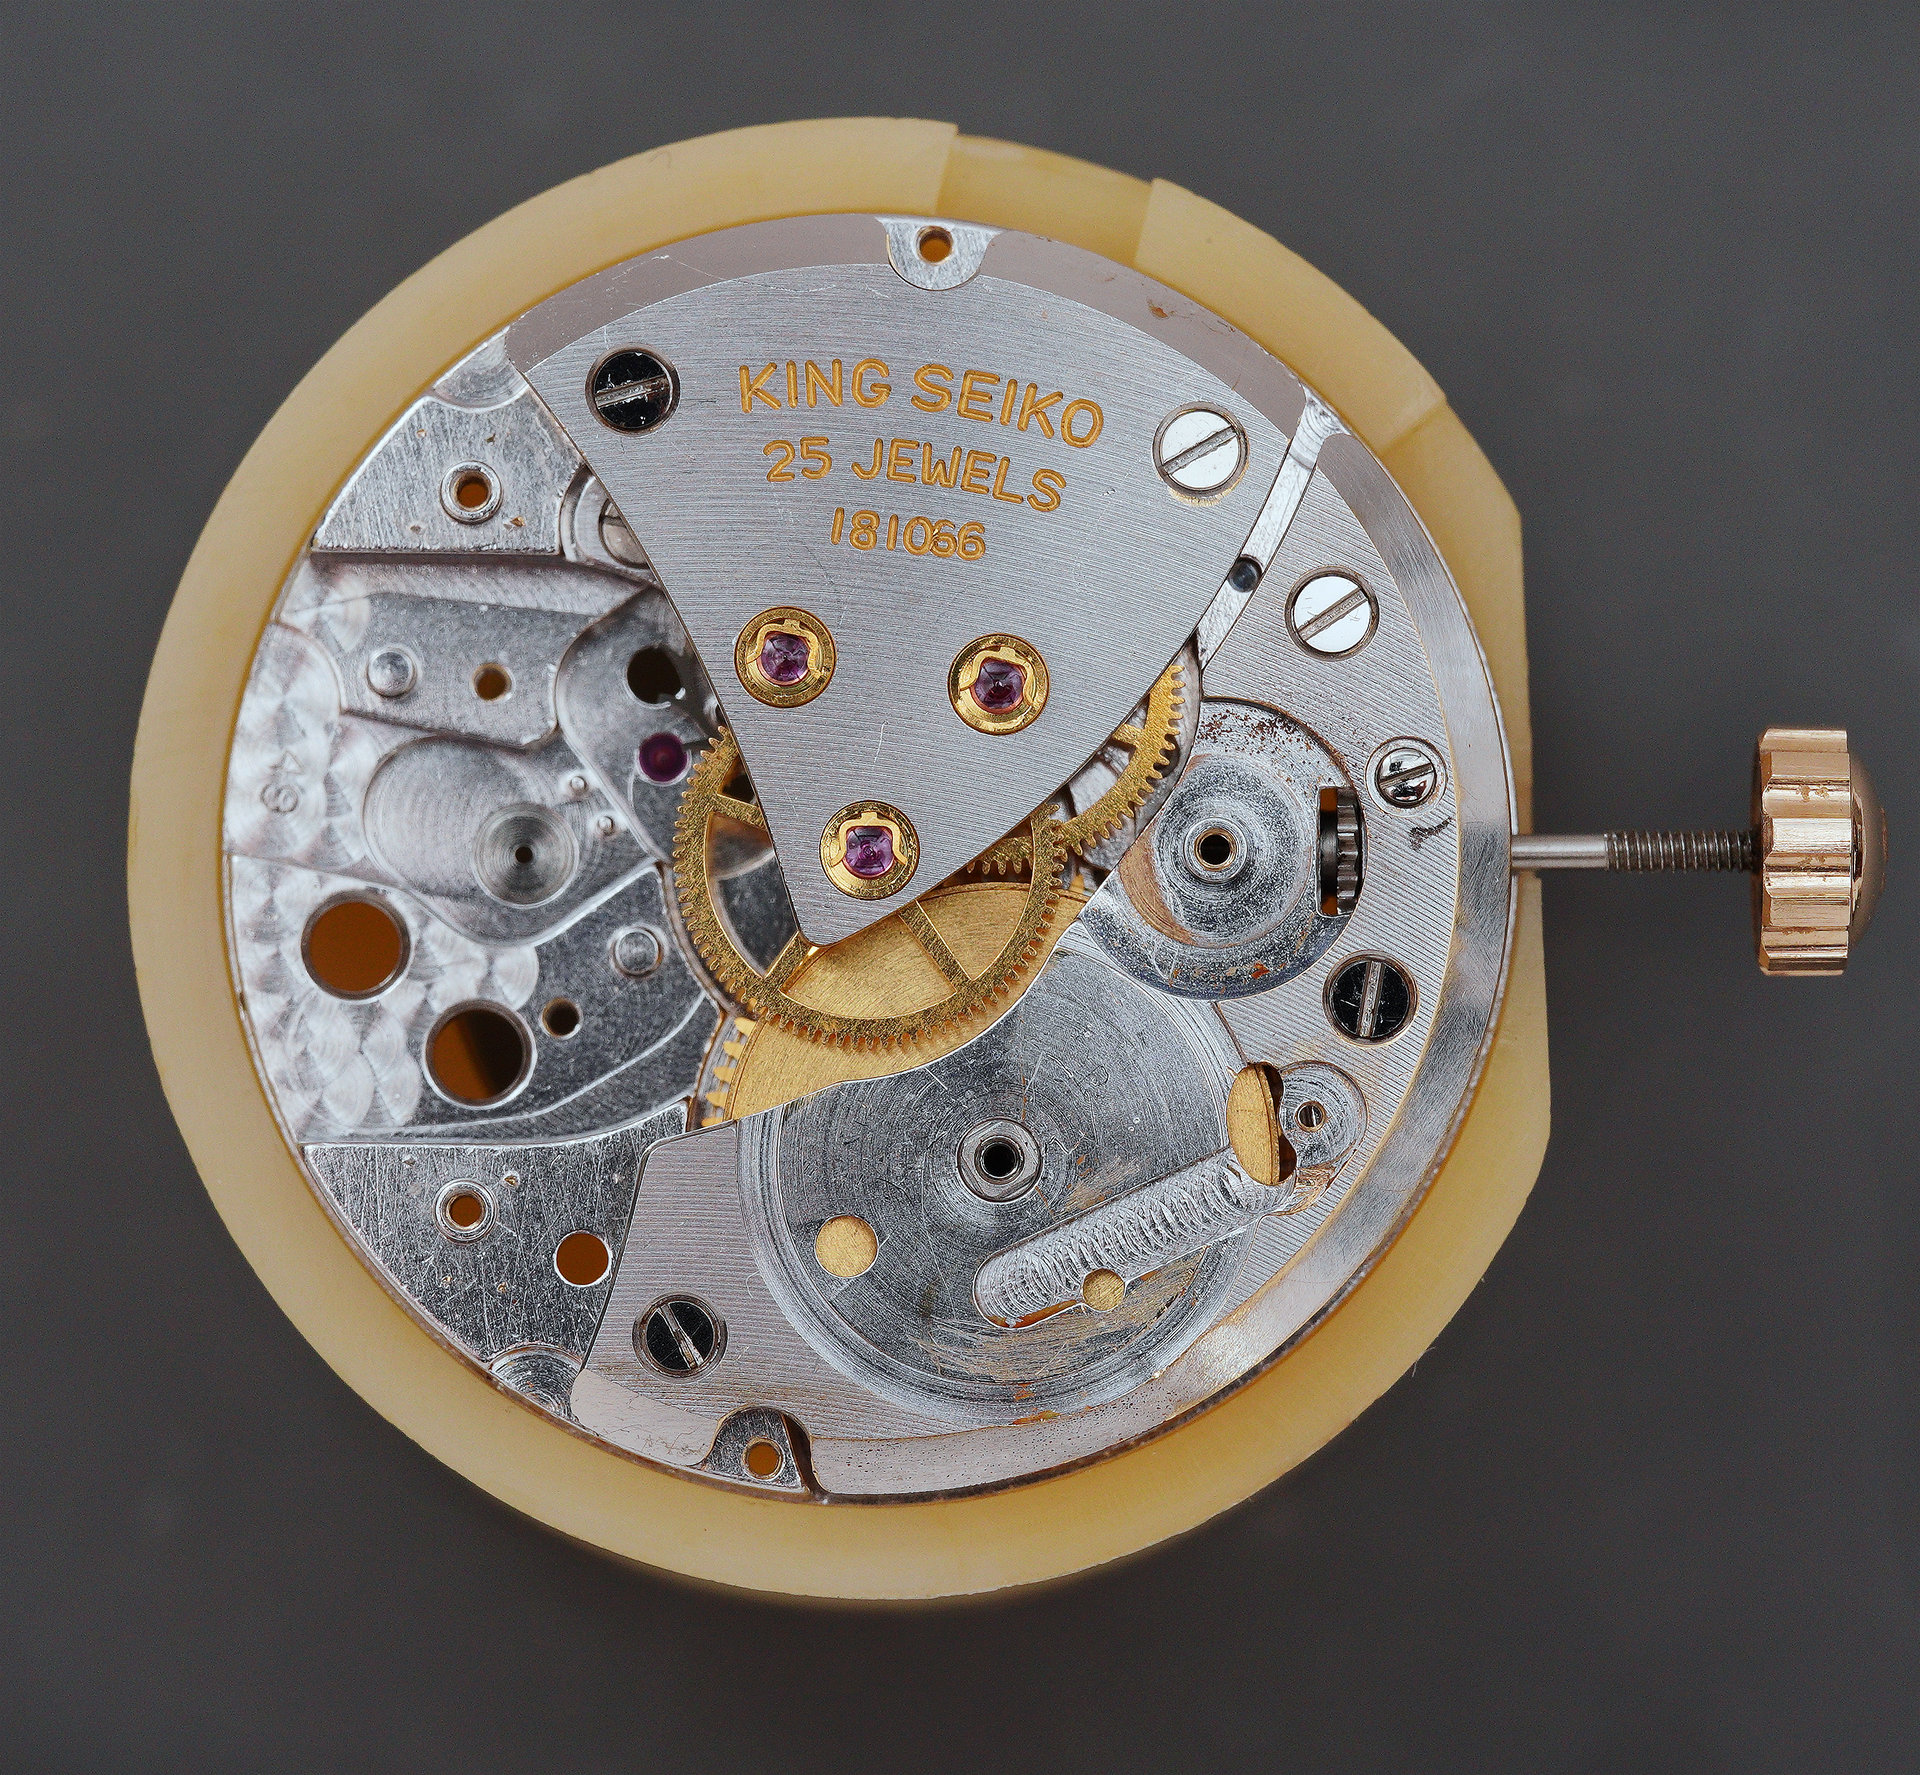
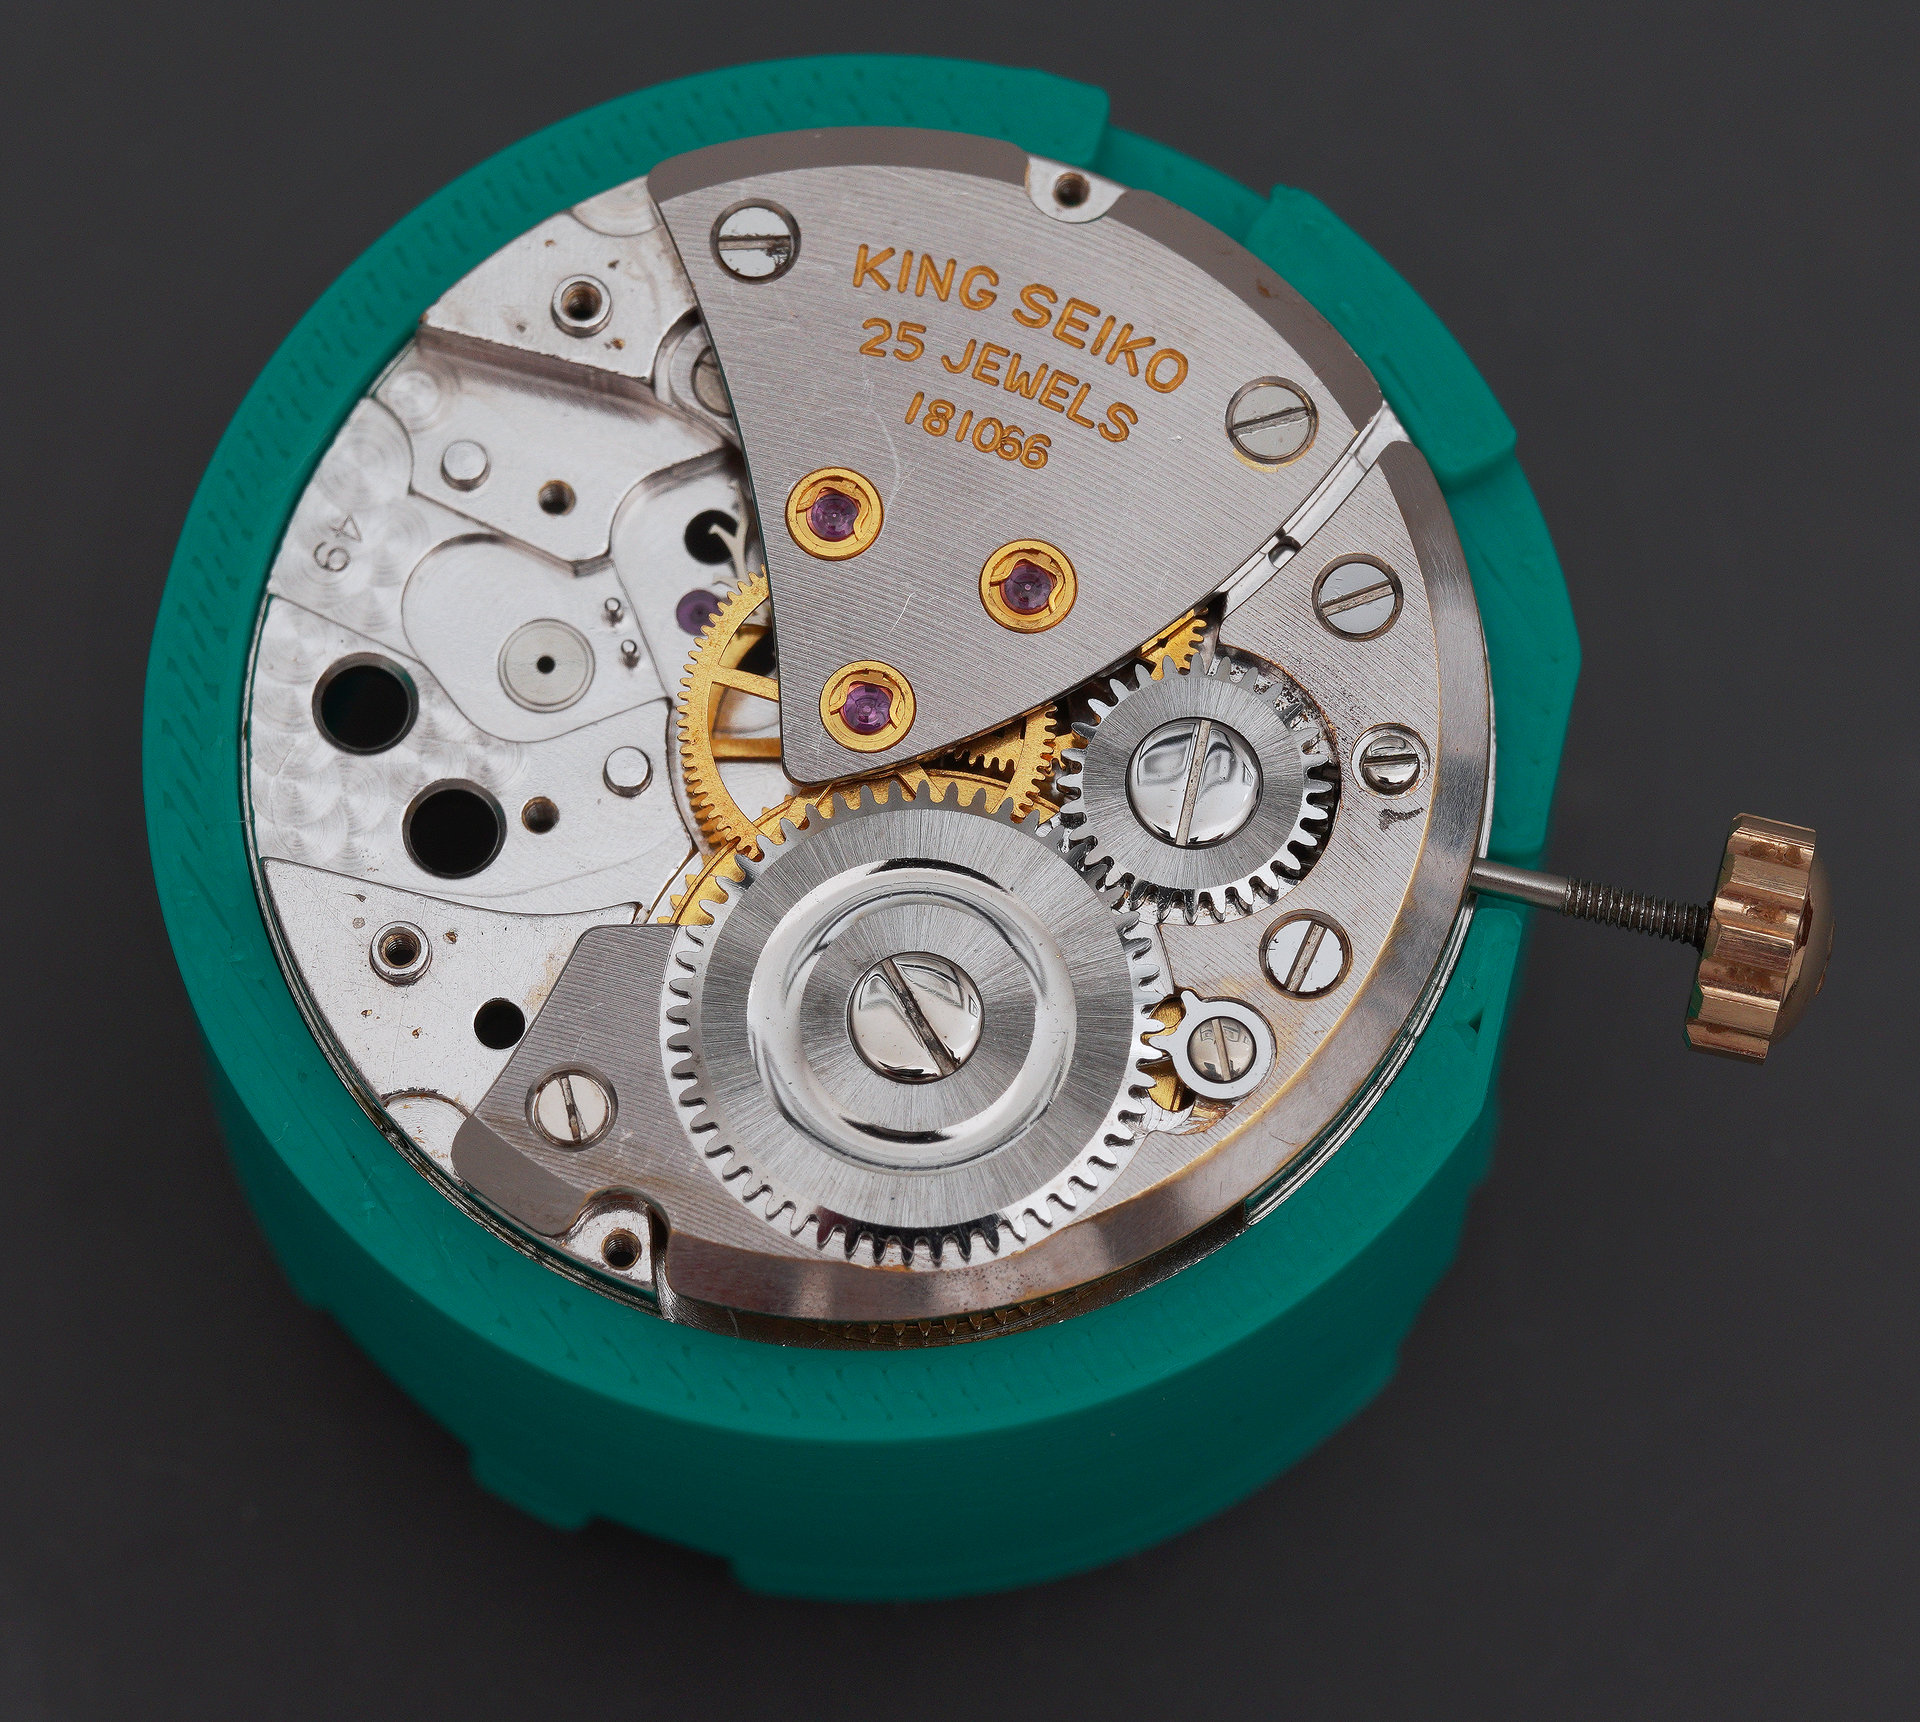
The dial side of the movement looks altogether tidier, with no causes for alarm. Note the older-style cap jewel plates sitting over the pallet fork, escape wheel and third wheel bearings (the latter two are served by Diafix settings on the train bridge). The second generation of King Seiko movement, the 44A, would see Diafix settings replacing the old-school caps for the escape and third wheel. The cap jewel over the pallet bearing seems redundant given that the pallet fork is commonly left unlubricated; the absence of a Diafix serving the pallet in the 44A would seem to be consistent with that observation.
As we deconstruct the movement, so the evidence for the persistent ingenuity of grime and the effects of chemistry reveal themselves further.

I am optimistic that the plates will clean up nicely but that escape wheel will need replacing along with the click spring, whose end looks decidedly past it.
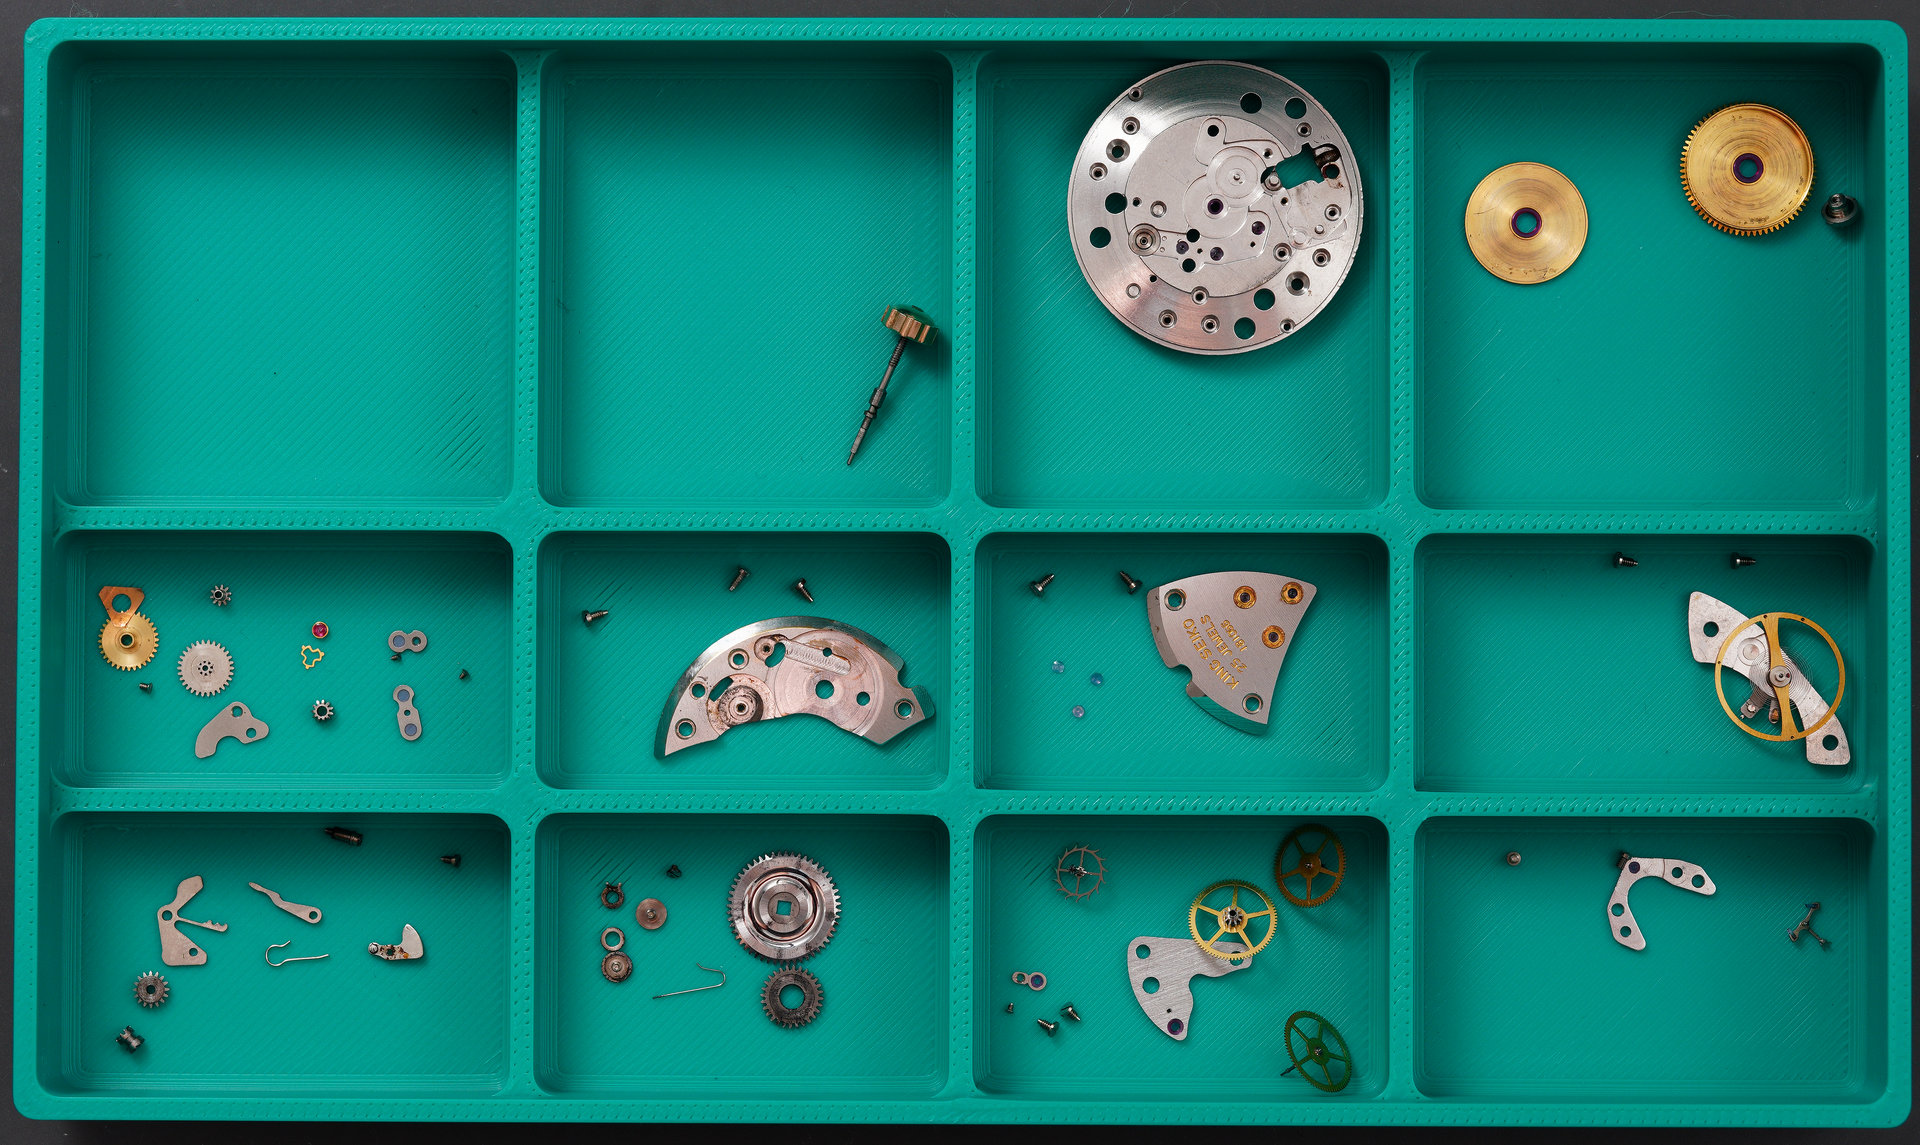
Deconstruction of the movement proceeded without further incident and with no notable additional way-points presenting themselves. The collection of parts congregated in one of my new 3D-printed parts trays (the mainspring and casing parts in lower trays) prior to cleaning.
The various replacement parts having since arrived (most of which supplied by the owner), the whole lot endured the six-step cleaning process (hand-cleaning in n-heptane, ultrasonic cleaning in L&R 111, and then three-stage cleaning and rinsing in the watch cleaning machine followed by a 40-minute drying cycle). The (very) clean parts are, at this point, ready to reunite. That process begins with the assembly of the setting parts, fitting and oiling the cap jewel plates and then fitting the centre wheel and bridge.

Meanwhile, the cleaned mainspring had been loaded into the barrel and the three Diafix cap jewels in the train bridge secured and lubricated. With those tasks completed, the assembly of the gear train can begin, starting with the barrel and its bridge, followed by the escape, third and sweep seconds wheels and their bridge.
You may have noted that the barrel bridge has cleaned up quite nicely. Next, we can fit the new winding parts and eradicate most of the evidence of the corrosive intrusion of water.
The pallet fork and its bridge come next, with the tip of the exit pallet stone serially lubricated with Moebius 9415, following which we can prepare the ground to fit the balance. The sequence begins with the dial-side Diashock setting.
With that in position, the balance Diashock is prepared, the balance eased into position and with a little luck, it starts swinging away at the first attempt. We can address any unrestrained waywardness by fitting the Diashock setting and its securing spring and she’s up and running at a canter, with only a twist or two of the crown having been delivered at this point.
You may have noticed that the balance is not the one originally fitted to the watch. This is because the original balance hairspring was beyond salvage (at least in terms of the economics of the enterprise) and so instead, I have substituted a complete balance from a donor 4402A. With the movement demagnetized and with some preliminary regulation, we are seeing in excess of 330 degrees of amplitude and clean and tidy timing curves, with good positional consistency and low beat error.
I left the watch to run for a day or so and once satisfied that all was well, refitted the dial and hands.
I should make mention of the crown. The correct crown on this watch should be coarse-knurled with either an embossed or engraved ‘S’ sitting at the centre of the outer dome. The crown fitted to this watch fits the bill precisely but its condition suggests that it may be a replacement rather than the original.
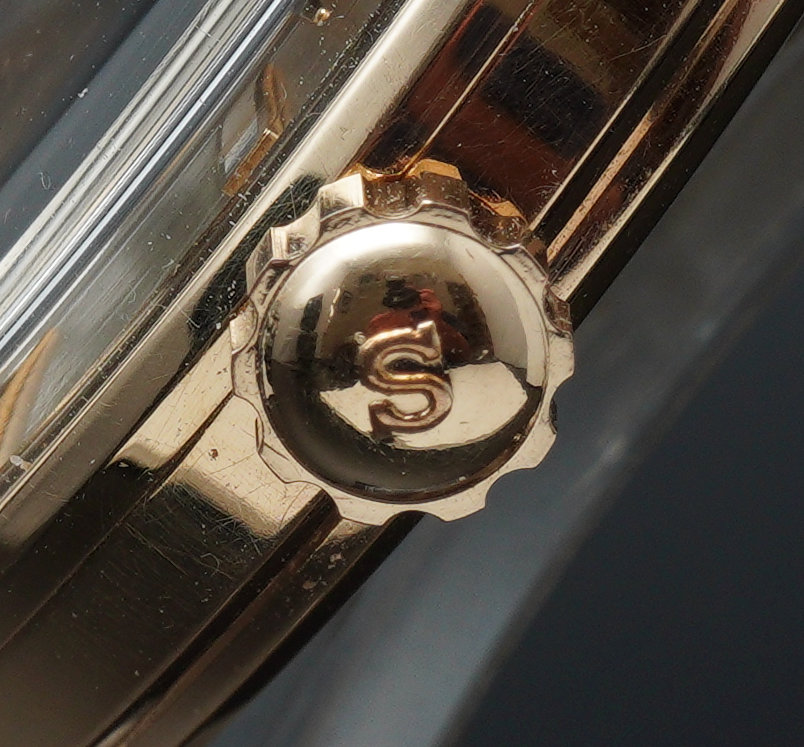
With its provenance unknown and wanting to avoid a repetition of the previous water intrusion through the crown tube, a decision was made to dismantle the crown with a view potentially to replacing what ought to be a very aged gasket if this was the original. That experiment revealed no fewer than two flat micro gaskets, both of which in good condition.
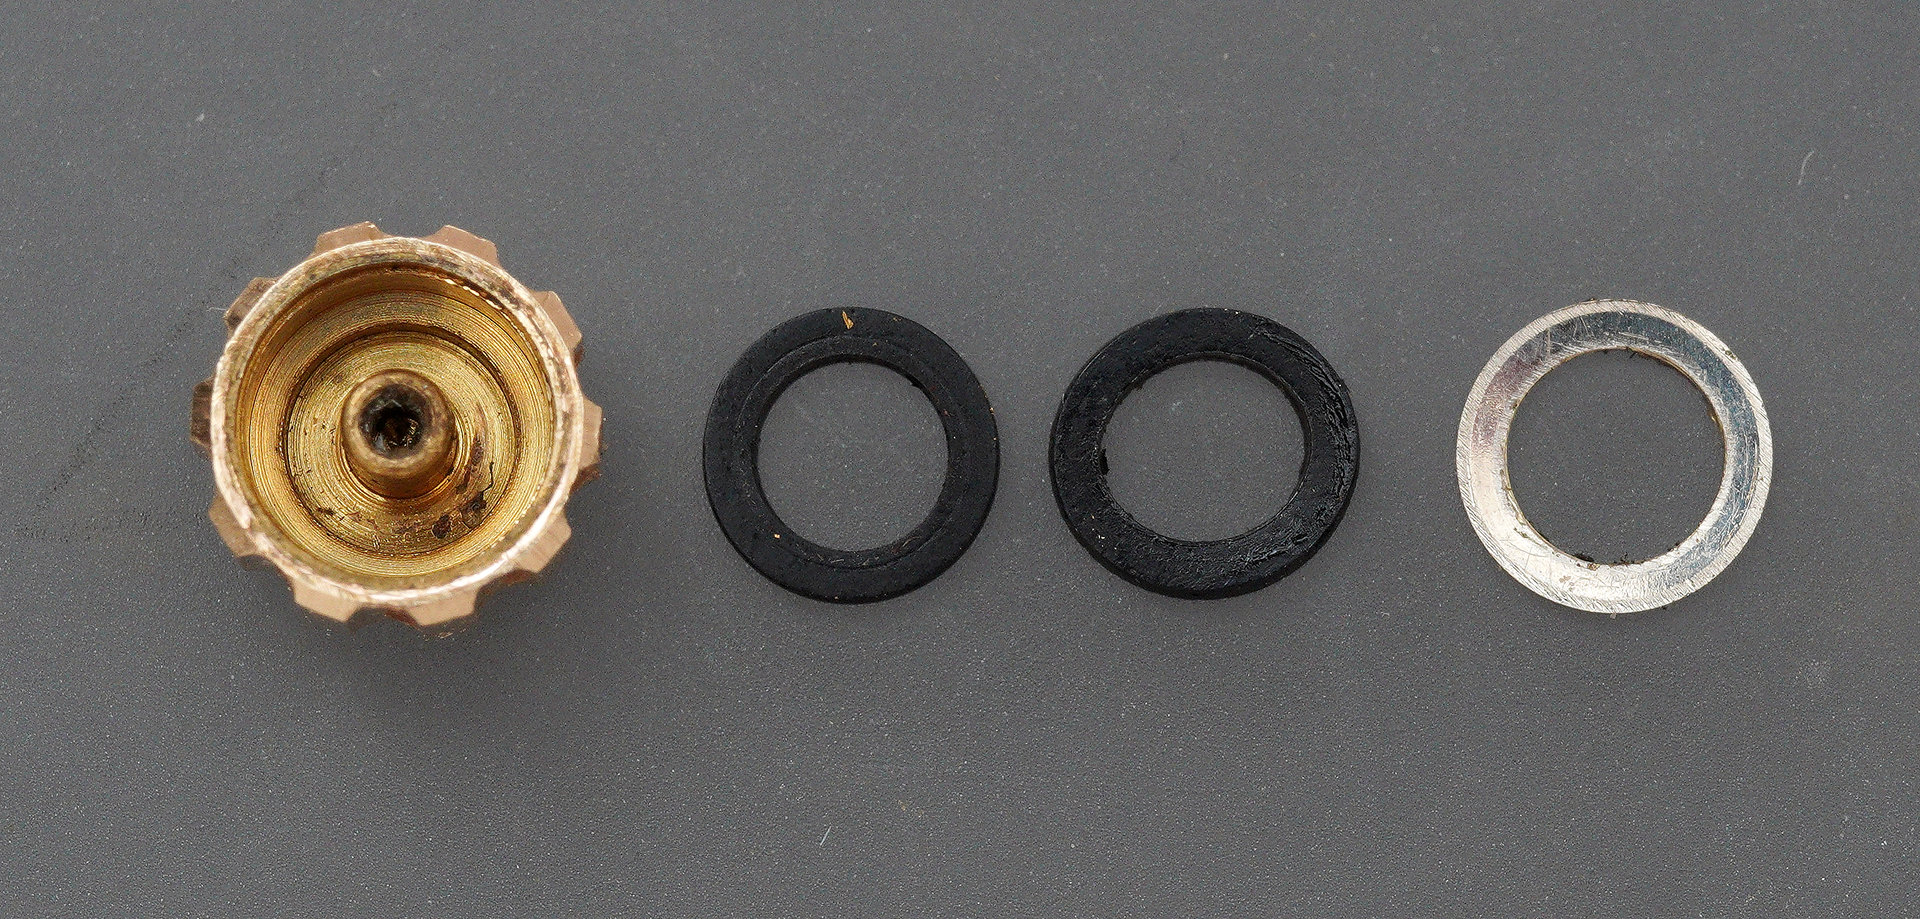
This makes me wonder whether this is a modern, third-party replacement part because it seems implausible that the gaskets would not have hardened, even in a new-old-stock original part. If any reader has further insight into this, I’d be interested to hear. I would note that there do seem to be a fair number of these crowns appearing regularly on Yahoo Japan each of which either priced quite highly as buy-it-now or which fetch elevated sums at auction. I experimented with an assortment of replacement gaskets but none of those fitted quite perfectly and given the good condition of the original pair of flat gaskets, I opted to clean, grease and refit those. A peace-of-mind exercise rather than a restoration.
The movement is ready to join the mid-case and so let’s do that.

You may notice that I’ve replaced both casing screws with the correct items in place of the mismatched pair that were fitted to the watch when received.
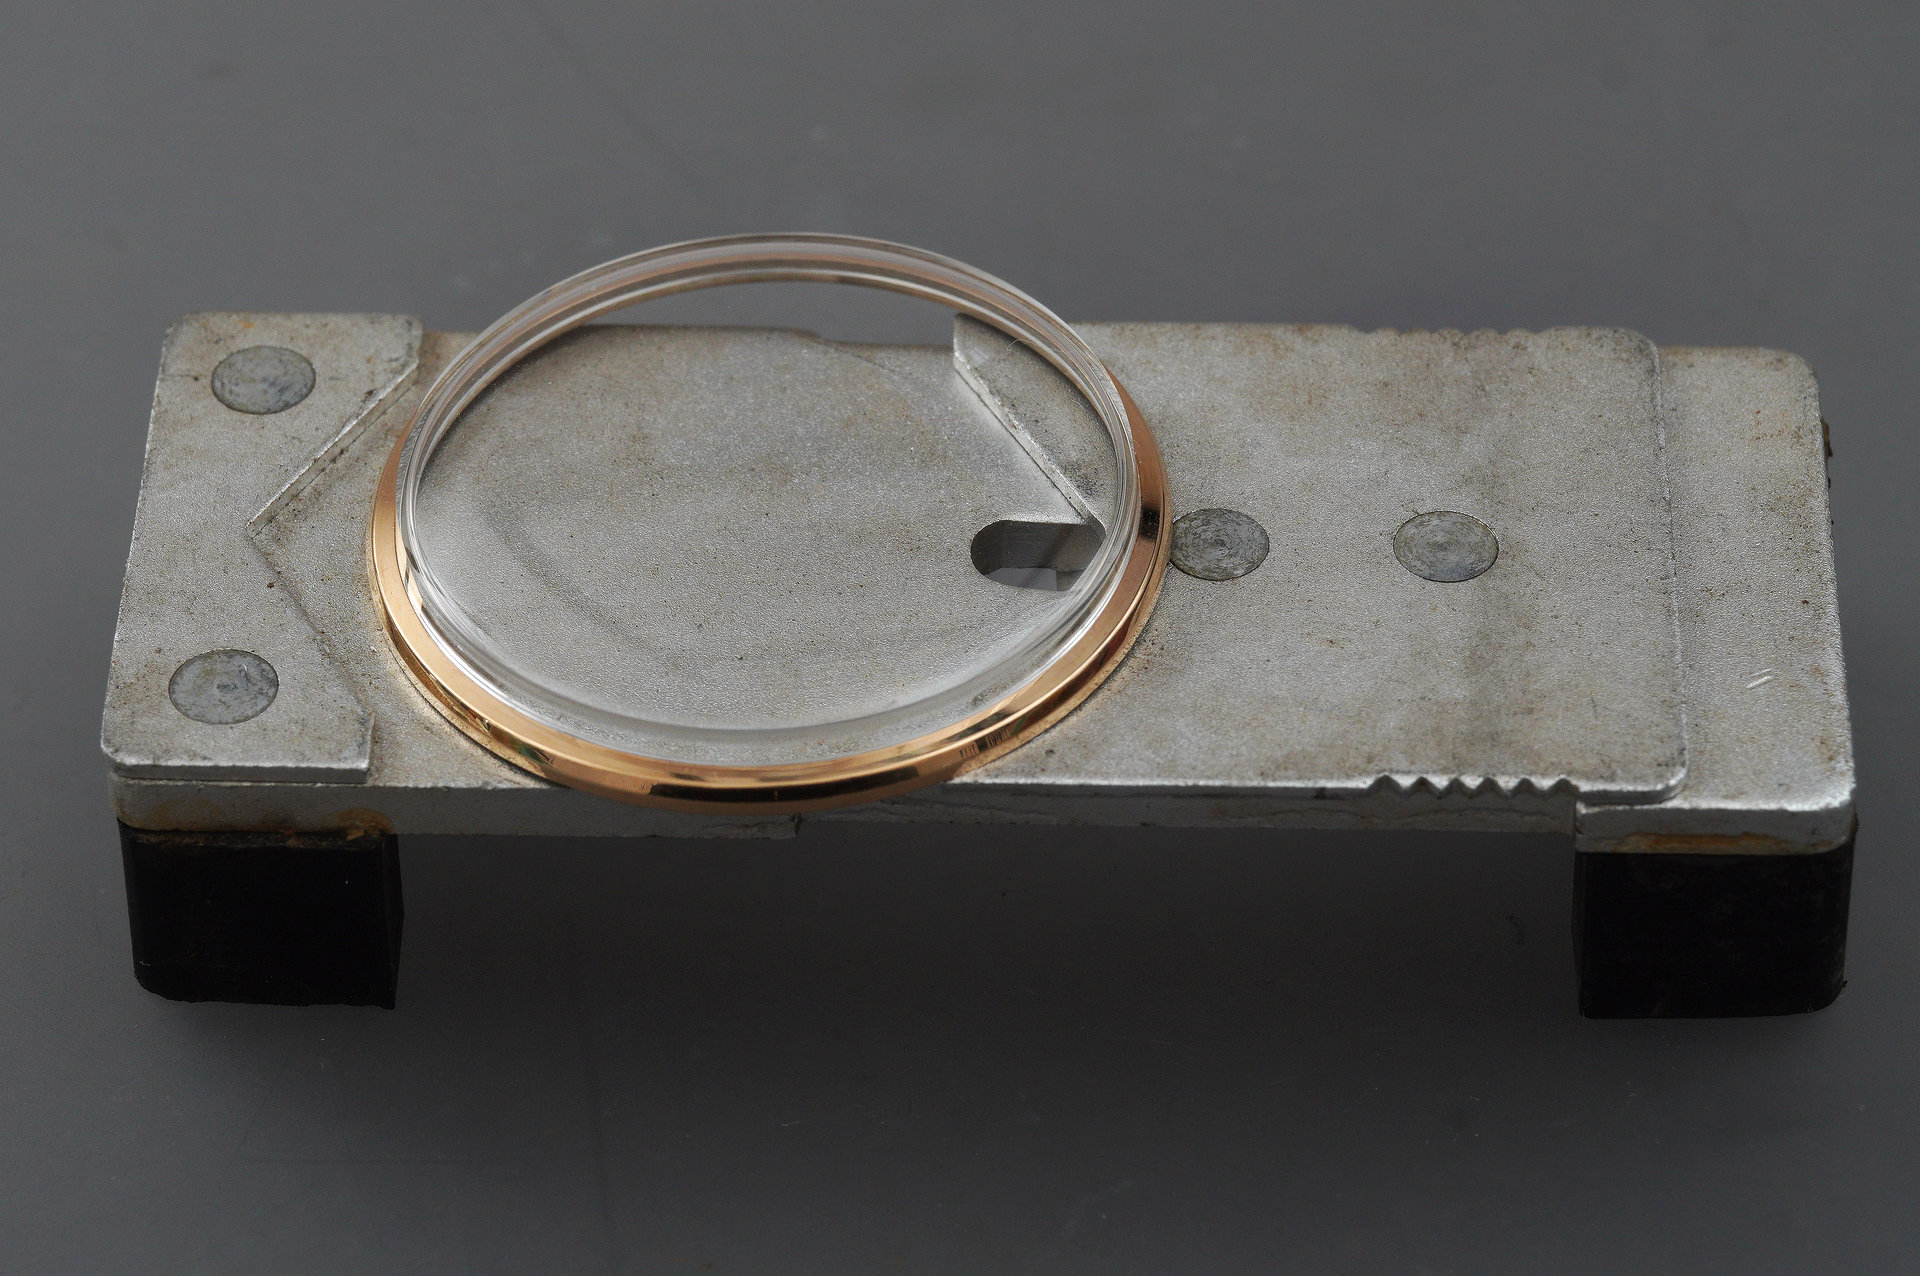
The next job is to resolve the issue with the ill-fitting crystal. Its condition when received was otherwise good and it would have responded well to a polish but it was undersized and pushed out too easily from the bezel. The original crystal would likely have been a tall, vertical-sided plexiglass but identifying the correct part can be a bit of a lottery with this age of model and the cost of likely candidates too high to risk buying something that might end up being undersized. A decision was made to fit a generic 32.8 mm plexiglass of as close a style as possible to what is likely to have been fitted originally.
In order to achieve a snug fit of the crystal to the bezel, the crystal needs first to be compressed, reducing its diameter, placed in situ and then released into the embrace of the bezel. I have two tools at my disposal to achieve this. One is a generic Swiss-style claw but in my experience, this always leaves marks around the outer edge of the crystal and so I turned to my Seiko S-14 one-piece case opener. This normally works a treat but unfortunately, none of the included dies was of the correct size to compress the 32.8 mm crystal. The 31.5/32.0mm die was too small and the 33.0/34.0mm die too large. As I’ve been on a recent run of designing and producing my own 3D-printed watch tools, I thought I’d have a go at printing a die of the correct size to work with this ‘Goldilocks’ crystal.
Getting the correct sizing required a couple of iterations but the final print worked a treat.
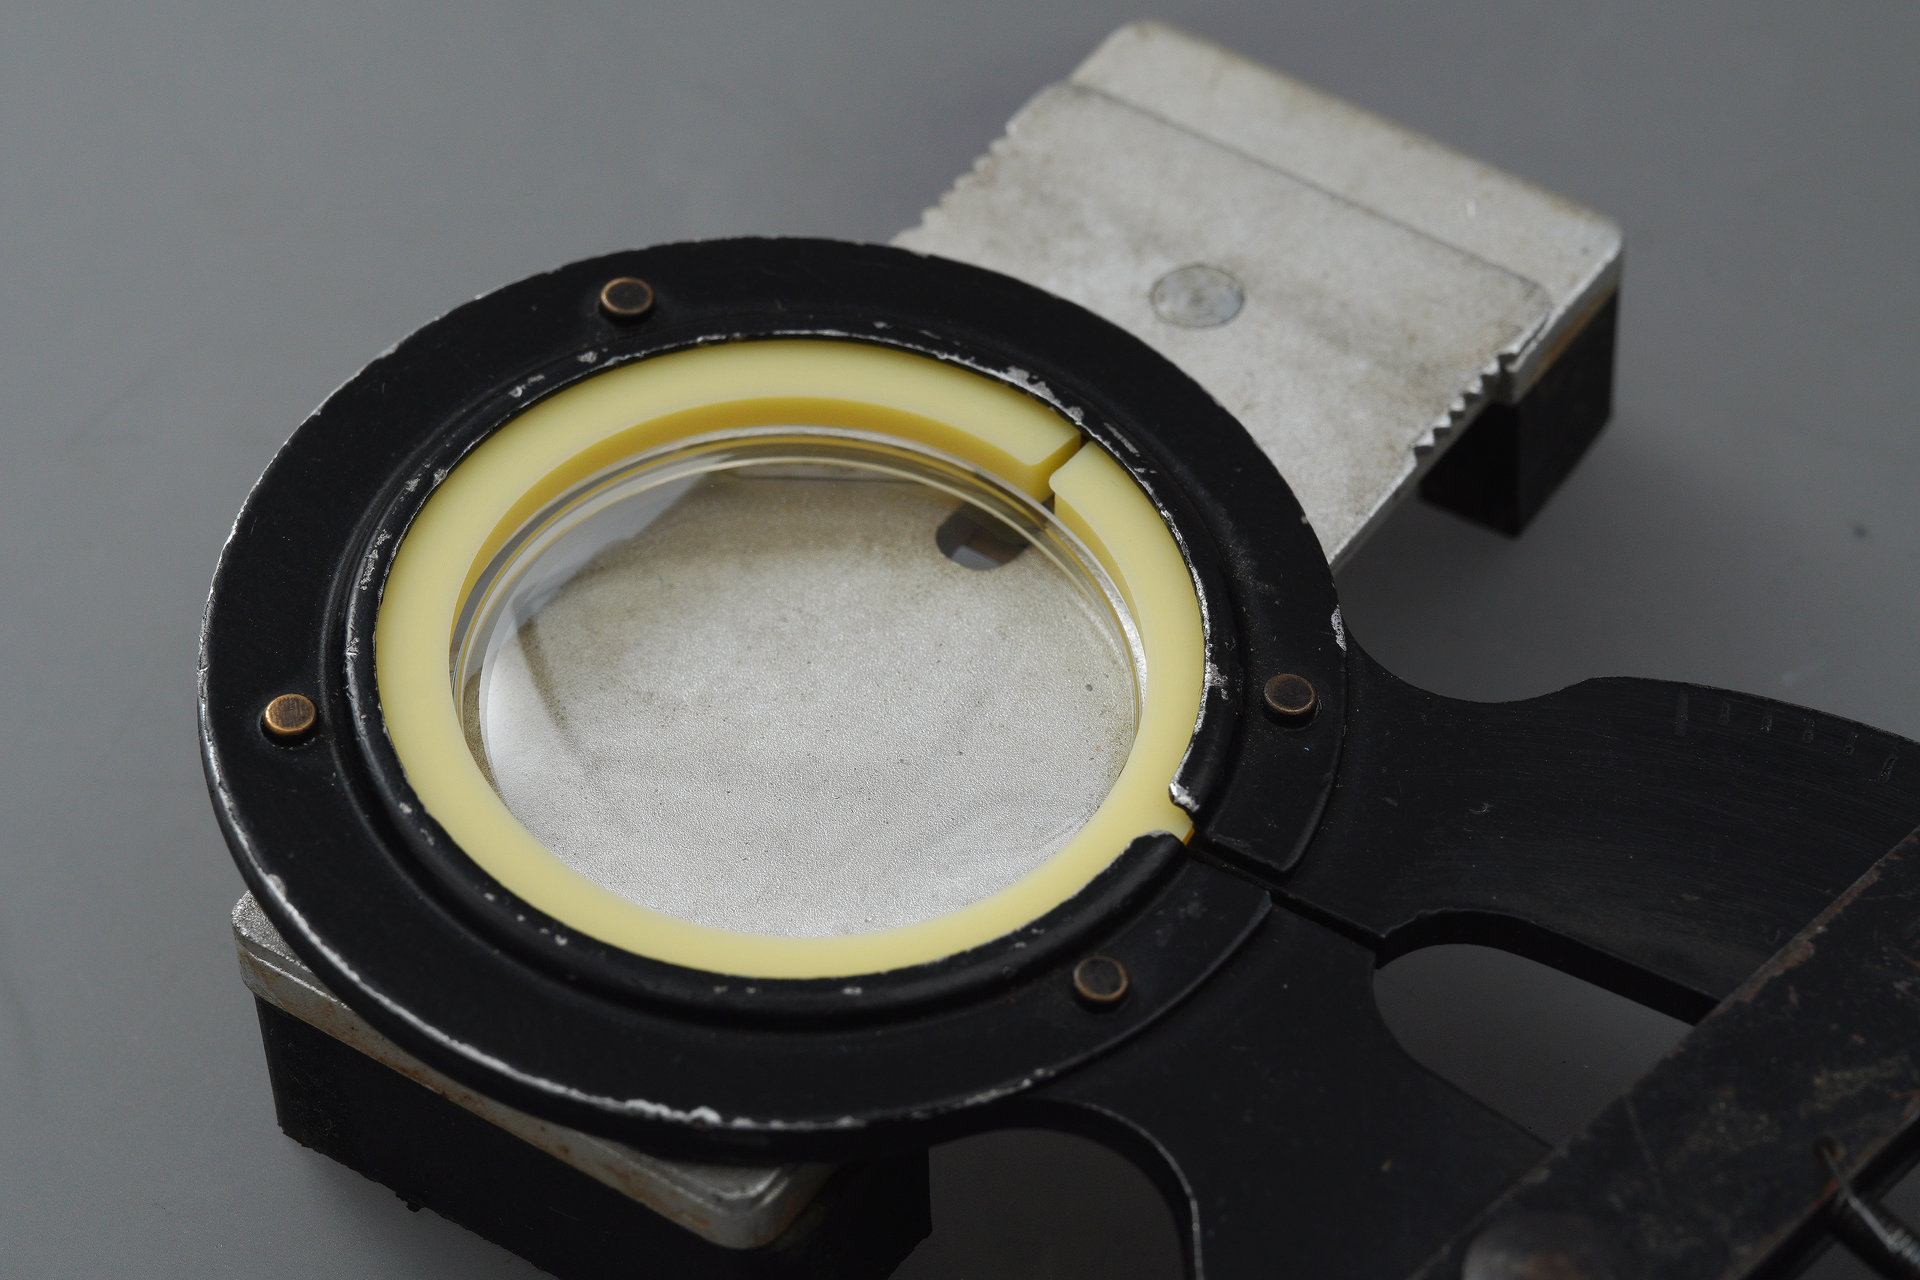
In the photo above, the crystal is in its compressed state and is placed over the waiting bezel. Releasing the tool results in the crystal snapping satisfyingly into place.
I reckon the profile, with its near-vertical walls, looks like an excellent match to what would have been fitted originally. One additional benefit of this replacement crystal is that the head-on perspective provides a clear view of the dial code text beneath the 6-marker.
With a fresh caseback gasket fitted, the caseback snaps into position and the watch is now ready for action once again.
I think this one has turned out really nicely and I am very pleased to have had an opportunity to have such a lovely example of the breed pass through my hands. Another notch on the bedpost as I work my way up the early King Seiko ladder.
Further reading: If you would like to read more about these wonderful watches, then I would encourage you to take a dip into either or both of the following sites:
http://www.egalizer.hu/targyak/orak/king1.htm
https://www.beyondthedial.com/post/king-seiko-collector-guide-part-1/

Hi what do you think of Vintage Watch Street on eBay? Are those cases over-polished ?
Hi Chris, I do not know if that store but a quick look now is enough to come to a judgement. My general approach would be to approach any eBay purchases of restored or otherwise gussied-up watches with caution.
Thanks Martin. I appreciate you taking the time to respond. Any sellers you recommend? Ignore if this is irritating.
Hi Chris, I buy very rarely from eBay these days and when I do I would be looking for unrestored watches from private sellers. Pretty much all of my watches come directly from Japan. My main advice if you are looking for restored or serviced watches is only to do so if you have reason to trust that the job has been done properly. I hope that helps.
All the best
Martin
How did you ever cope without a 3D printer? 😉 It might be time for a series on 3D printed watch tools. A printer is definitely on my want-list now!
I muddled along! In fact, I’ve been lining up just such a post. Just need to find the time to sit sown and write it.
Beautiful work! Can you steer me to where you sourced that 32.8mm crystal? I’ve got a 15034 in need of a replacement crystal. Thanks!
Hi Nelson,
I think I used Sternkreuz N 32.8.
All the best
Martin