
Two years before the introduction of the first Grand Seiko, the pinnacle of the Seiko product tree was occupied by the Lord Marvel, introduced in 1958 as a luxurious refinement of the Marvel. The first Lord Marvel movement used as its basis the 11.5 ligne (25.6 mm) Marvel but with significant upgrades in jeweling, finish and features.

The gear train was fully jeweled in the new 23 jewel calibre (with the exception of the barrel) with the centre wheel gaining two jewels, one at each end of its arbor, the third wheel, escape wheel and pallet fork benefiting from end-piece cap jewels (the pre-cursor to Diafix) on the dial side and the third, escape and sweep seconds wheel similarly capped on the train side. The fixed stud holder of the Marvel was replaced by moveable and the overall level of finishing at a higher level, marking the Lord Marvel out as a top tier product.
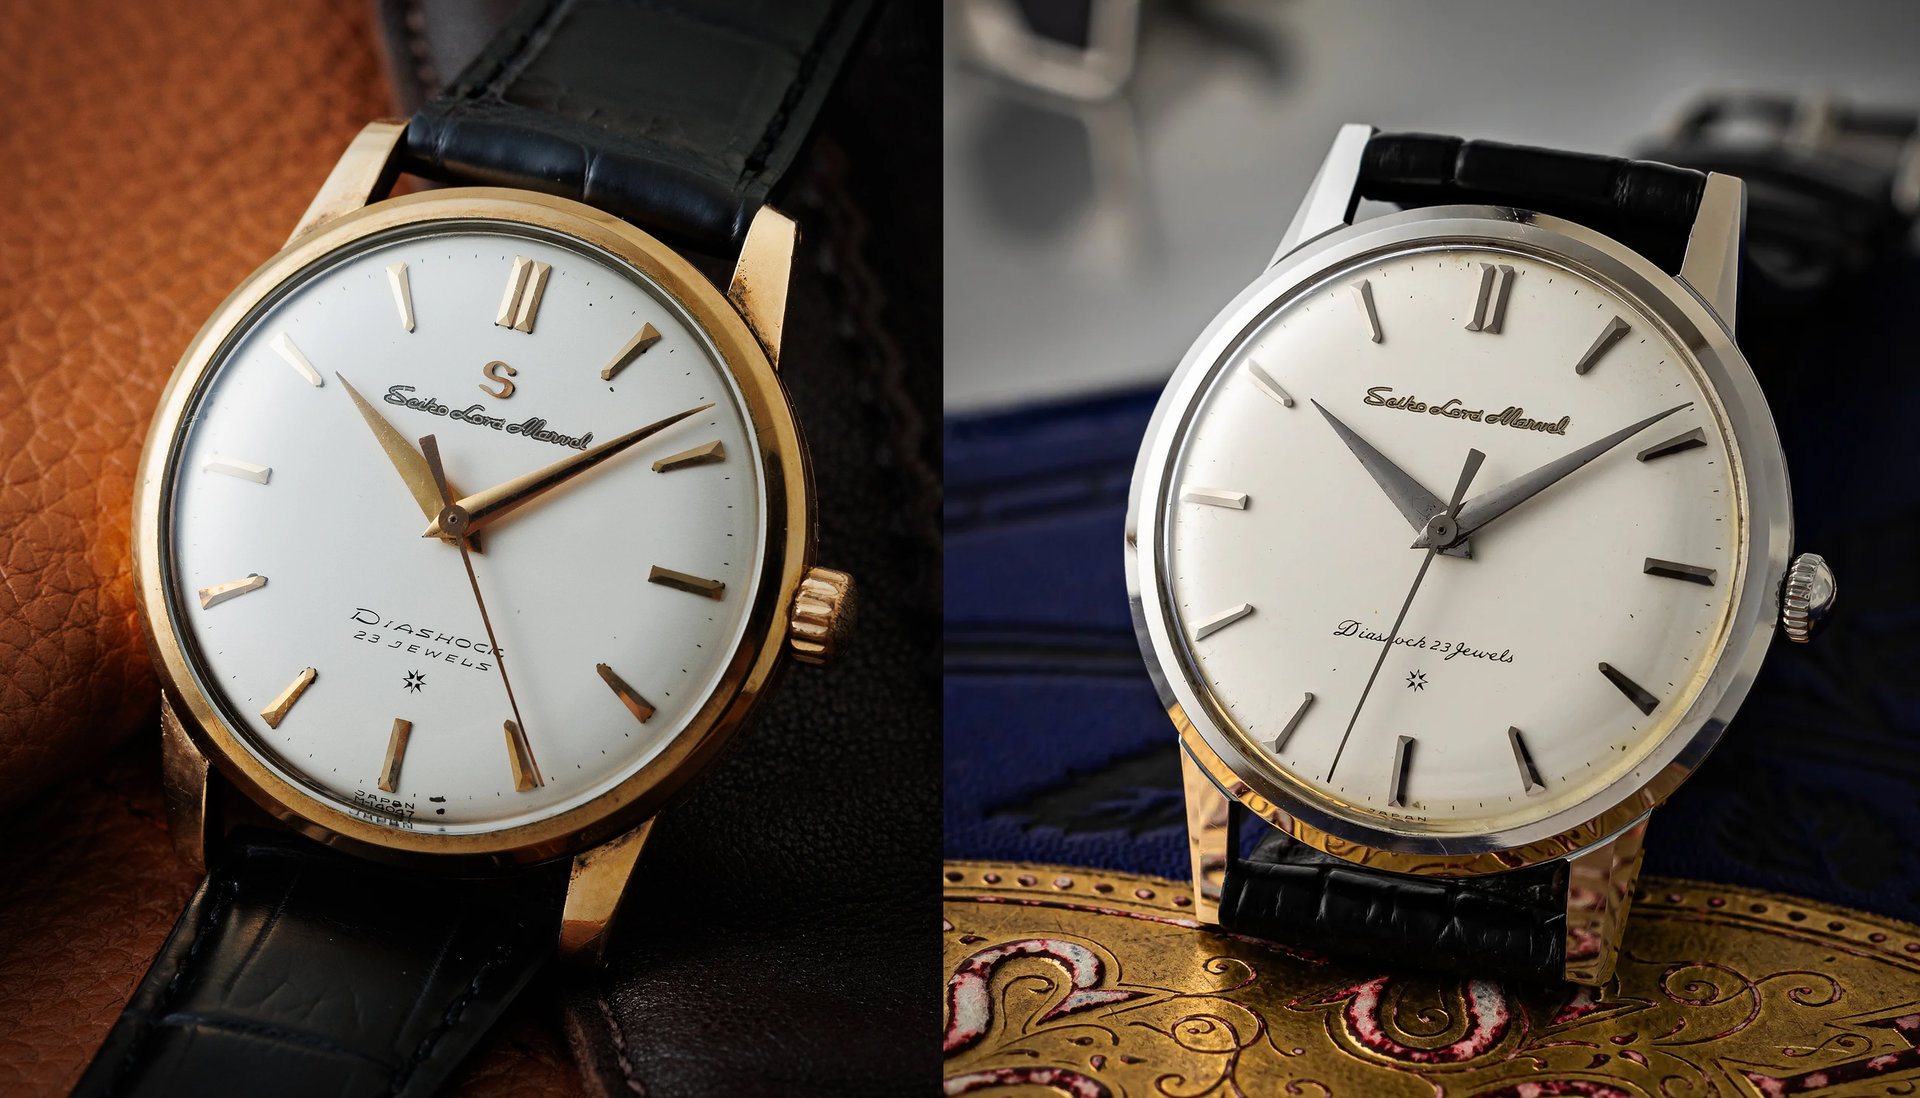
The original Lord Marvel was available in steel or 14k gold-filled cases with case codes 14056 and 14057, respectively. These two models were produced for just a year, between April 1958 and May 1959, in a somewhat bewildering number of subtly different dial layout variations. The earliest of these watches featured an applied ‘S’ sitting above the engraved ‘Seiko Lord Marvel’ text (see above), but that design feature disappeared in later watches, with the dial text layout then settling into a configuration that lasted for the remainder of that model run and through the next two generations of low-beat Lord Marvel models.
Within a year, the Lord Marvel case design was updated with the release in the summer of 1959 of the J14038, J14039 and J14050 models in steel, 14k gold-filled and 18K solid gold cases. These watches retained the engraved Seiko Lord Marvel dial text of the earlier watches, a feature that would be duplicated in the first Grand Seiko released a year later. In terms of the consistency of design language, it is these second iterations of the Lord Marvel that assume the role most convincingly as the progenitor to the Grand Seiko.
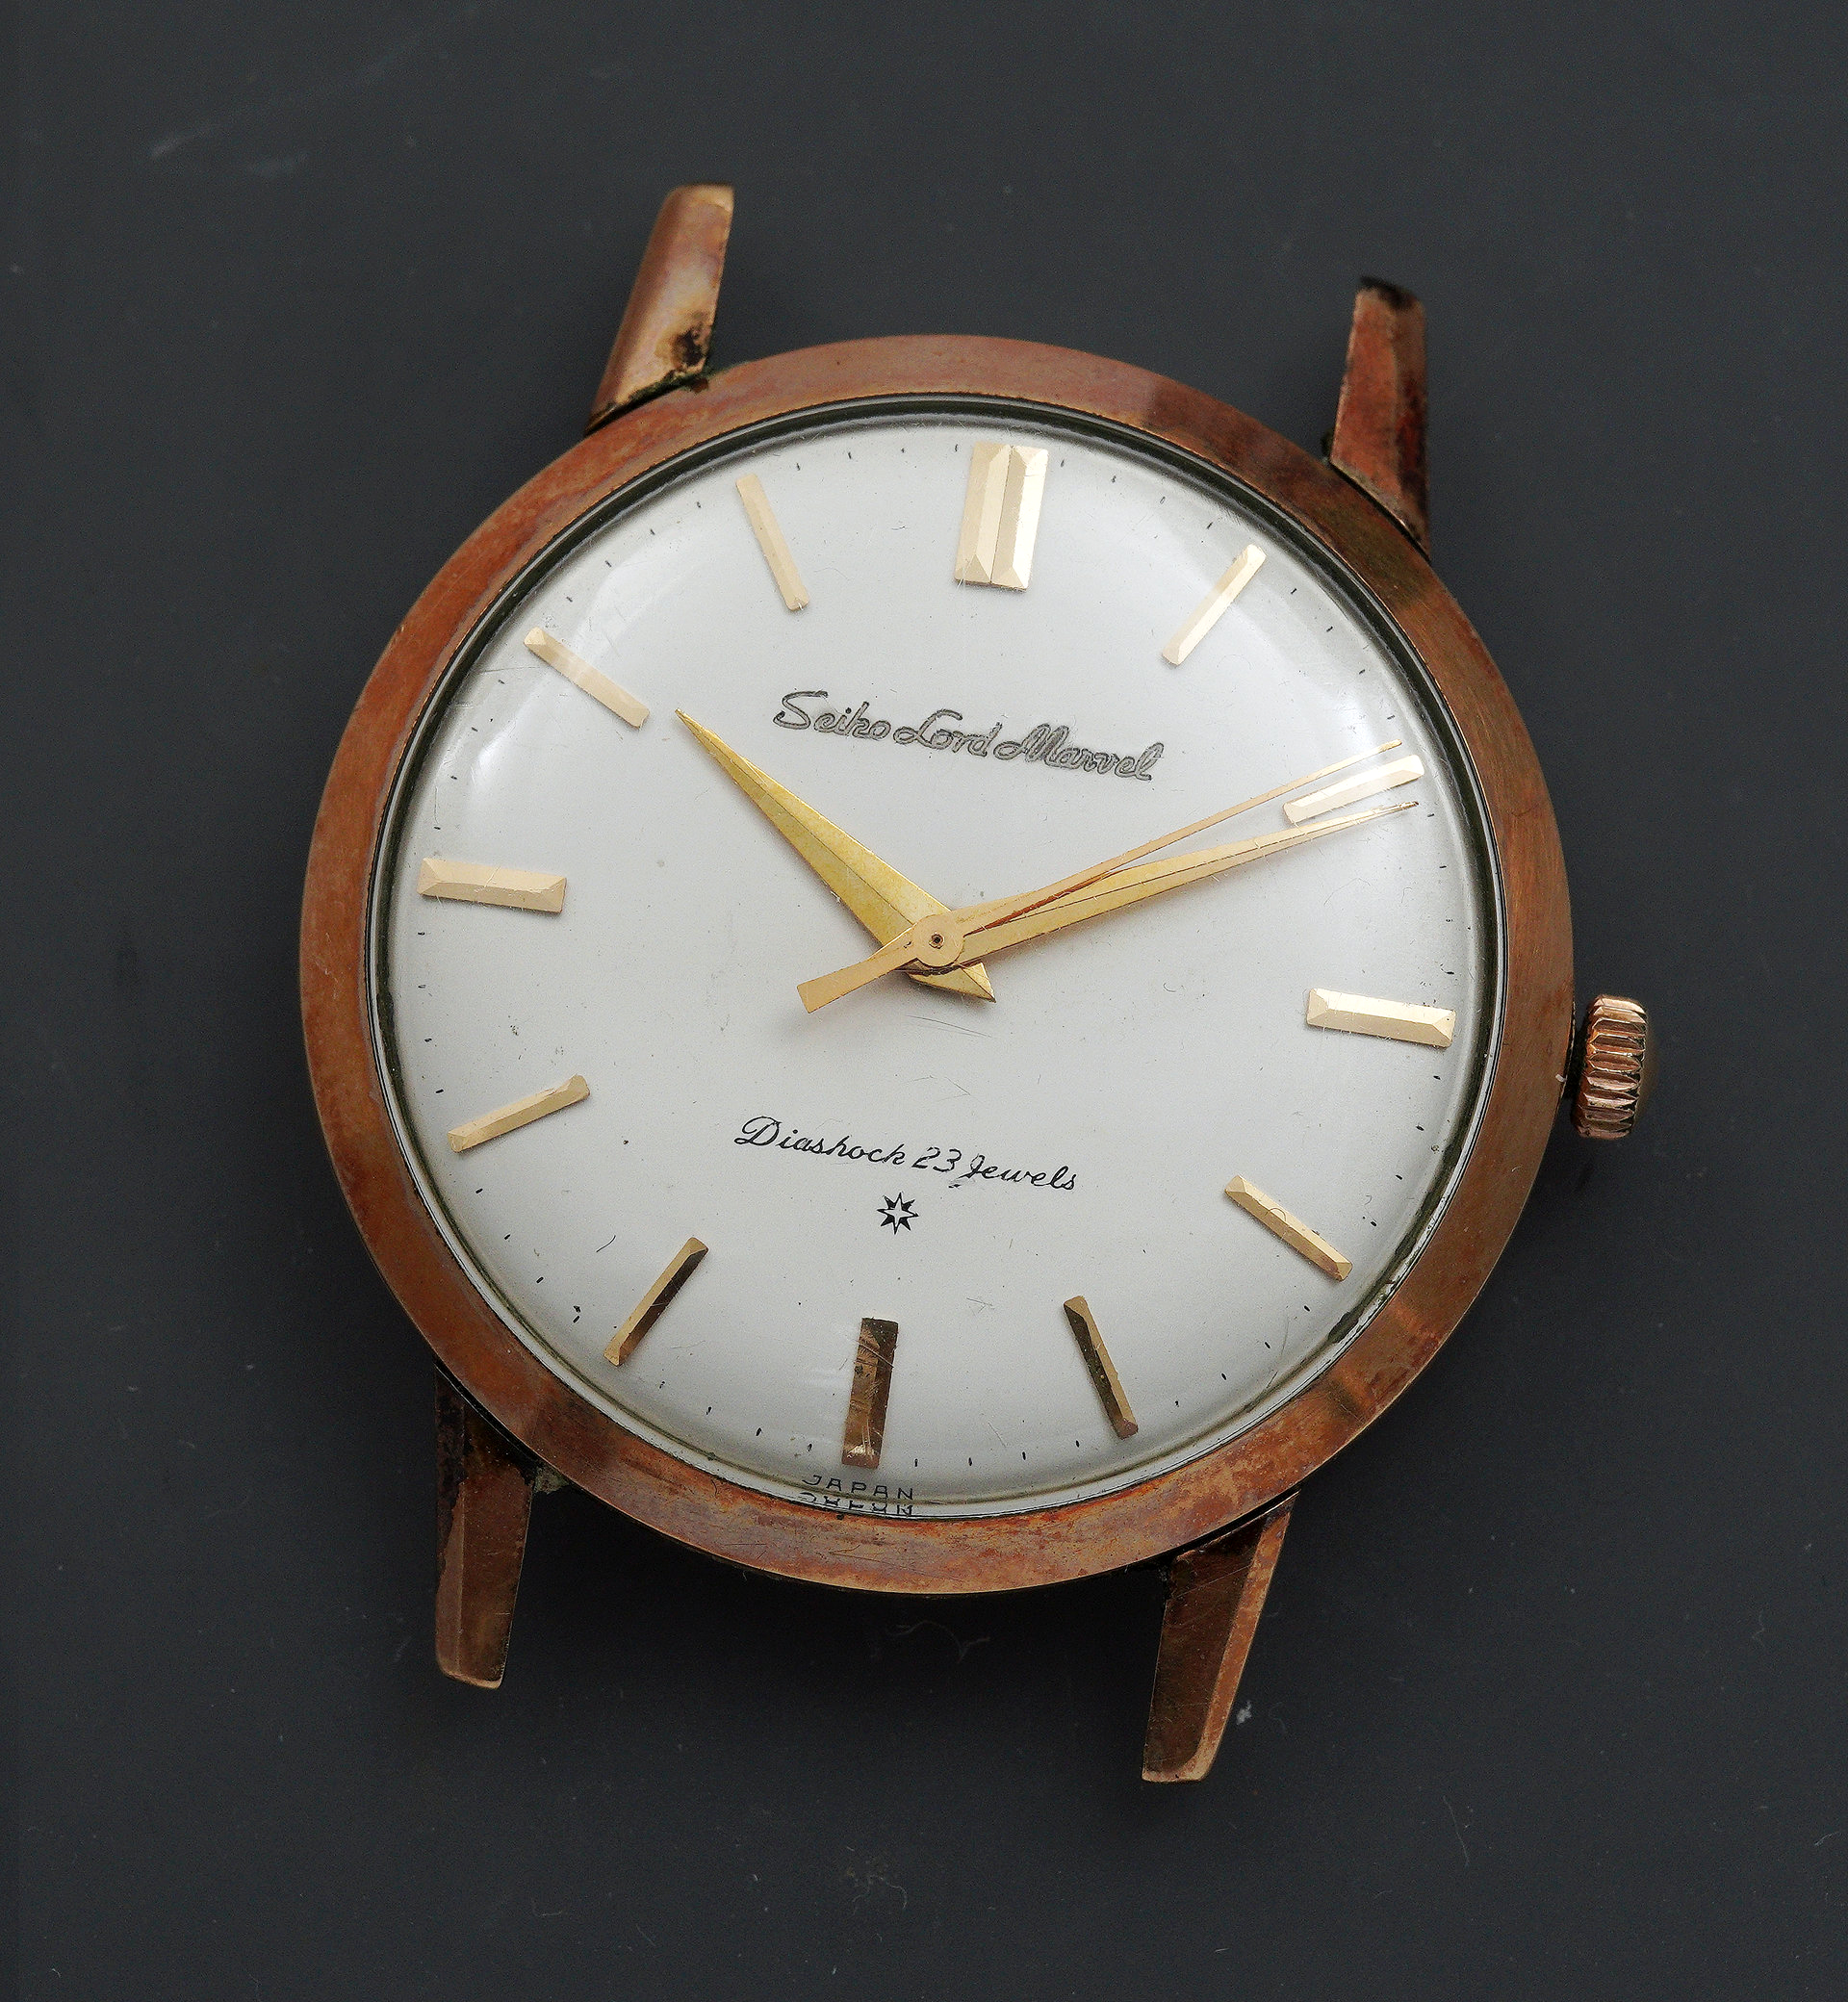
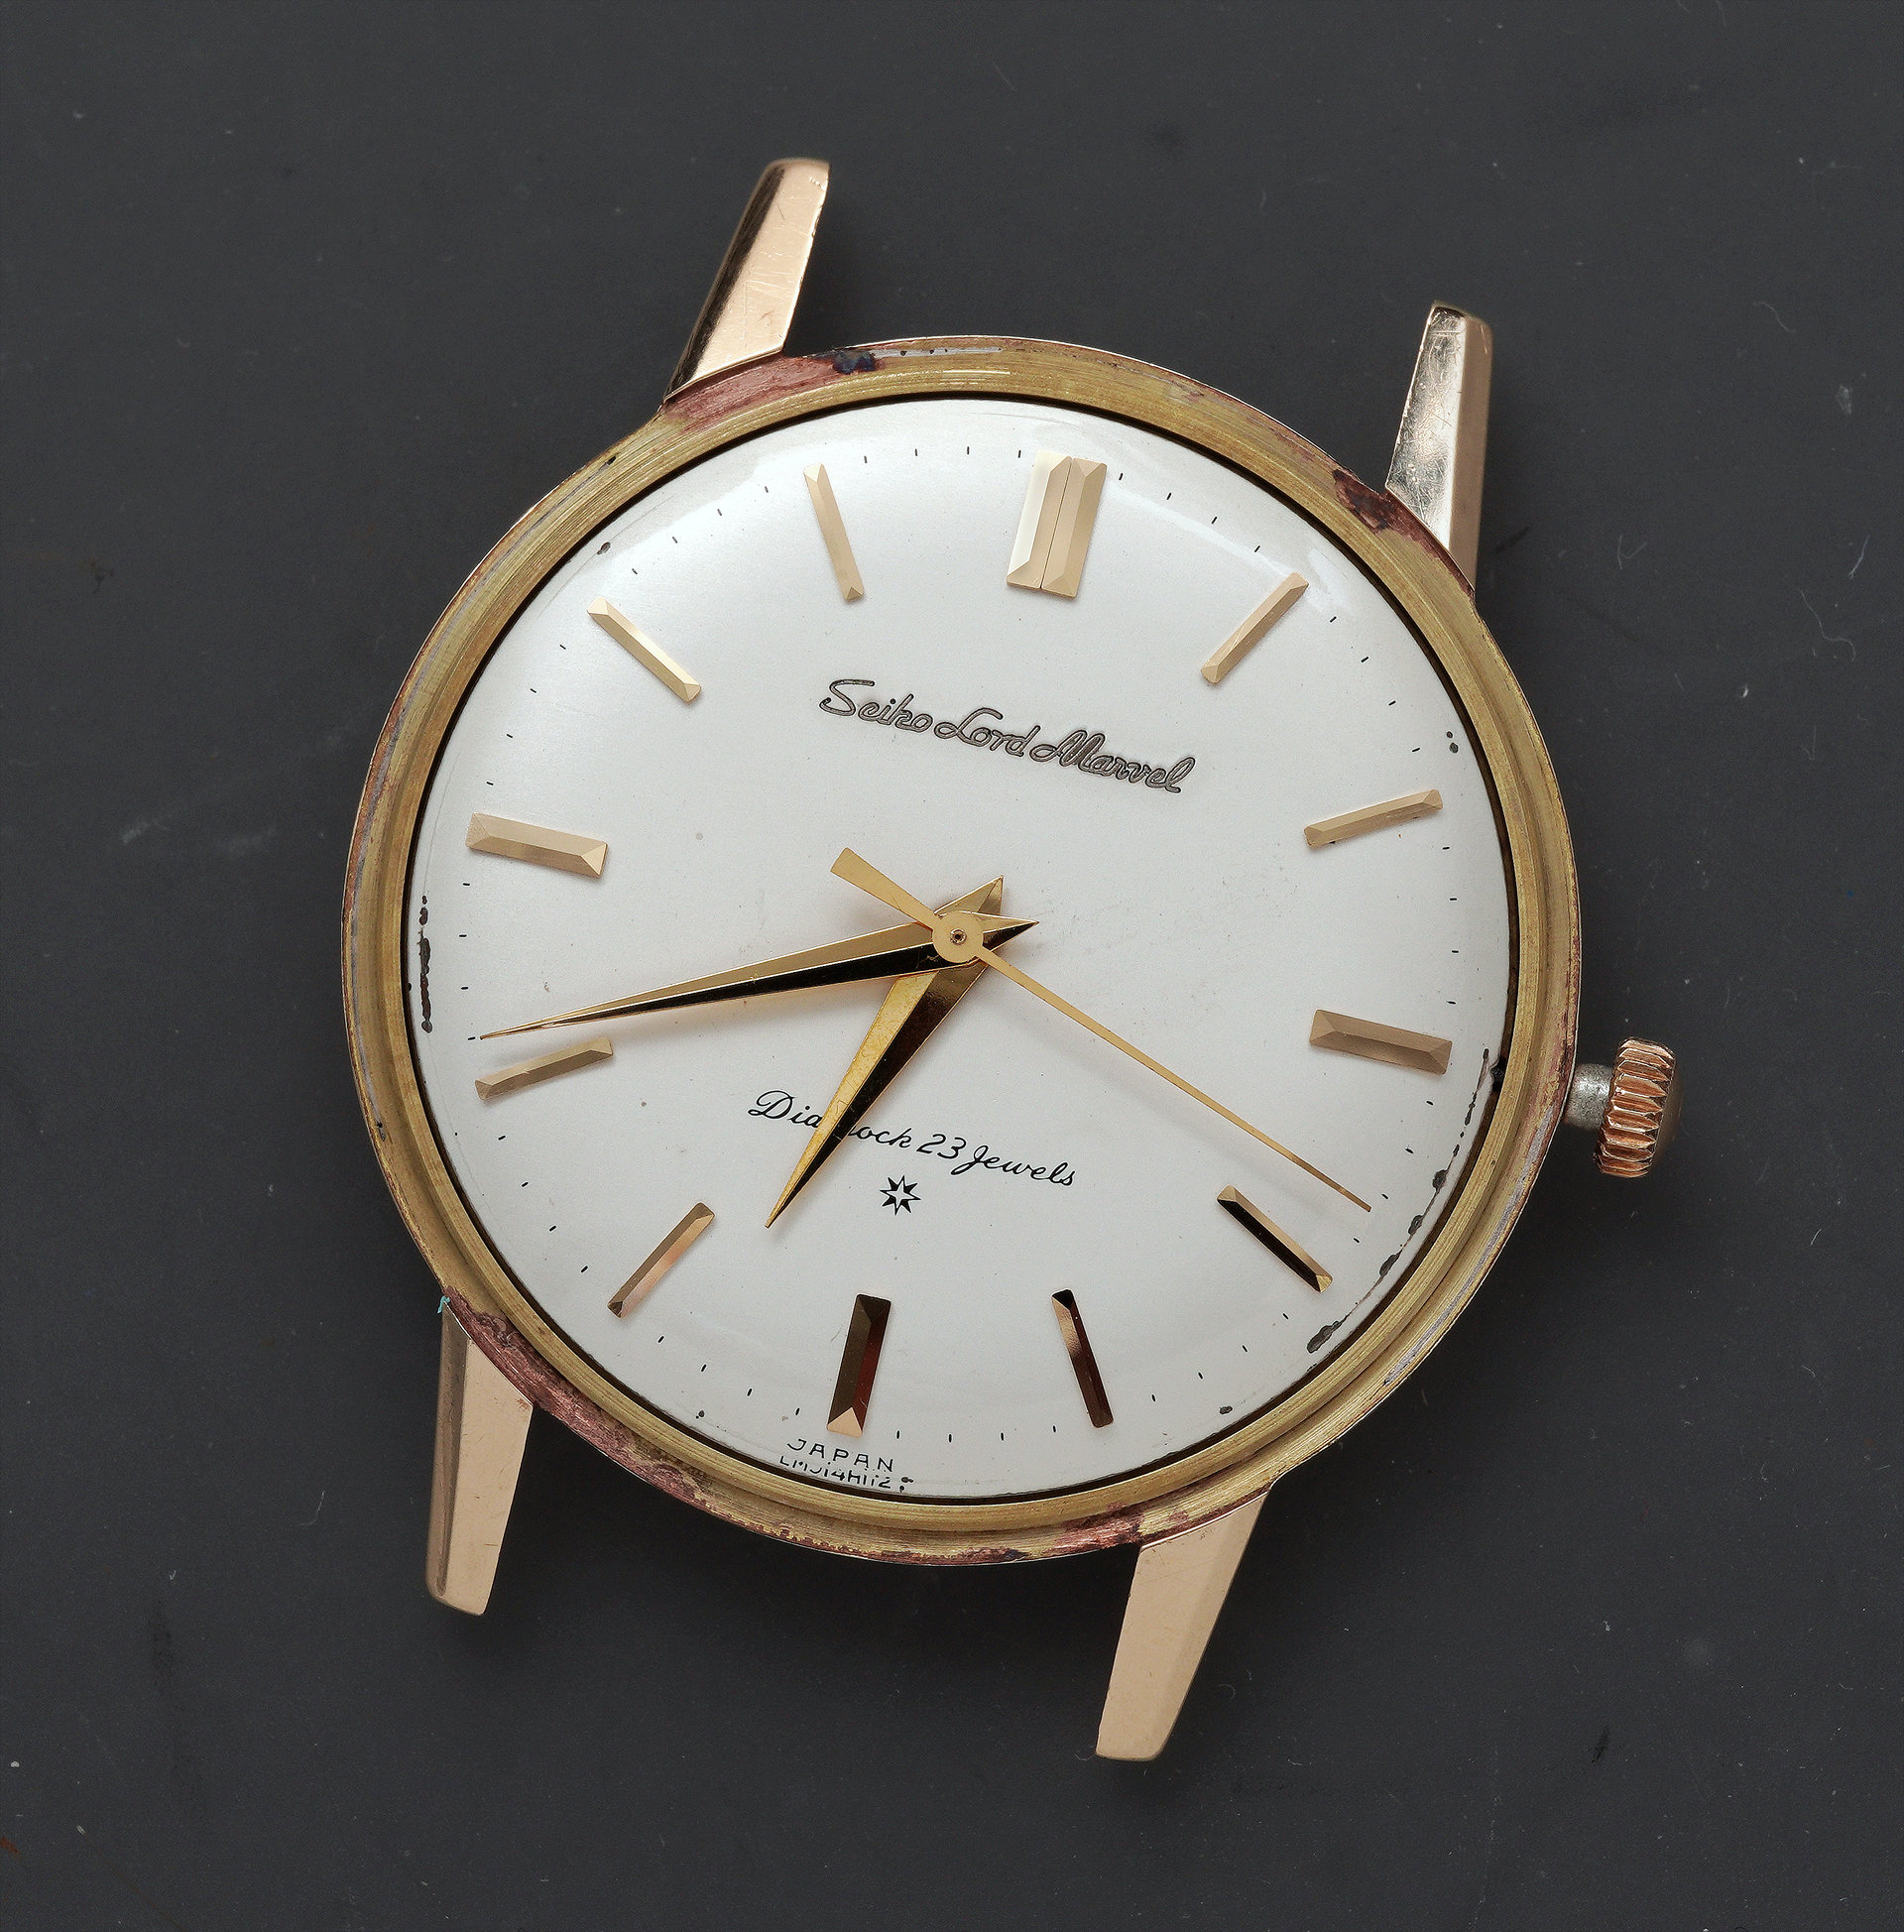
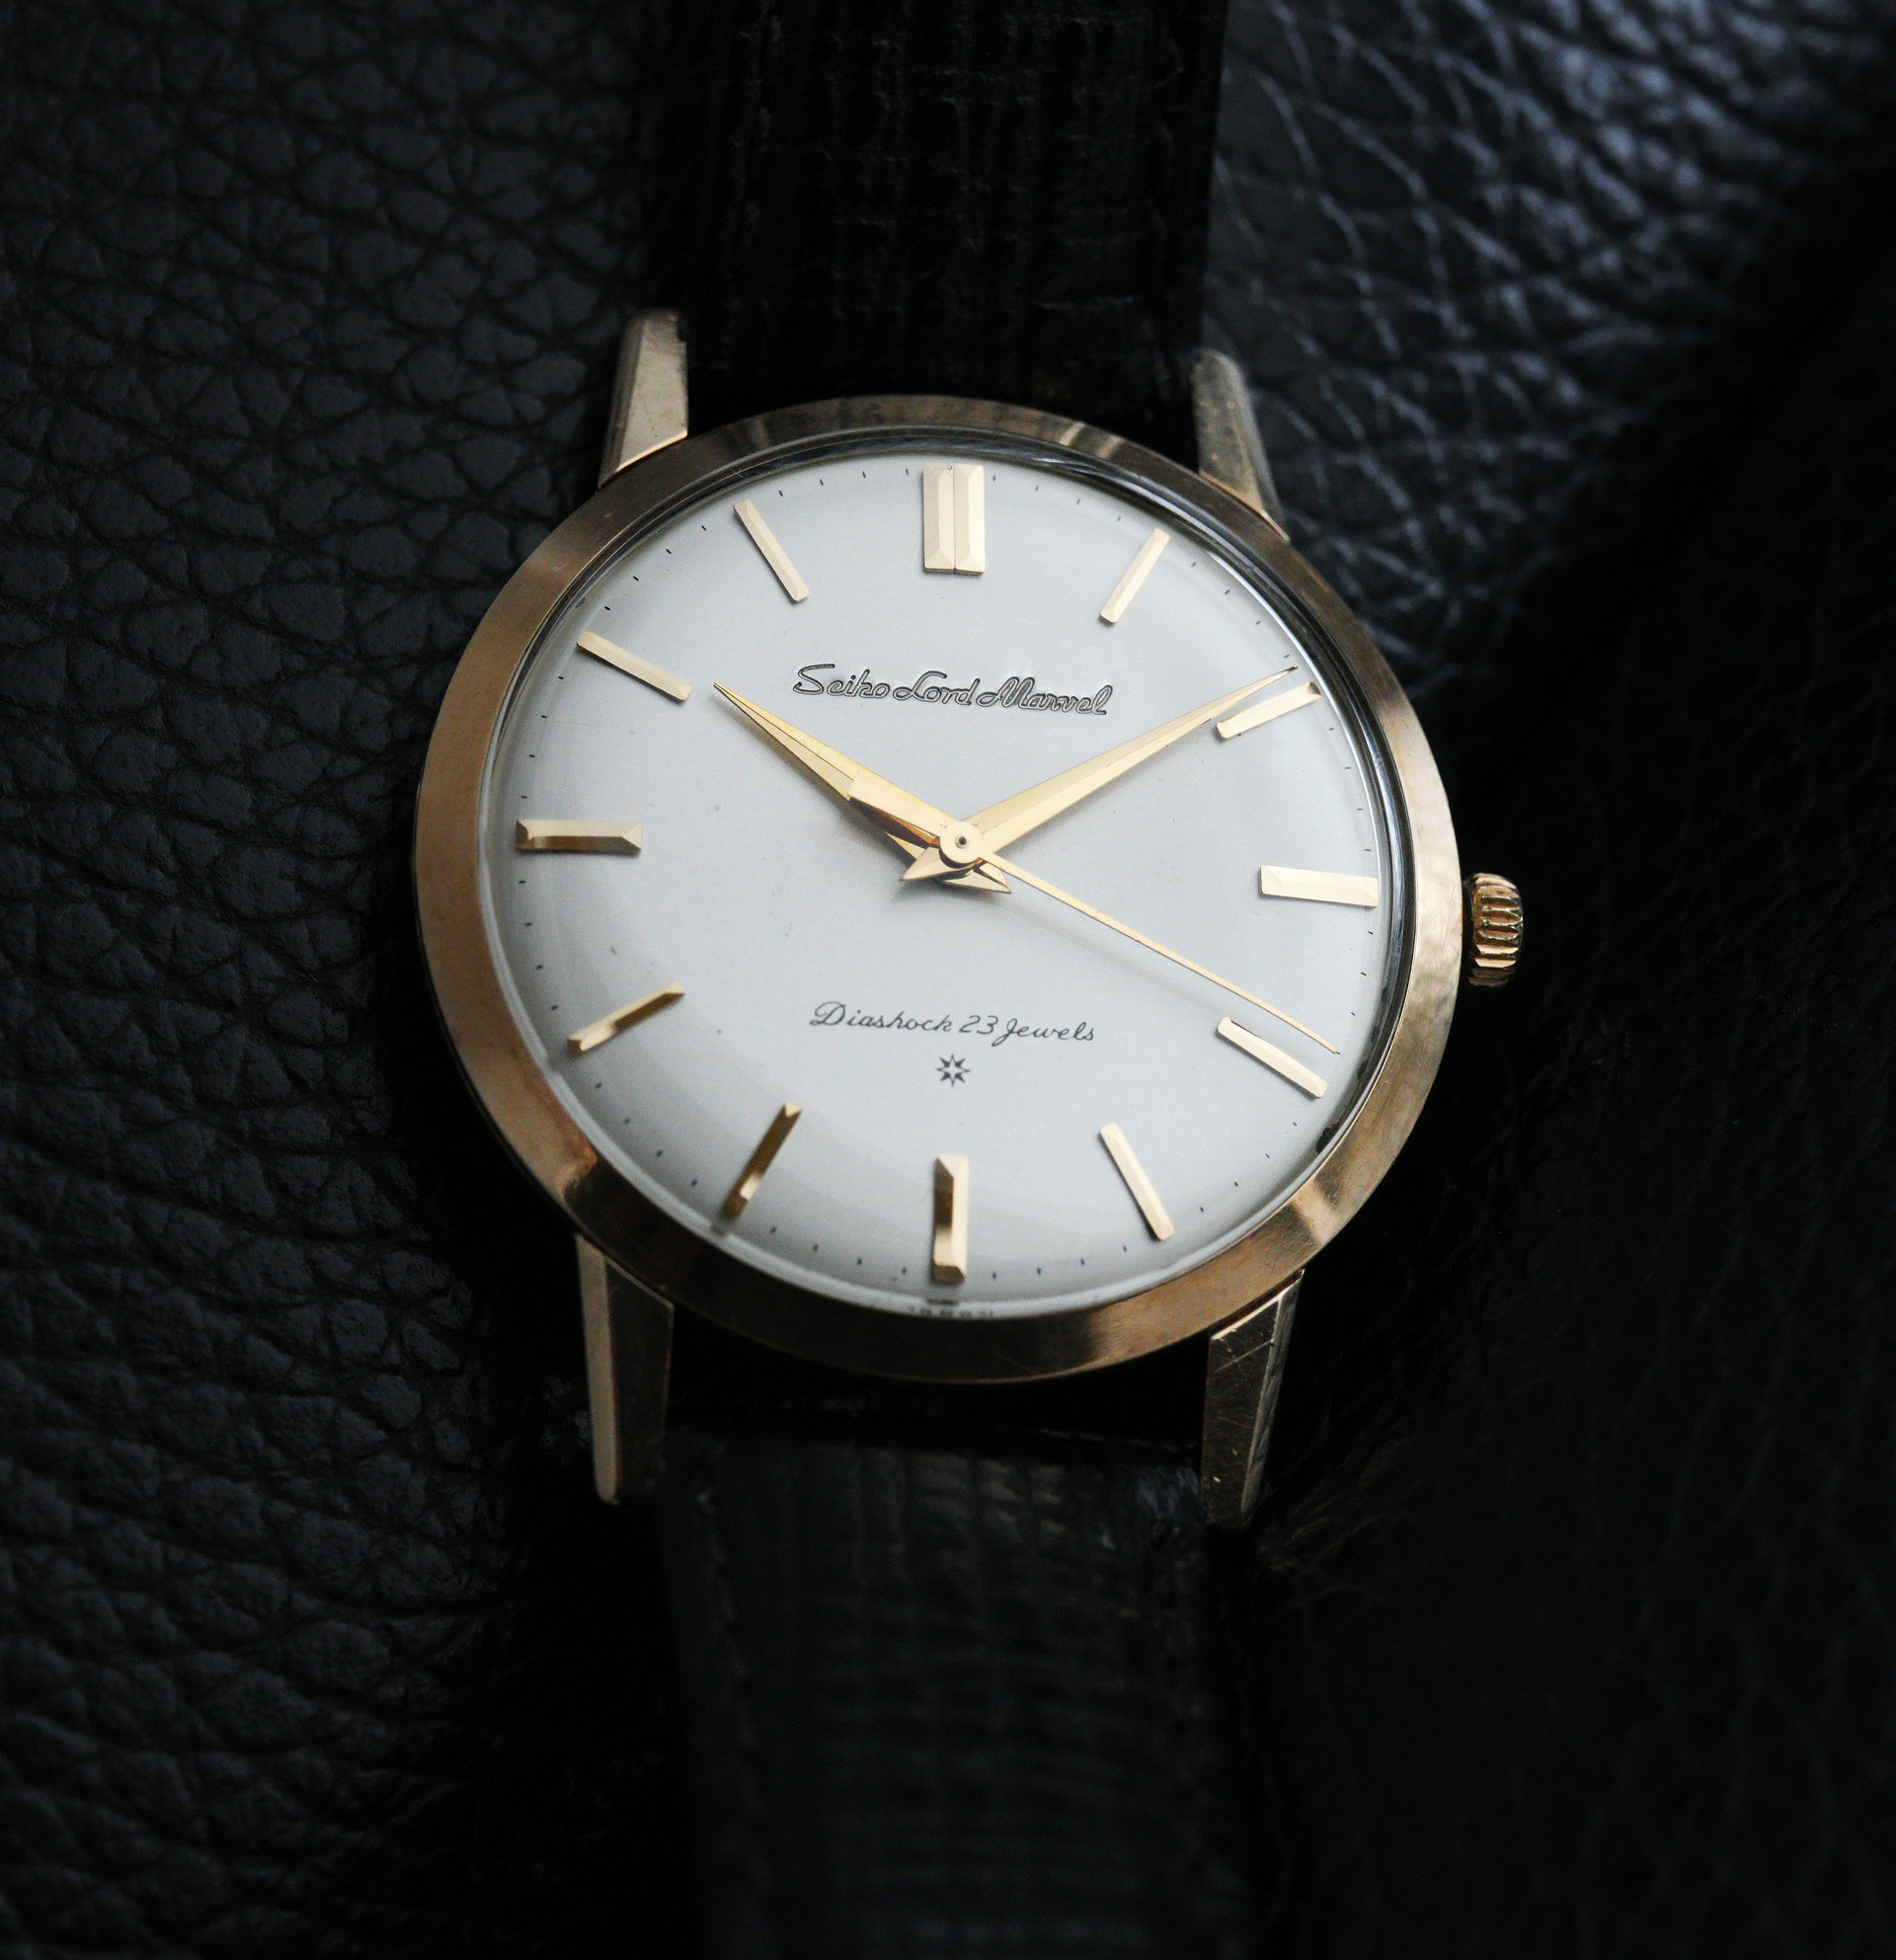
Let’s take ourselves back to August 1960, four months before the release of the Grand Seiko 3180. A 14k gold-filled Seiko Lord Marvel emerges from the production line at the Daini Seikosha factory in Tokyo and begins its life both as a device to tell the time but also as a small, perfectly-formed object of desire, signaling the aspirations and measure of the person on whose wrist it sits. In the 65 years that have passed since, this particular example has seen some action, has lived a life but not one that is yet concluded for it finds itself in the summer of 2025 as the object of my attention.

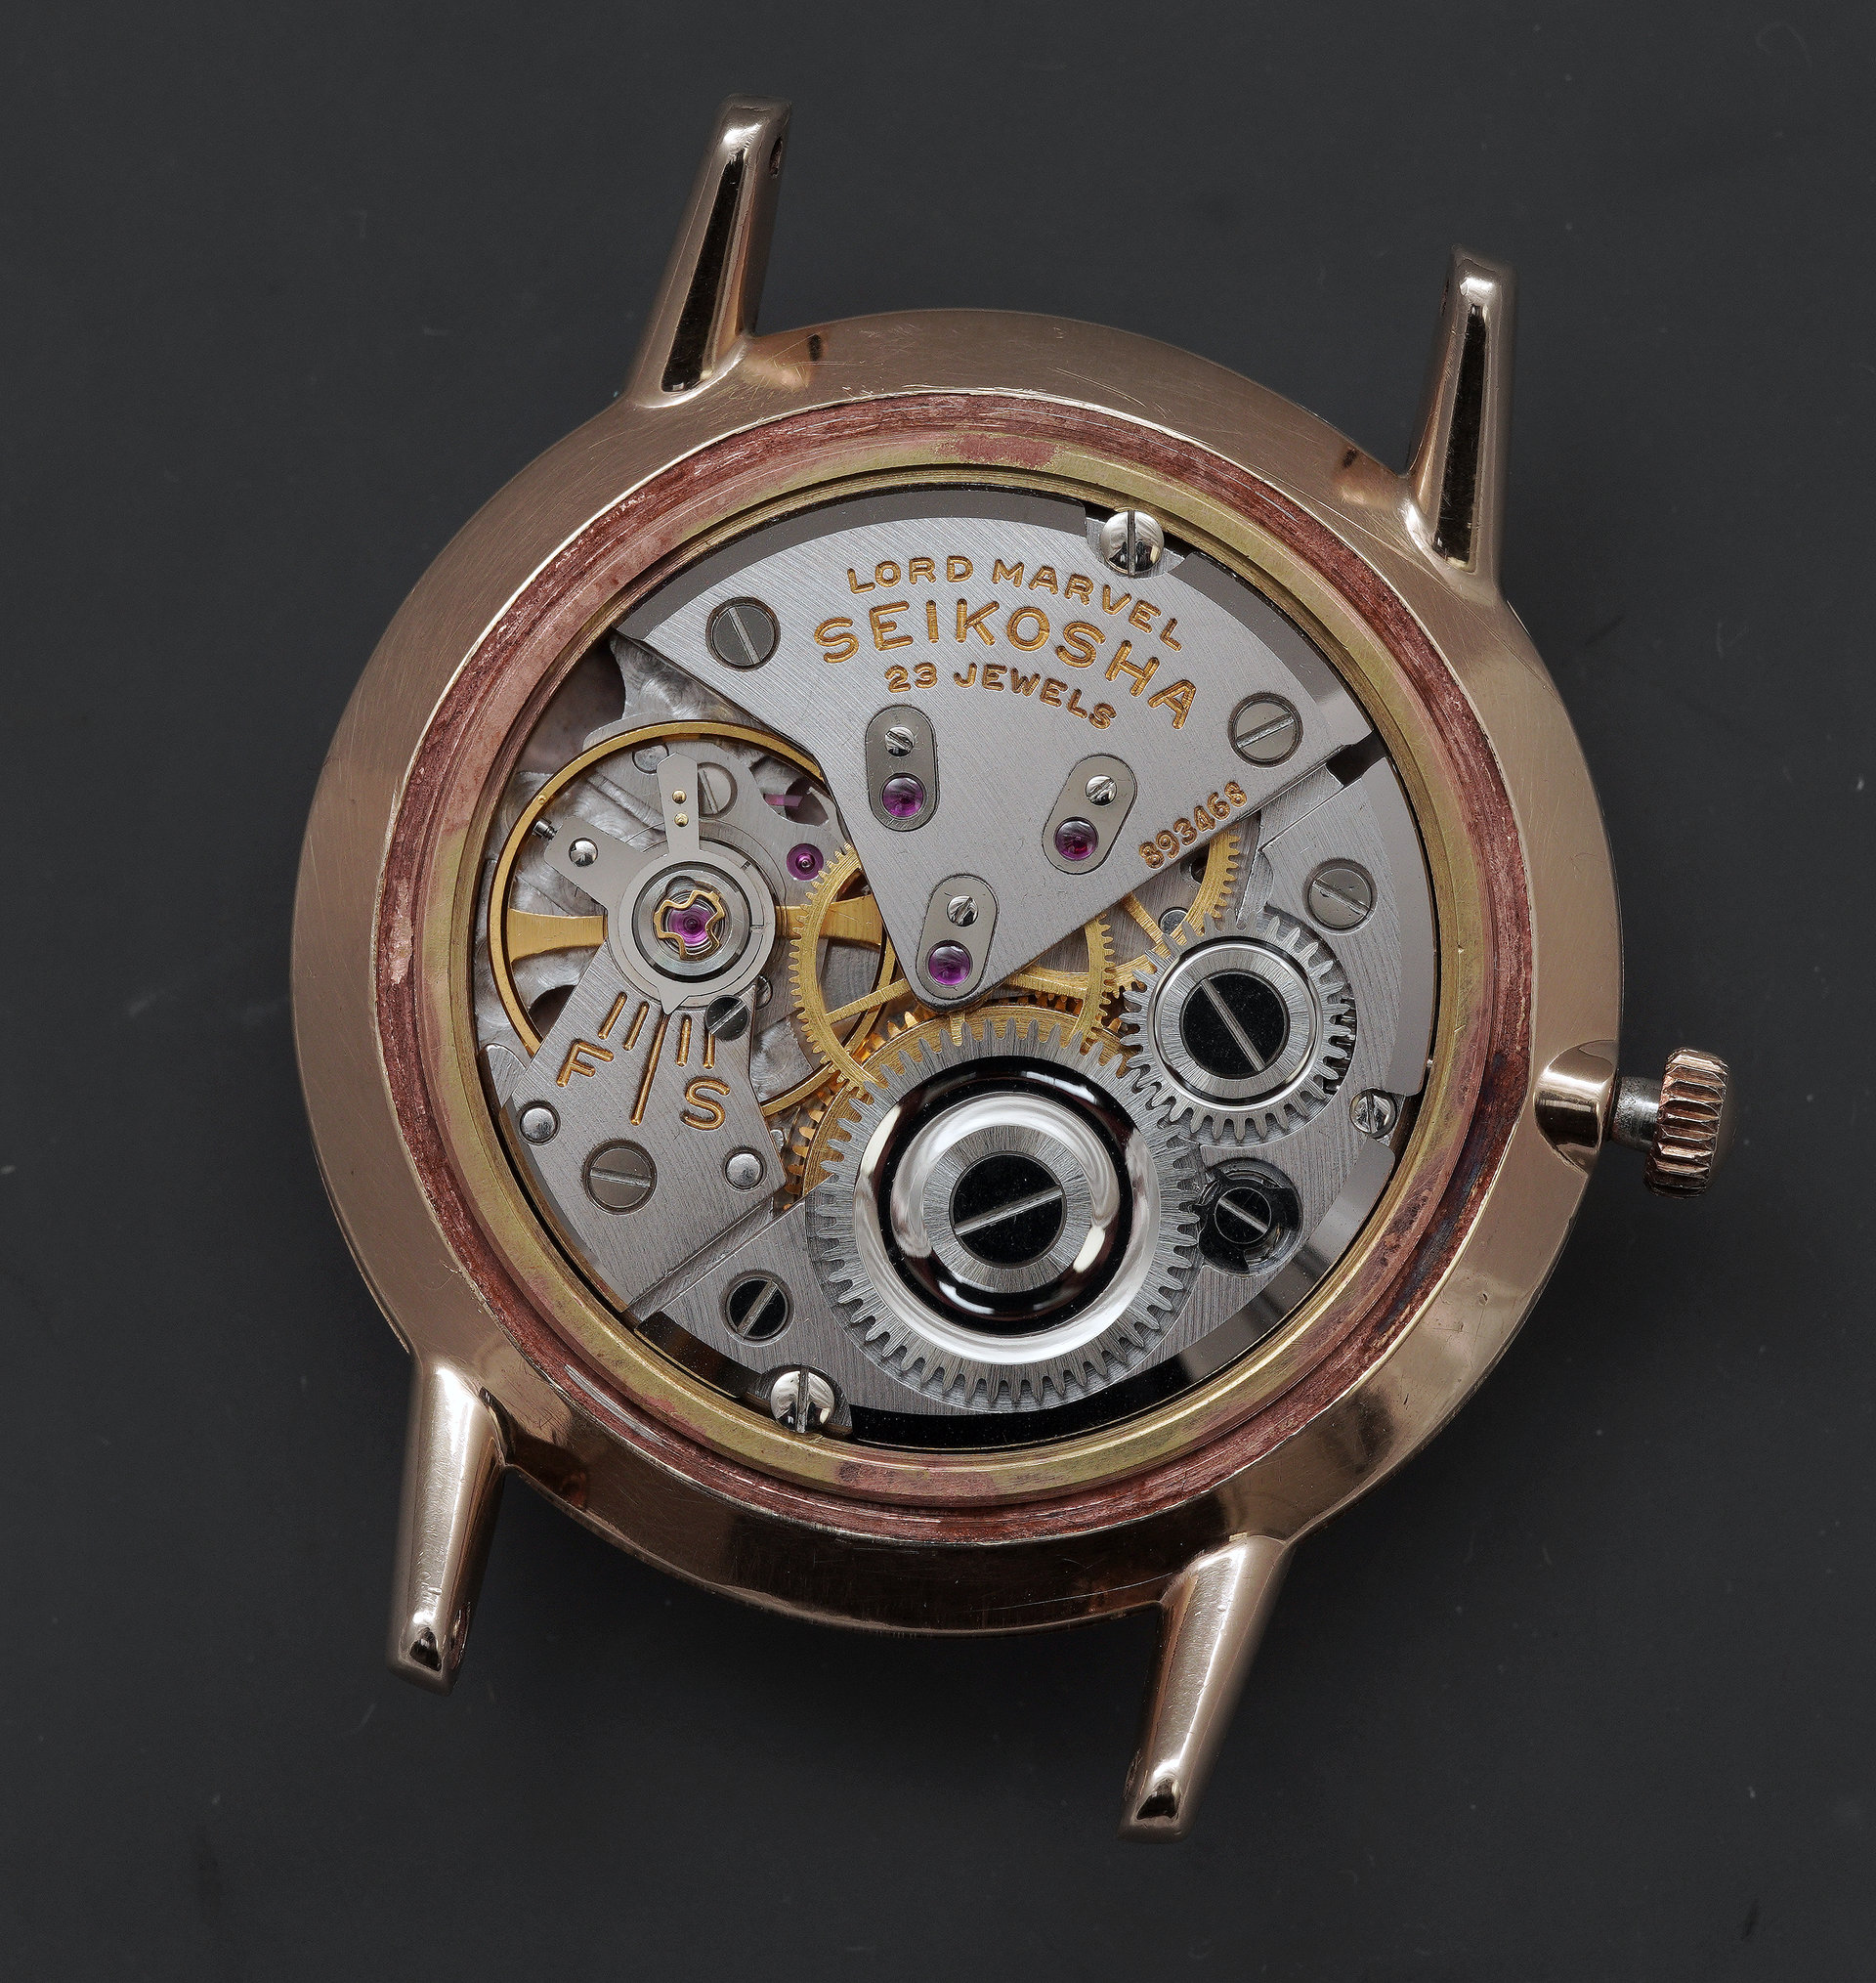
Clearly, there is the appearance that the combined chemical effects of dirt, water and oxygen have wrought a certain amount of havoc upon the case mating surfaces but as we shall see, that faux carnage flatters to deceive. This is a very nice example of the breed, rendered all the more beautiful by the patina. It is worth taking a peek at the inside of the case back before diving in.
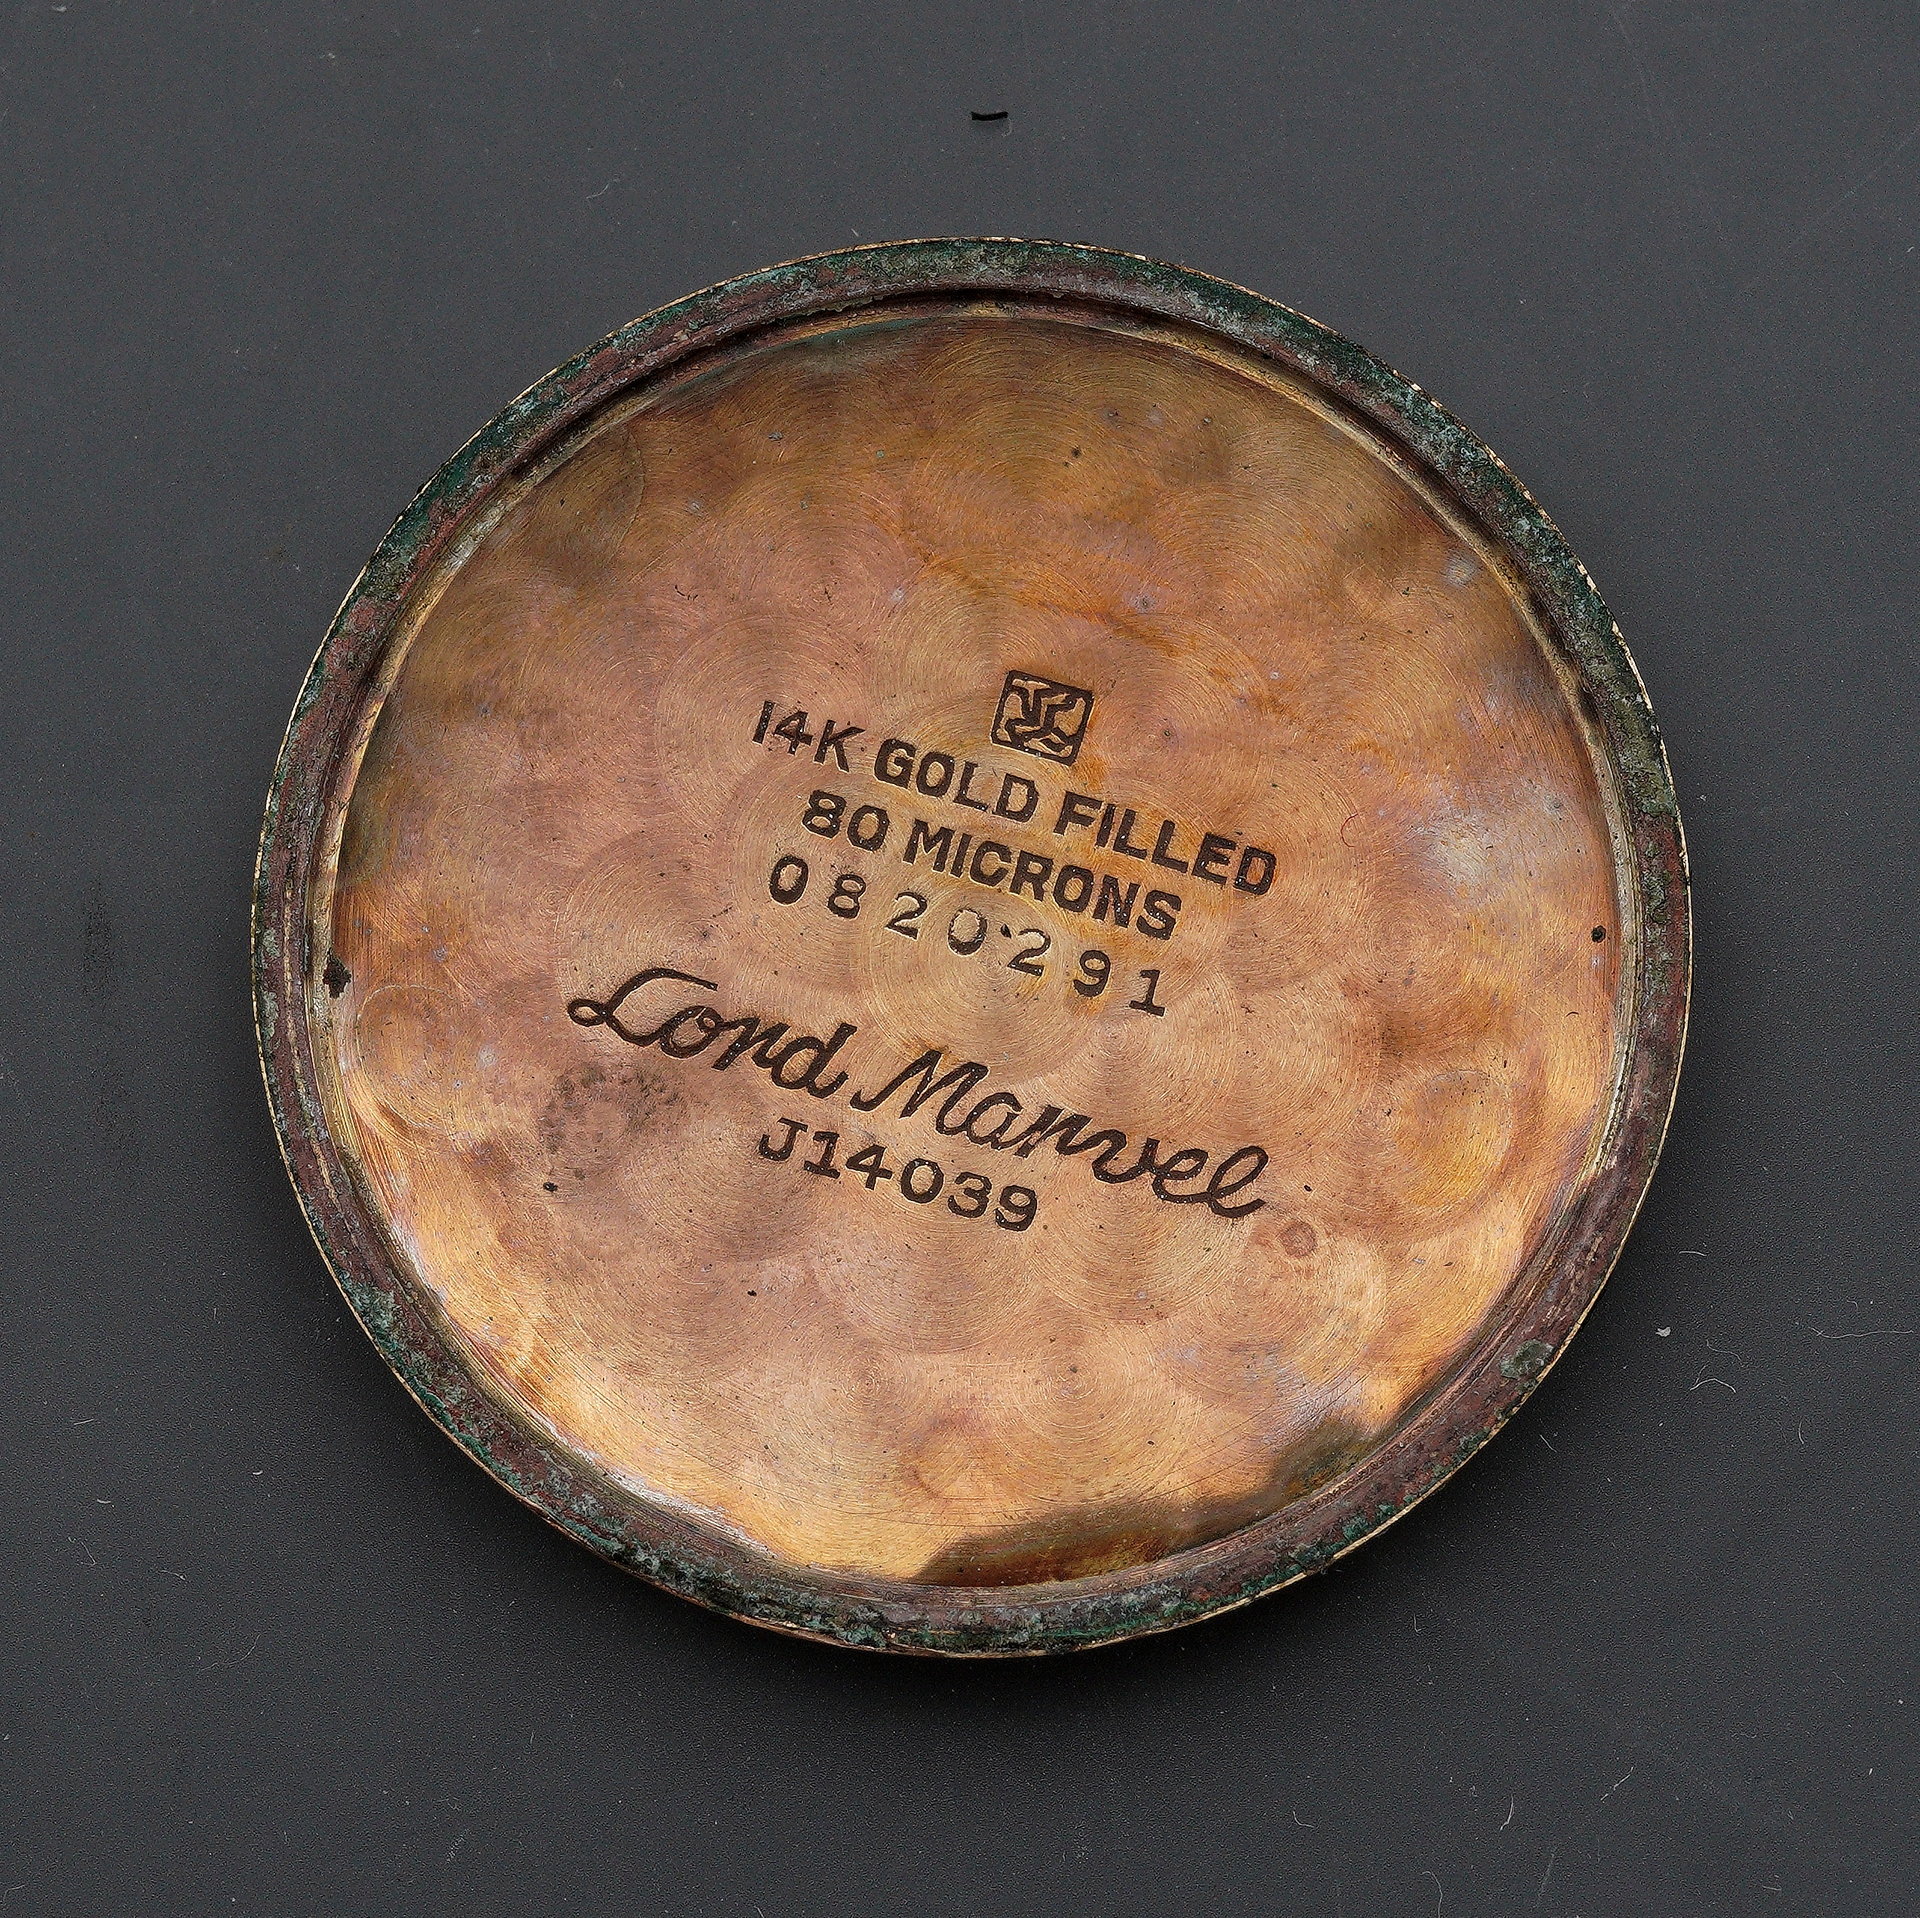
There is much to absorb here and to enjoy, starting with the embossed crane symbol at the top, signifying that the case (and presumably the watch itself) was produced in the Daini Seikosha Kameido factory in Tokyo. The next two lines of text describe the case material as 14k gold-filled. The serial number, beginning 08, dates the watch to August 1960, the last month of production of the J14039. The last two lines provide the sub-brand, Lord Marvel, rendered in a looping script, and the model number, J14039.
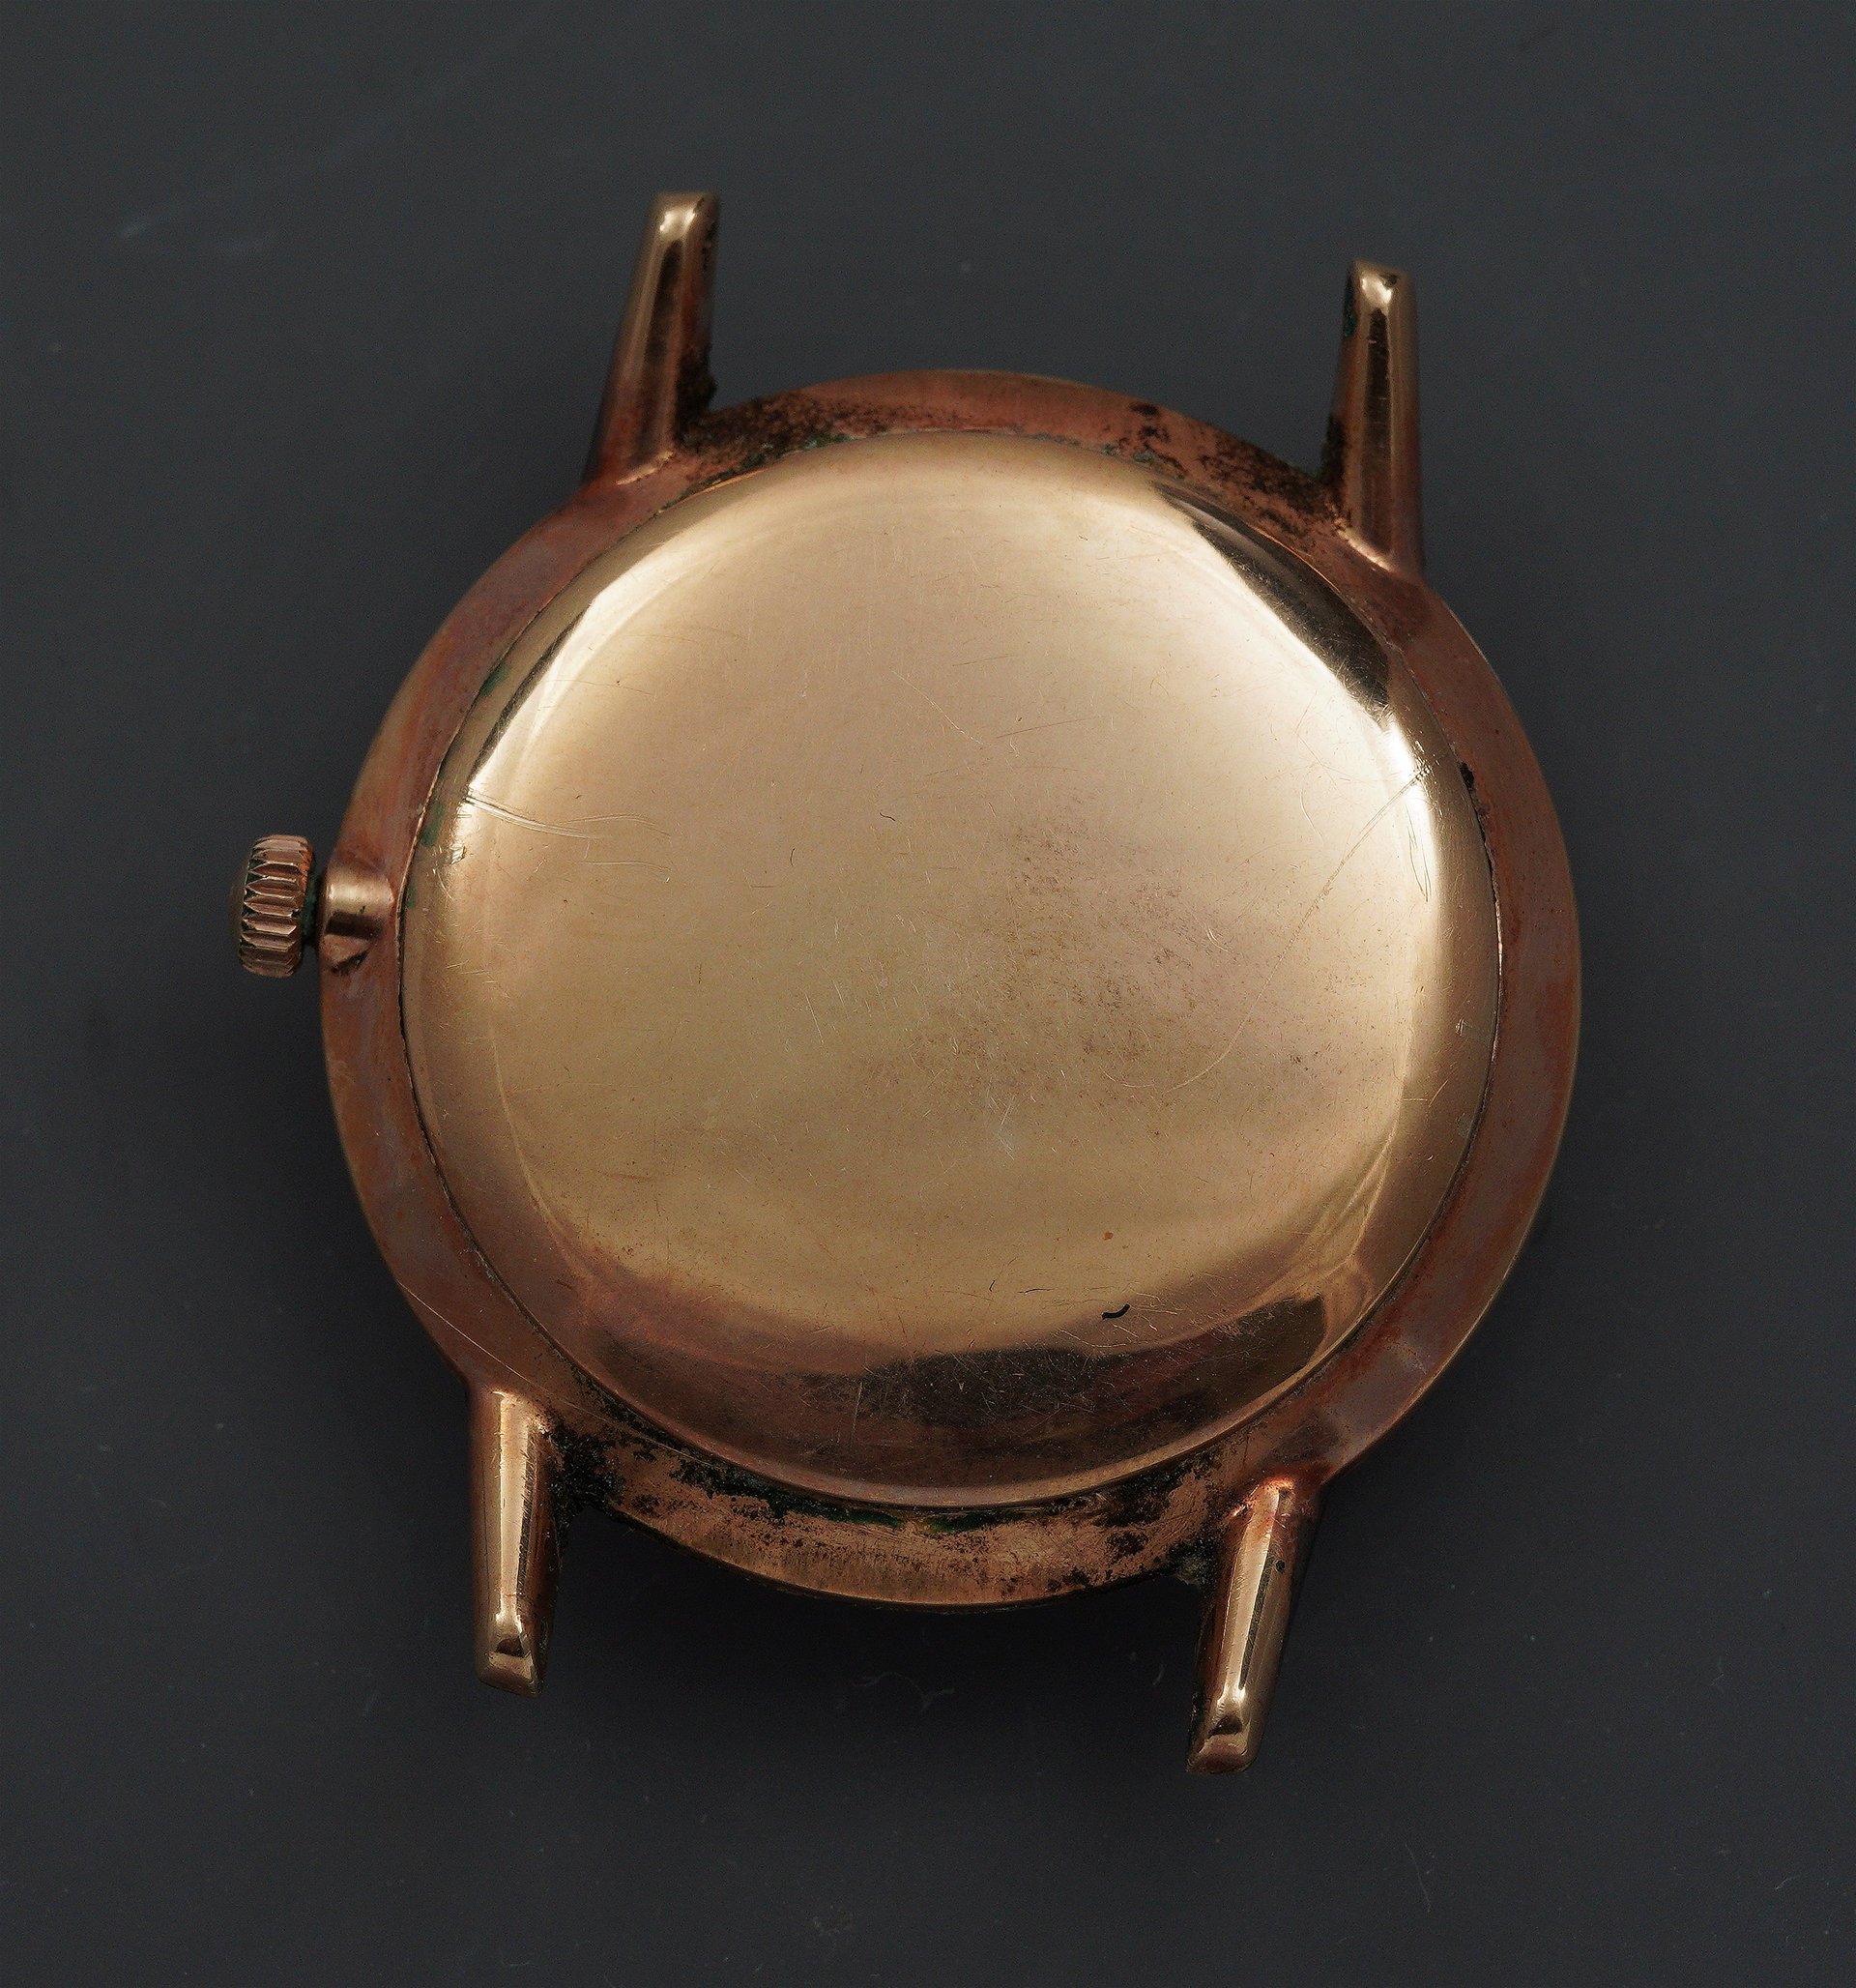
The outward-facing, curved, polished surface of the case back reveals nothing other than the reflection of the observer.
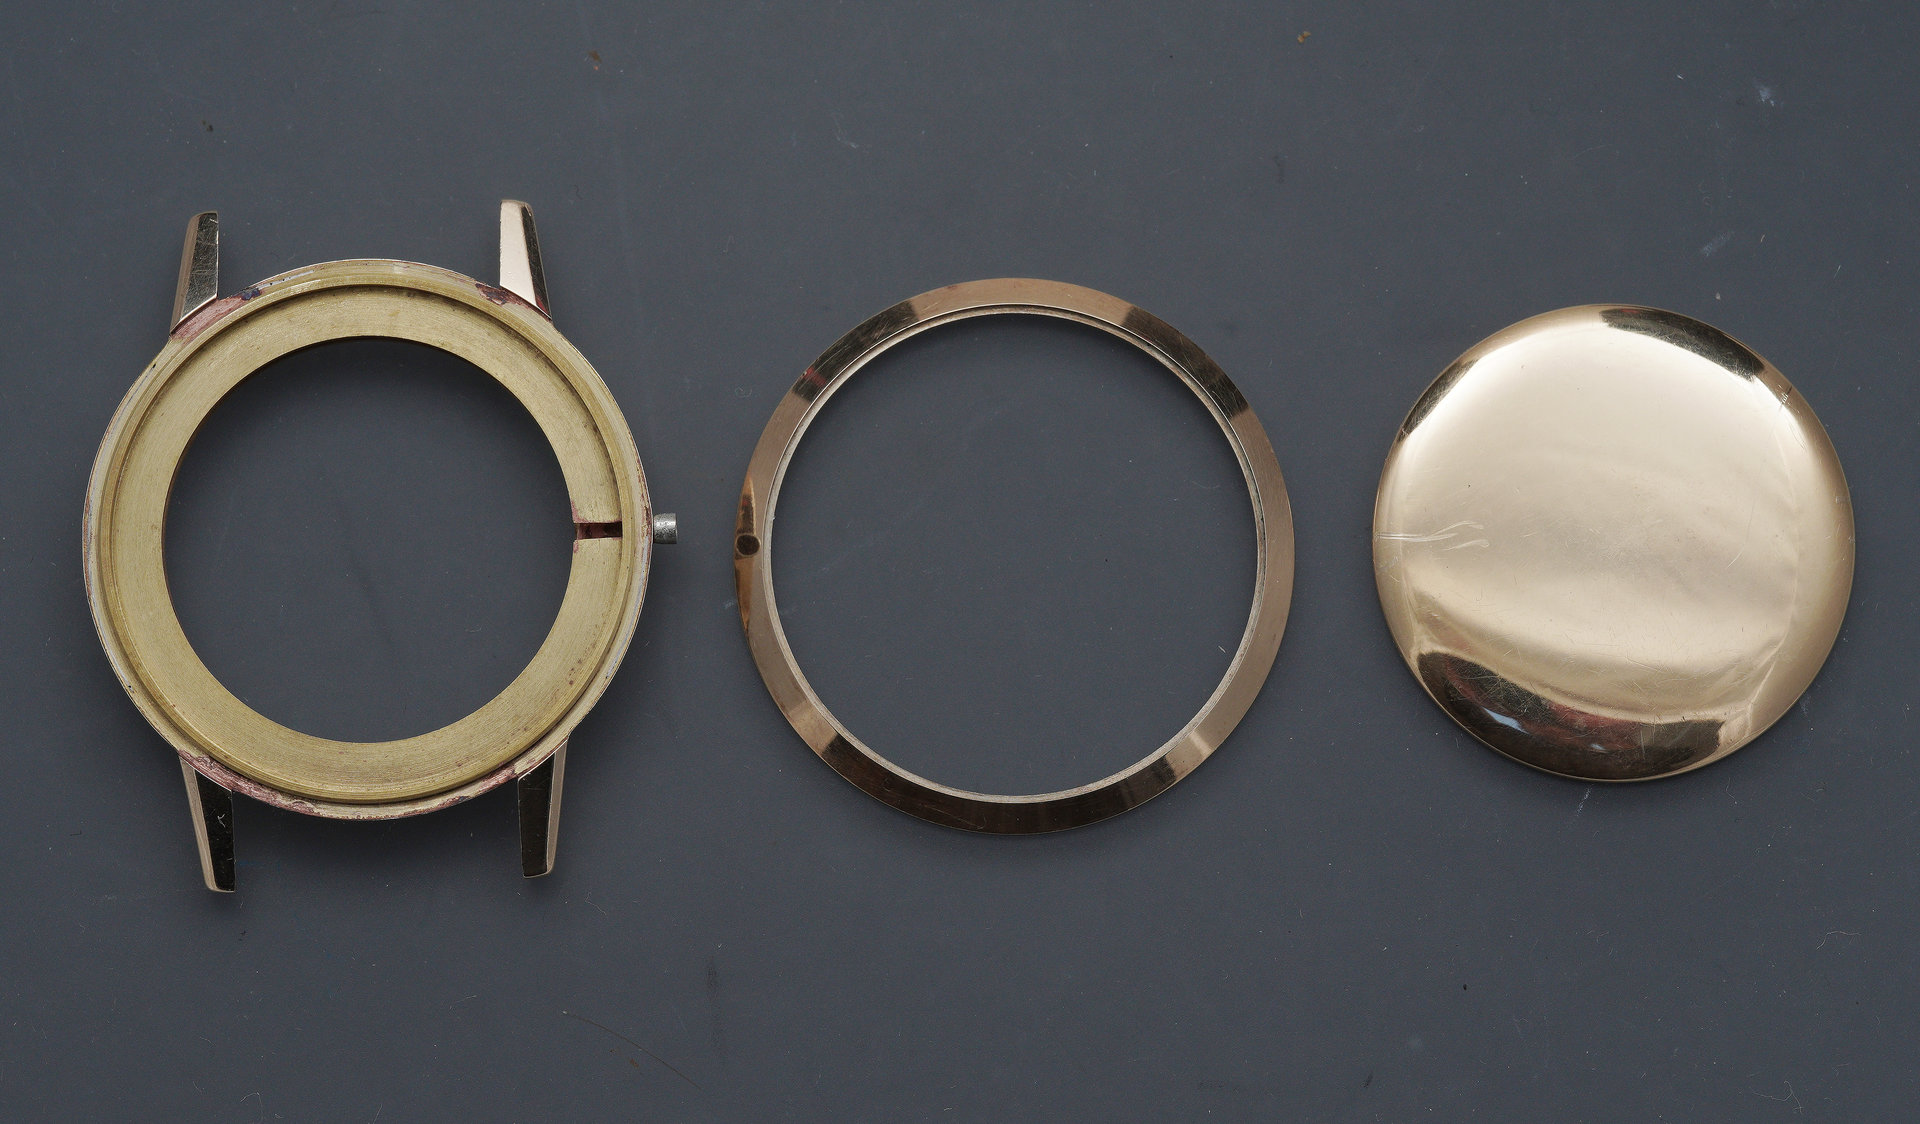
This being a traditional three-part case, the movement is extracted from the front, rather than the rear, the crystal and its retaining bezel first requiring removal.
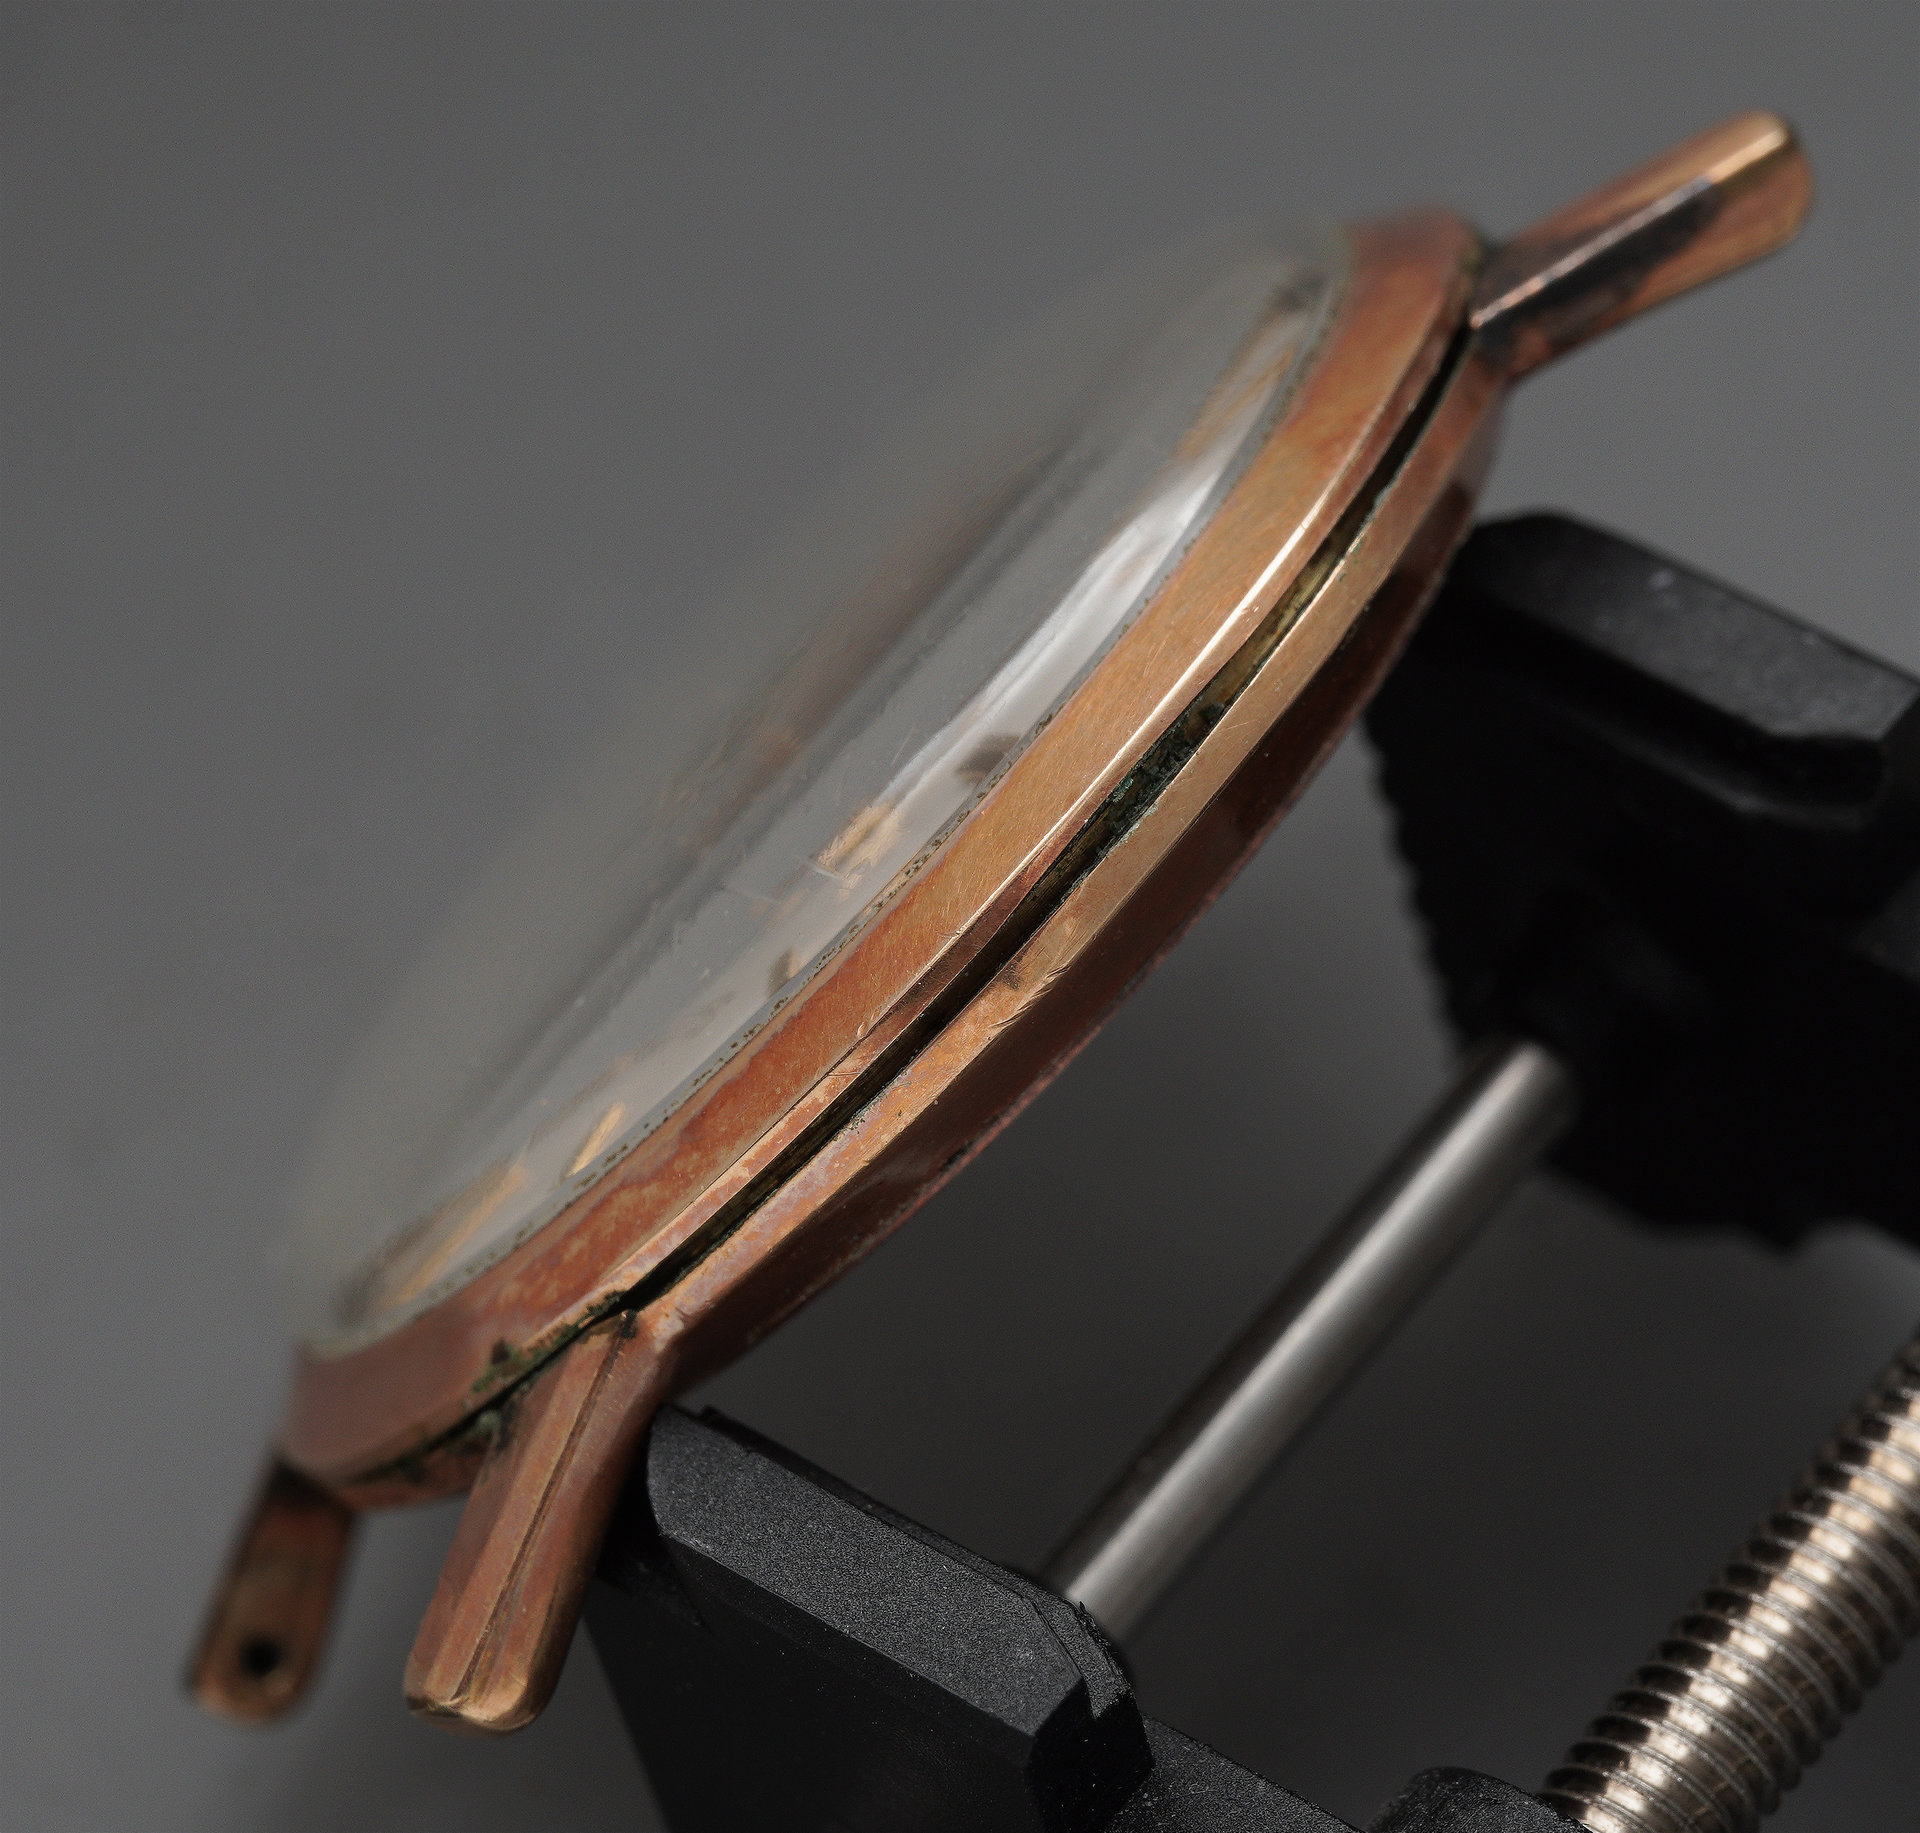
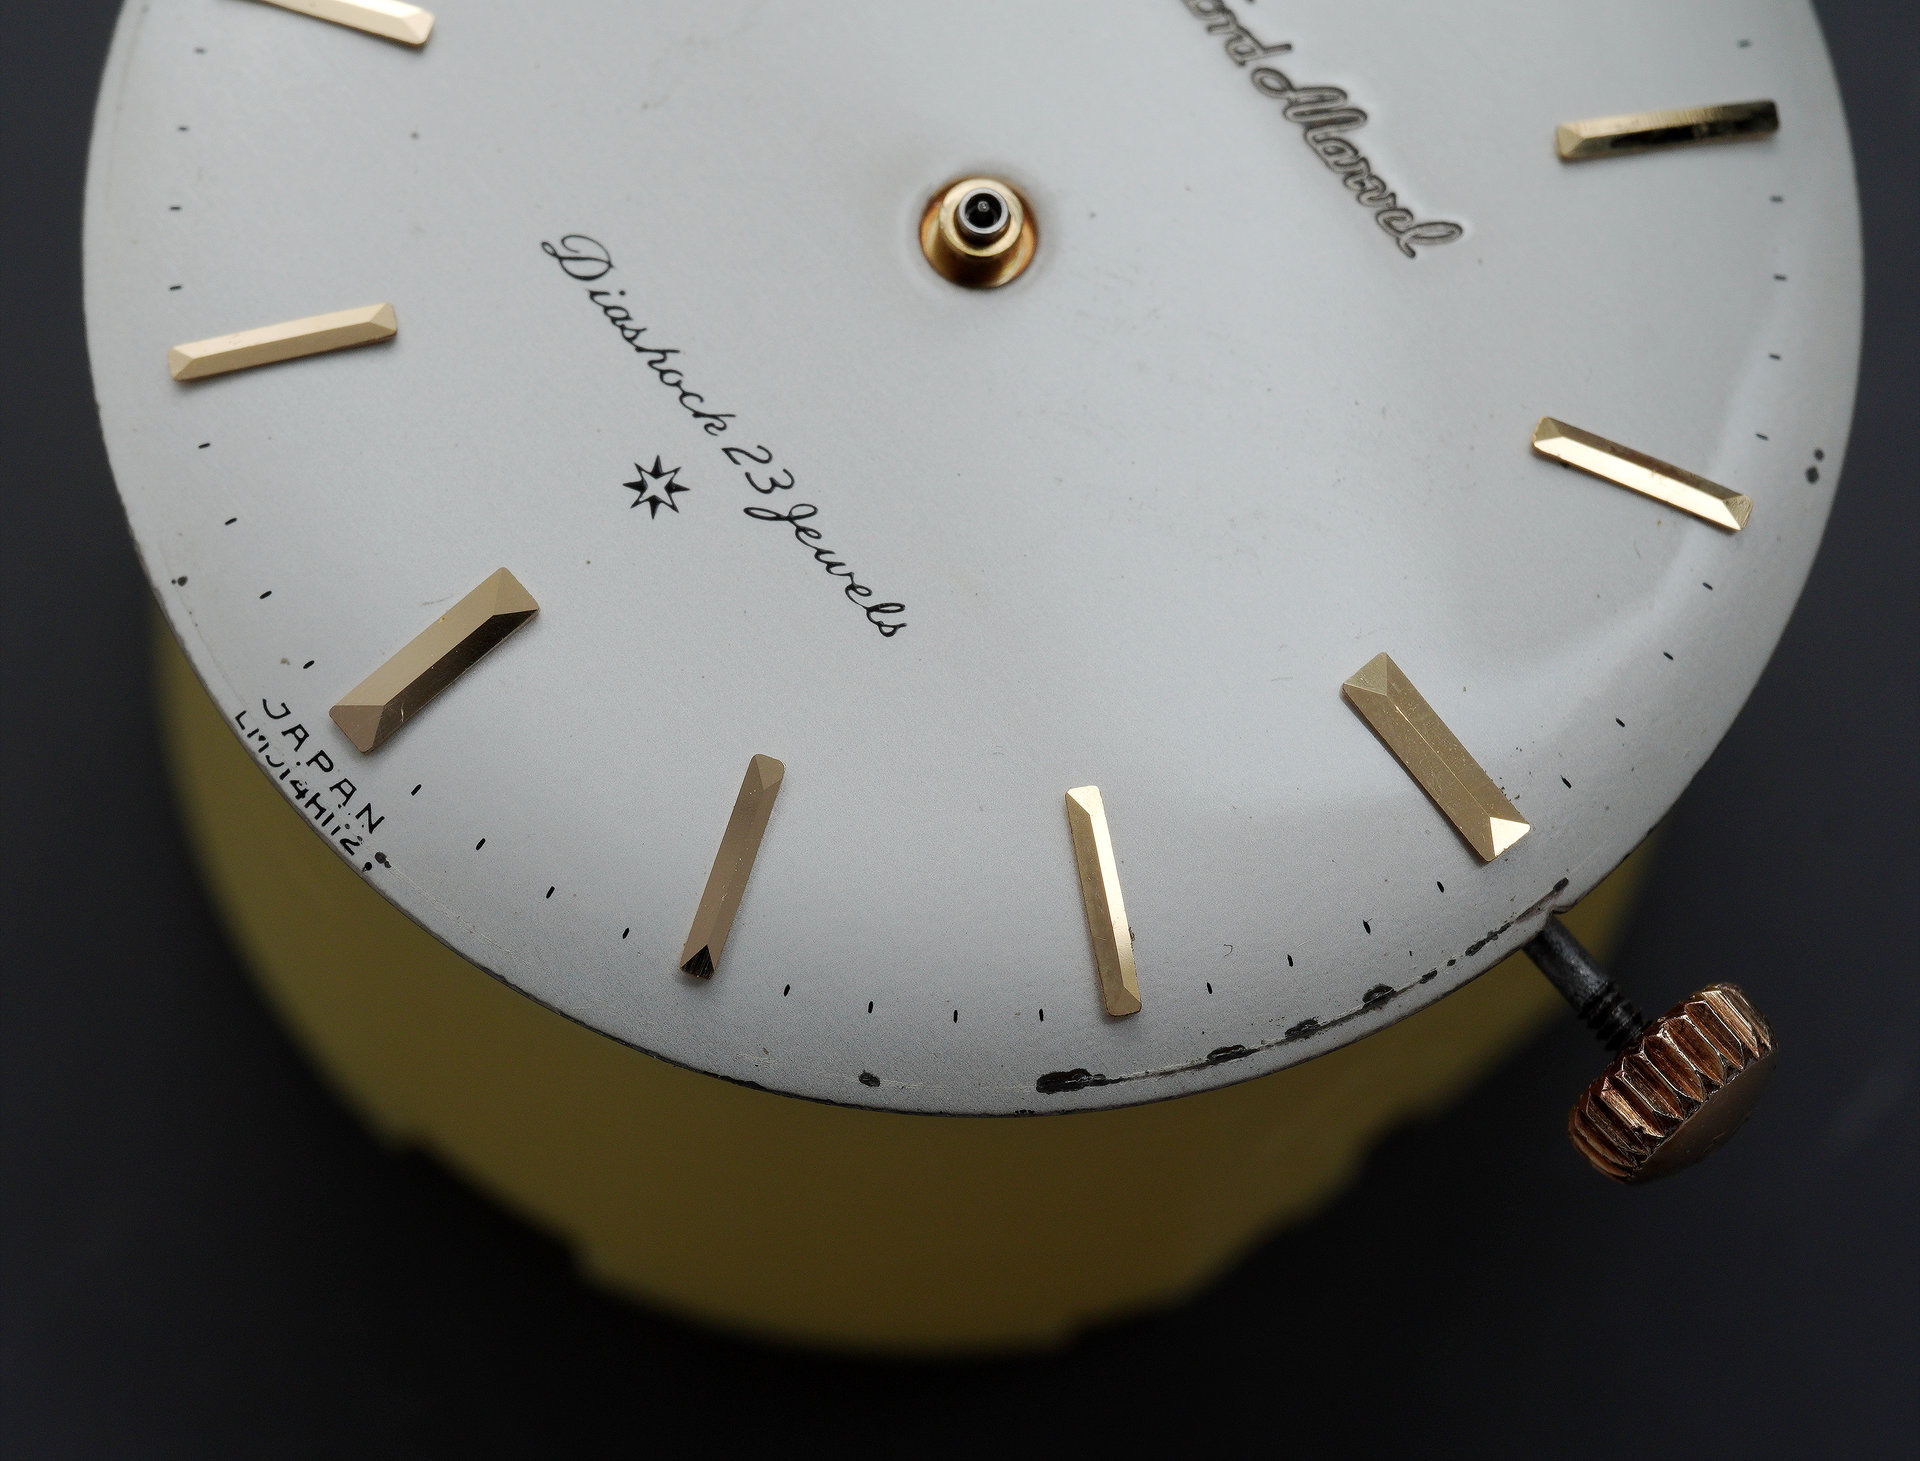
This operation reveals the dial and hands, unobscured by the murky crystal.
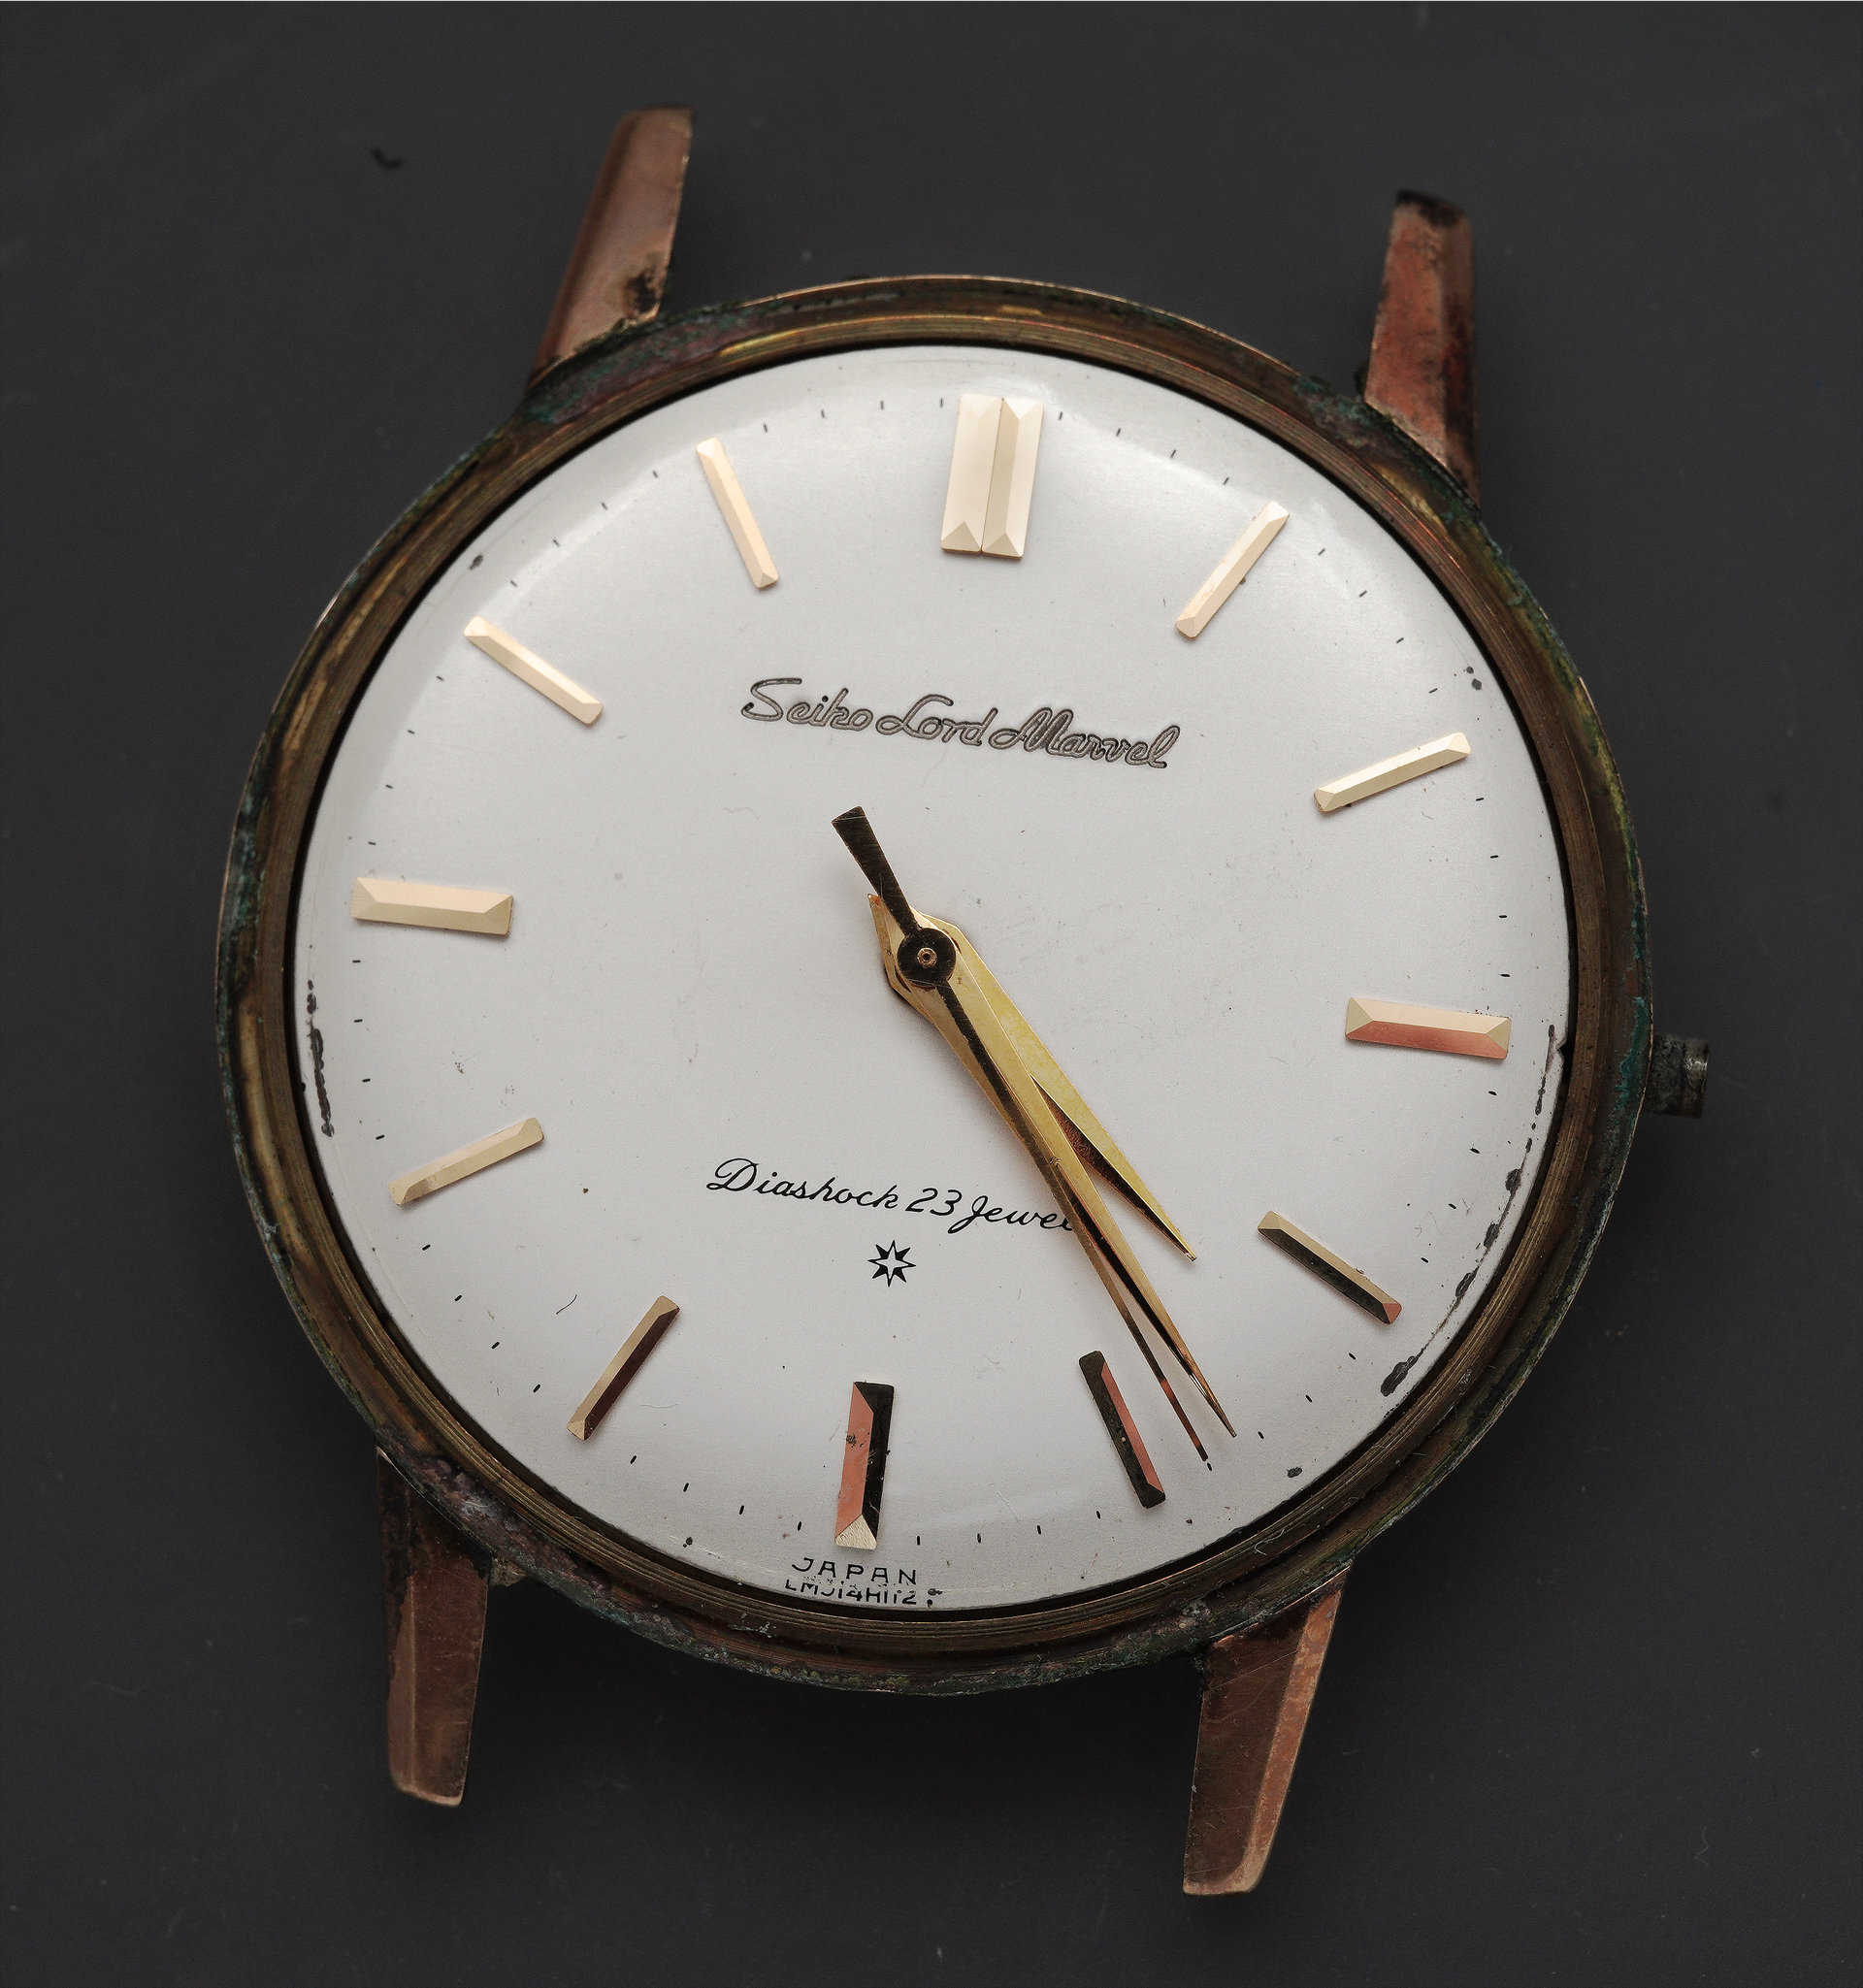
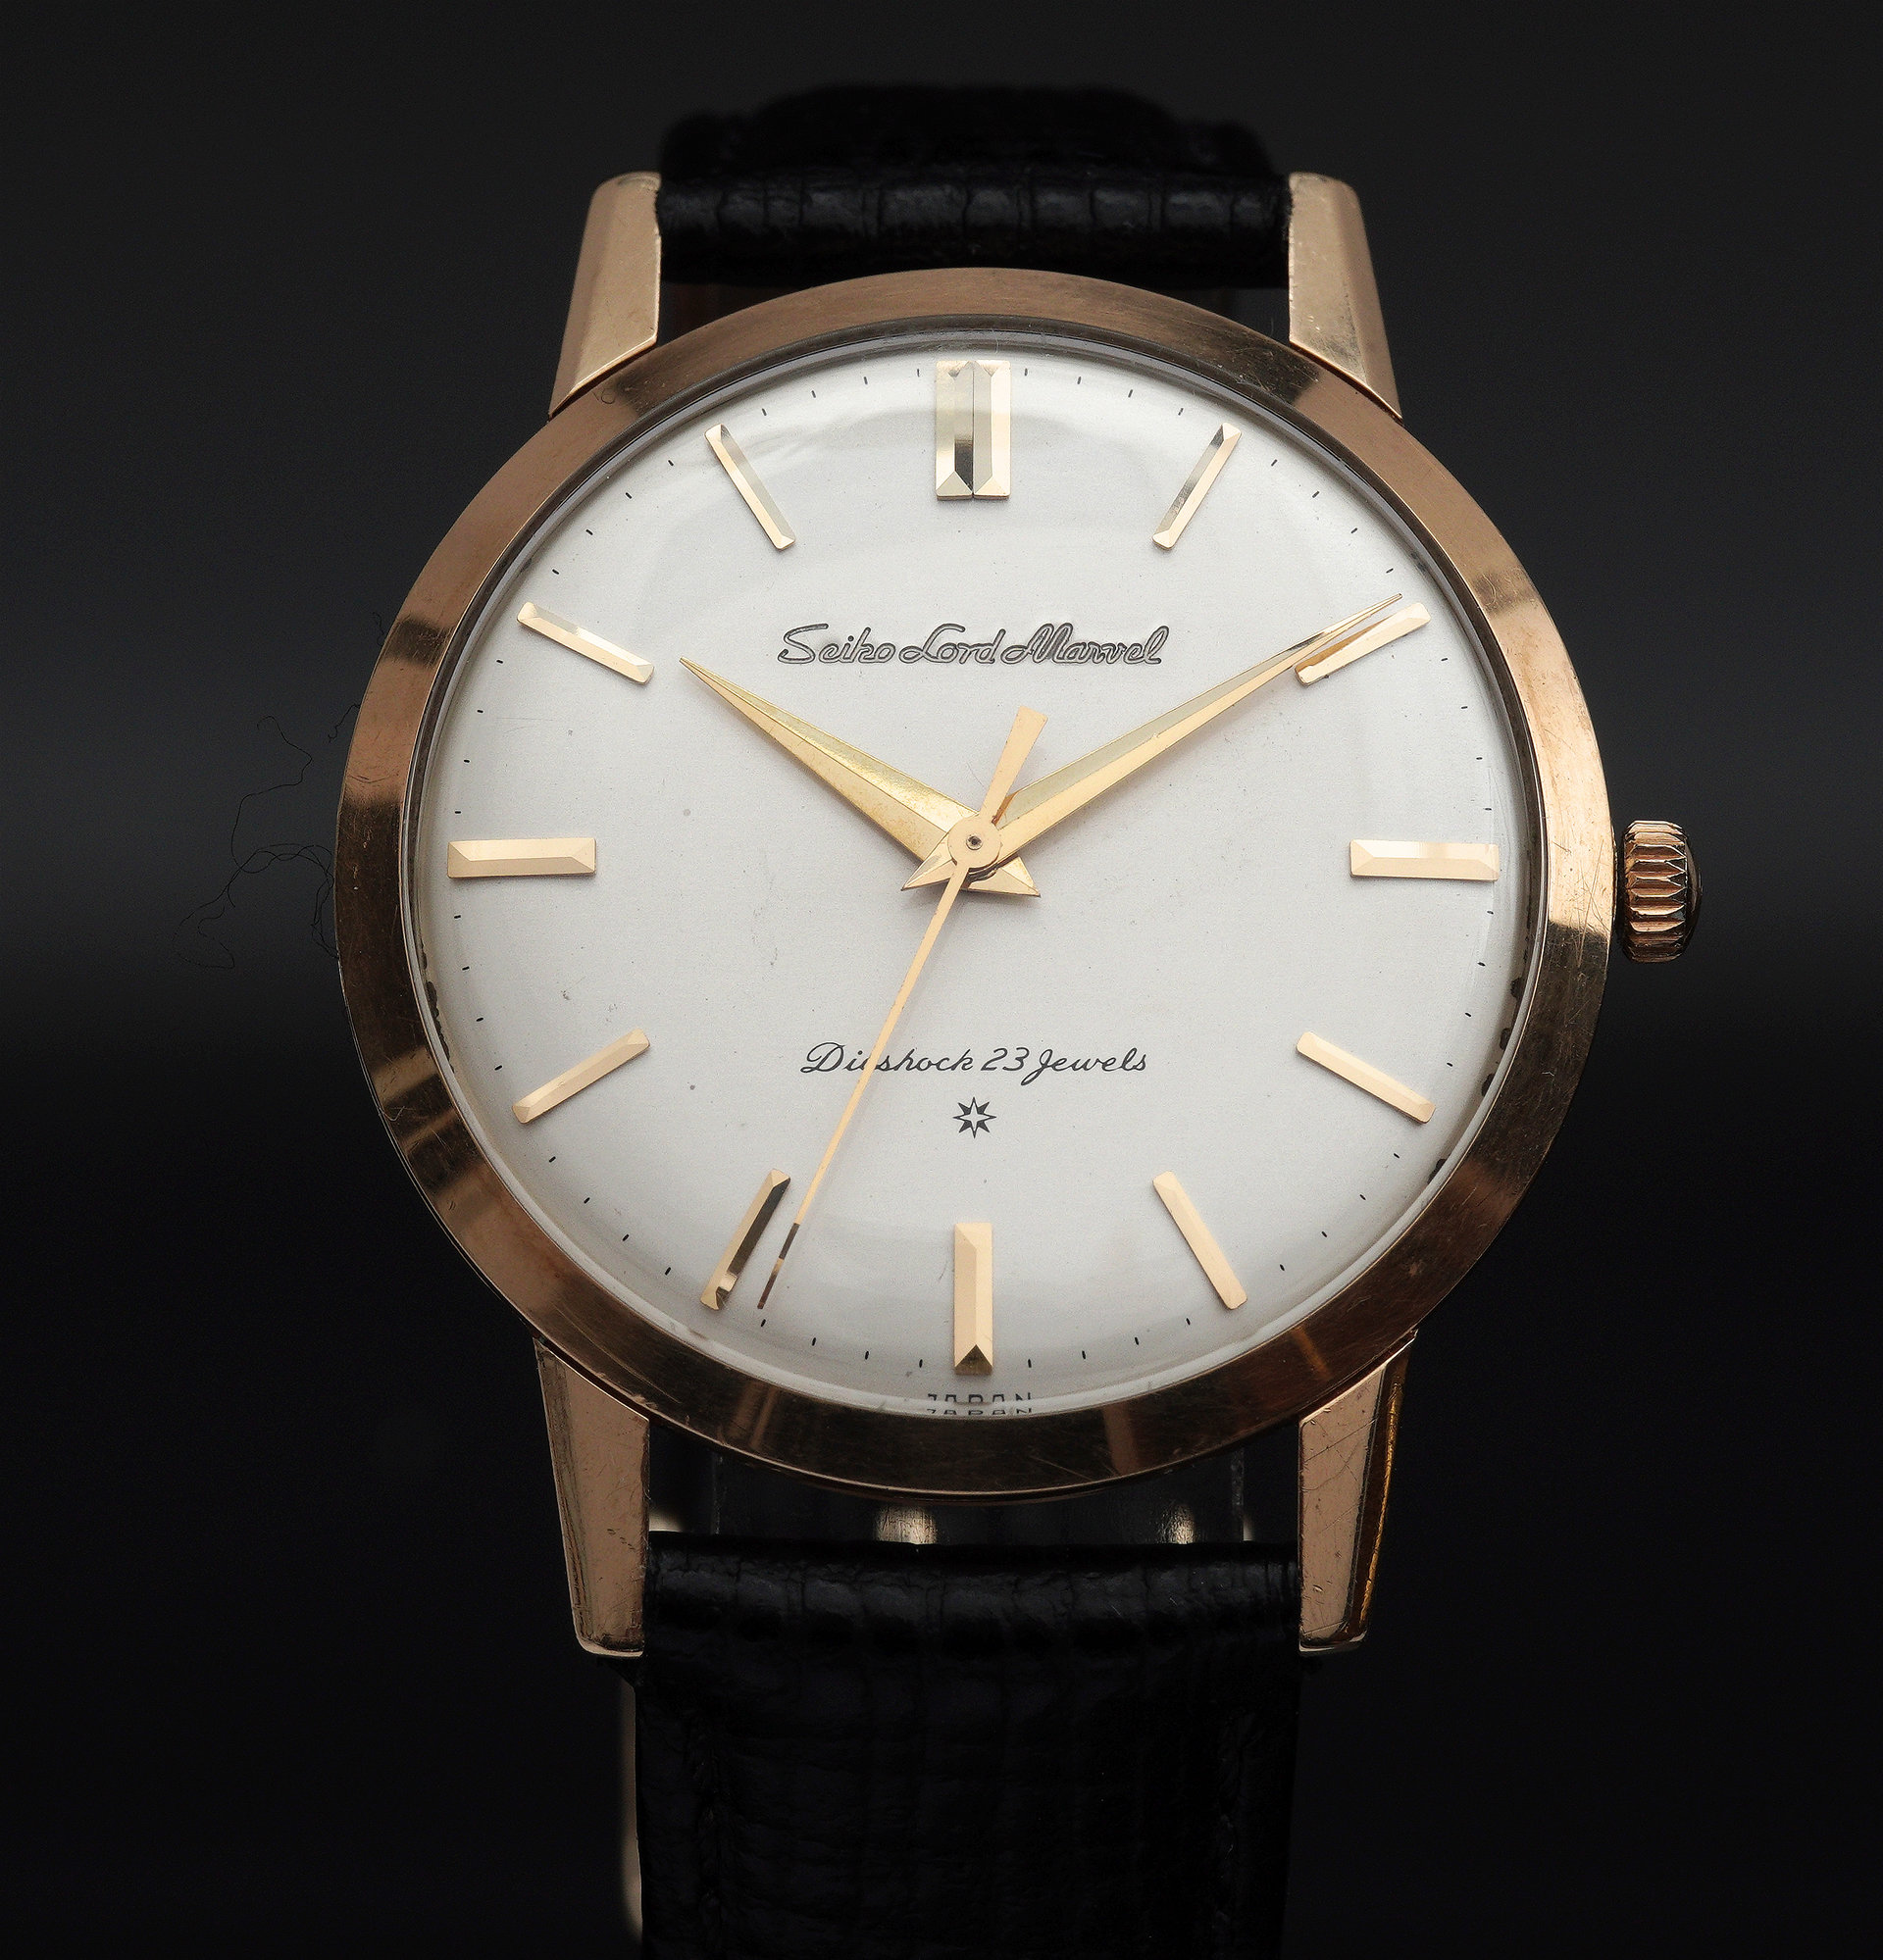
My initial, and lasting impression at this point in proceedings is that this is possibly the loveliest dial I have ever clapped eyes on. It is just beautiful. The perfect porcelain, soft gloss of the dial finish, the engraved script beneath the 12-marker and the flawless printing above the 6-marker. This, incidentally, is a Special Dial, as indicated by the eight-point star, which tells us that the applied markers are solid gold.
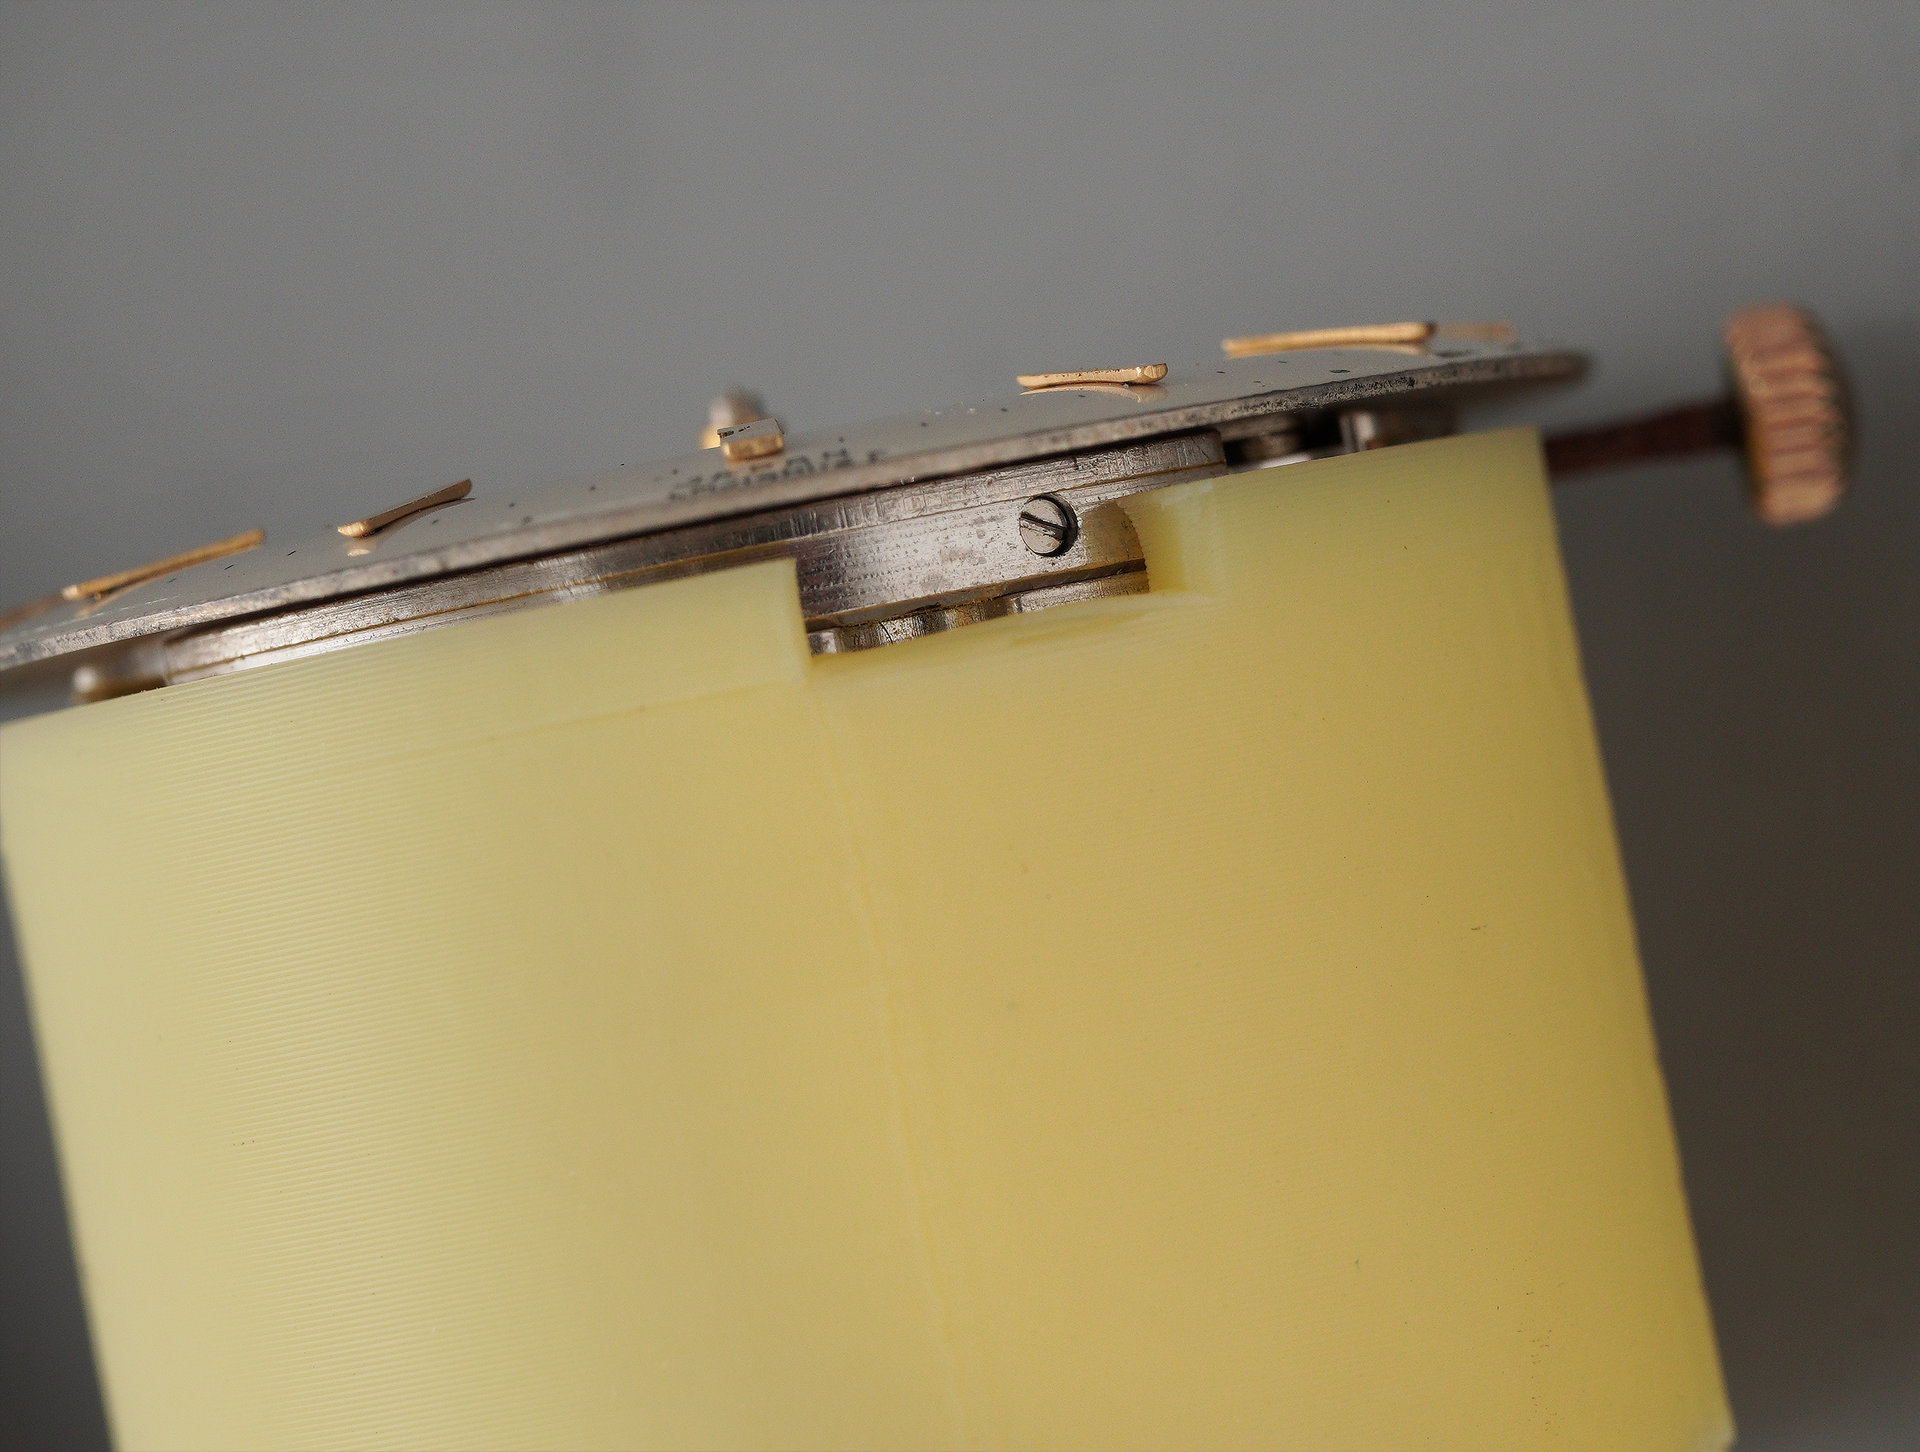
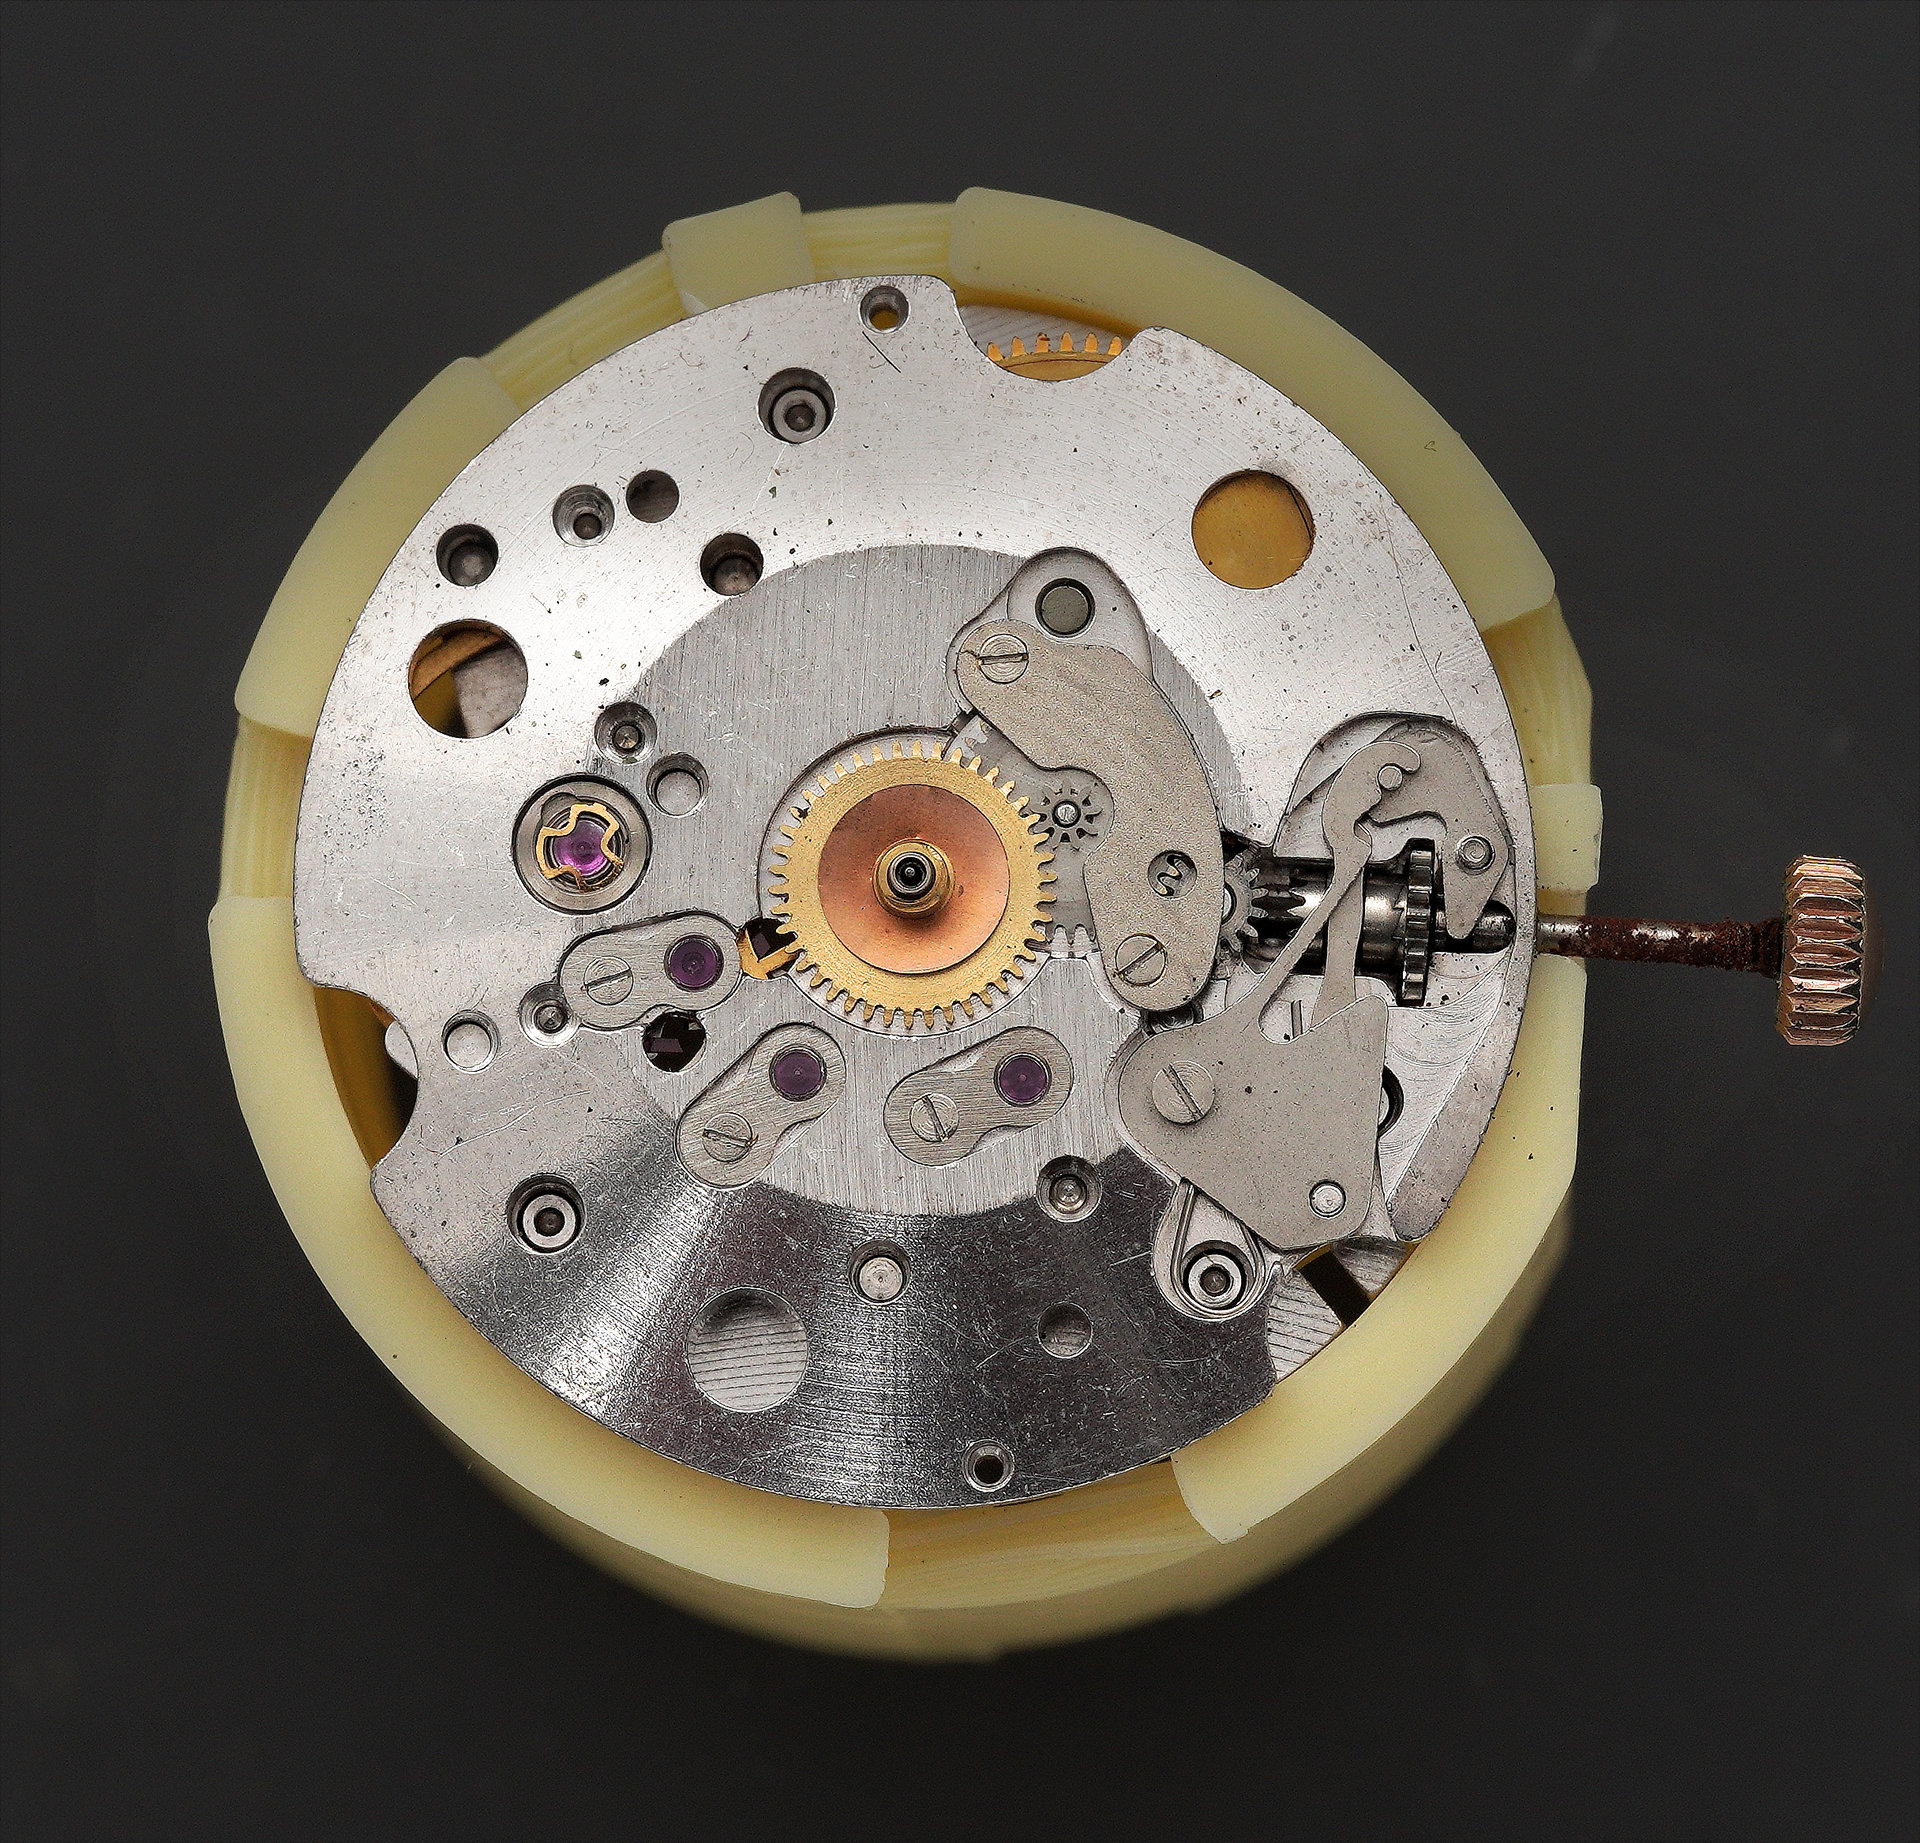
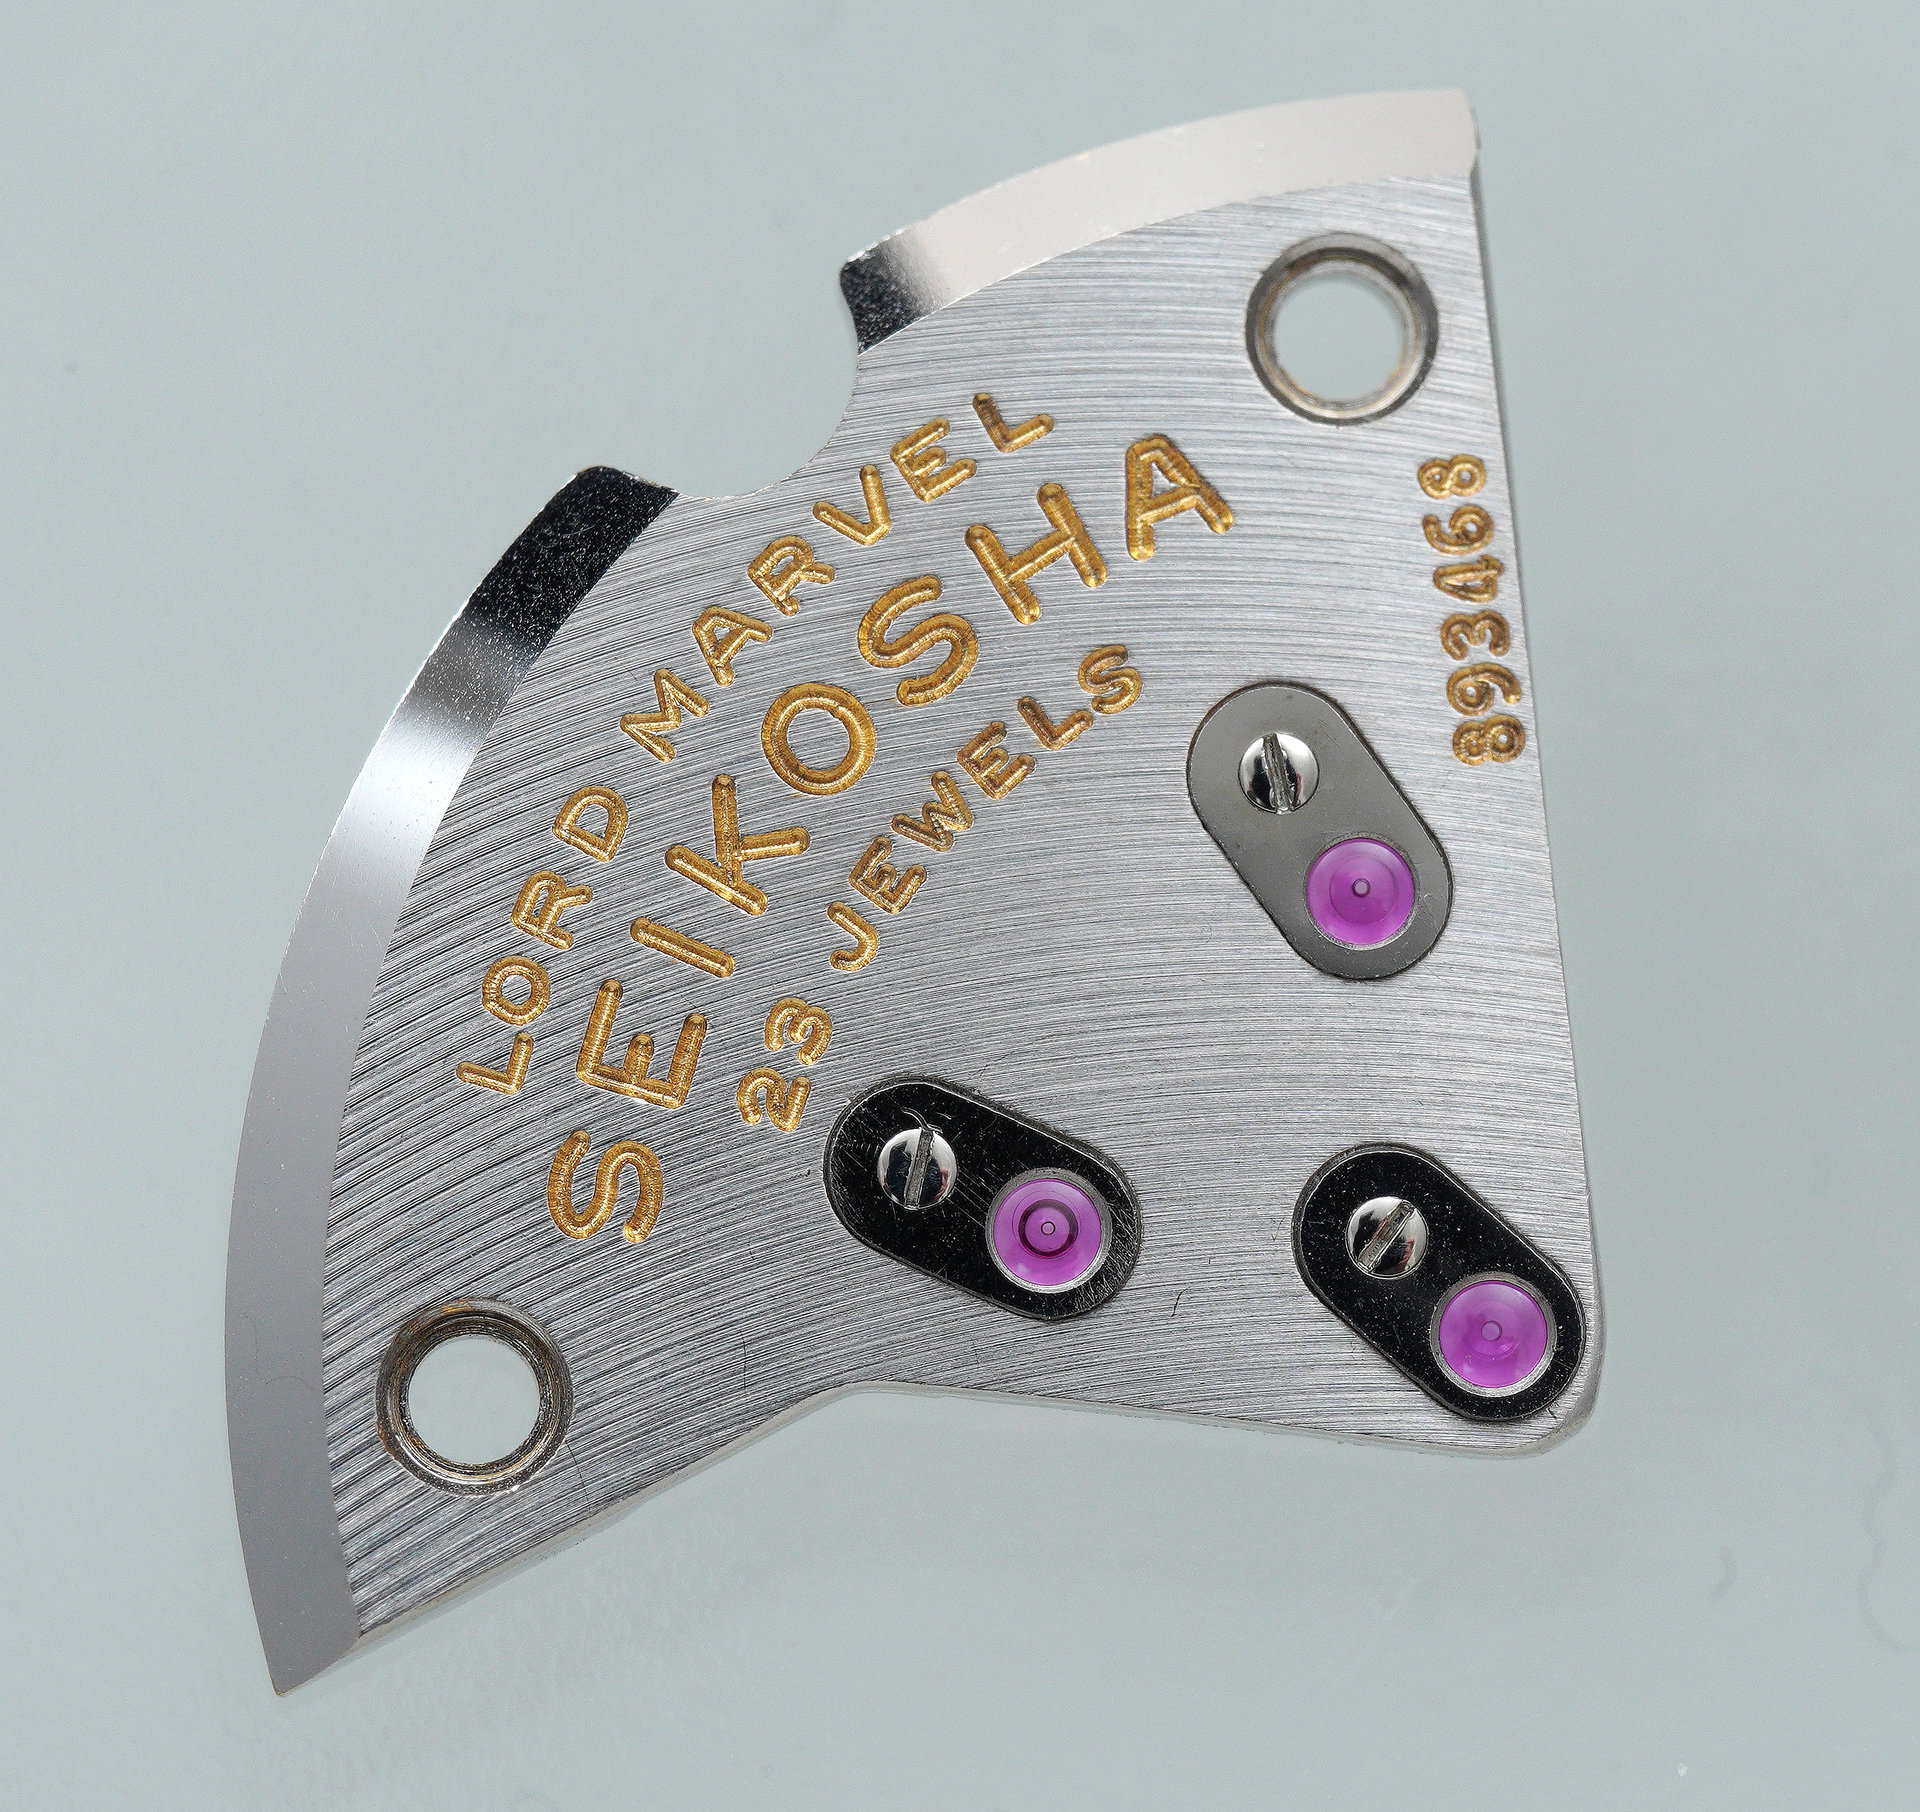
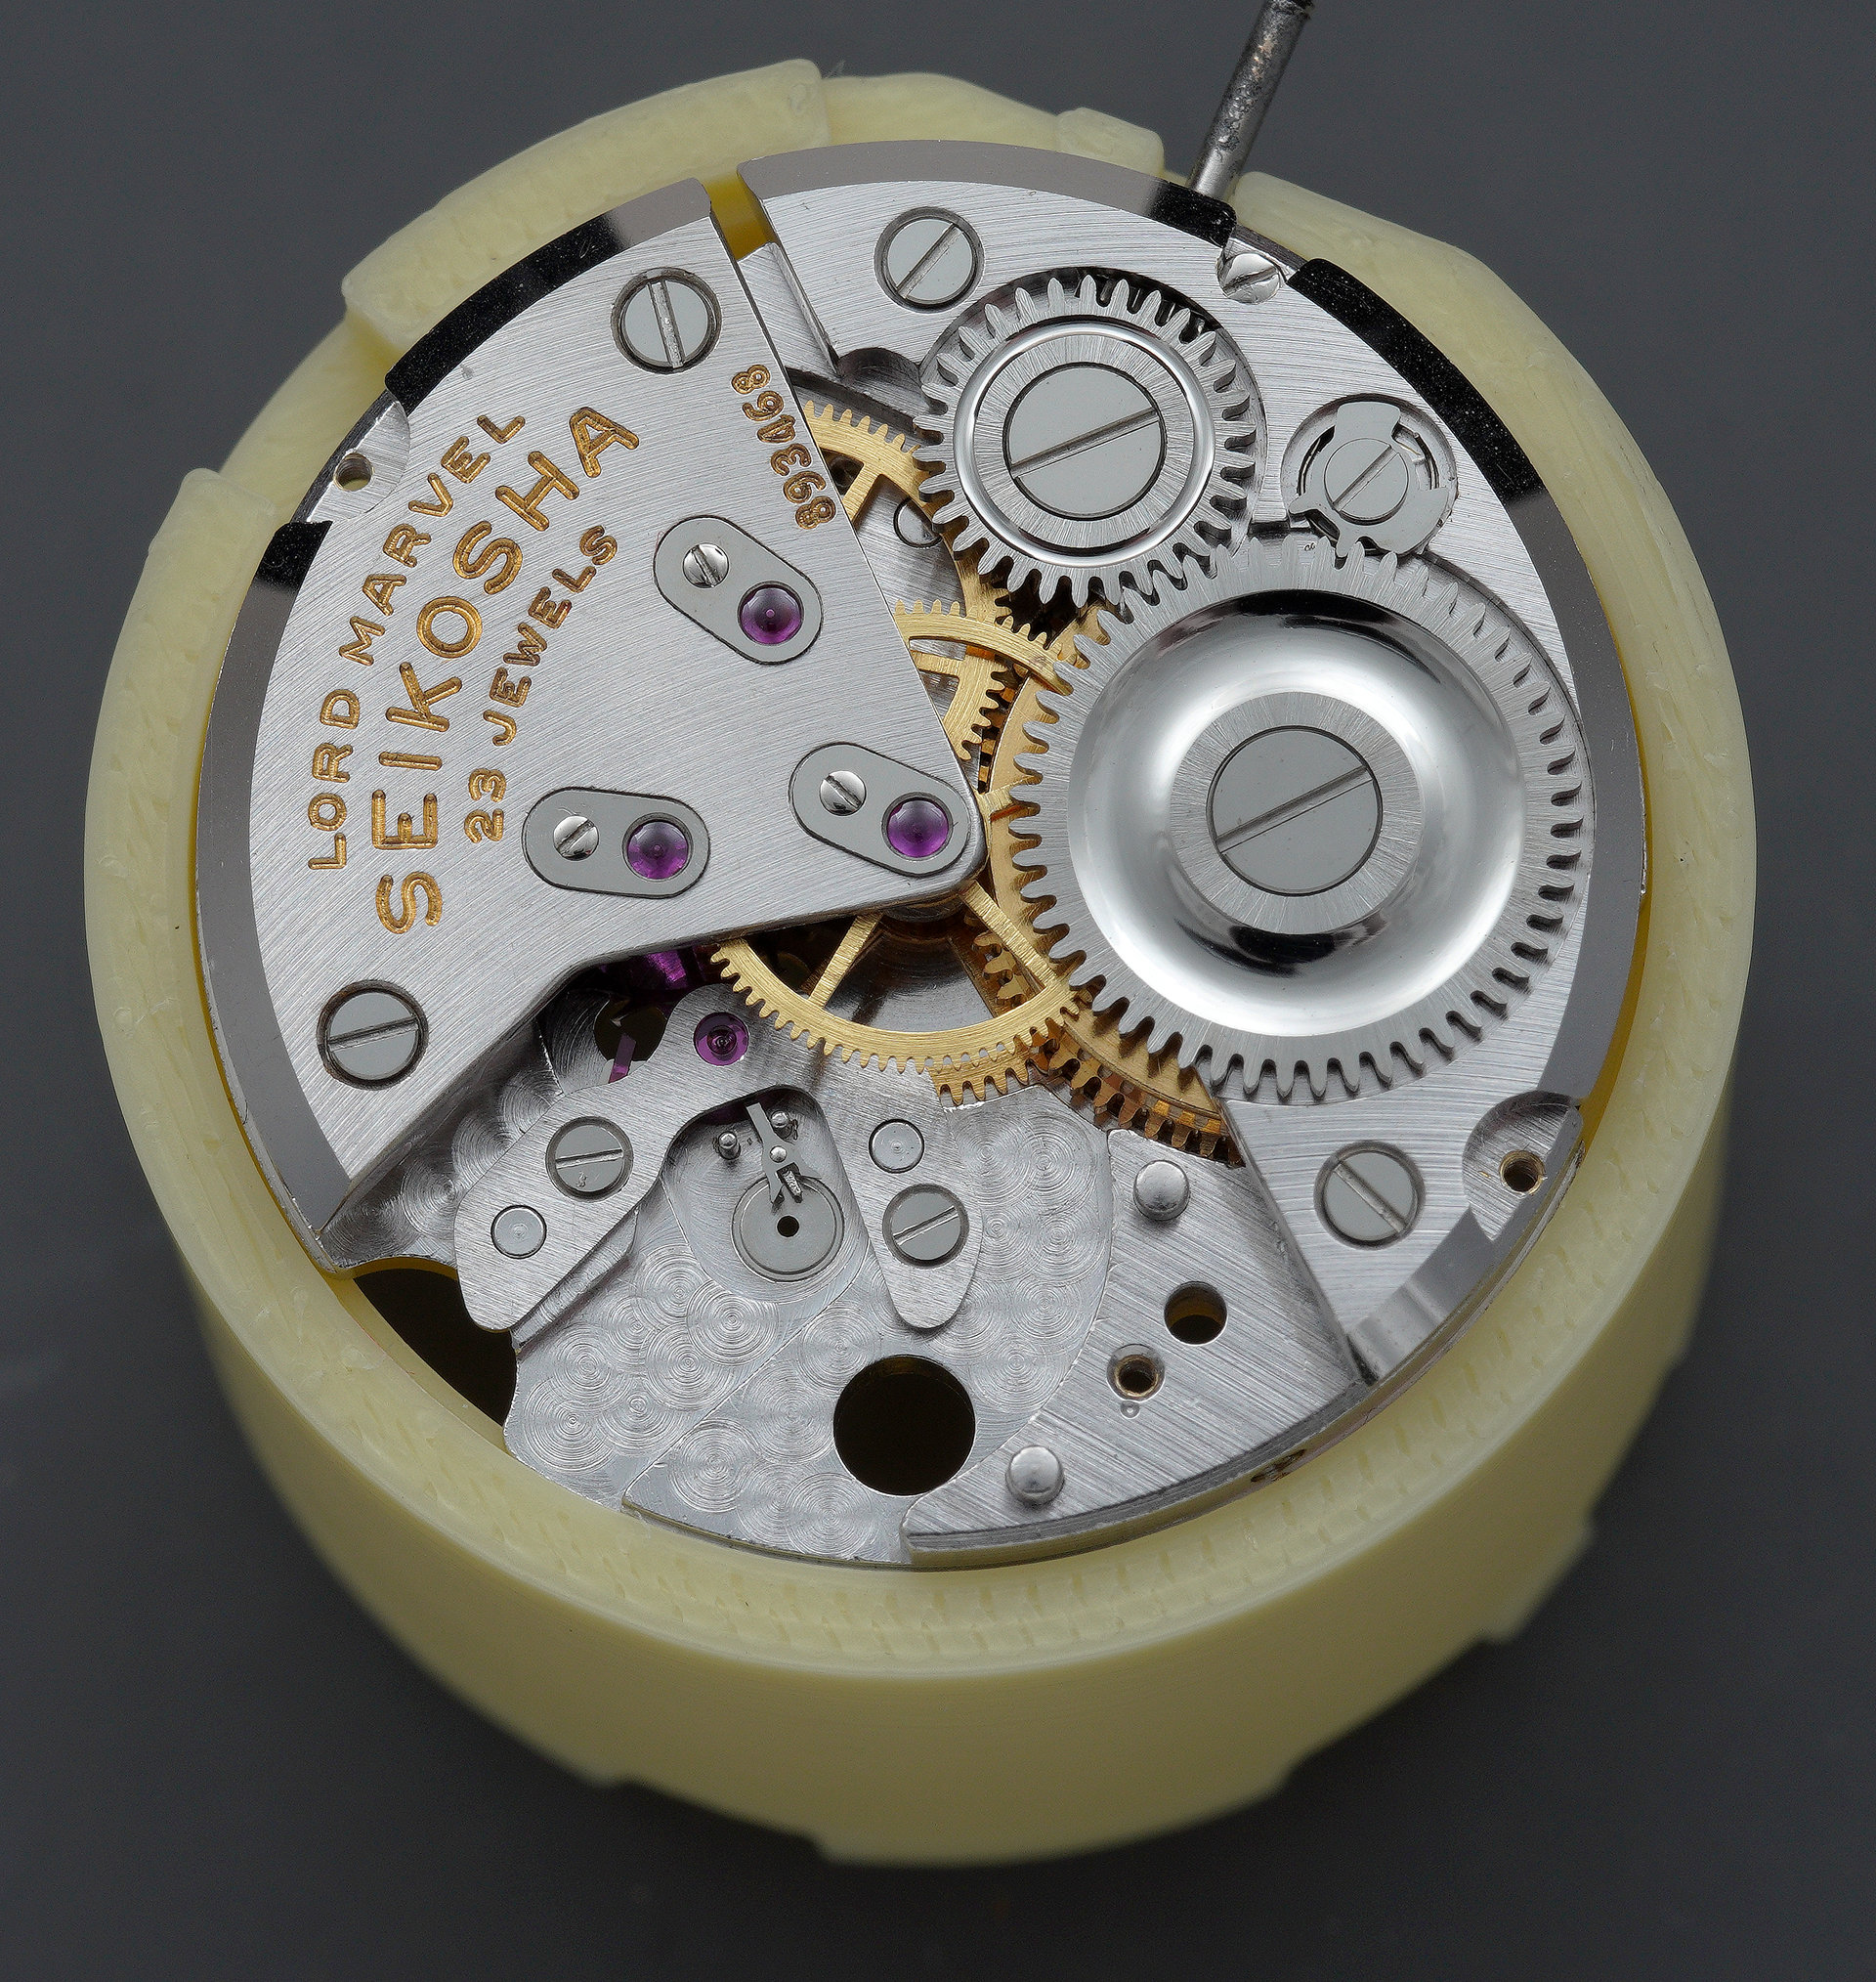
Removing the hands and setting the inverted movement into a movement holder provides a less obstructed view of the movement.
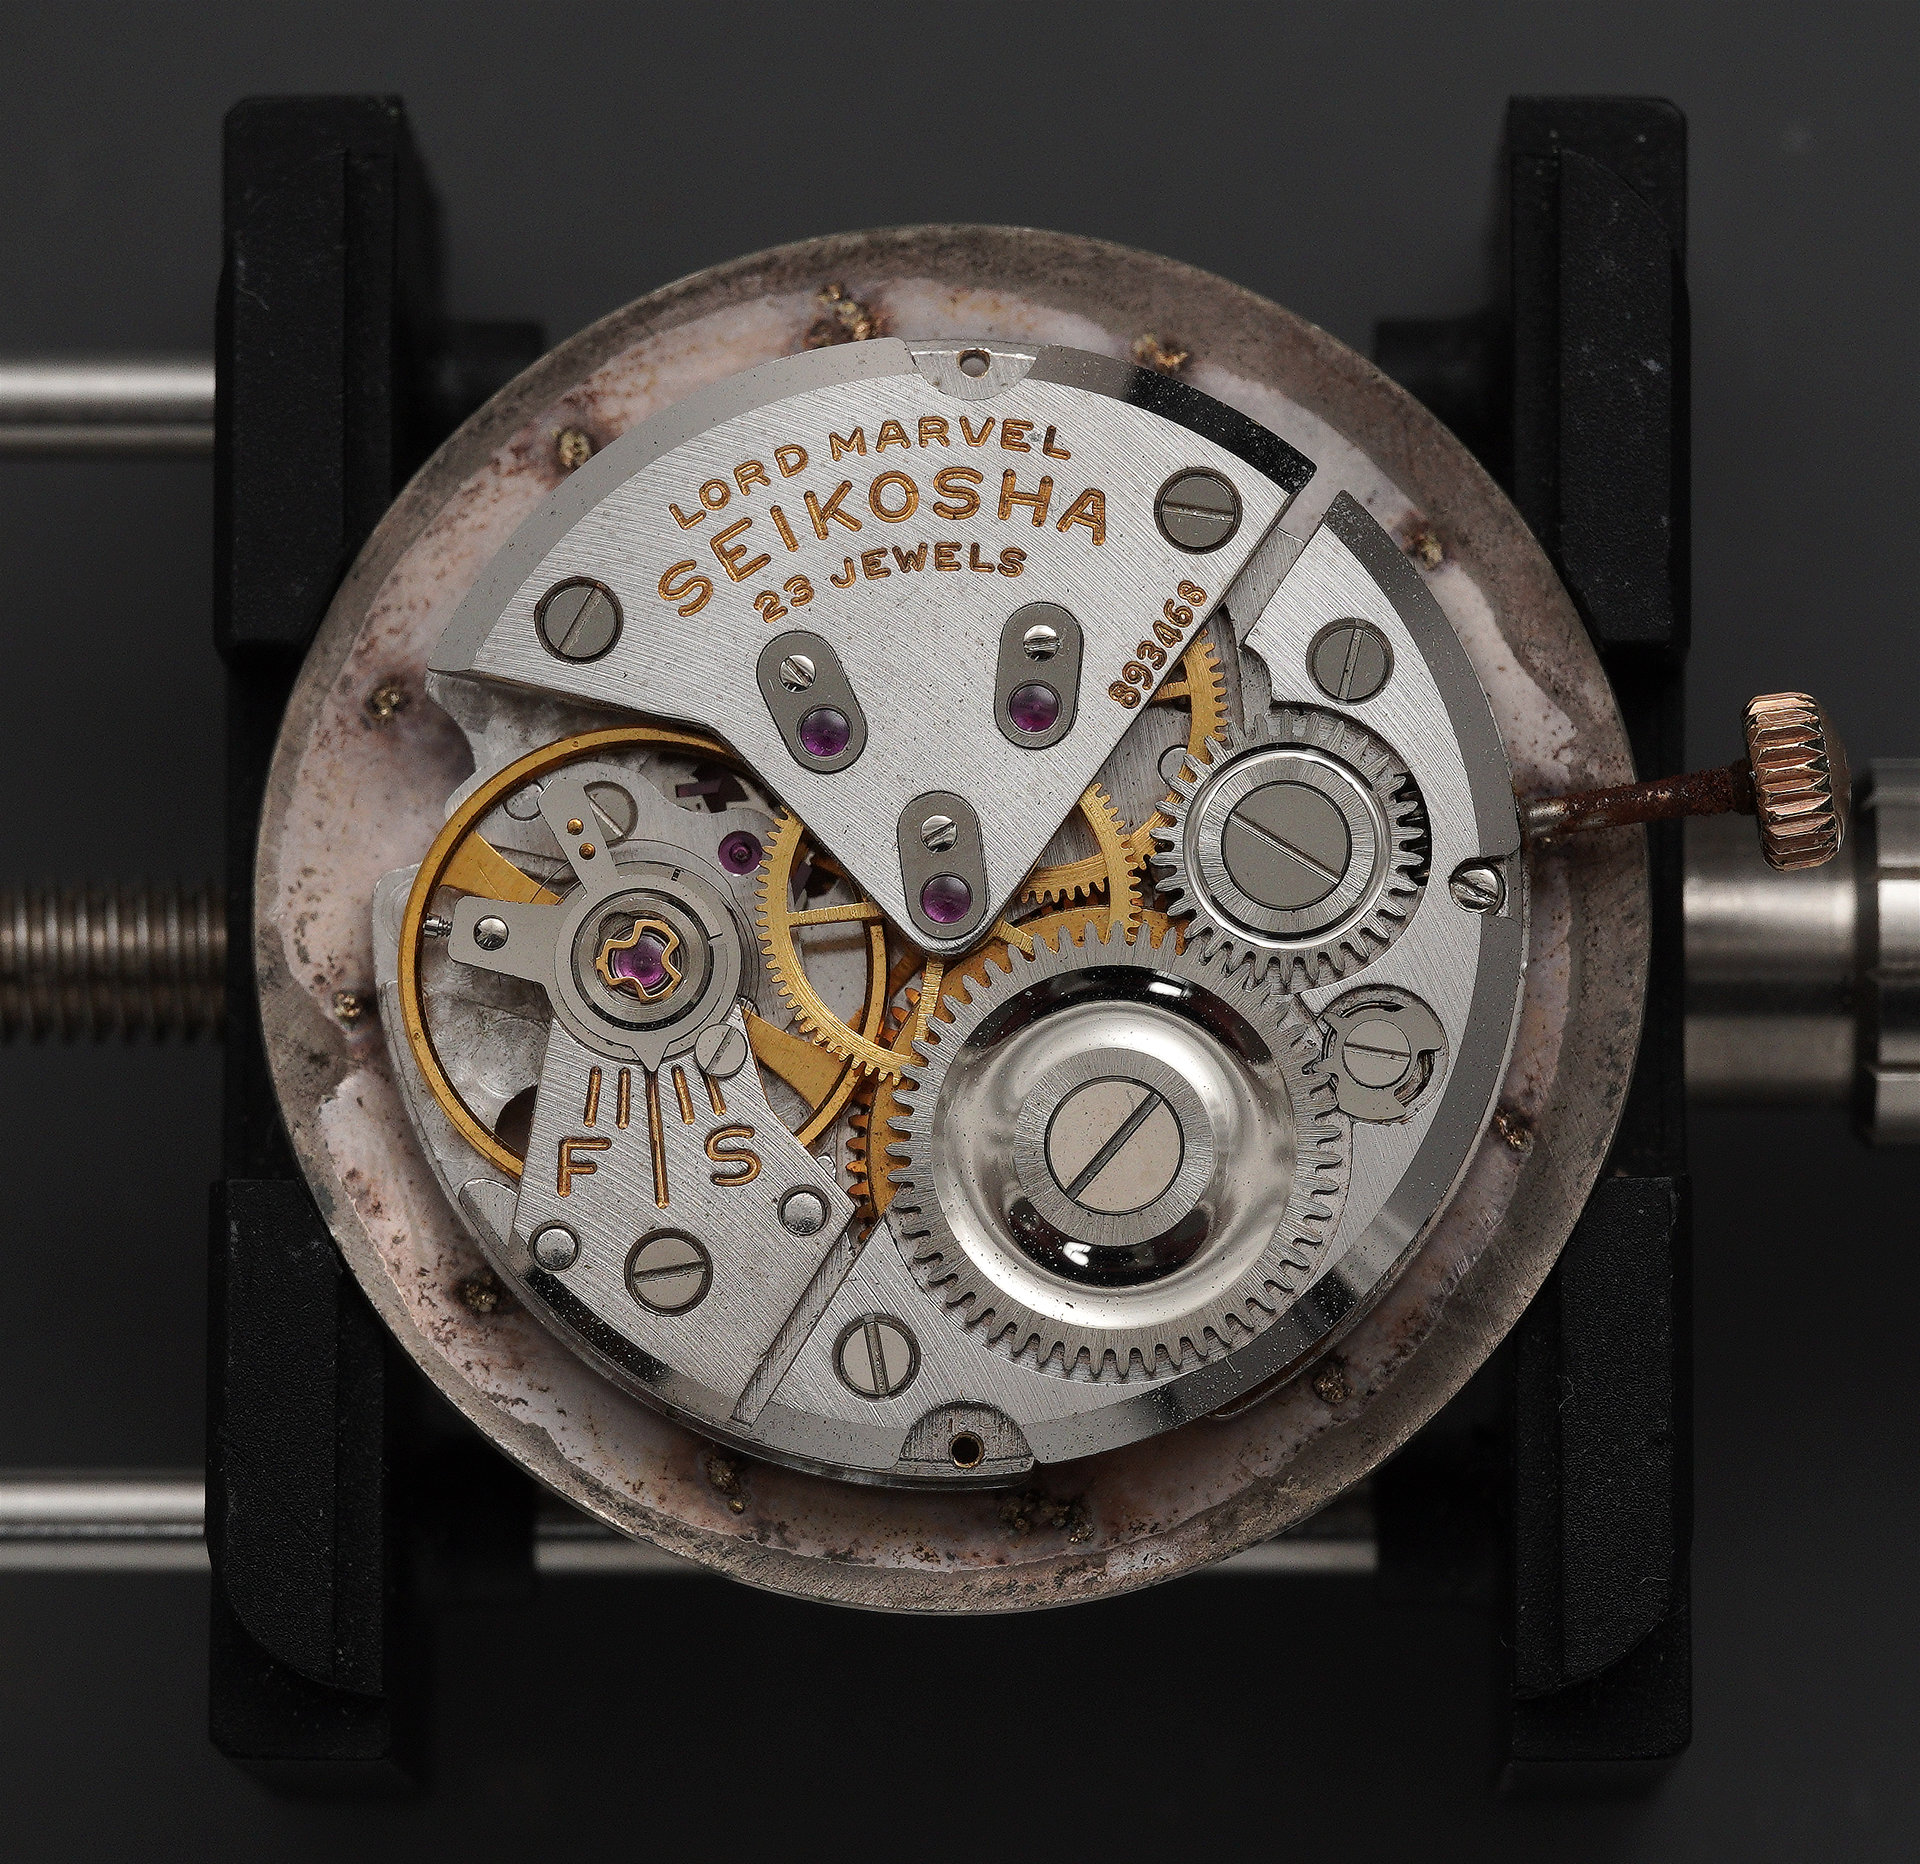
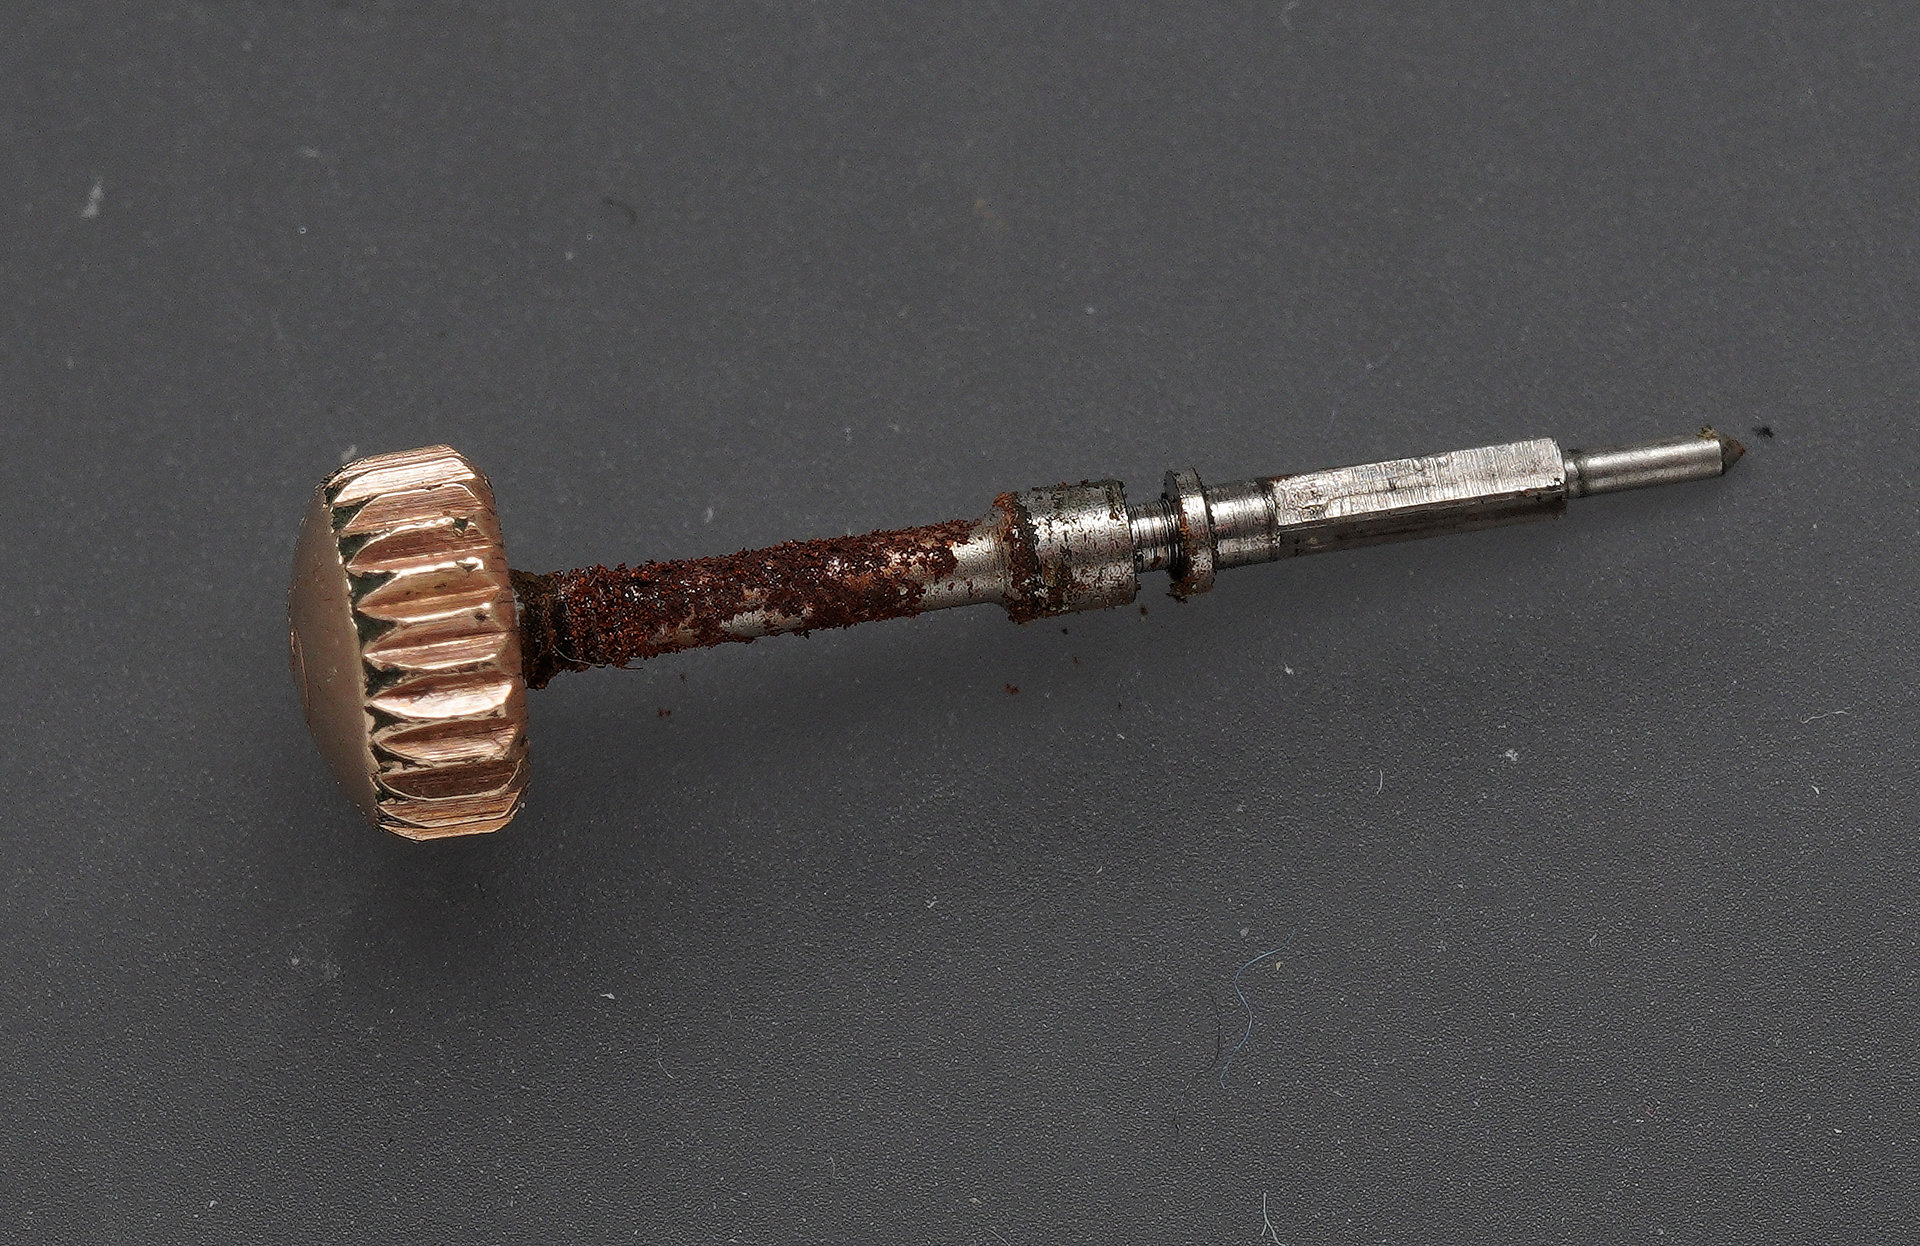
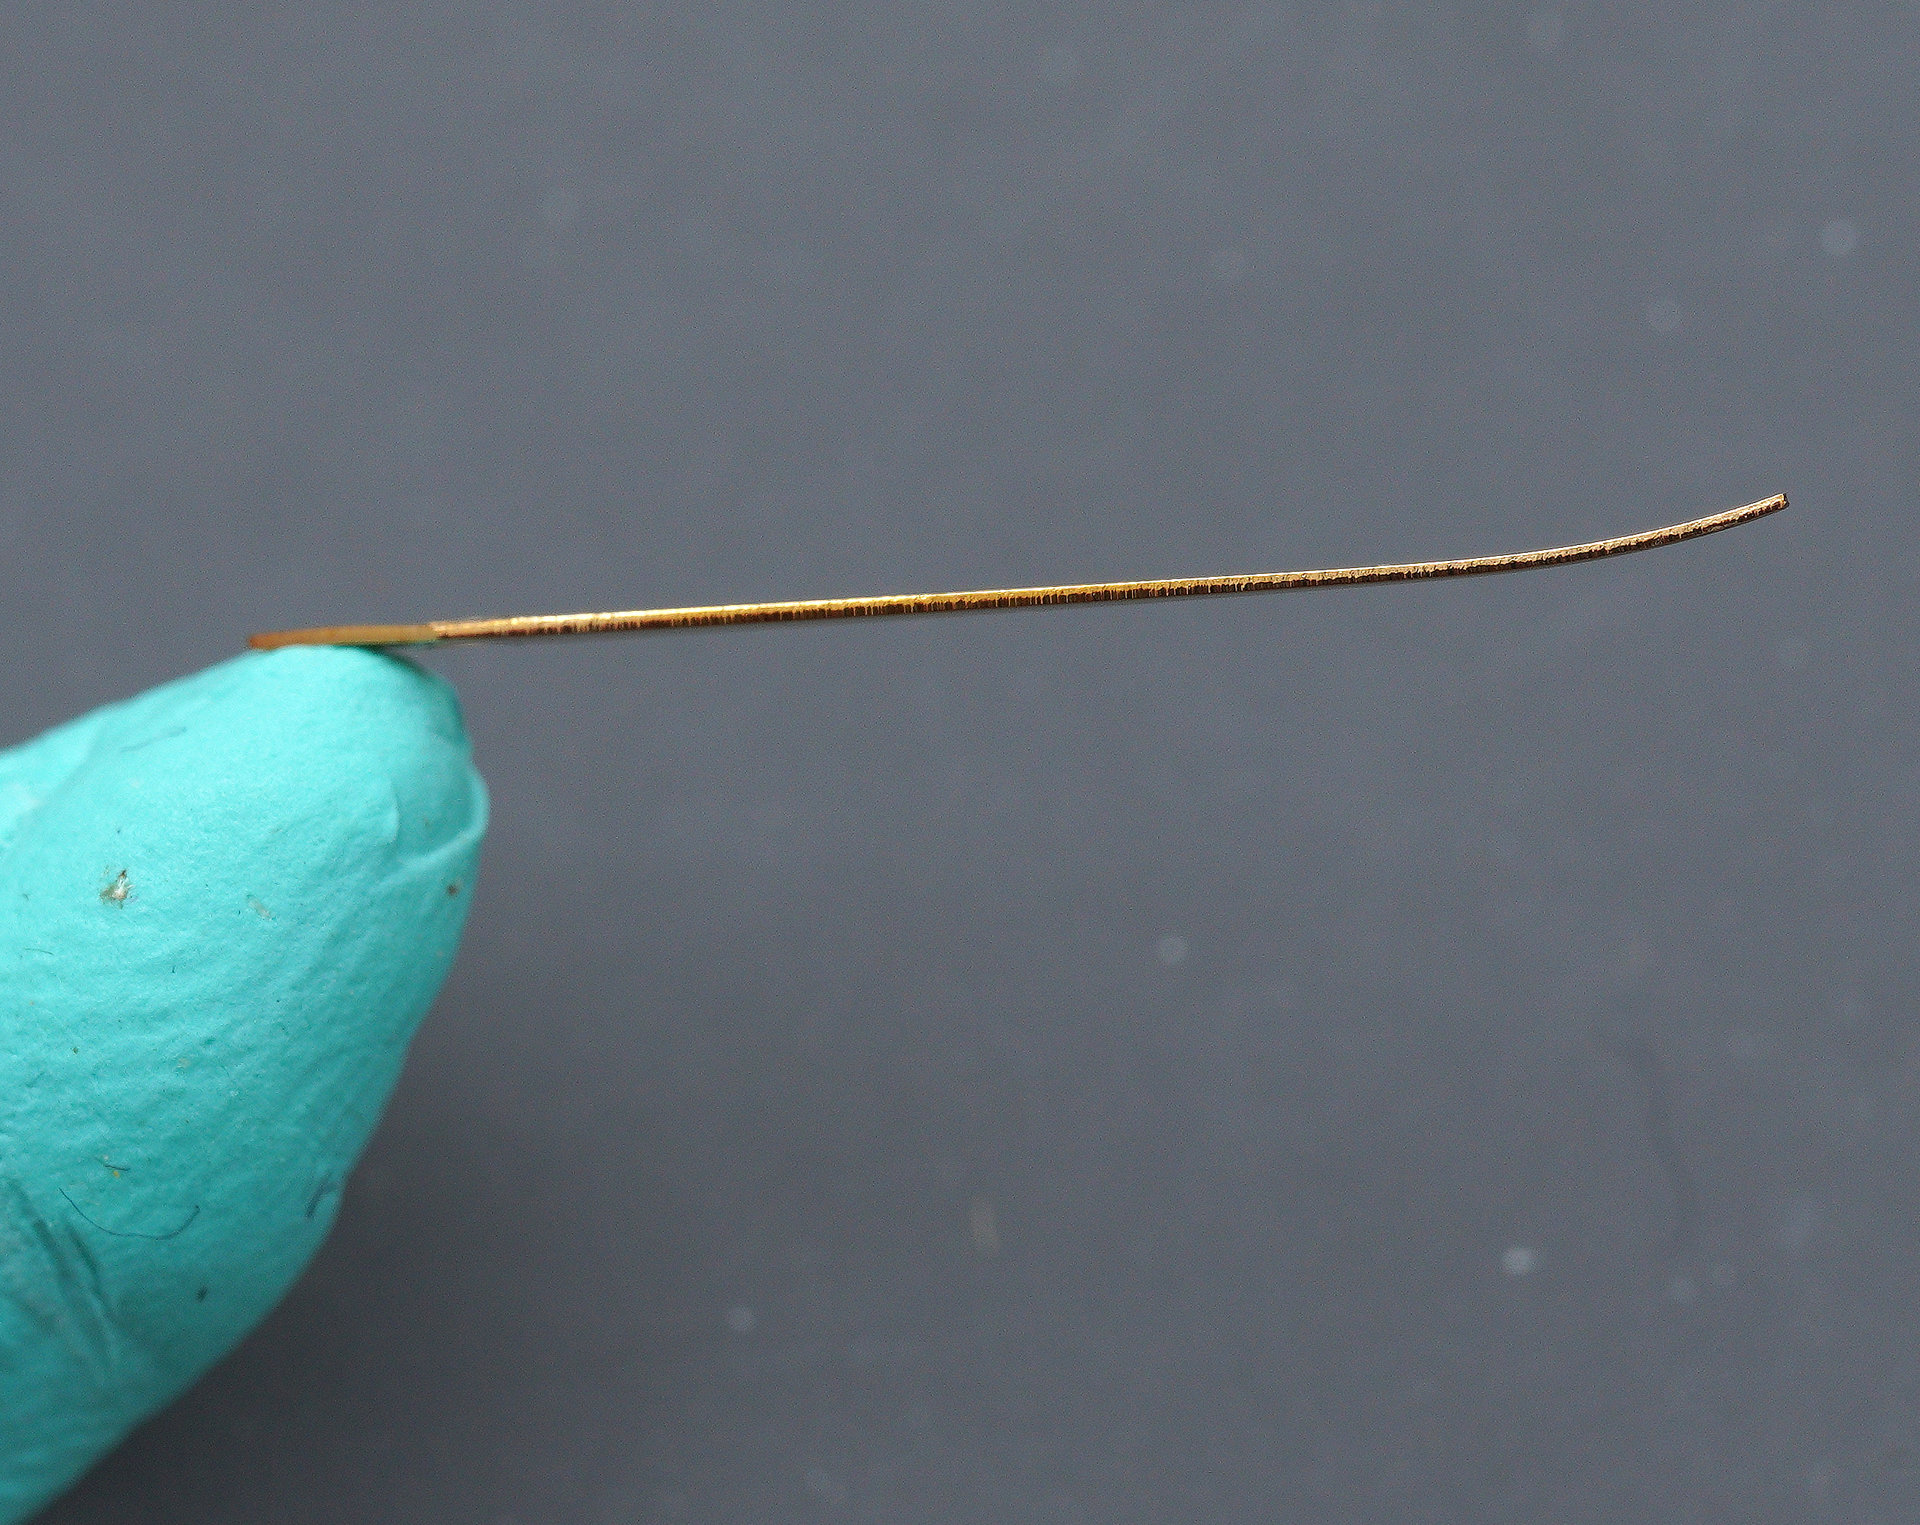
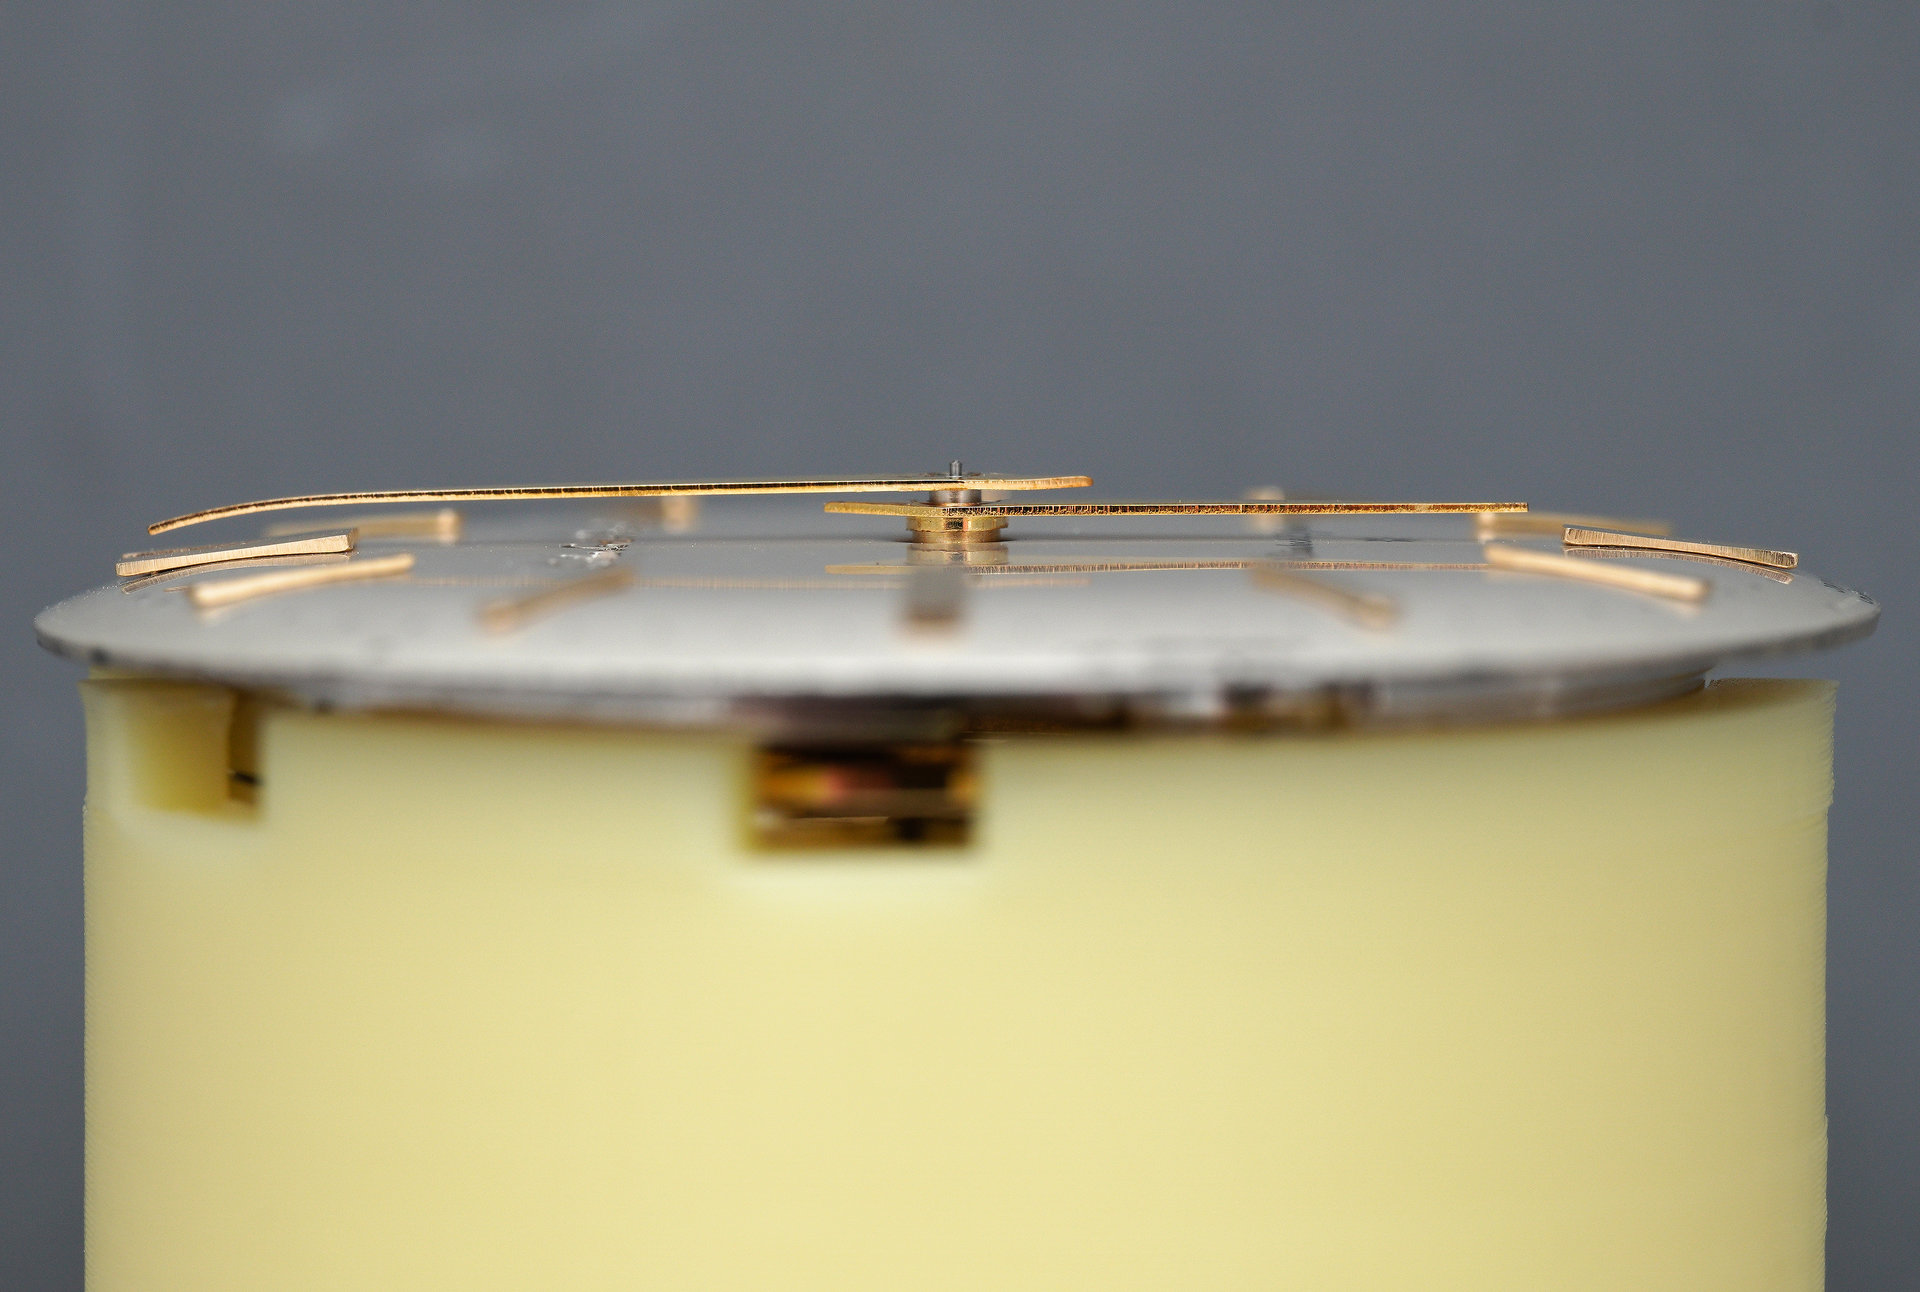
One feature which I have not previously encountered is the use of a locking screw on the regulator arm – a nice touch. The other less welcome observation is the parlous state of the stem, a clearer view provided with it extracted.
Mounting the movement into one of my freshly-printed movement holders, provides safe access to each of the two dial foot screws.
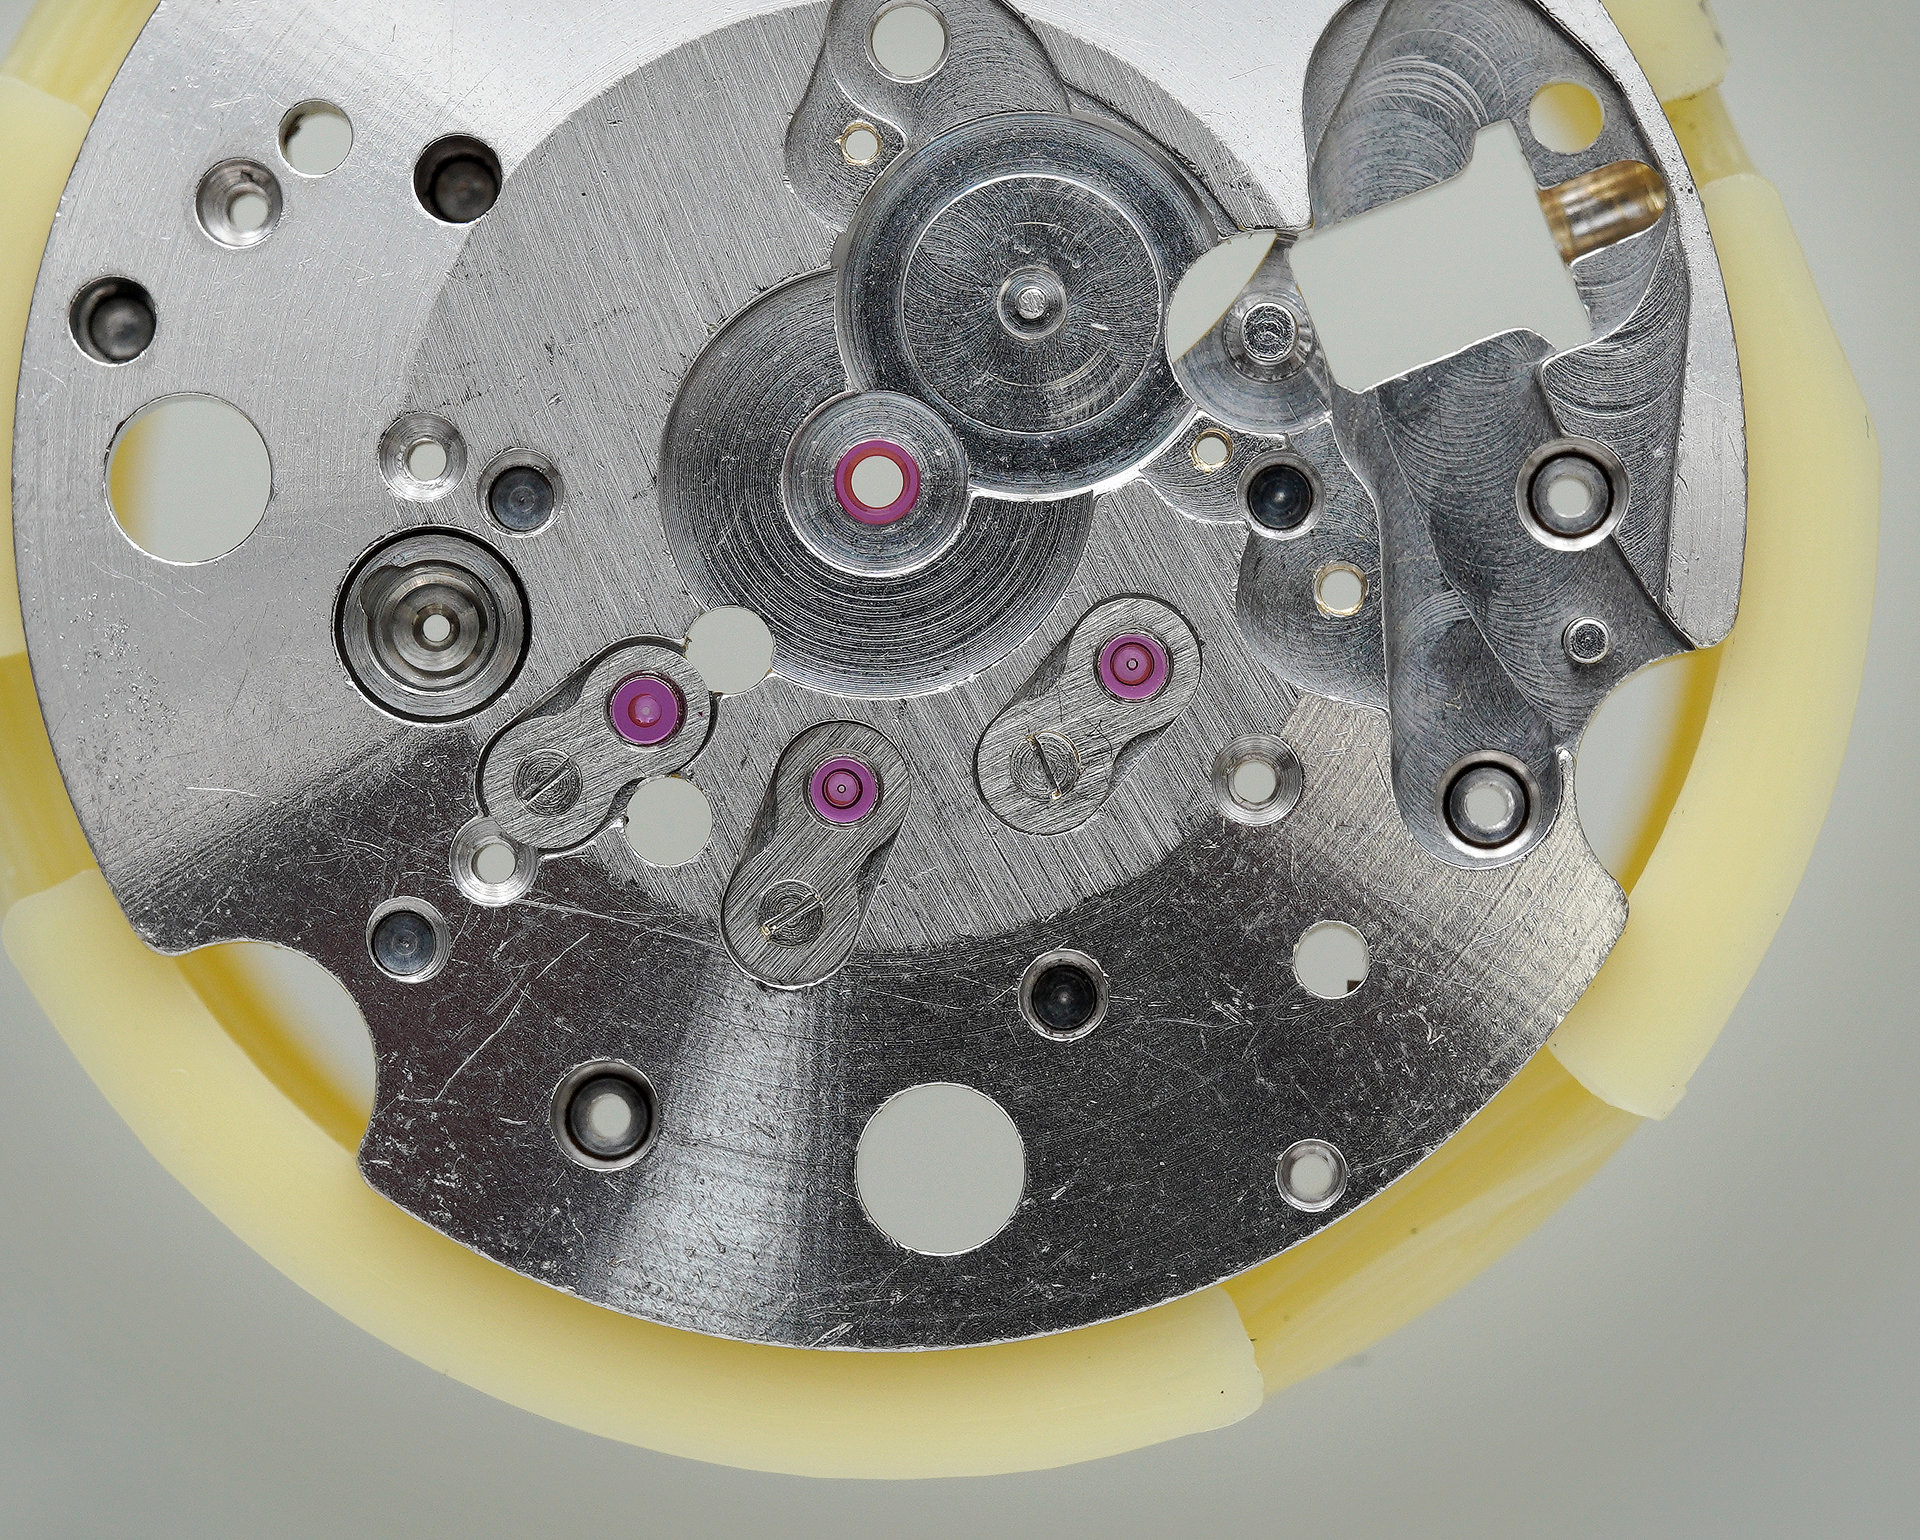
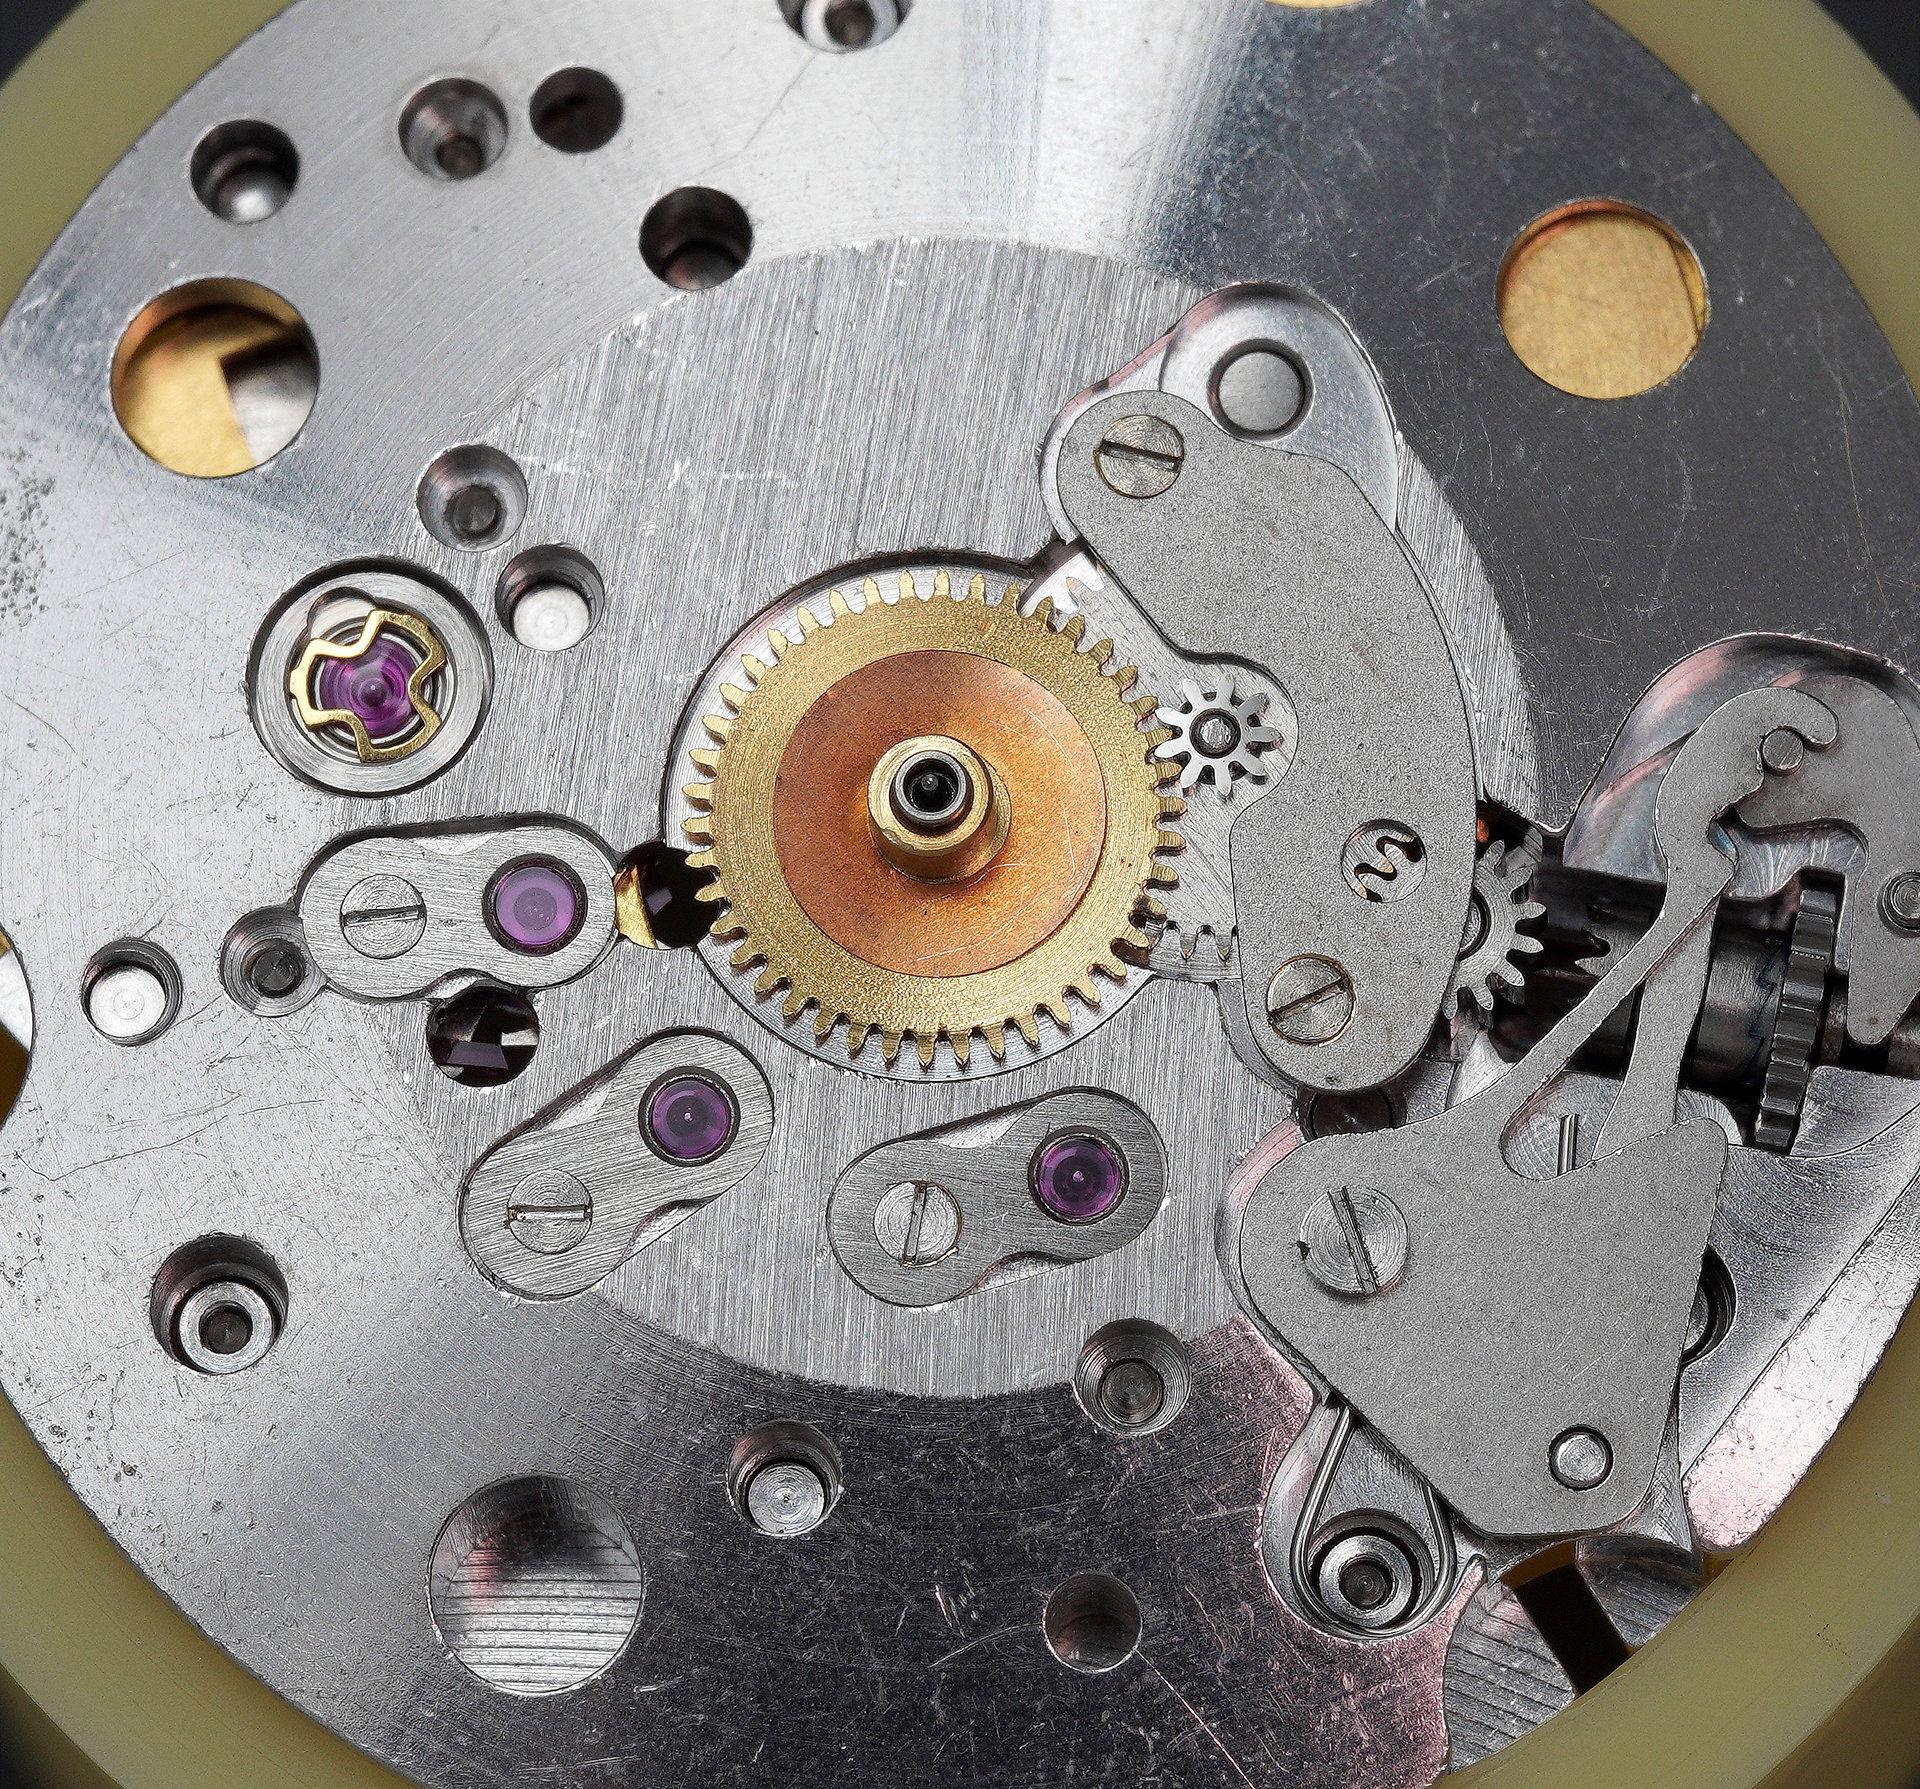
The dial lifts off, revealing the dial side of the movement.
There is nothing to surprise us here but we note the presence of three end-piece cap jewels protecting the pallet, escape and third wheel bearings from contamination. These three jewels provide no functional purpose and their presence may therefore be viewed as providing a slight-of-hand enhancement to the perception of quality, albeit in a less cynical way than the entirely decorative role played by no fewer than 11 of the 35 jewels of the Grand Seiko Self-Dater.
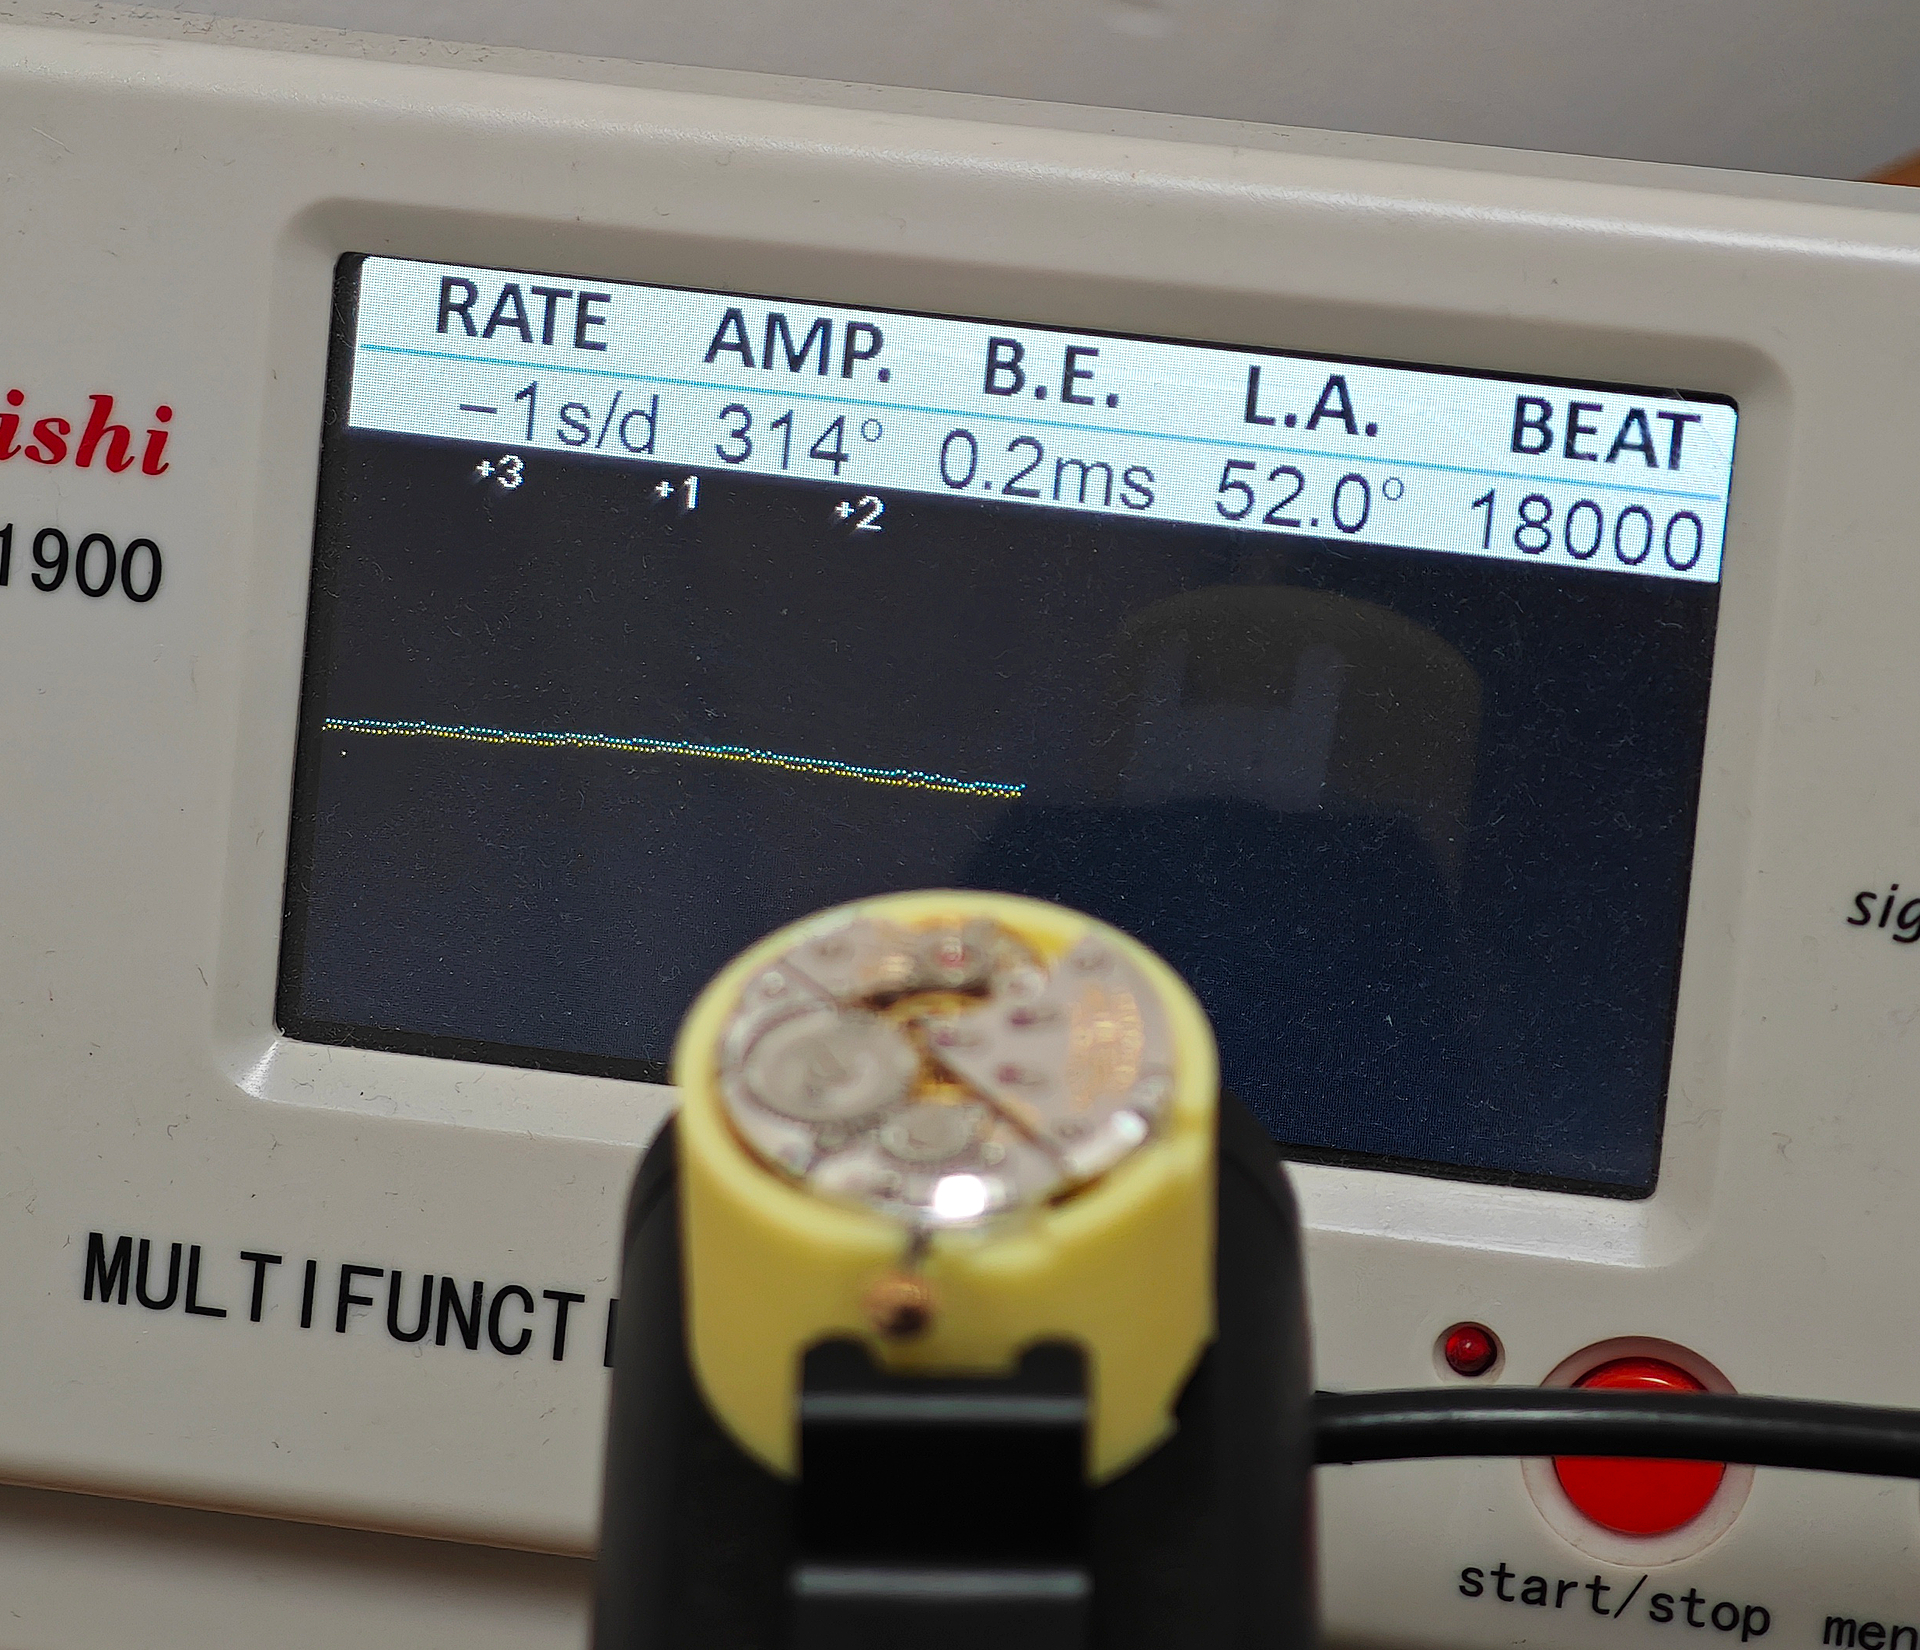
Before starting the deconstruction, it can be helpful to make a reference timing measurement on a full wind.

The very low amplitude and noisy timing curve is a testament to how dirty this movement is and how long a period of time has passed since it was last serviced. Dial up, the amplitude was even lower, the beat error higher. With that done, we can start work on the dial side.
Removing the three end-piece plates reveals that the pallet bearing jewel is inverted compared to those of the escape and third wheels, with the oil well accessed from the dial side. The presence of the well is, though, redundant given that that vast majority of watchmakers would leave the pallet arbor unlubricated.

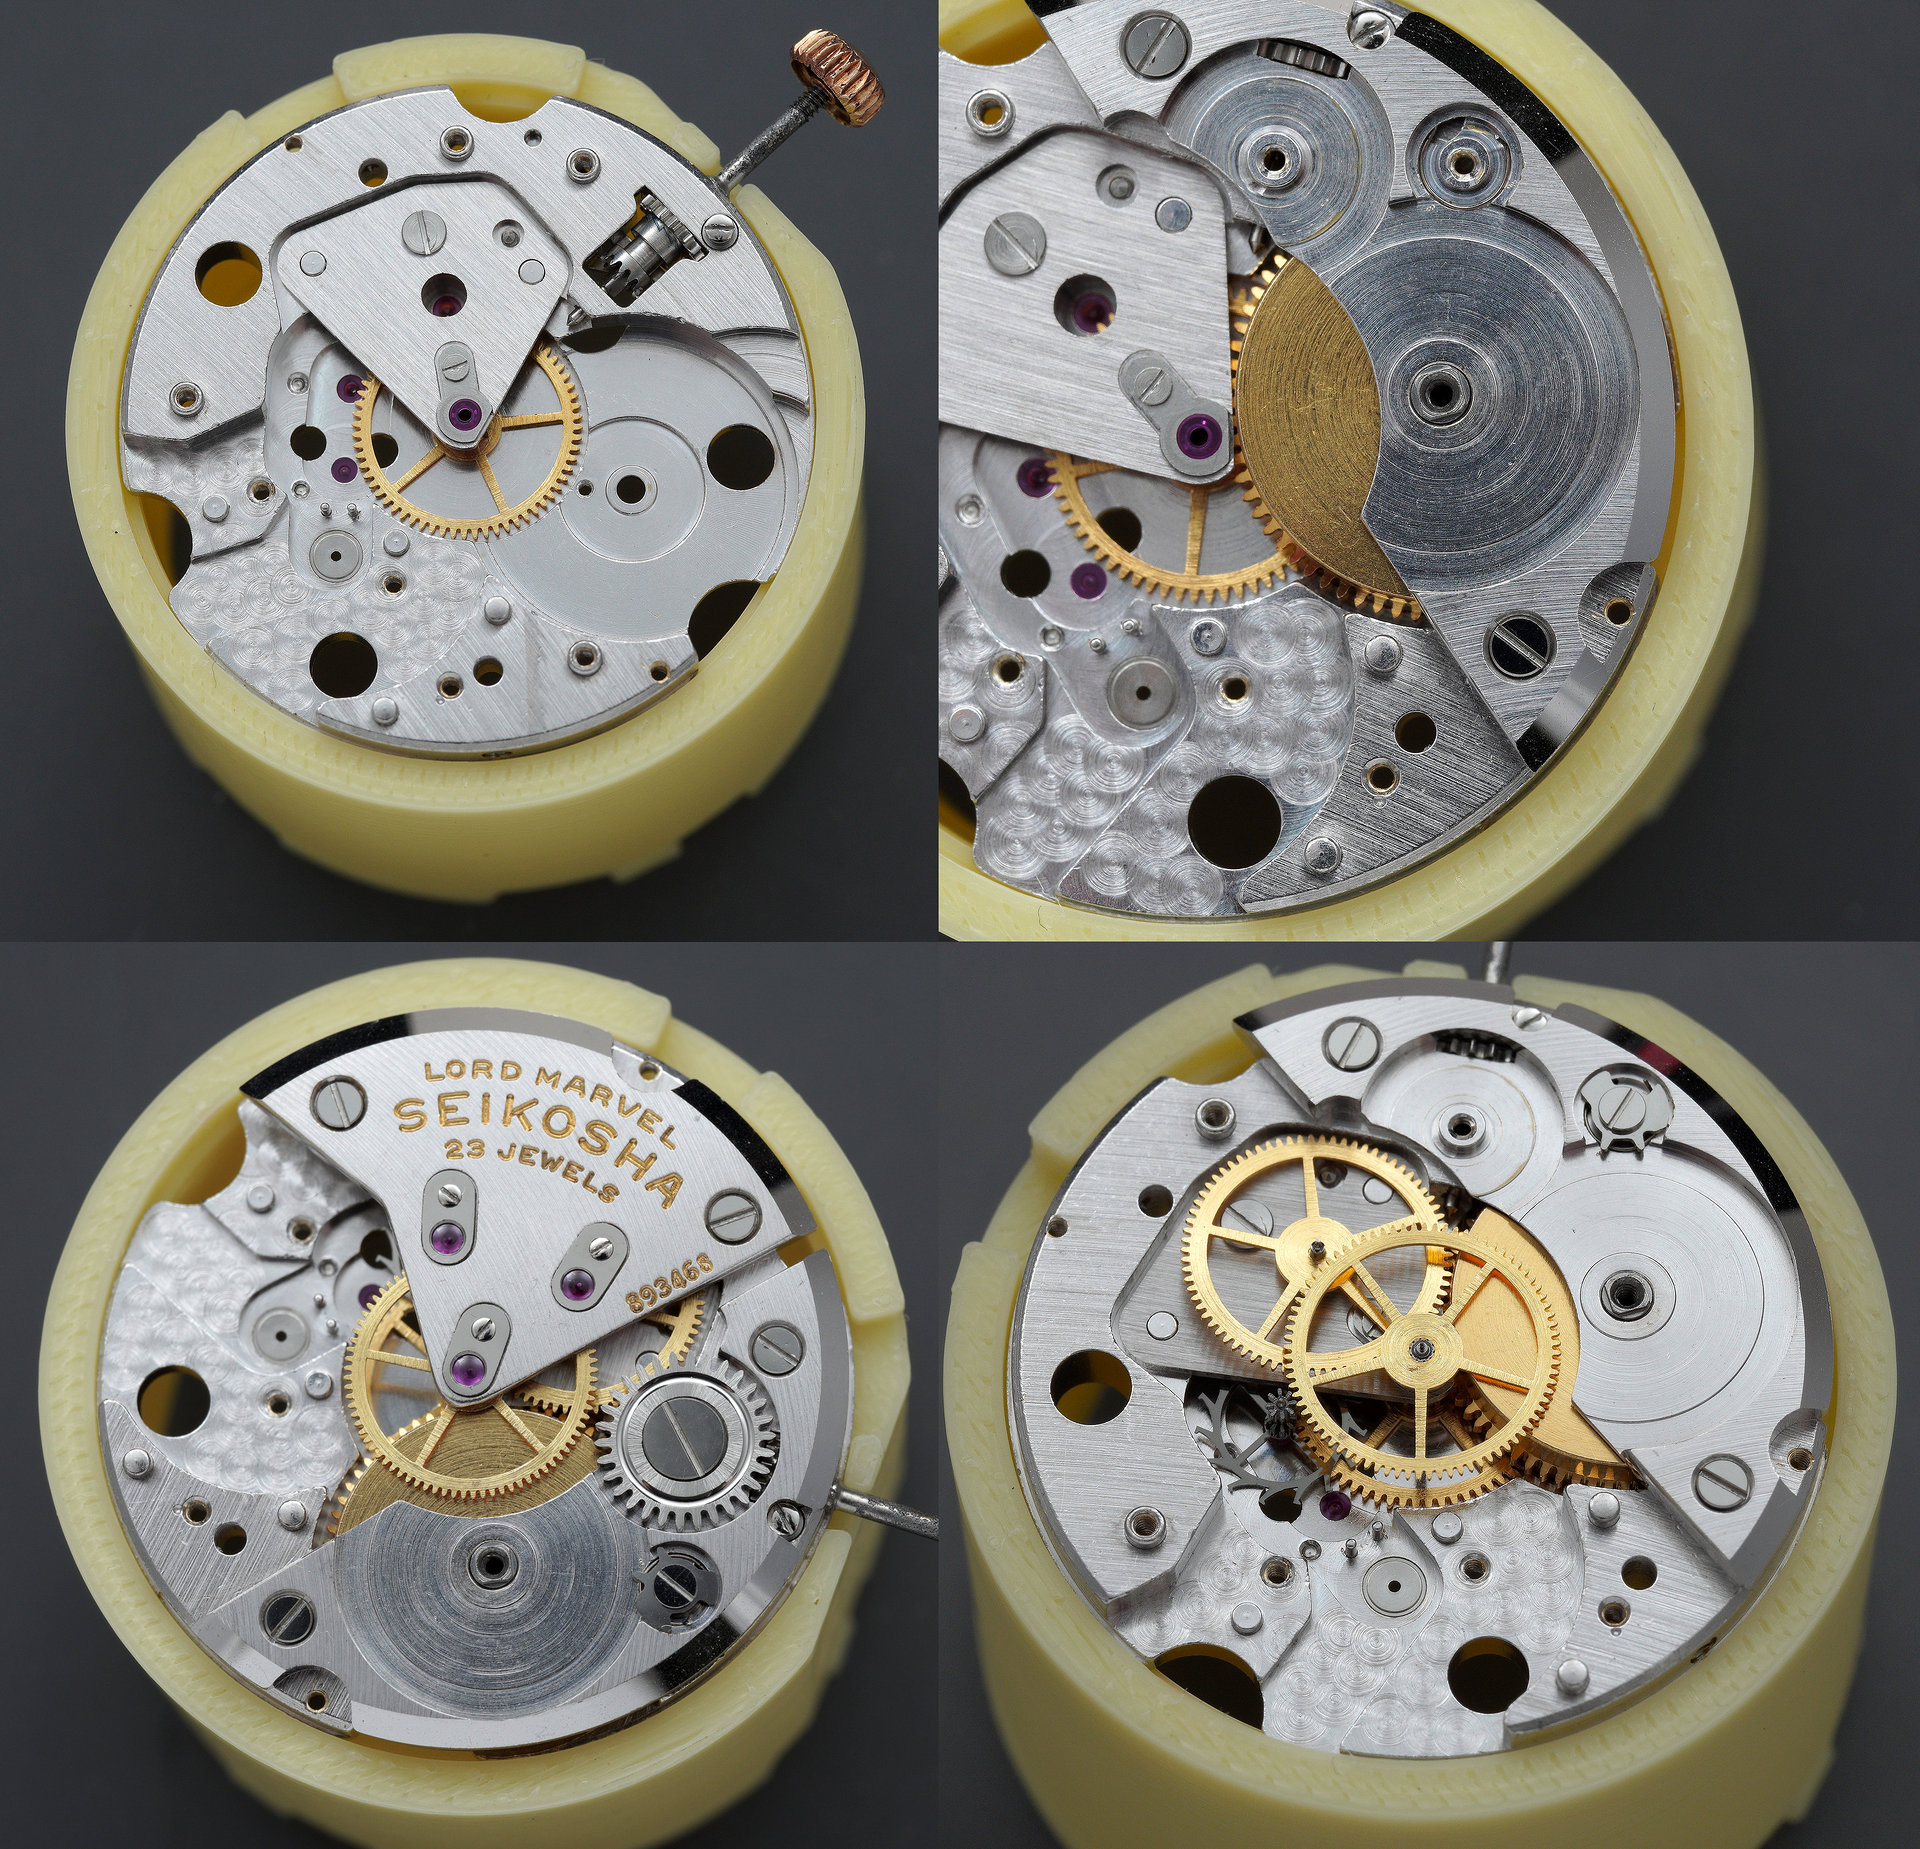
The dismantling of the movement begins in earnest with the extraction of the balance and escapement which provides a route to the sequential removal of the ratchet and crown wheels plus click (top left, below), the train wheel bridge (top right below), the barrel bridge (bottom right, below) and finally the barrel itself.
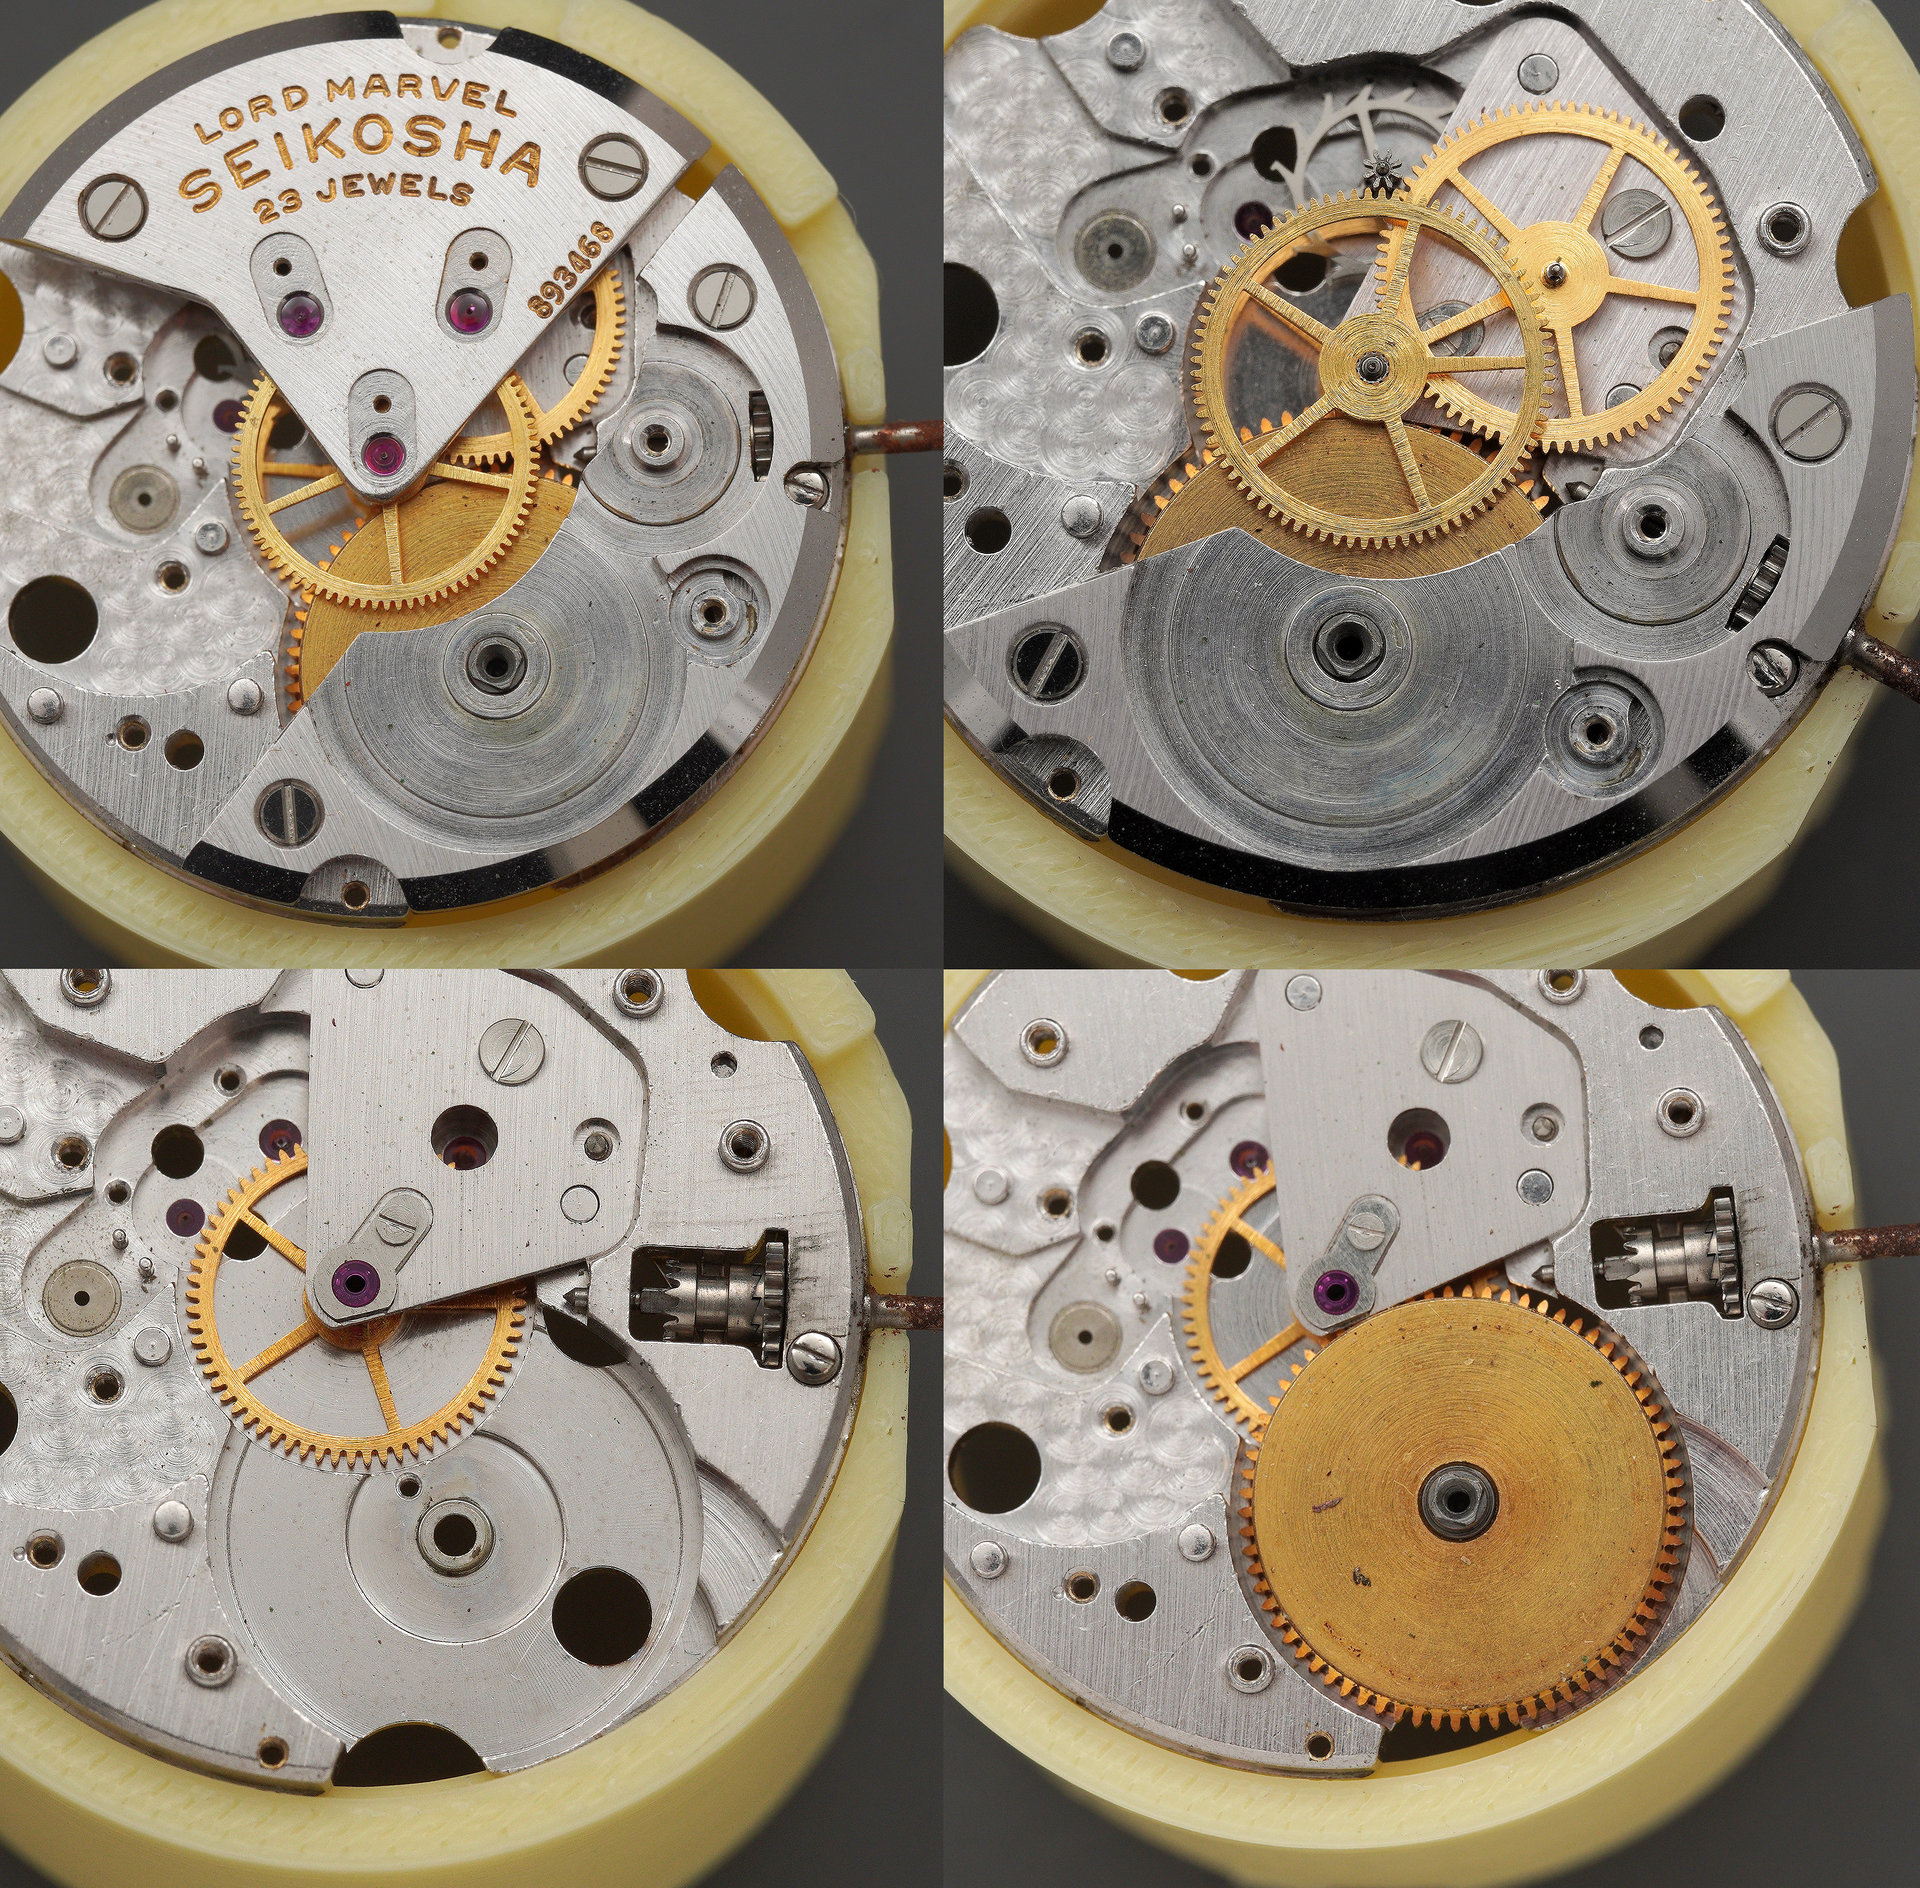
Note that the barrel is entirely un-jeweled, a short-coming that would be rectified in 1964 with the enlarged 5740A fitted to the fourth generation of Lord Marvel (see here).
In surveying the condition of the movement overall, I had noted just how dirty the balance bridge was and so before submitting all of the movement parts to the cleaning machine, I wanted to give this part some special attention, knowing that much of the grime may prove resistant to the agitative cleaning process of the cleaning machine. To this end, I removed the balance wheel and manually cleaned the bridge before reassembling and installing on the main plate prior to the subsequent cleaning cycles. Here is the bridge pre-clean. You can get a sense of how dirty it is from the speckled condition of the polished stud holder and regulator arm.

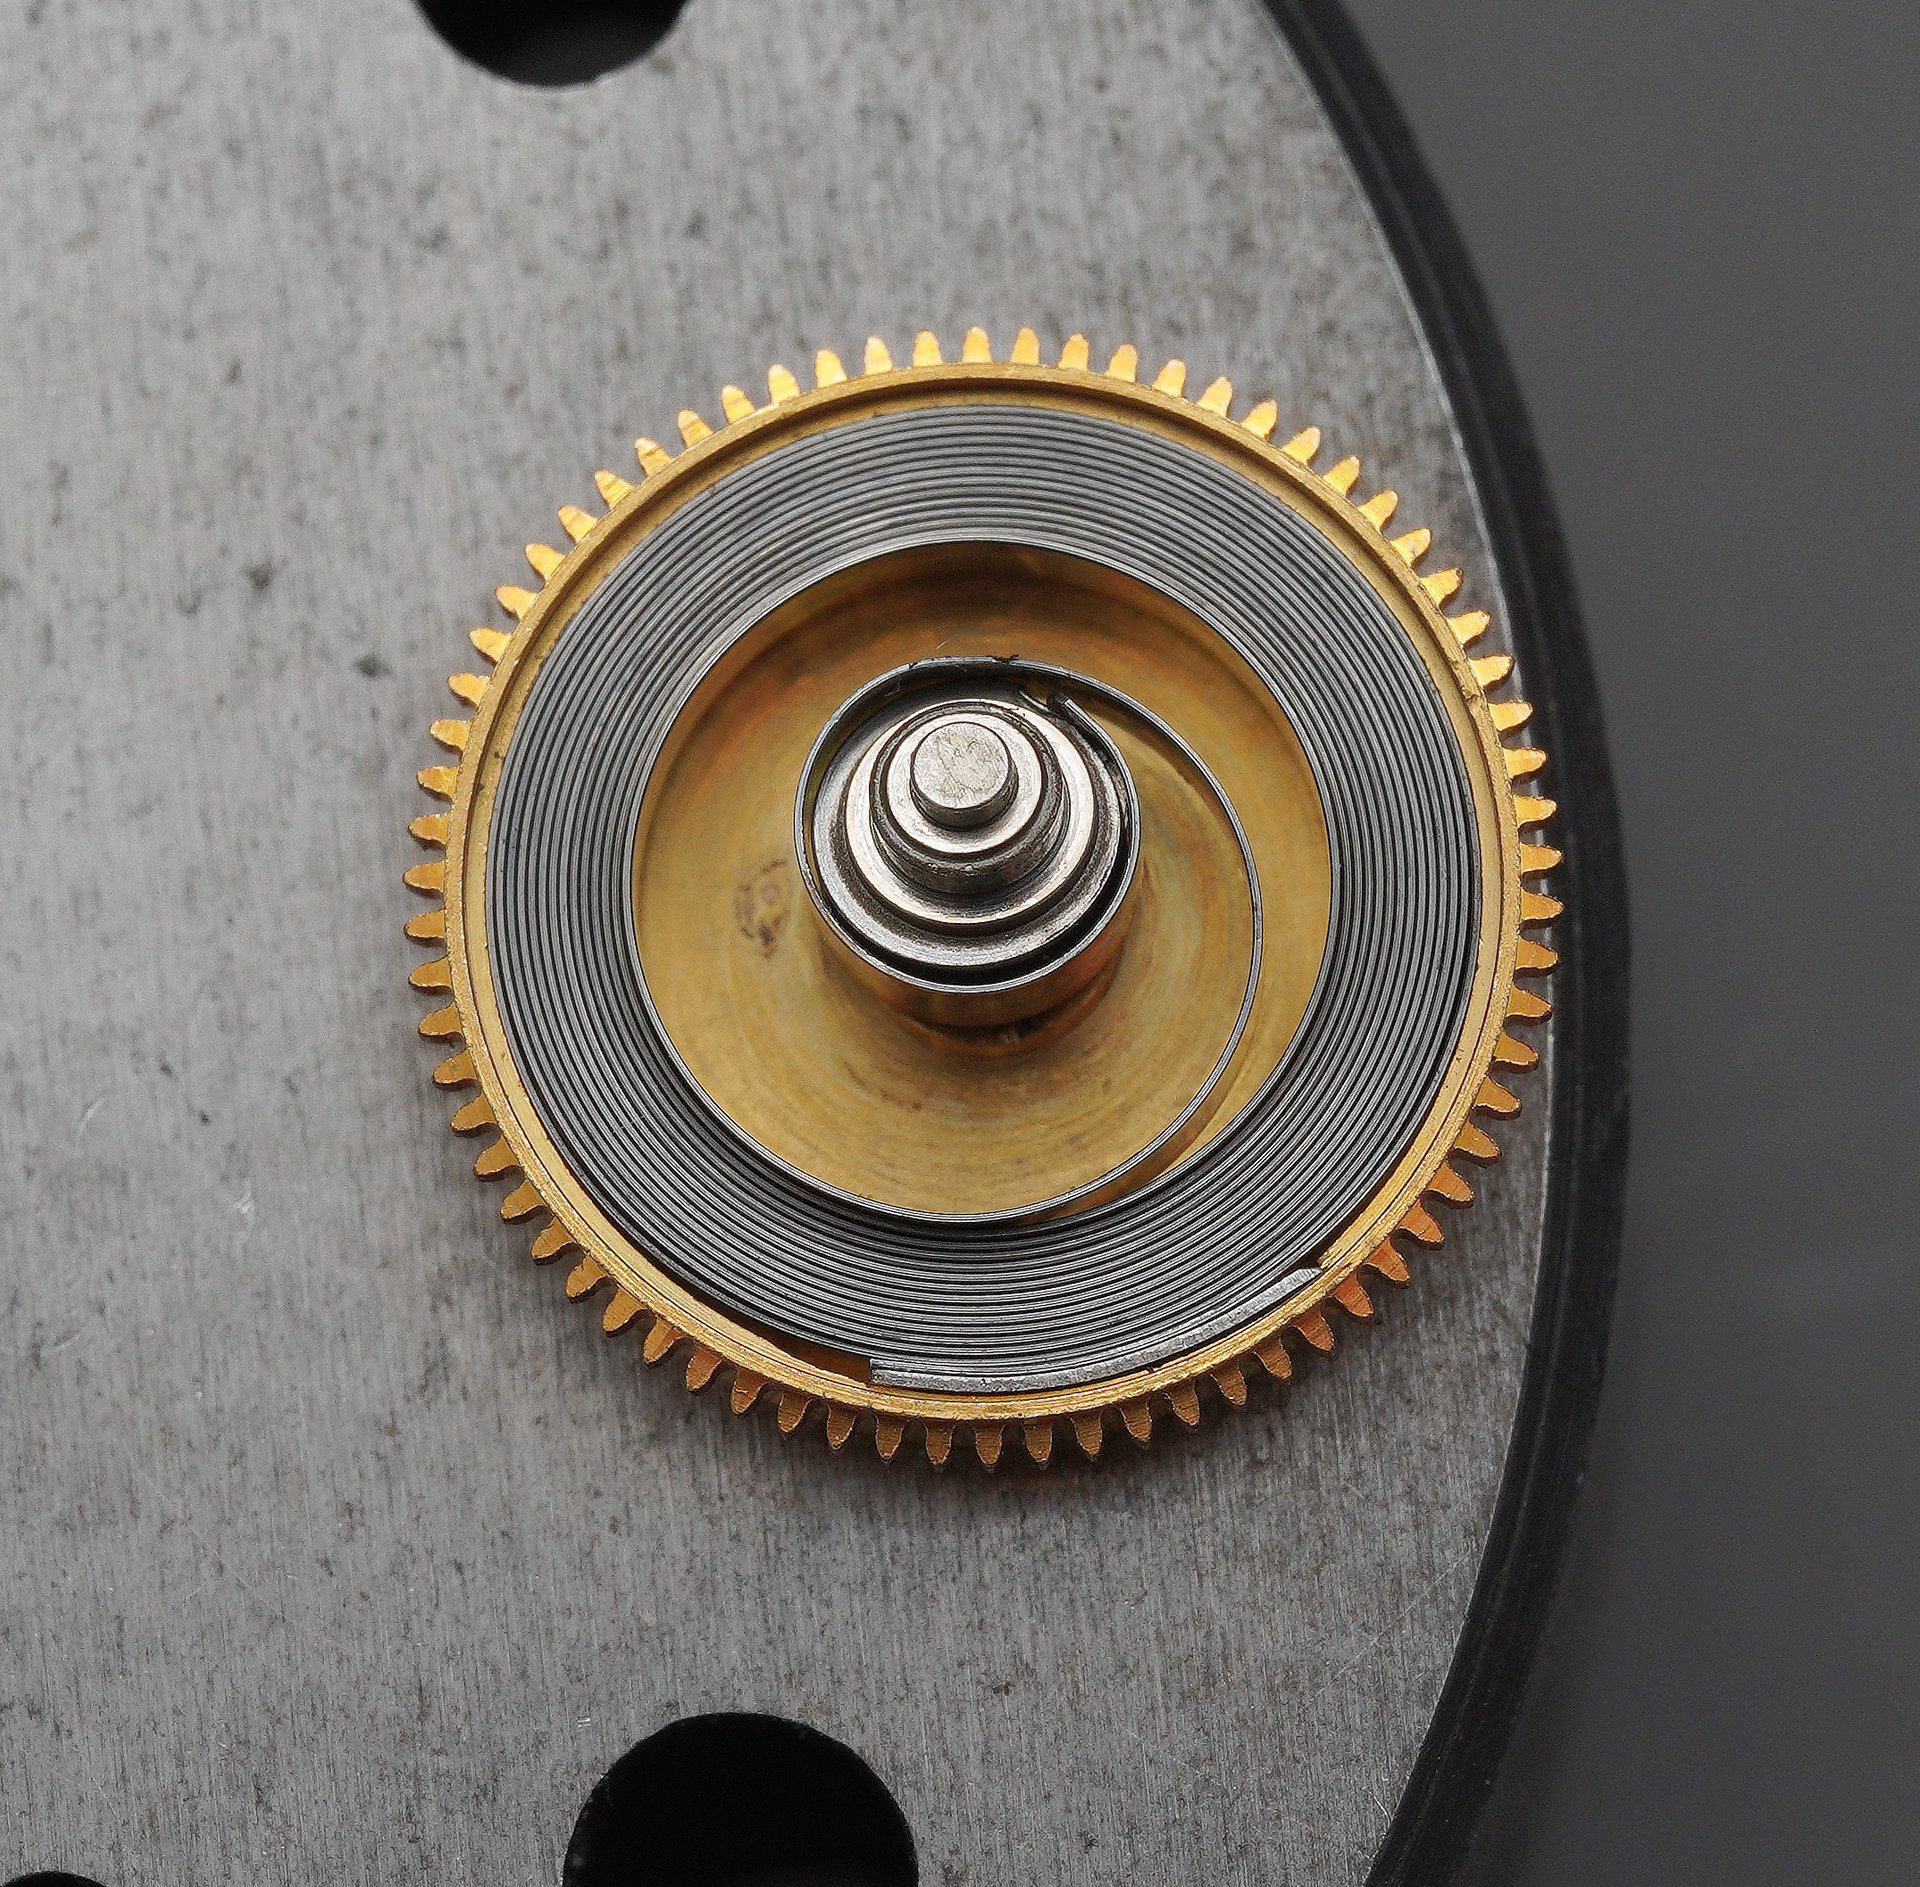
Following the three-step cleaning process (manual cleaning in n-heptane, ultrasonic immersion in watch cleaning fluid and then three-stage agitative cleaning cycles), we can begin the assembly of the movement. We start with the mainspring, cleaned and installed in the barrel.
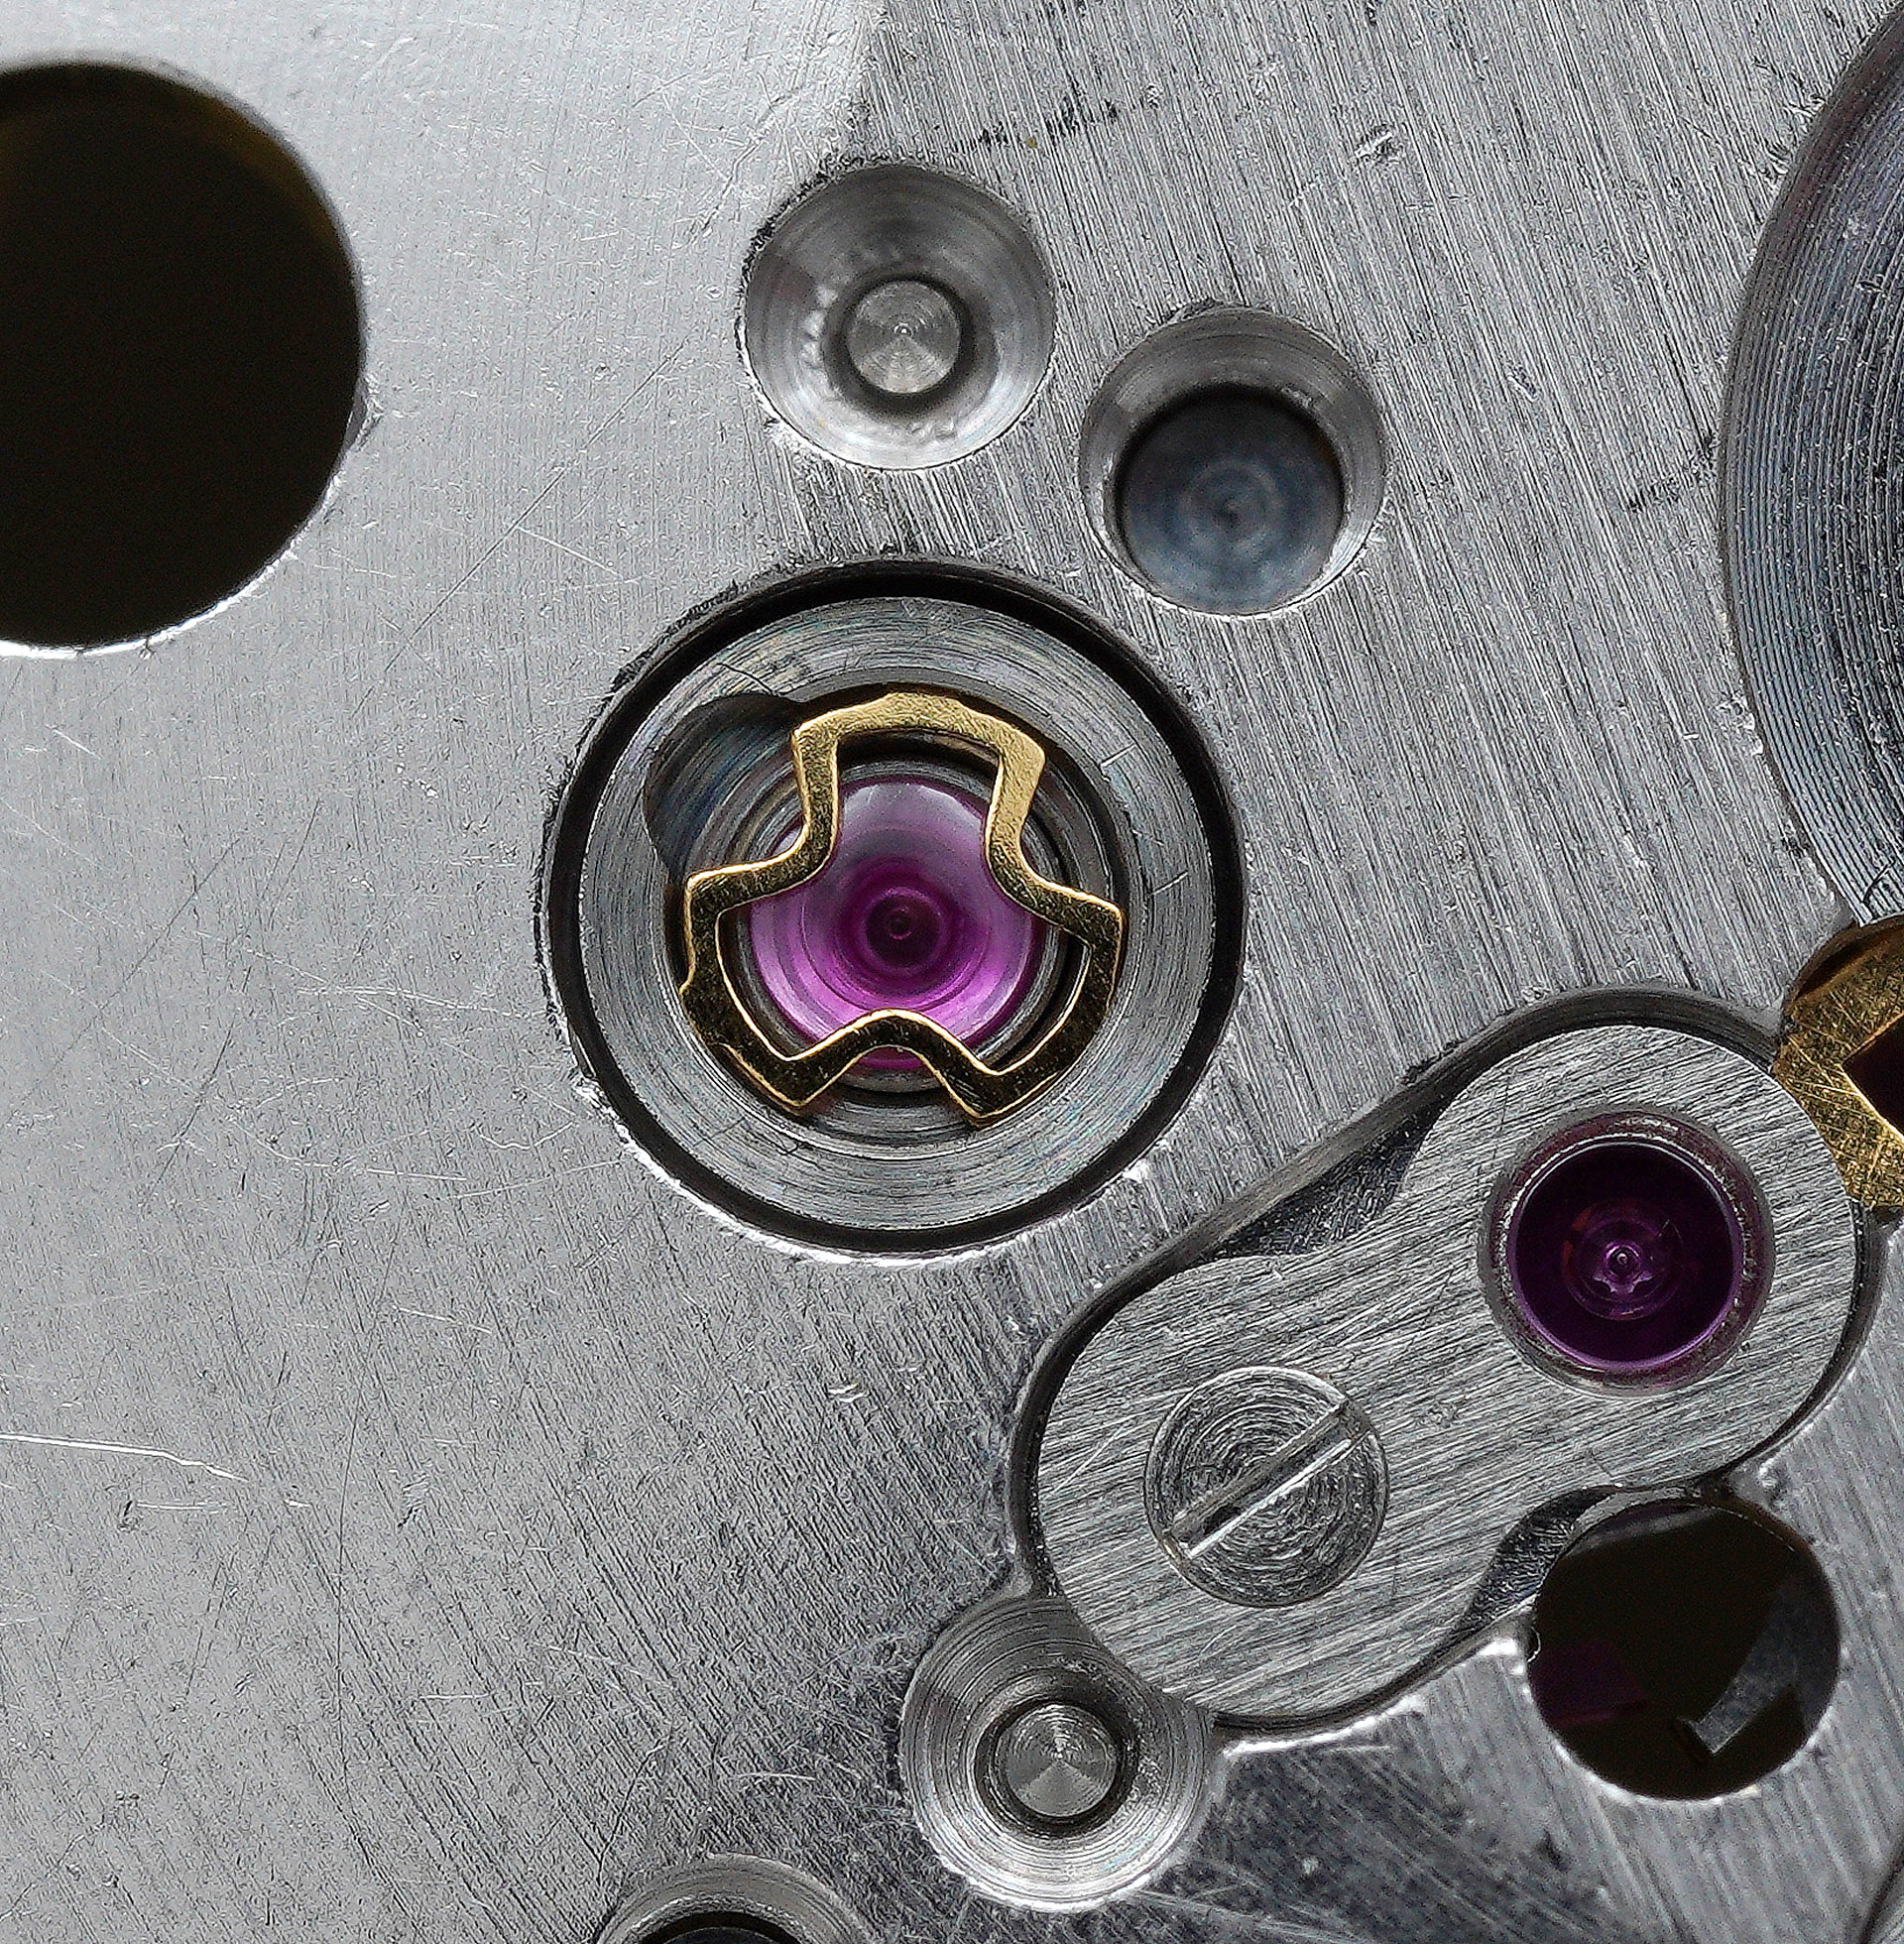
Fitting and lubrication of the end-piece cap jewel plates follows, starting with the main plate.
As I mentioned earlier, the jeweled pallet fork arbor bearing is left unlubricated (the left-most in the photo above). Rinse and repeat on the train bridge settings.
I will pause at this point to note an error in execution that is invisible from this perspective but which will reveal itself a few steps henceforth.
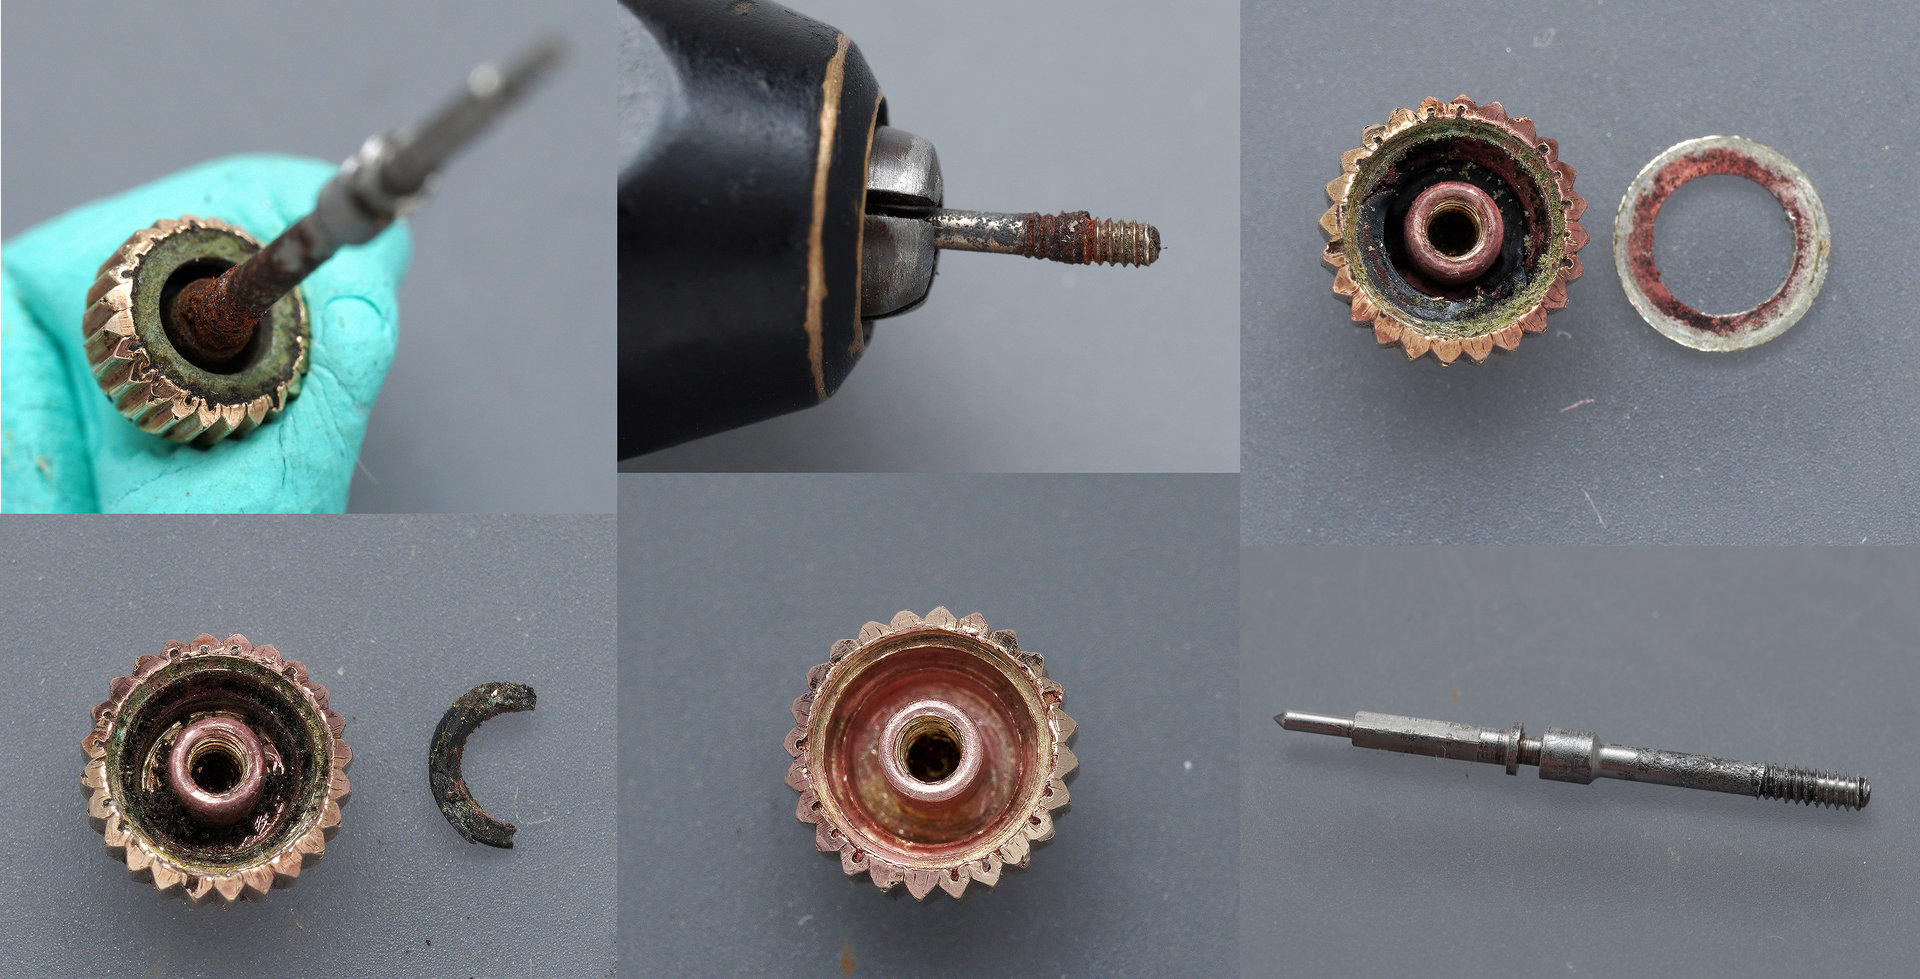
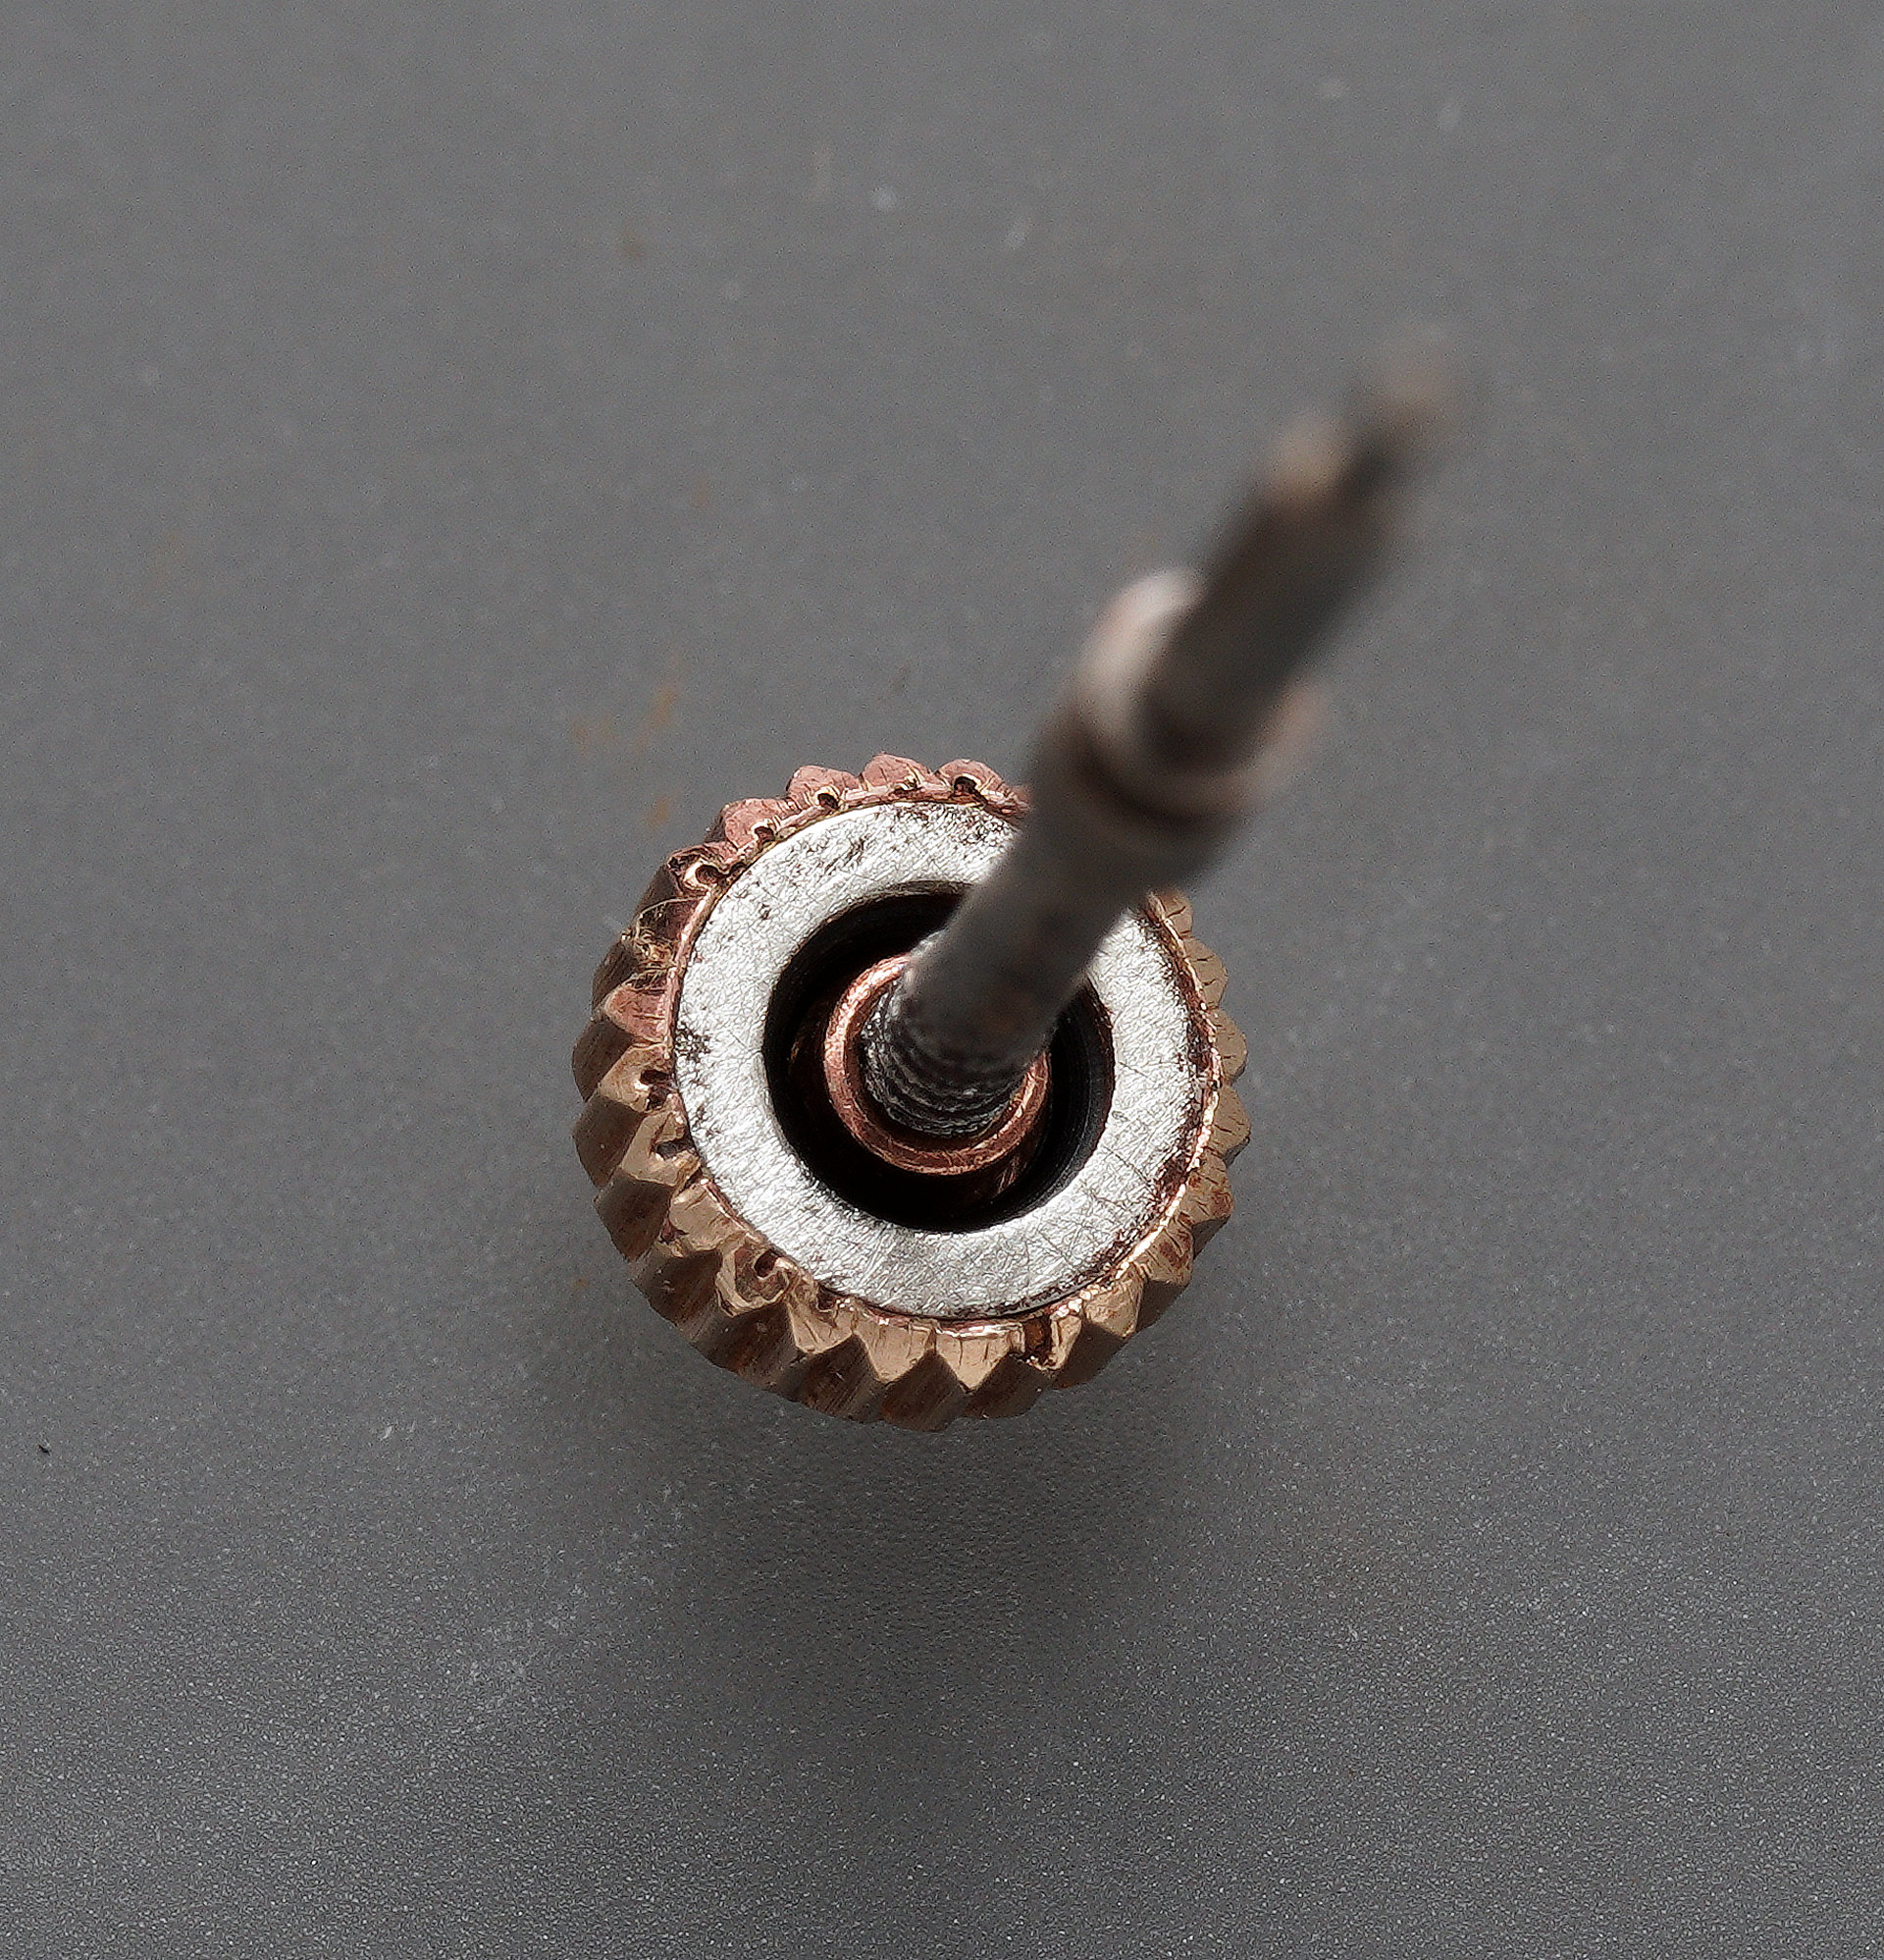
The next step should be to build up the setting parts but first we need to clean up that very corroded stem and deconstruct and clean the crown. Some of the key steps in that time-consuming process are shown below.
With the stem looking presentable but the crown not yet rebuilt, we can proceed with the assembly of the setting components.
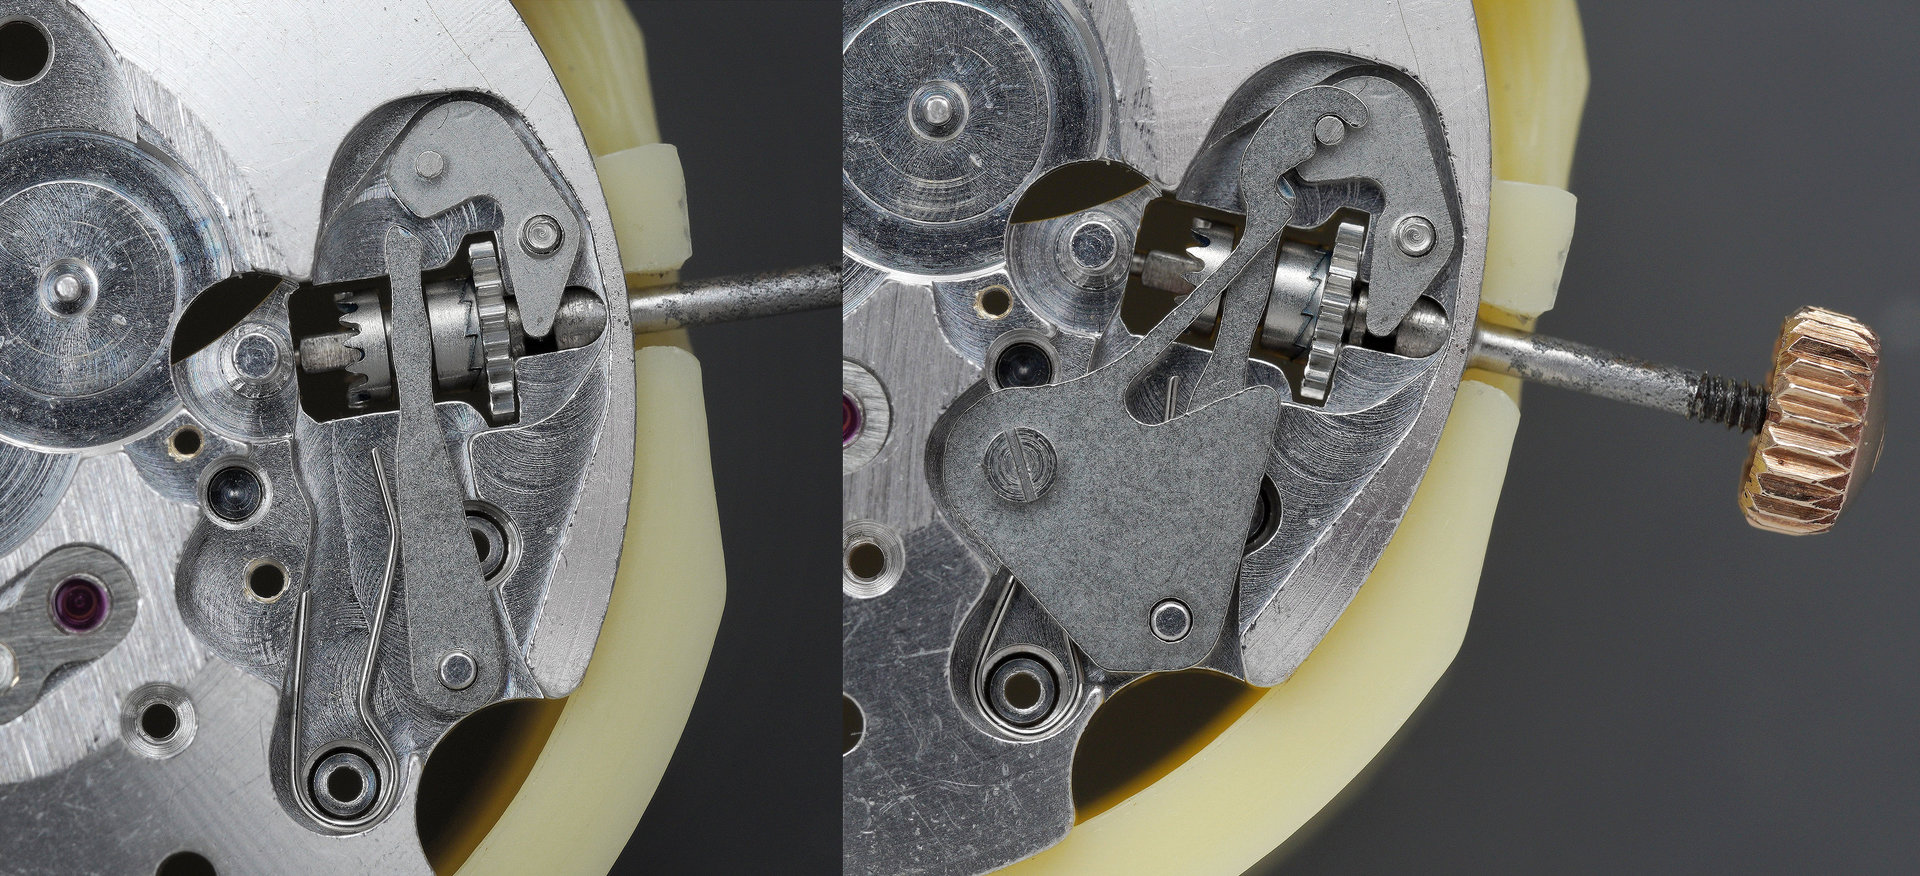
Inverting the movement, we assemble the gear train, starting with the centre wheel and its bridge (top left, below), followed by the barrel and its bridge (top right, below), then the escape, third and fourth wheels (bottom right, below) and finally the train bridge (bottom left, below).
It was at this point that the error I mentioned earlier revealed itself. With the train bridge loosely in position, the gear train would not run freely. I went back and forth a number of times, trying to identify what might be impeding the motion in the ocean, until finally I realised what I’d done. Has anyone guessed what that might have been yet? Here’s the answer:
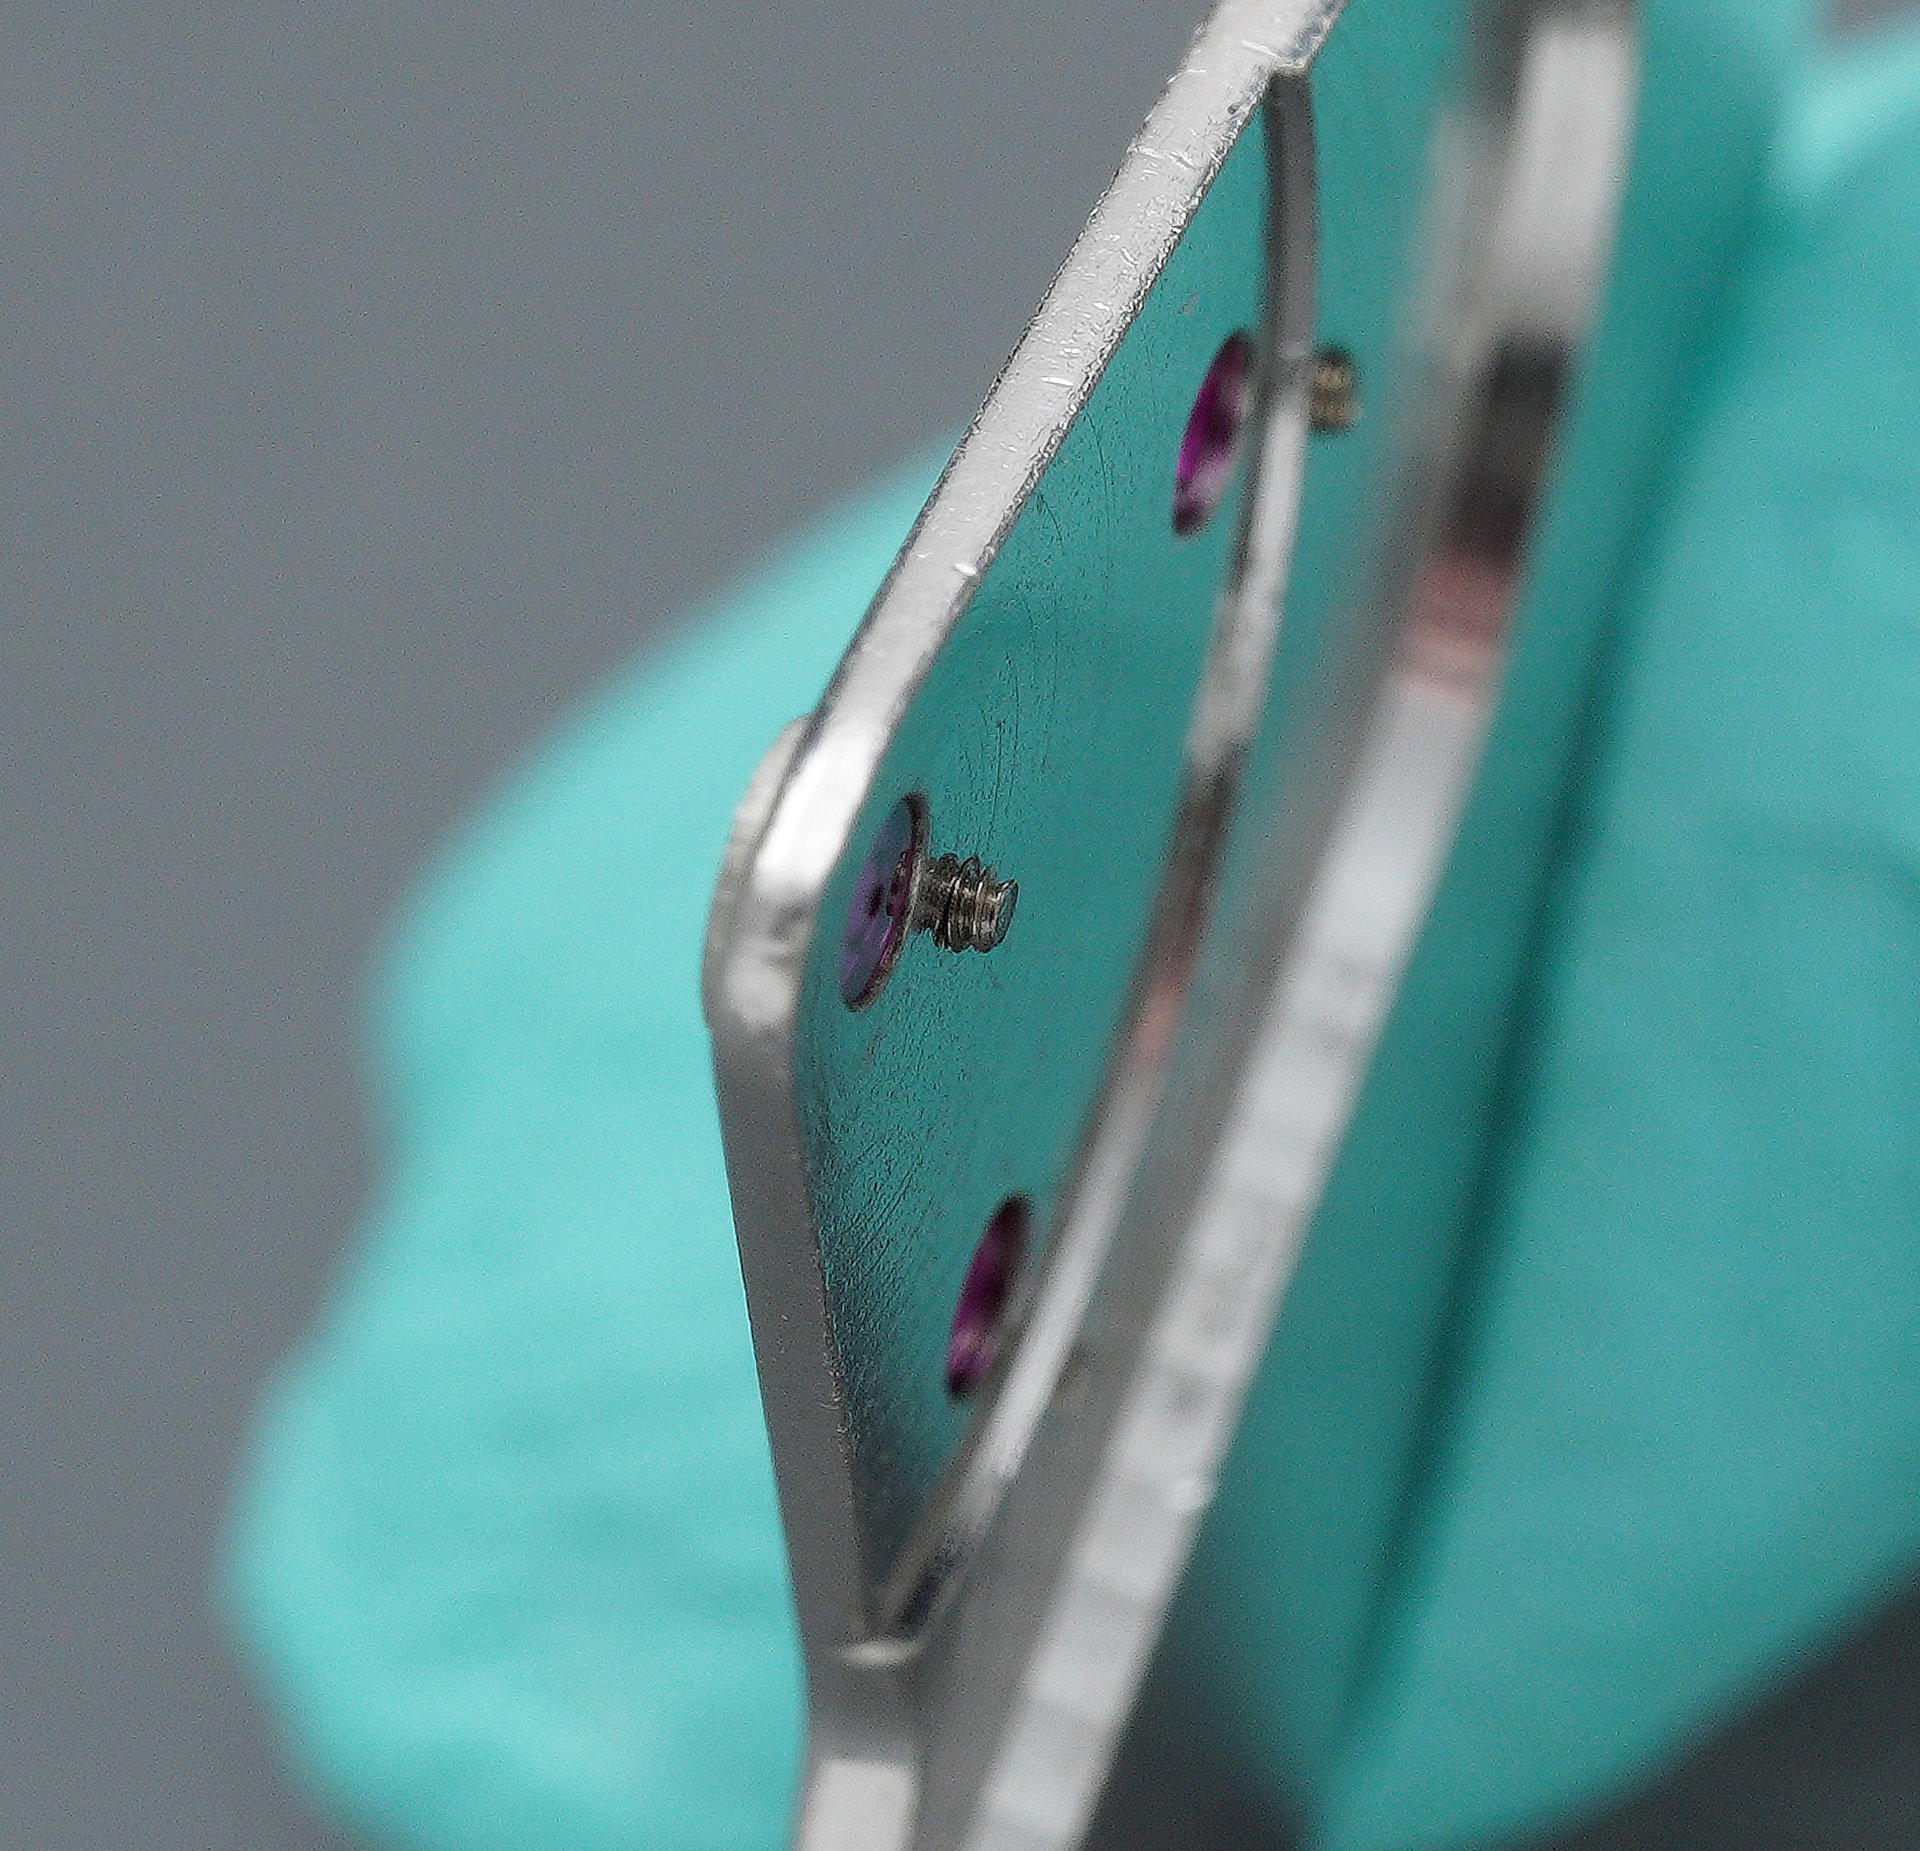
The three tiny screws that secure the jeweled end-piece plates are of different lengths, reflecting the different thickness of the bridge at their respective locations. In fitting the end-plates, I had allocated the screws randomly without noticing that one of the three was shorter than the other two and inadvertently fitted one of the longer screws to the end-plate requiring the shorter screw. The protruding end of the screw thread was touching the fourth wheel with the bridge fitted and this was the cause of the impediment. Having identified and rectified the problem, I was able to fit and properly secure the train bridge and then fit the pallet fork having established that the train was now running freely.
With the pallet stones lubricated, we embark on the final steps required to kick some life into the movement. Fitting the dial-side Diashock is the first step.
The balance Diashock is lubricated and assembled, some power wound into the mainspring, the balance eased into place, at which point it begins its lazy swing back and forth and we can fit its Diashock setting.

An initial regulation on a full wind suggests all is well.
That provides licence to proceed to completing the dial side by fitting the minute wheel, its bridge and the hour wheel.
We are all set at this point to fit the dial.
The light in this photo catches the faceted gold hour markers very nicely. Let’s take a closer look at just how sharply defined those markers are.
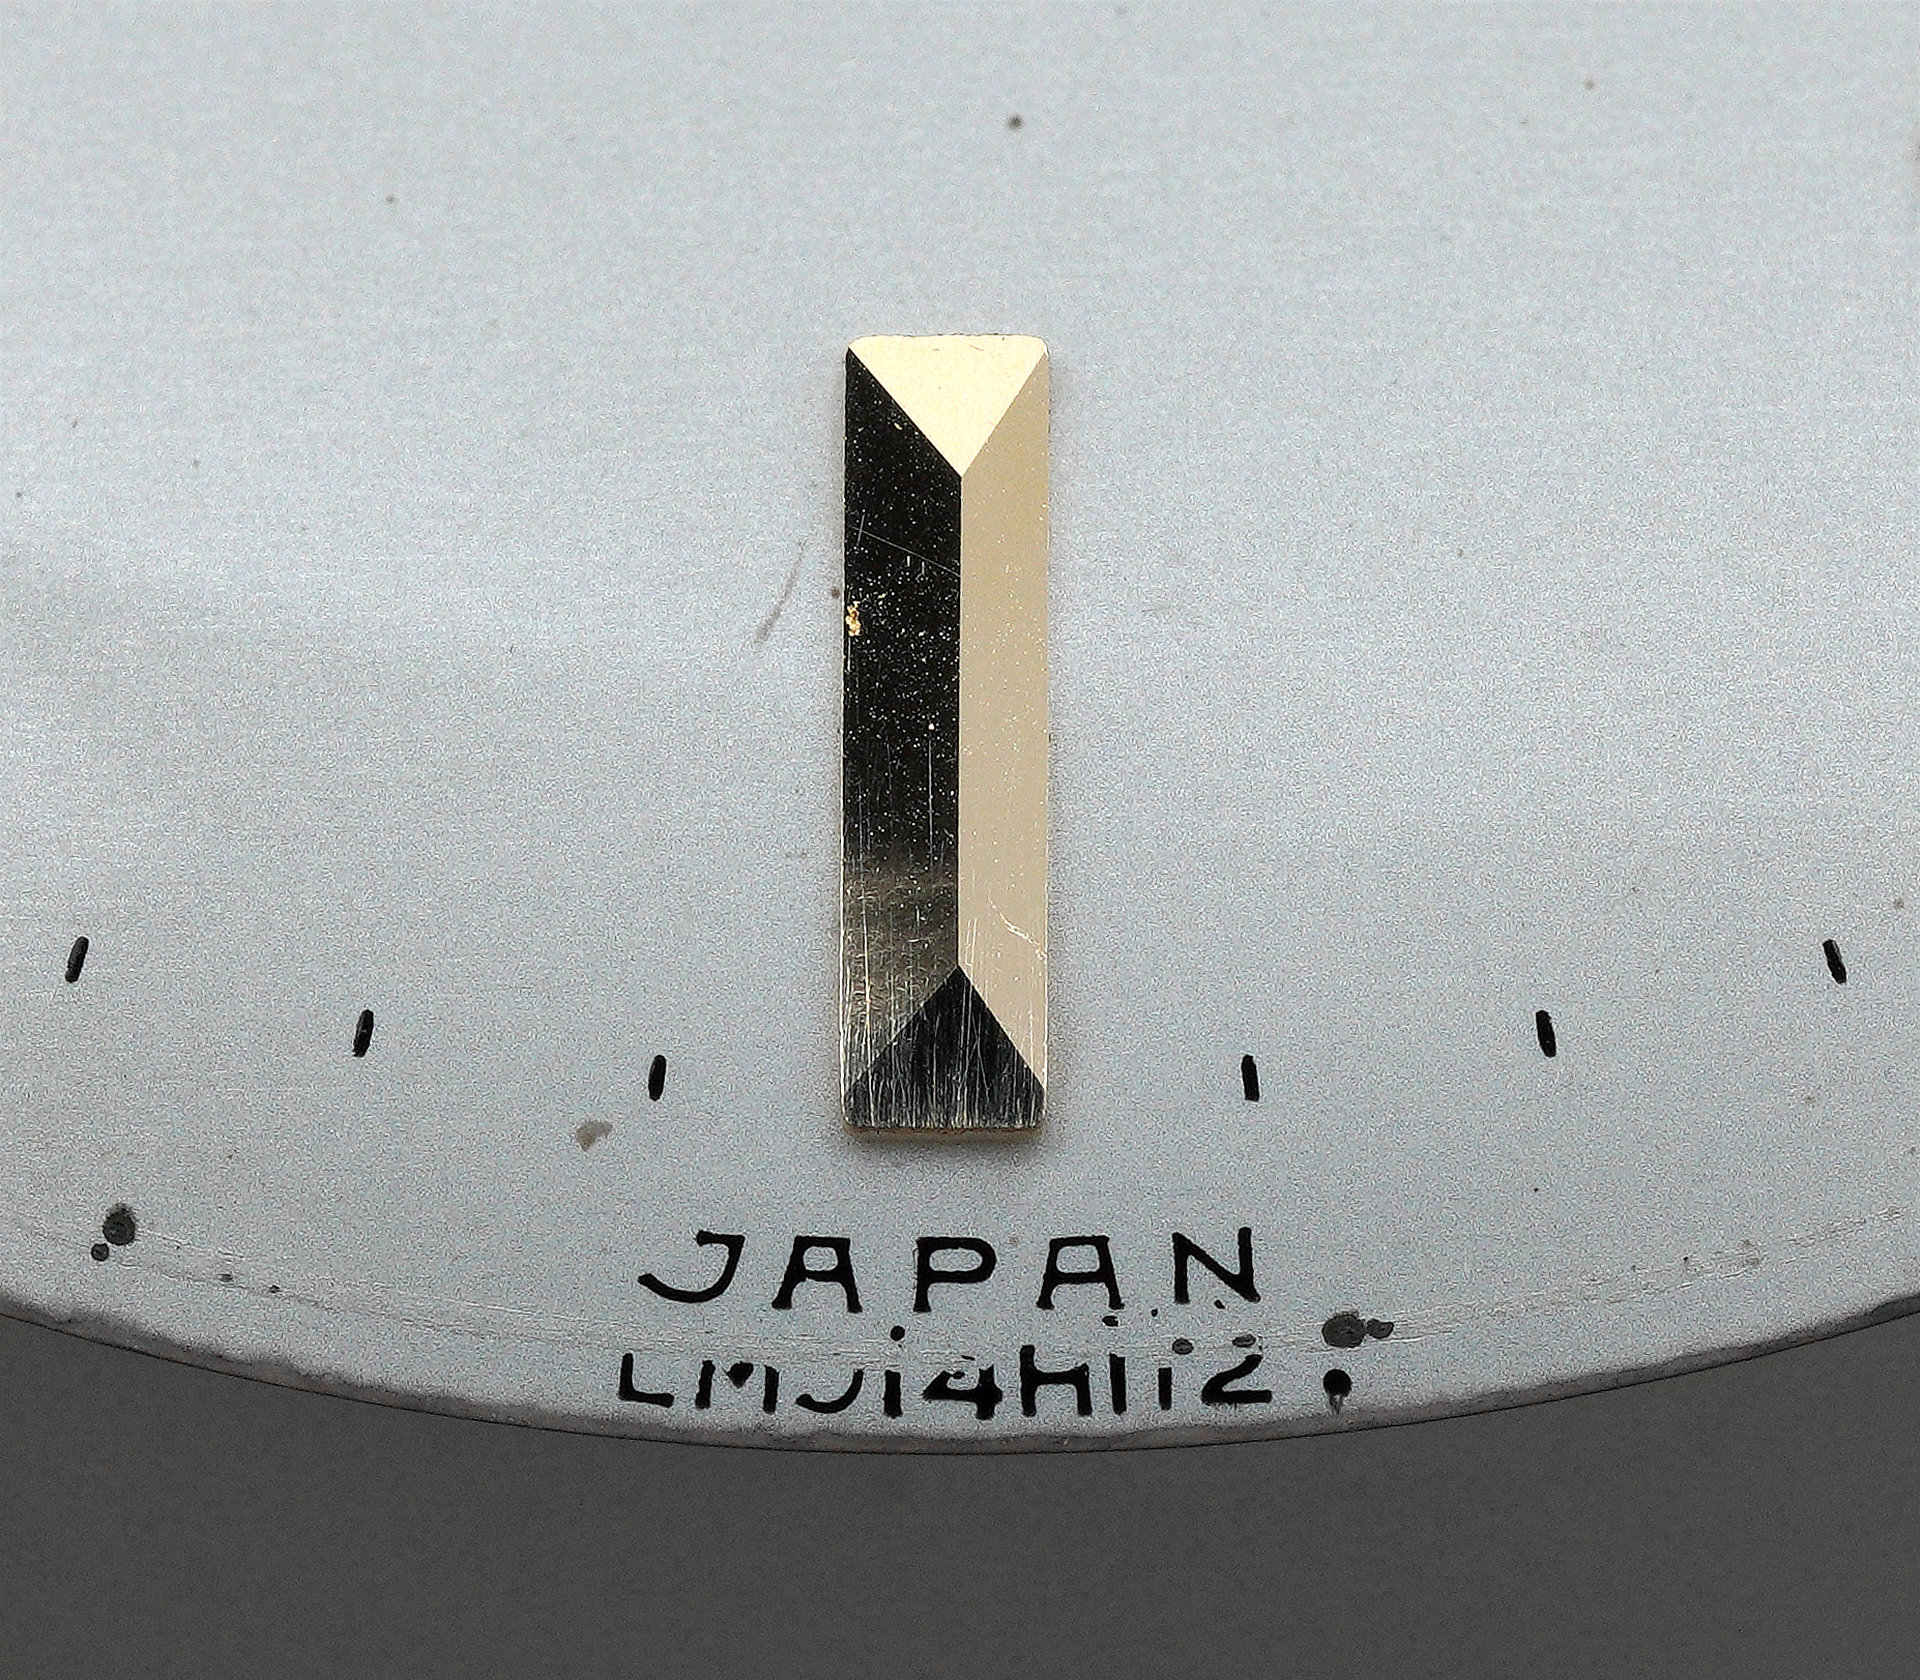
At this level of magnification we see flaws that are invisible to the naked eye, some of which will vanish once I’ve given the dial a proper clean. The convex dial combined with the concave inner surface of the crystal requires that the minute and seconds hand be curved. Here’s a view of the curvy minute hand.
And here’s a perpendicular view of the hour and minute hands fitted to the movement.
Fitting the seconds hand completes the deal.

There are two more tasks to complete before we can contemplate final assembly. The first is to remove as much of the evidence as possible of all of that gorgeous patina from the case.
The crown refurbishment requires that the stem is removed once again, a fresh gasket fitted and the retaining washer secured into position. With a dab of Loctite applied to the threaded end of the stem, the two are reunited and our crown now looks fit for purpose once more.
The movement is placed into the mid-case and secured using the two casing screws to the rear.
A new crystal is compressed and then released into the embrace of the bezel and the two are aligned and then pressed into place with a satisfying if slightly muted snap.

The protection offered by the crystal allows us to invert the watch and take a look at the movement in situ.
Whatever your horological prejudices may be, there is no denying that this is one very beautiful movement. It is also one that swings with some considerable conviction, powering this wonderful jewel of a watch with a power at odds with the delicacy of its outward-facing aspect.
Seiko hit the ground running with the introduction of the Marvel in 1956 and their aspirations to use that as the basis of a legacy of aspirational watches bore fruit within just four years.
The Lord Marvel is a very special yet under-celebrated waypoint in the evolution of Seiko as a producer of high-end watches of genuine star quality. In comparison to the more overtly muscular Grand Seiko that was to follow, it does not have quite the same conspicuous charisma, but it is in its subtlety that its power to beguile lies.

Grazie Martin, come sempre interessante. Ciao
Superlativo come sempre!!
Grazie mille!
I am lucky to own several Seiko Lord Marvel. Some 1st generation Lord Marvel too (and some Seiko Marvel). Seiko did make really beautiful watches back then.
I really enjoyed reading this, as I love these watches.
I’m happy to hear that. I’d love a first generation ‘S’ but I fear too rich for me these days!
I know, there are some for sale, but the prices, they are asking, is way beyond funny… I rather buy me a 1st generation GS 3180 for the money…
Or I just enjoy the Lord Marvel collection I already got, much cheaper…
The GS 3180, at least the engraved dial versions, look like pretty good value compared to the earliest Lord Marvels. I’m not so interested in chasing niche or indeed in collecting. I just enjoy buying what catches my eye and then getting my hands dirty!
I just collect the old handwinders, Seiko Marvel, Laurel, Cronos, Liner, Goldfeather, Lord Marvel. And I own a large collection of Seikomatics… Beautifull watches to collect and enjoy wearing. And do service them myself, so plenty of work to be done…
I’ve not yet worked on a Goldfeather but I’m keeping an eye out. And yes, Seikomatics are lovely and fantastic value for money.
Very interesting and timely, as I just serviced a 1959 ref. 14057 myself. I have to admit that I made the same mistake with the cap jewel screws too 😛
I can also appreciate your reasoning against lubricating the pallet fork pivot jewels, and I generally don’t do so. However, my watch was running at a very healthy amplitude (~320 horizontal, ~295 verticals) so I decided to lubricate them lightly- only 50 percent of the diameter of the cap jewel, and equally gently on the balance side pivot. I haven’t noticed any significant difference in amplitude or rate after 3 weeks [certainly less than 5 degrees), so I guess I got away with it. I don’t have specs for the Lord Marvel specifically, but Seiko did often indicate that they should be lubricated, and I try to do so when it is sensible.
As a side note, I would argue that cap jewels have a number of benefits critical to the function of the movement that prevent one from considering them “uneccesary.” Besides preventing contamination (extremely important in the pre-waterproof era) they also remove the guesswork in applying the correct amount of oil and stabilizing its position.
Hi Josh,
Yes, Seiko do indeed indicate that the pallet fork pivots should be lubricated in most (all?) technical manuals for their mechanical movements and indeed, their modern movements, such as the NH series have had comfortably more than a smear applied! I am not arguing against it as a practice but simply repeating the received wisdom that they are better left unlubricated than lubricated. I have always assumed that this is because the unimpeded operation of the pallet fork is more sensitive to deposition of dirt than other parts and that over time performance will degrade faster if those pivots are lubricated.
As to the purpose of cap jewels, I completely appreciate their role in greatly reducing contamination in the longer term, but the watch will run with no limitations if they were not present and that they consequently play no functional role in the operation of the movement. There is a purpose to them, it’s just not integral to the operation of the movement.
Thanks for your comment!
All the best
Martin