
Tags
To lume or not to lume? That is a question that’s been percolating around my noggin for the few weeks that have passed since I finished reinstating some degree of originality into the longest-serving stalwart of my collection, documented here. One of the main features of that restoration was to fit an original, if slightly scruffy 6105 dial married to a set of correct, original hands part-sourced from a 7005 dress watch. The dial was good enough for me to be satisfied at the time to leave it alone, barring a good clean, and fit the hands, also in their original state.
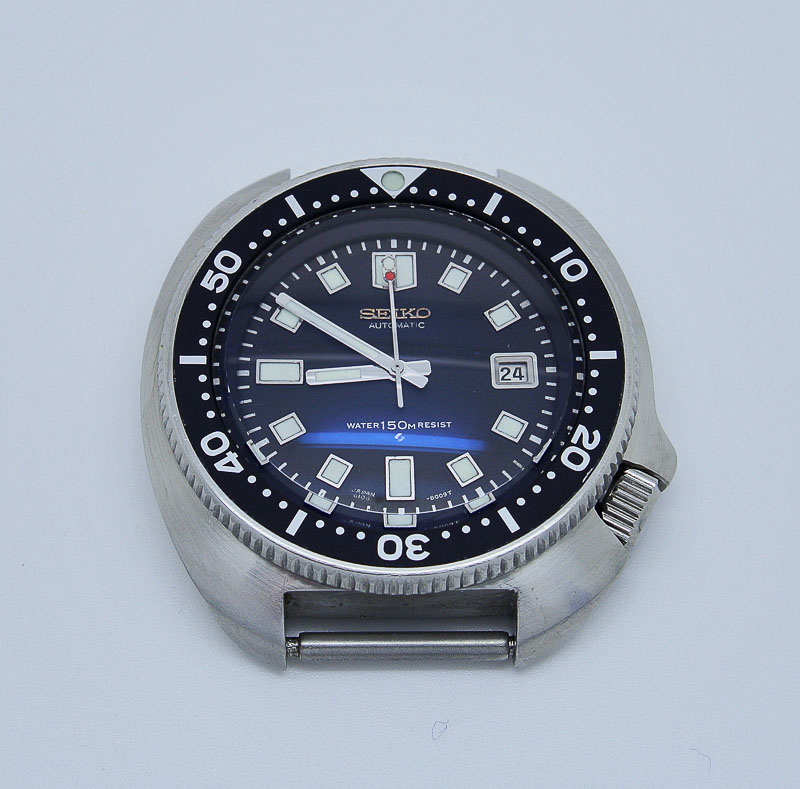
 However, the marriage of the green-hued lume of the hands with the dirty grey of the dial’s lume plots grated (illustrated quite well in the photo above), and I ended up reluming the hands in an attempt to correct the mismatch. To be honest this was only partly successful but good enough for me to opt to use this as my holiday watch this year.
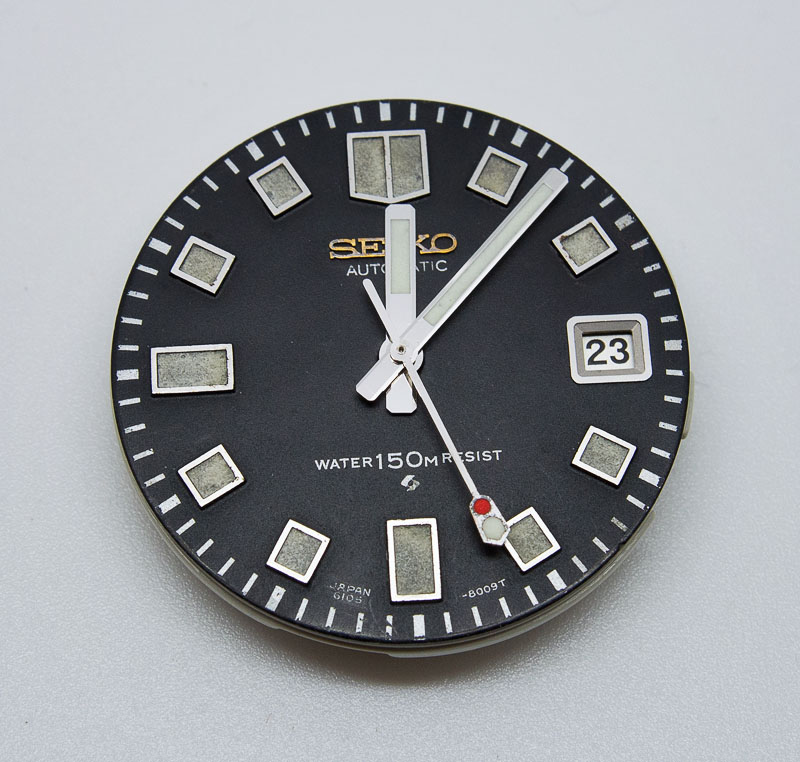
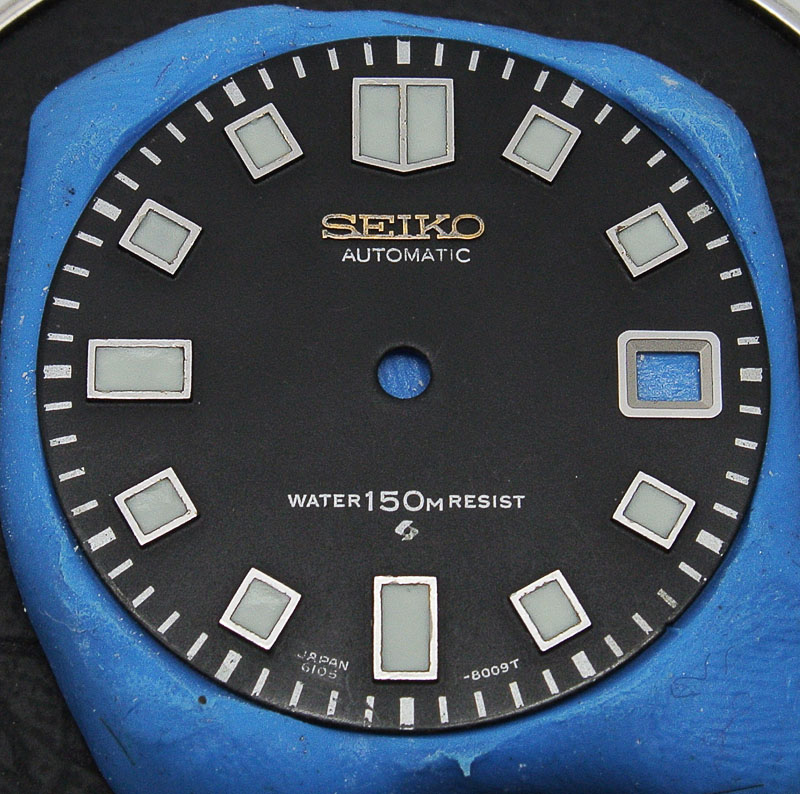
 It looks ok – good even – but having it on my wrist every day for the best part of three weeks increasingly highlighted the obvious flaws in the appearance of the lume in the dial markers and the uncomfortable contrast they made with the clean look of the relumed hands. As I use this watch as my go-to default, as a waterproof do-it-all and a frequent work watch, it also seemed right that I should be able to tell the time at night and so by the end of the holiday, I had resolved to have a stab at reluming the dial myself. This is not something to undertake lightly. I’ve seen a lot of very unsuccessful relumes, some performed by professional relumers, but most by first timers such as myself making a real hash of it. However, I’ve relumed a few sets of hands and have been acquiring some sense of how to make up and handle the wet lume mixture and so felt I had enough of an idea of how to proceed to give it a go. So let’s start then by taking a closer look at the dial and hands, still fitted to the movement, hopefully highlighting the true state if that aging lume:
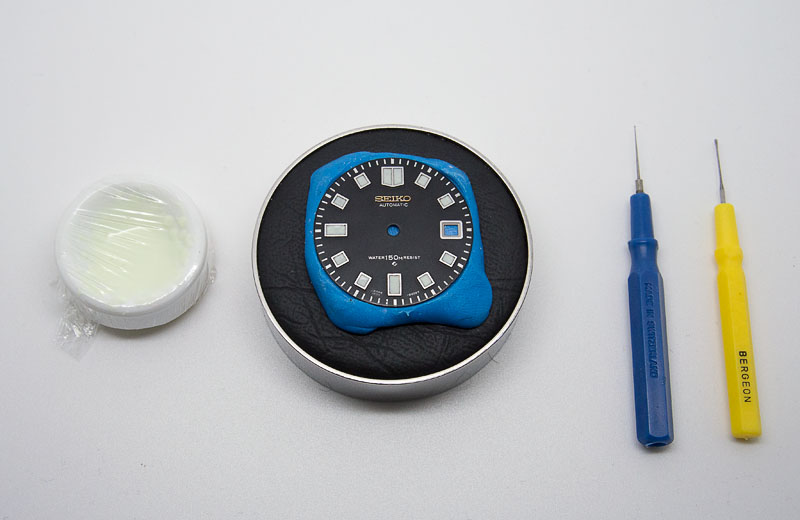
 Looking at this does nothing at all to divert me from my mission. So, lay on, MacDuff (but with not too much vigour). The next step is to remove the dial from the movement and to support it in a such way that the lume can be removed without risk of distorting the dial. So, I placed it onto a flattened lump of watchmakers putty and sat that on top of a casing cushion.
 A brave pill and a deep intake of breath and off we go, starting with the marker at the 6 position.
 Very careful use of two sizes of jeweler’s screwdrivers, working initially northwards away from the centre of the marker, then swiveling the dial around and working towards the base of the marker frame. The lume was not so hard that there was any real danger of slippage but I wanted to avoid making any contact with the surrounds which are in excellent condition. Working anticlockwise, I made my way around to the twelve marker without incident.
 Five more polished off at a steady but unrushed rate, and the scene is set for the second part of the process.
 Having removed all of the old lume, I gave the dial another good clean to get rid of any traces of lume dust and then set about making up the lume mixture. I have two colours of luminous powder, one white and one yellow, the yellow looking a little more like pale green in some lighting, both of which emit green luminescence. The 6105 dials were originally lumed in white but given the age of this watch I wanted a slightly off-white colour and so made up a mixture of about one part yellow to about two parts white, thoroughly mixed with an equal part by volume of matt binding agent.
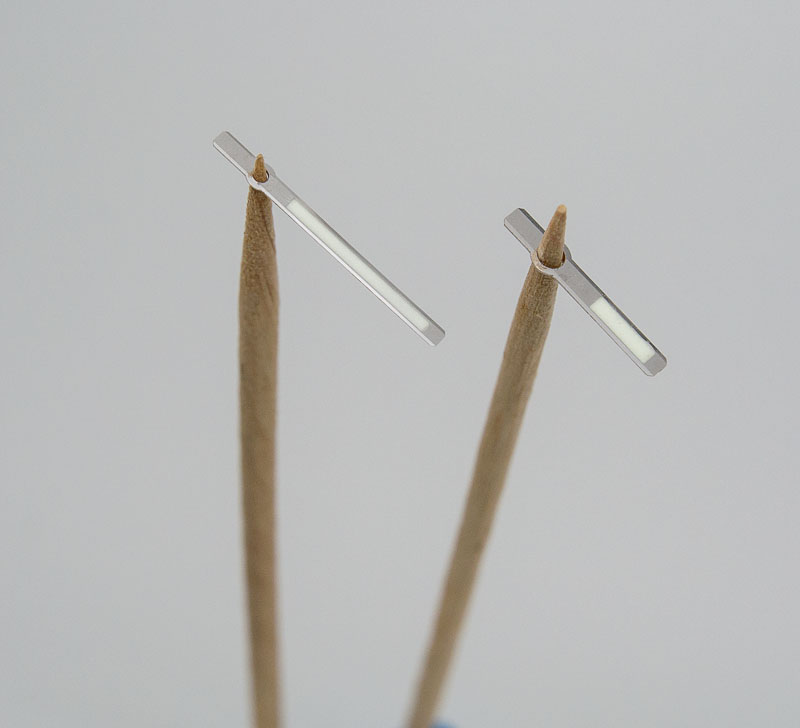
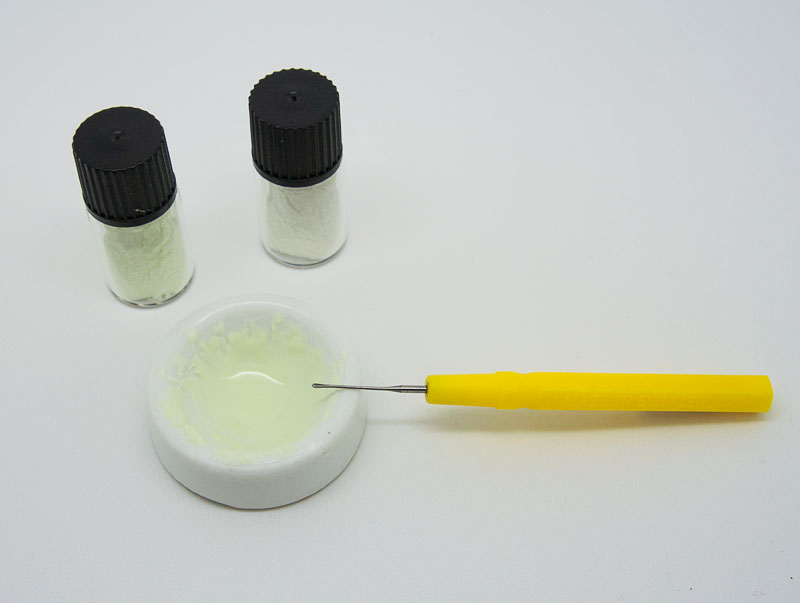 I was conscious that I needed to complete the whole dial in one sitting before the lume mixture started to dry and so I worked steadily around the dial without pausing to take any photos and risk compromising the process. My method was to take a sensible sized blob of lume using the yellow oiler shown above and deposit into the centre of each marker, initially teasing it gradually towards the corners using the yellow oiler, and then into the corners using a finer blue oiler. This approach worked a treat but by the time I had got to the 10 marker (working anti-clockwise) the viscosity of the mixture was starting to increase as it dried. I kept going though and made it all the way round before I became conscious of it affecting the approach I was taking. Here’s an overview of the completed dial, markers still wet on the left hand side and drying on the right
 The trick, I believe, is not, under any circumstances, to allow yourself to be tempted to interfere with the lume once it has been applied and has started to dry. Just let gravity do its stuff, the surface tension helping the lume to assume an even and flat appearance as it dries. Here’s a better view of the drying dial
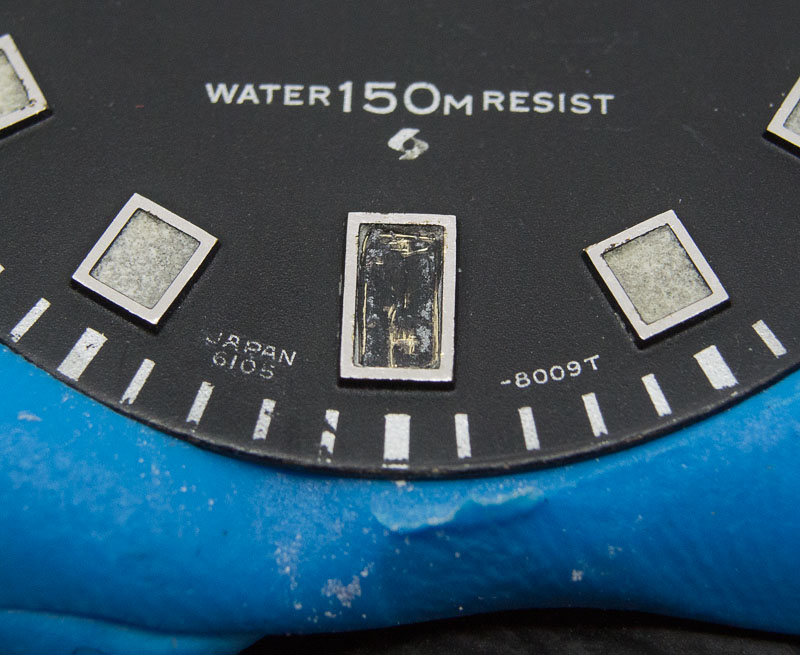
 in which you may be able to discern the contrast between the slightly glistening finish of the lume on the 7, 8 and 9 markers and the flattening matt finish on the drier markers to the right. With the lume assuming something approaching a dried state, we can take a critical closer look. Here are a few of the markers at the bottom of the dial
 and here’s the tricky 12 marker with its twin plots.
 I have to say, this has gone rather well. Somehow, I’ve ended up with a finish which I hope does not too obviously flag the fact that this is a relume. I like the flat matt finish, not quite flush with the surrounds, with a hint of a shadow around the lume edges somehow imbuing it with something of an authentic vintage look.
I turn next to the hands as the previous relume was just a bit too white, not quite matching the off-white colour I’ve used on the dial markers. After a couple of attempts at the minute hand, I manage a finish I am happy with
 followed by the lume pip on the bezel
 With everything done, I tidied up the edges of the hands, left it all to dry for a day and a half and then refitted the dial and hands to the movement
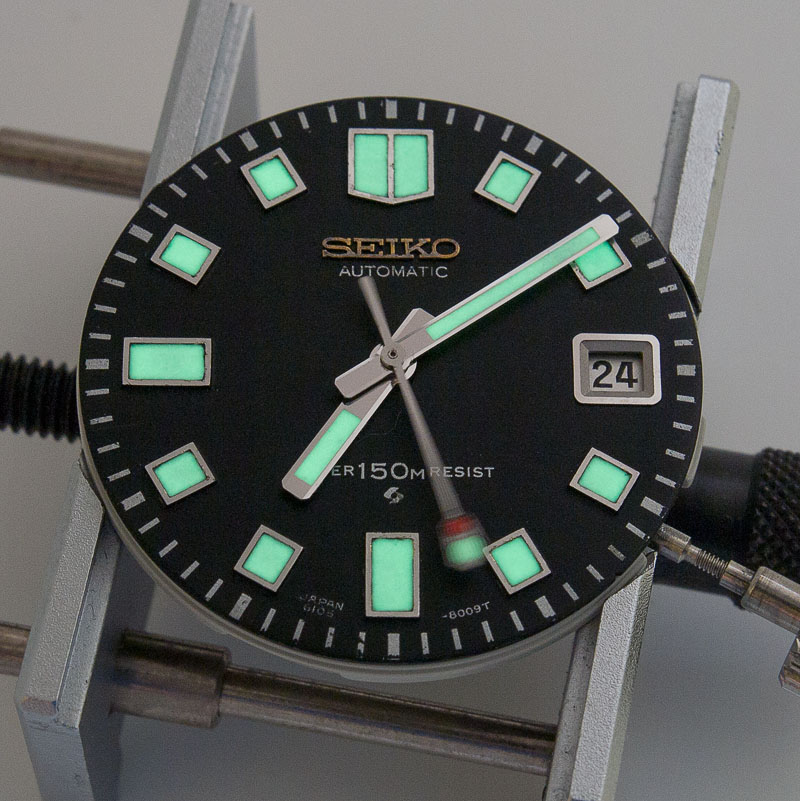
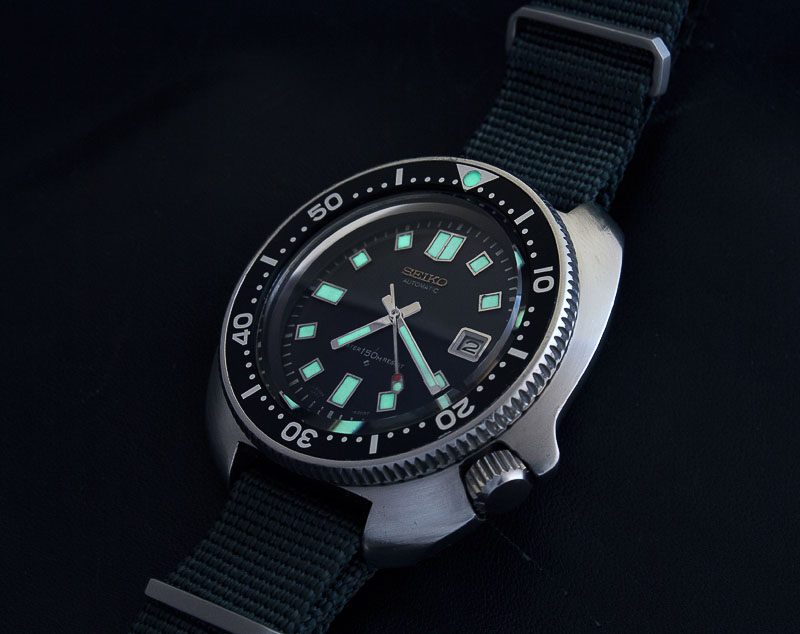
 The luminescence qualitiy of this stuff is not quite up to modern day Seiko Lumibrite but it’s plenty good enough in this application
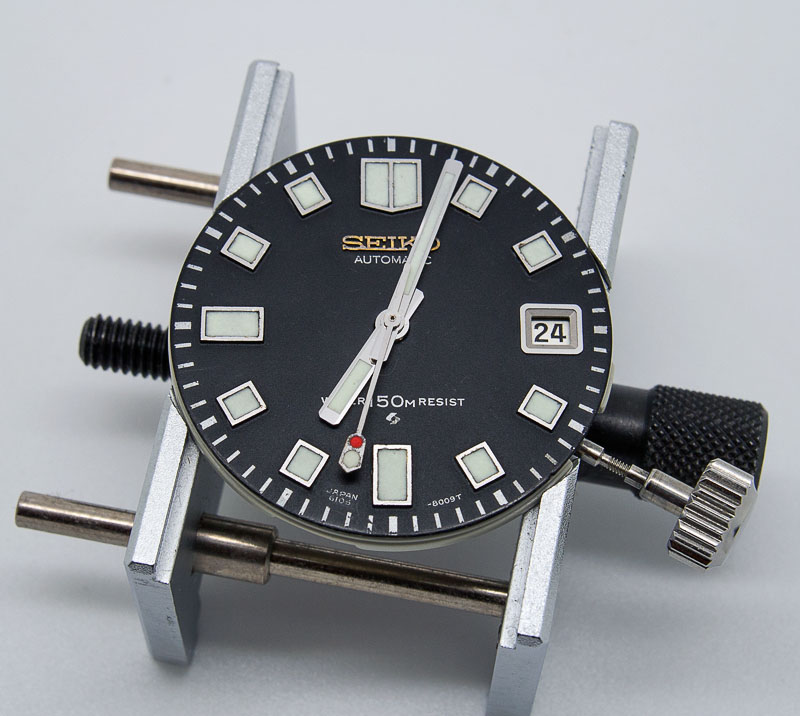
 All that remains is to re-case the movement
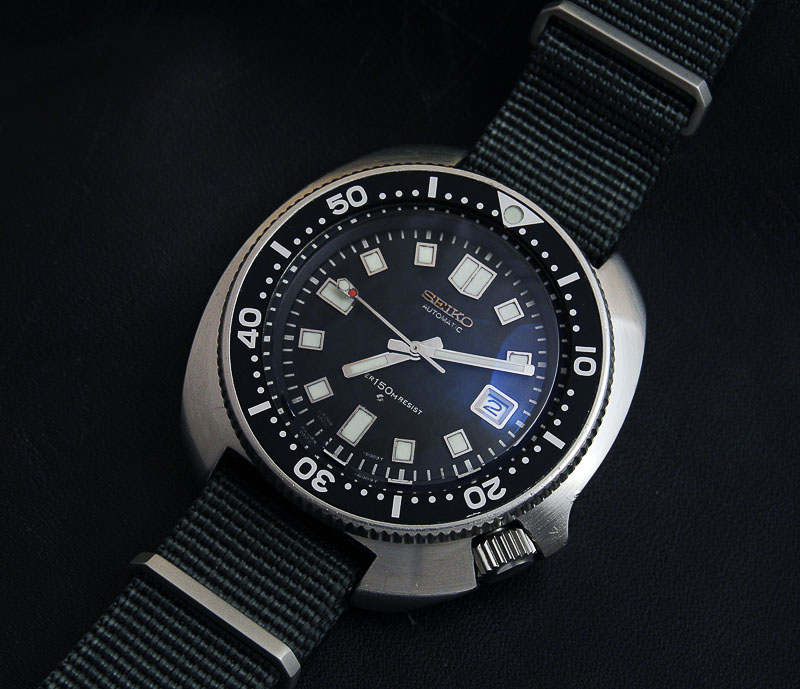
 and take a couple of glamour shots to show off the face lift:

Great job on the lume and the final product is quite a lovely sight. It inspires me to fix the non-luminous paint on the original dial of my 7002-7020. It’s a refurbished, cobbled together piece from the Far East that I got relatively cheaply and have been nudging closer to it’s original state. Looking forward to your next post!
Excellent job, tricky stuff lume and this has come out looking very good indeed.
Hi Martin ace job there my friend, I’d love a dial like that, mine unfortunately has all the minute markers worn off, so I might have to go for a repro dial unless I can find a way to reapply them, anyway well done my friend.
I know I’ve already commented but I’ve just noticed your crown, where did you get that from, obviously it screws down and locks as does the original as you say your piece is waterproof. Lastly how much was it, I have my original crown away with a watchsmith at the moment with a snapped stem still stubbornly refusing to let go, so I might need a replacement crown, thanks for any info martin.
The mid-case features a triplock conversion performed by Randall Benson in the US. When I had the watch tested for water resistance a while after getting it, there was a leak from the case tube and the only solution was to install the triplock. I think I paid something like $200 for the conversion back at the tail end of 2010.
Many thanks Martin, I’m looking around for a stand in replacement as my crown is away getting a stem drilled out (stainless steel stem) and your crown looked like a 6106 so I thought that might just fit mine for the time being.
As with all your work, a fantastic job Martin. Your work is such an inspiration! To relume is always a tricky question, especially when considering resale value. However, in my opinion, a 6105 with original dial and hands, relumed, should hold its value as if it were not in NOS shape, but rather, with a bit of patina and wear, showing that the watch has indeed been worn and used, as it should be. Having a beautiful NOS 6105 that ends up sitting in a safe ends up being a great inheritance to one’s heirs, but not much else. I’m sure the workers building these watches in the late 60’s and early 70’s didn’t imagine much fuss would be made over their products. “Oh, if we only knew then….” Cheers Martin, thanks for posting your work!
Thanks for these kind comments Dan. It is not always easy to form a completely objective judgement on just how successful a particular project has been and so I value the opinions of others a great deal.
Thank you for sharing this Martin. Excellent work as usual. This makes the idea of re luming a bit less daunting although I will definitely practise on some cheap project watches before attempting anything on a better quality watch.
Pingback: Anonymous
Pingback: Metamorphoses | Adventures in Amateur Watch Fettling
Great work as usual Martin. A quick question, you might be the expert to answer this. Is the hands of a 6215 usable in a 6105?
As far as I know, the hand hole sizes are common across most of the Seiko mechanical movements and so 6215 hands should fit 6105. I remember having an issue with the seconds hand when fitting a 6146 movement to one of my 6105s but don’t think there are any size differences between 6215 and 6105.