
Tags
 The first fully fledged waterproof Seiko watch appeared in 1959 in the form of the Seiko Cronos Sea horse fitted with the 21 jewel manual wind Cronos 54/54A movement. That watch was equipped with a two part screw down case back and was rated water proof to 50m. Although it was actively marketed in some sense as a divers watch, in reality its use would have been limited at best to swimming or snorkeling.

Photocredit: http://matic6246.web.fc2.com/
The first automatic waterproof Seiko watches appeared in 1961 as part of the Seikomatic line. Those earliest Seikomatic Water Proof 30 watches bore the now iconic dolphin symbol on their press fit case backs, there to guarantee their ability to withstand water pressure to a depth of 30 m. As with the earlier Cronos, the marketing of these watches featured images of men and women in scuba gear and although a nominal 30m water resistance would appear ample for recreational diving, in reality you would have to be pretty brave to actually use these watches in such an environment.
 Although Seiko were clearly guilty of over-egging the capabilities of these early watches, their longer term intent was clear in the release the same year of the Seikomatic Silver Wave, a striking watch equipped with the same two-part screw down case back as the Cronos Seahorse and good for the same 50m water resistance rating. Here was a watch whose credentials as a diver’s watch were much more evidently on display in its beefy exterior design and in the presence of an internal count-up rotating bezel.
 I’ve written before about the position this watch holds in the history of the Seiko diver’s watch and so won’t revisit too much of that again now. However, if the Cronos Seahorse was the twinkle in the eye of Seiko’s future aspirations as the producer of professional diver’s watches, the Silver Wave marks the point of Seiko not only dipping their toe in the water, but slipping beneath the surface.
The Seikomatic Silver Wave 50m came in four flavours, distinguished by the colour combinations and styles of the dial and bezel. These were:
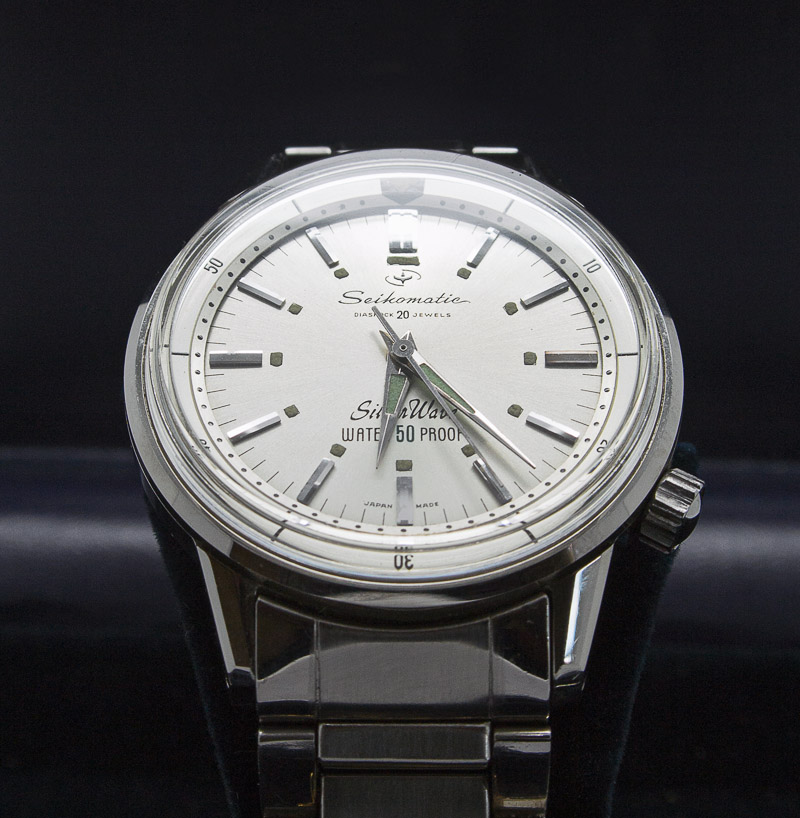
- silver dial with silver bezel (as seen in the photo above);
- silver dial and black bezel;
- star burst silver dial with silver bezel;
- star burst silver dial with black bezel.
The plain silver-dialed watches included the Water 50 Proof text on the dial with Diashock 20 Jewels appearing immediately beneath the Seikomatic logo. The star burst dials omitted the Water 50 Proof markings with the Diashock 20 jewels text shifting down to below the SilverWave script. I have the sense that the star burst-dialed watches are the rarer and consequently more sought after but all combinations are beautiful and highly desirable. Incidentally, there have been some suggestions of black/black 50m combination but the only example I’ve seen looked like a cobble job with a redial. This is all getting a bit geeky and so perhaps it is time to introduce the subject of today’s post: a star burst-dialed Seikomatic Silver Wave 50m from February 1962:
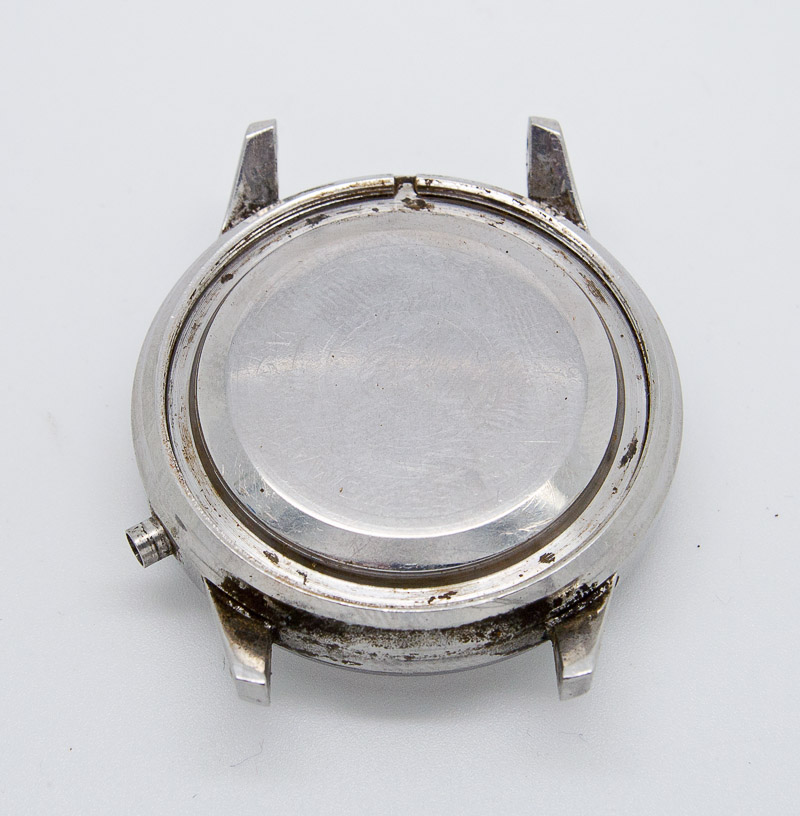
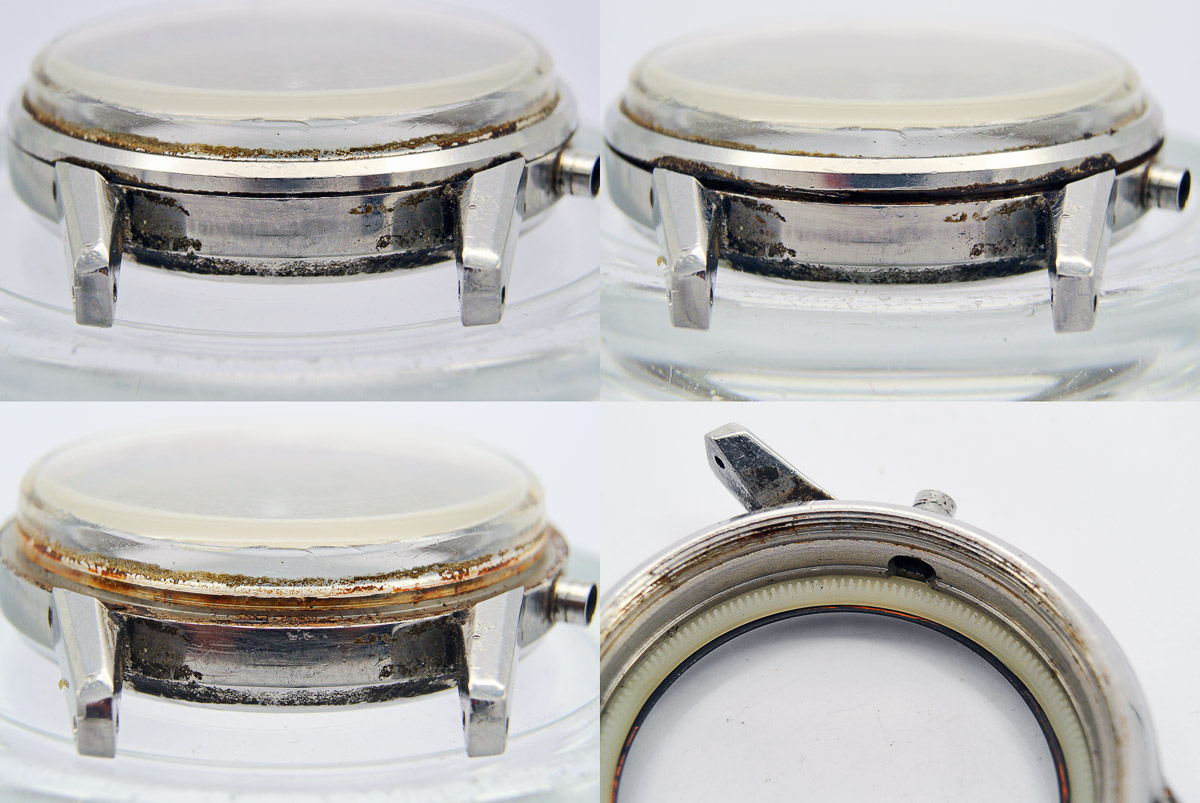
 Obviously, it does not exude quite the glamour expected from our extended build-up but as we know by now, I rarely buy swans to convert to swans, preferring instead to start with the ugly ducklings. Aside from the usual exterior grime, the main obvious flaw is the partially detached marker at 7 but apart from that, cosmetically this looks like a well-used but by no means abused 54 year old watch. Turning the watch over reveals that two-part case back.
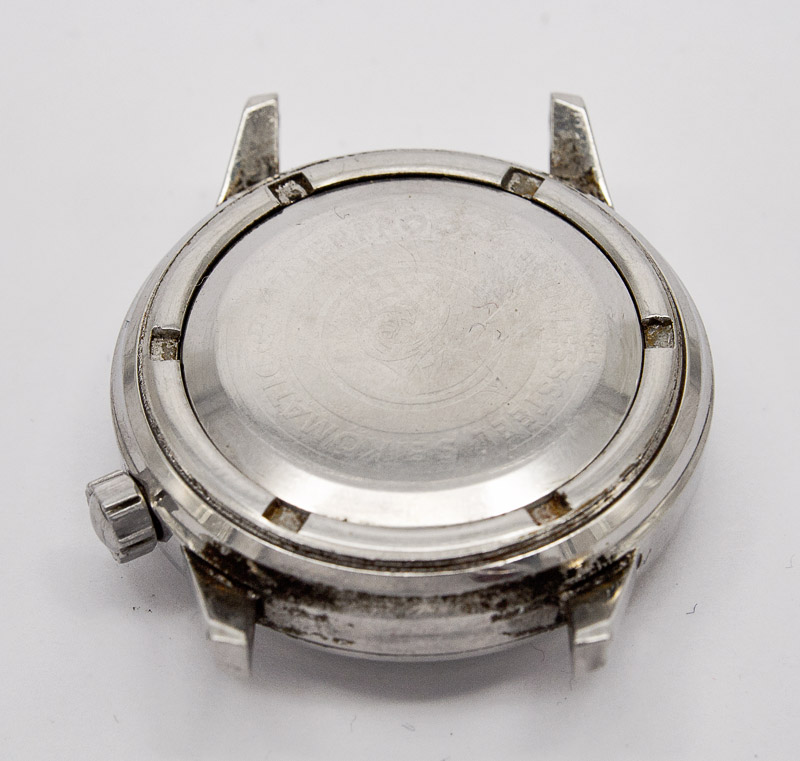 This looks like quite an esoteric approach, the main part of the case back being pressed against the gasket beneath as the separate ring is screwed down. The obvious weakness of such a design is that there are now four surfaces with the potential to trap dirt and corrode rather than just the two with a single piece screw-down back. The truth of that concern is revealed once the retaining ring is removed.
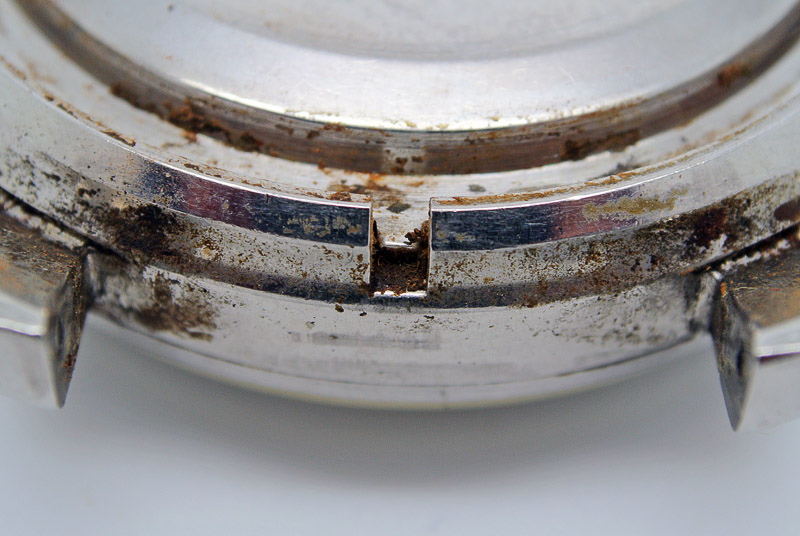
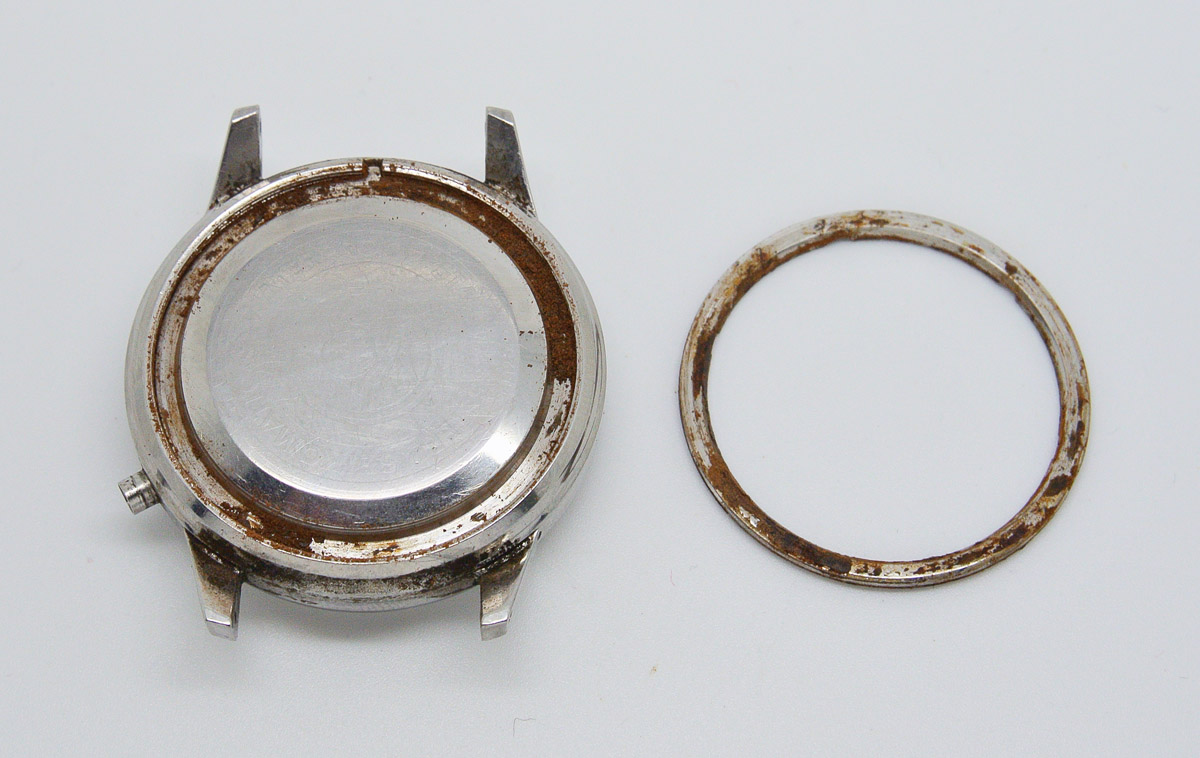 The sheer quantity of iron oxide seems somewhat alarming at first but we must remember that the iron in the steel contributes a smaller component to the rust than the oxygen and water and once it is cleared away, a degree of residual surface pitting looks relatively modest.
 To gain access to the movement, we need to locate the helpful tab at the 12 o’clock position.
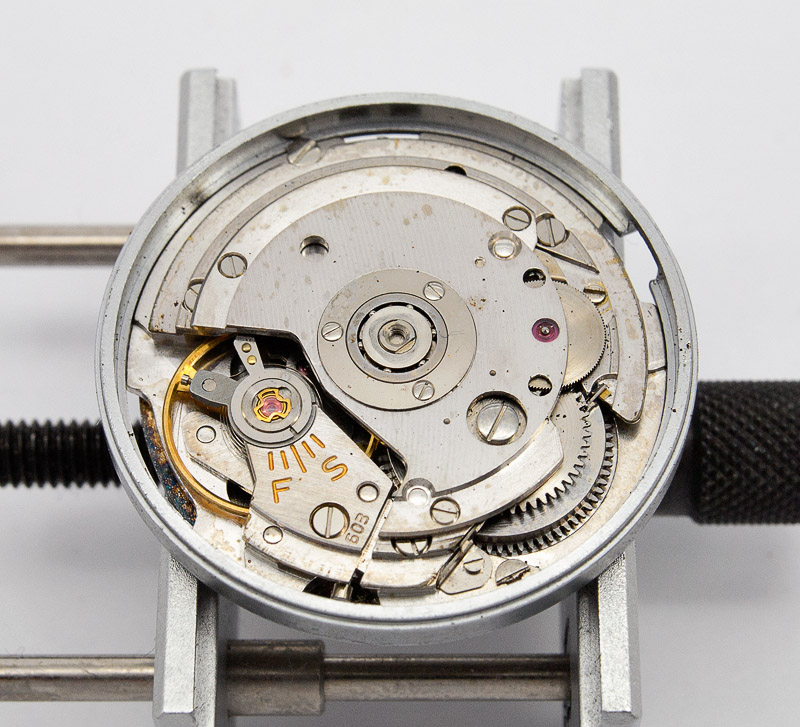
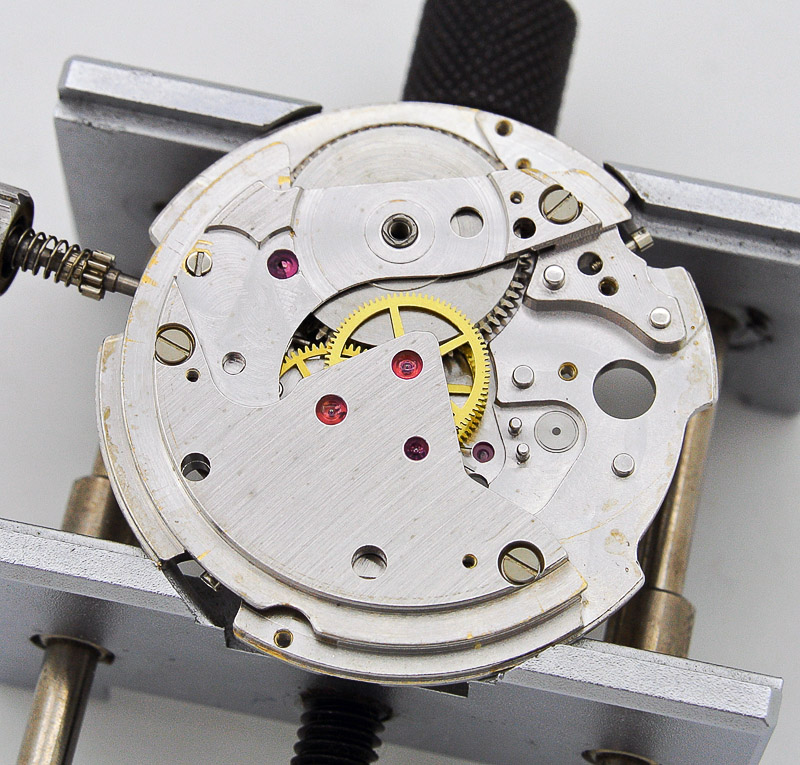
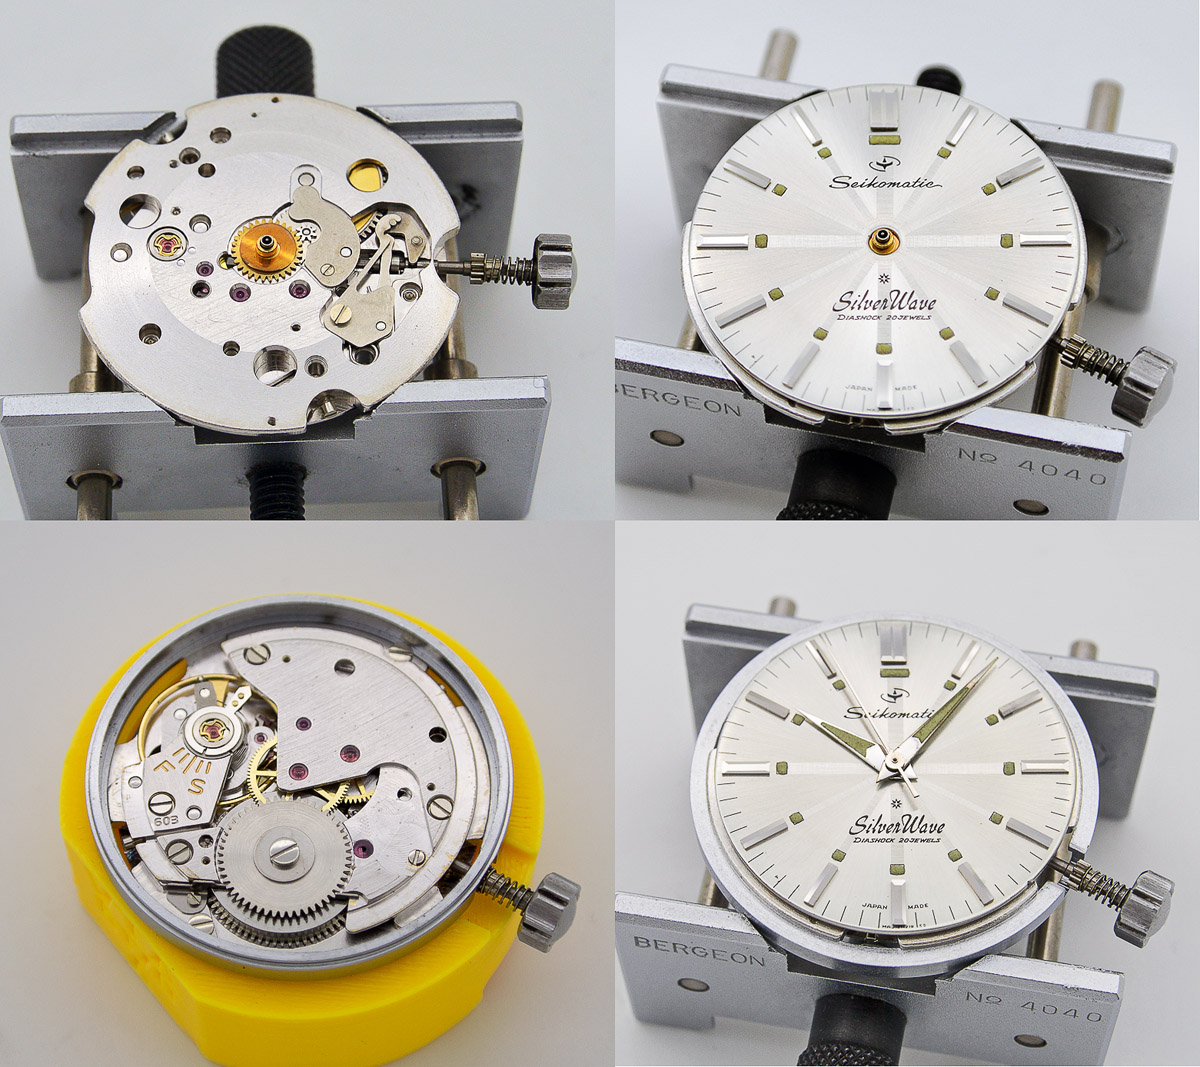
 Clearing away some of the debris and levering up the back and we meet the 20 jewel 603 movement.
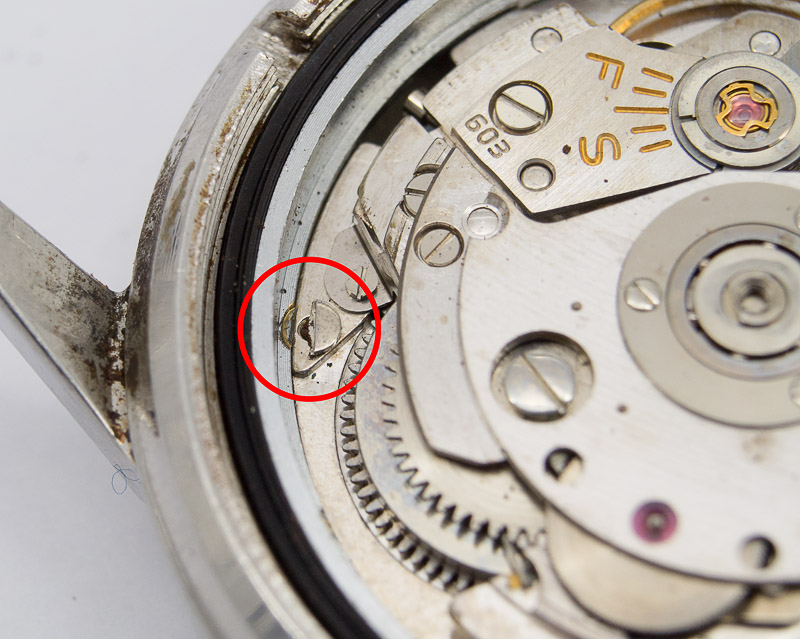
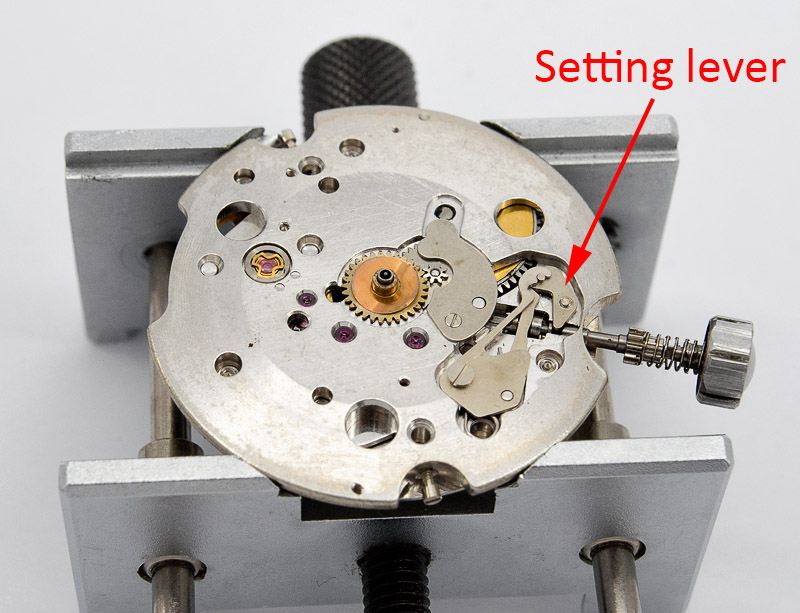
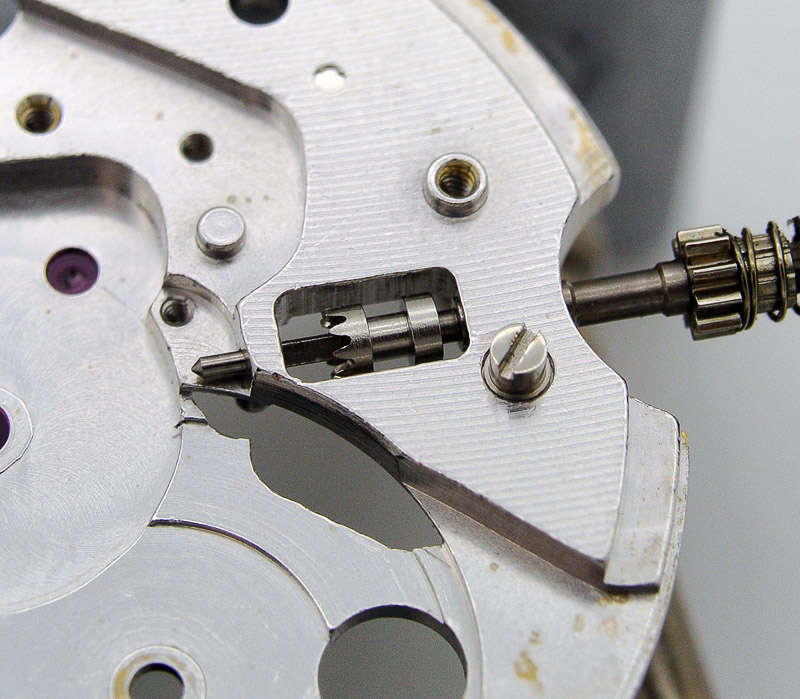
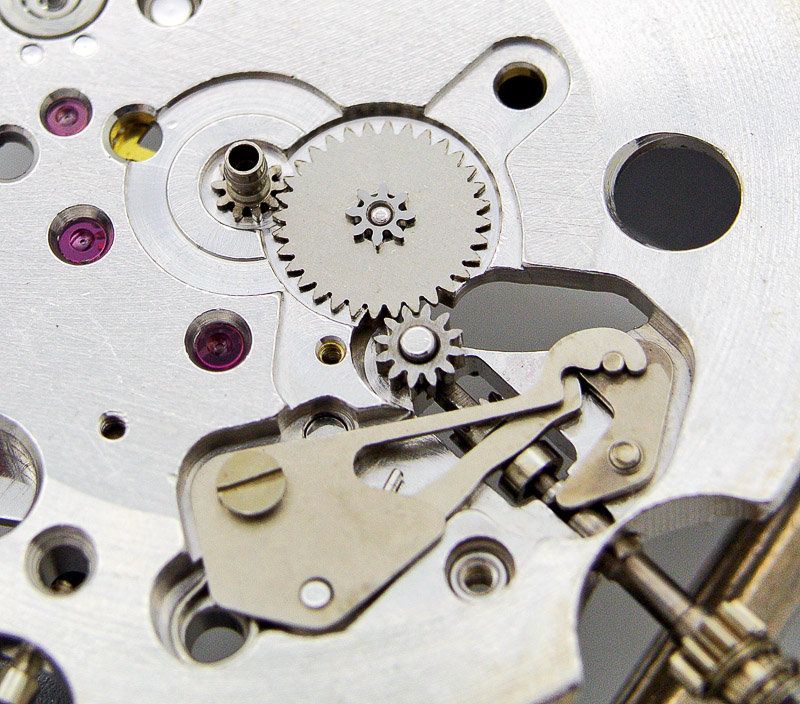
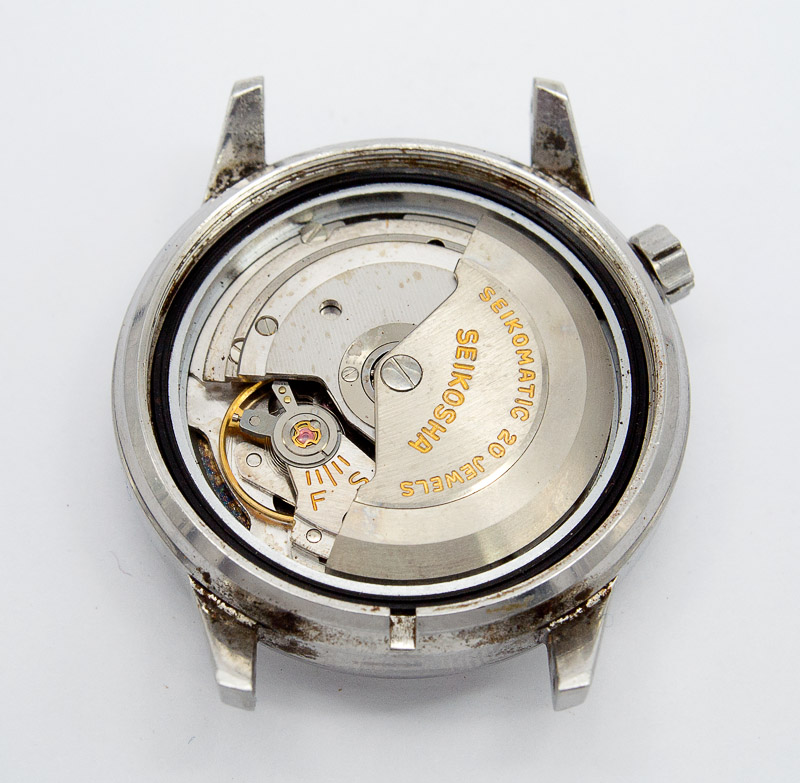 If the appearance looks familiar, that is because it is essentially the same as the later 62 series movements used throughout the Seikomatic line, 62MAS, World Timers and early automatic Grand Seikos. There are one or two notable differences though, the most obvious of which is that the setting lever is not sprung and so release of the stem is not achieved through depression of a button on the balance side but by partially unscrewing a setting lever screw (indicated in the photo below).
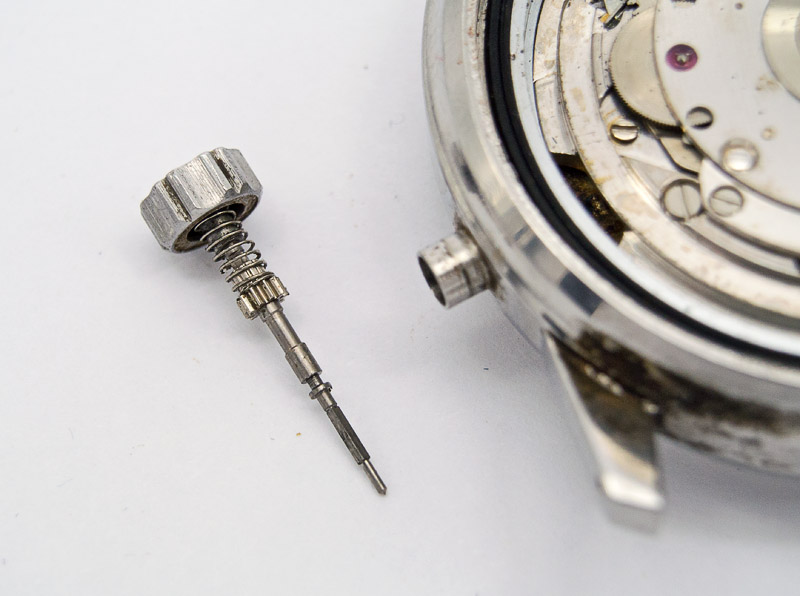
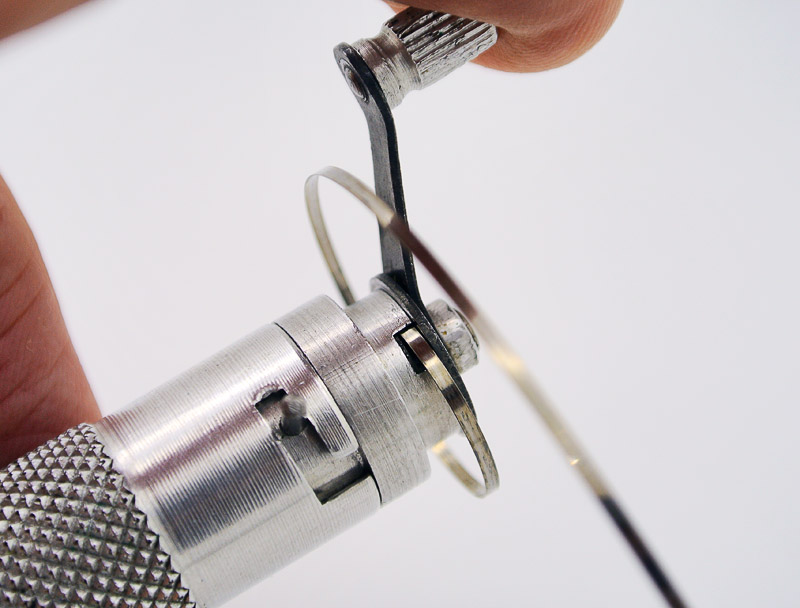
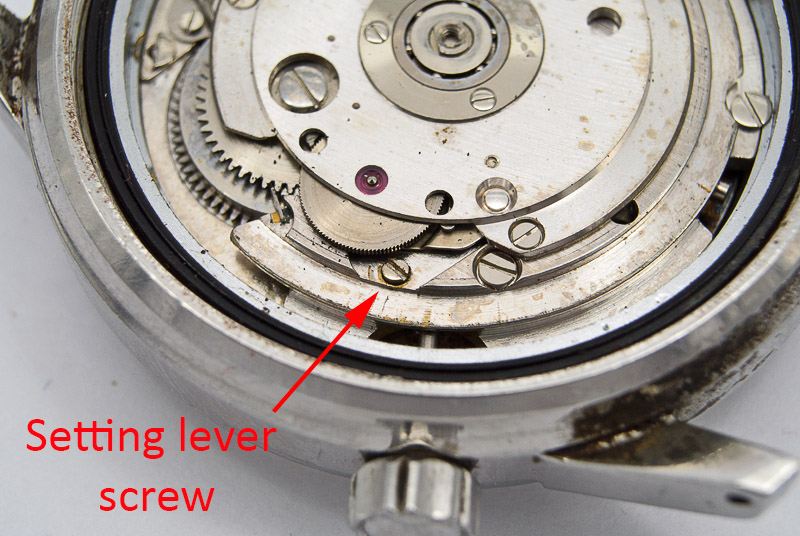 A half turn or so anticlockwise is all that is required to allow the crown and stem to be eased out, revealing the spring and cog at the crown end, there to allow rotation of the internal count-up bezel.
 It is worth observing at this point that the movement was a non-runner and my suspicions as to the cause were raised as soon as I noted the condition of one of the two screws used to secure the movement to the case ring.
 Whenever I see a screw head in this sort of condition, I always wonder – where is the other half? With the crown and stem removed and the case back gasket out of the way, the movement and case ring drop out as a unit.
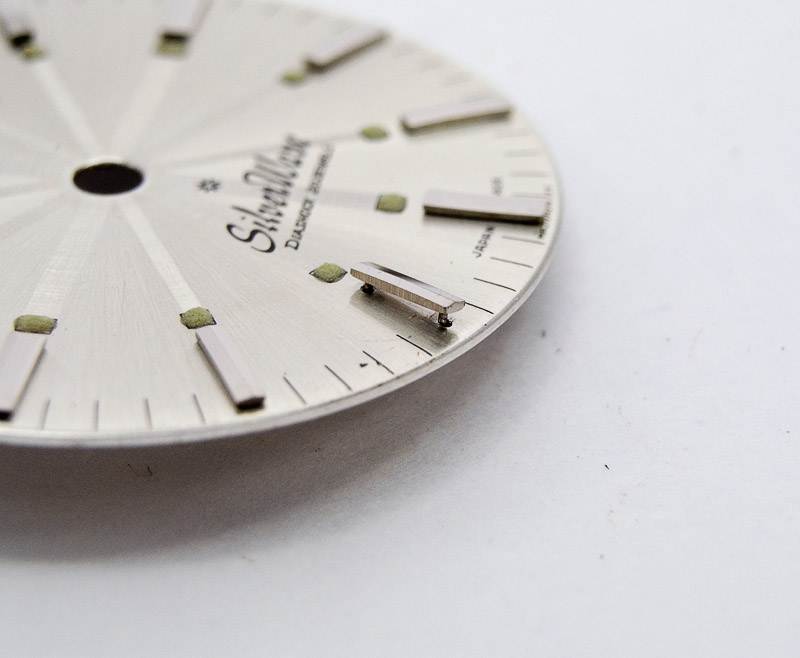
 Access to the dial feet screws requires the case ring to be parted from the movement and we can then take a look at that loose hour marker.
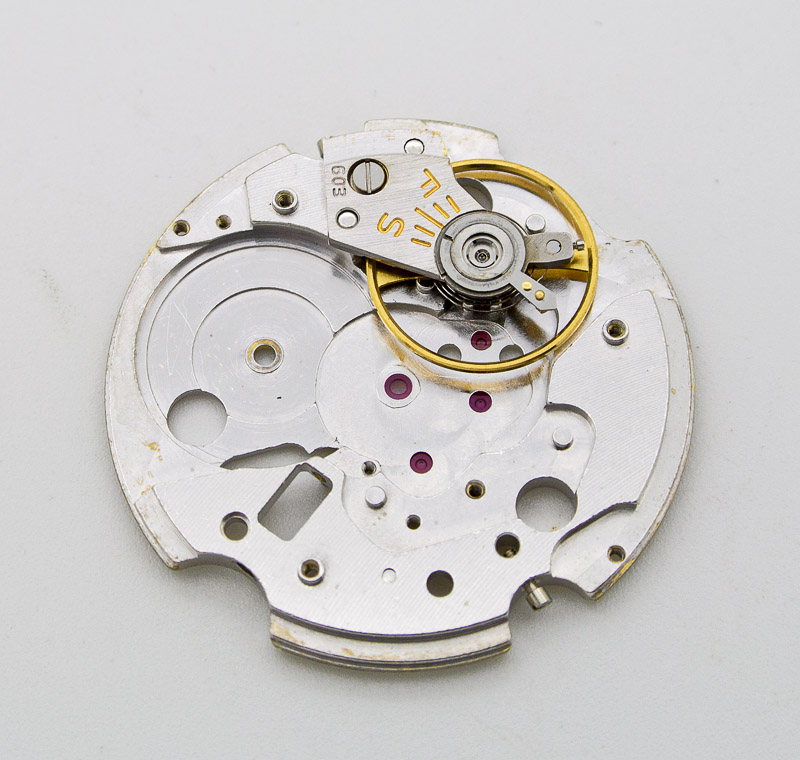
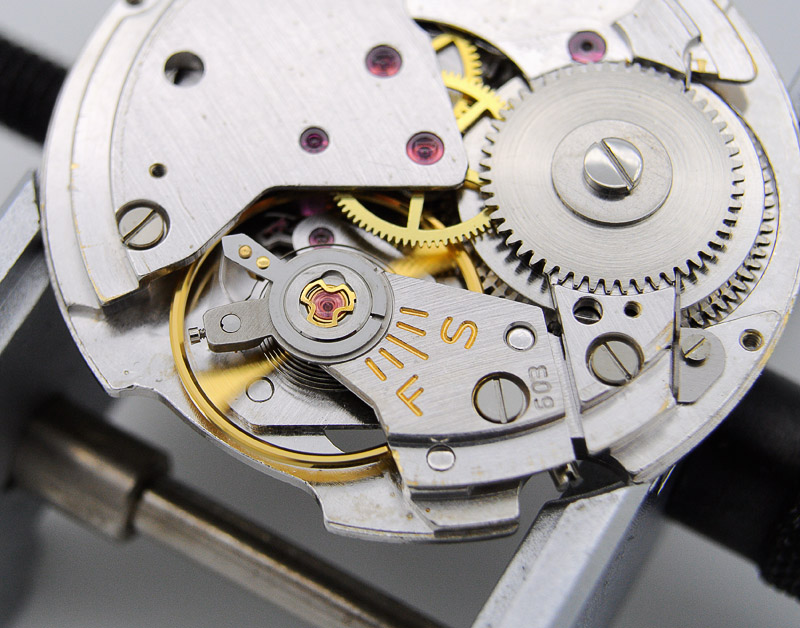
 I set the dial to one side for the moment but plan to secure the marker back into place, probably using GS cement applied from the rear. With no calendar parts to concern us, the dial side of the movement looks plain and simple compared to the dater and weekdater 62 series movements I’ve become accustomed to. Note the lack of a retaining spring atop the setting lever and the threaded end of the setting lever screw poking through.
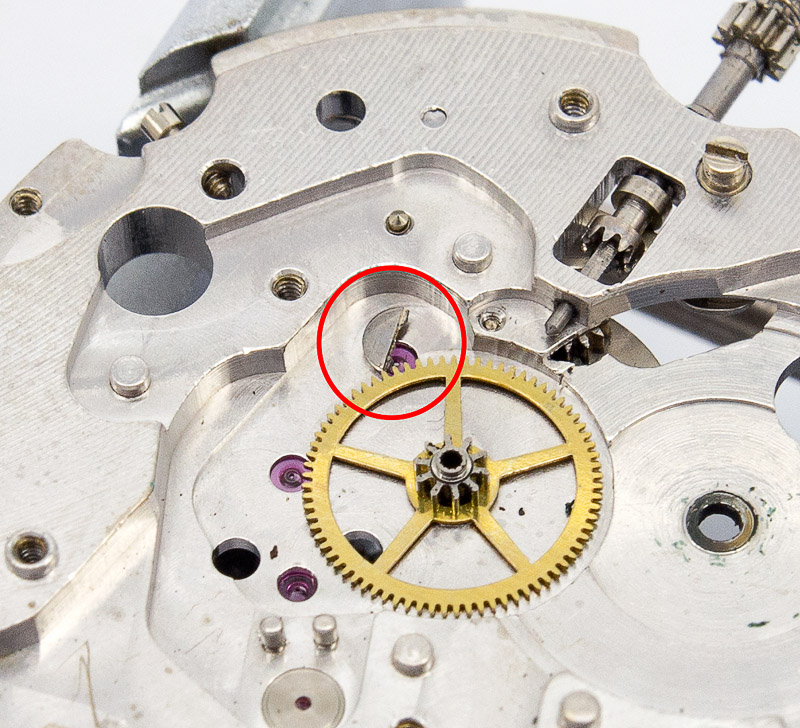
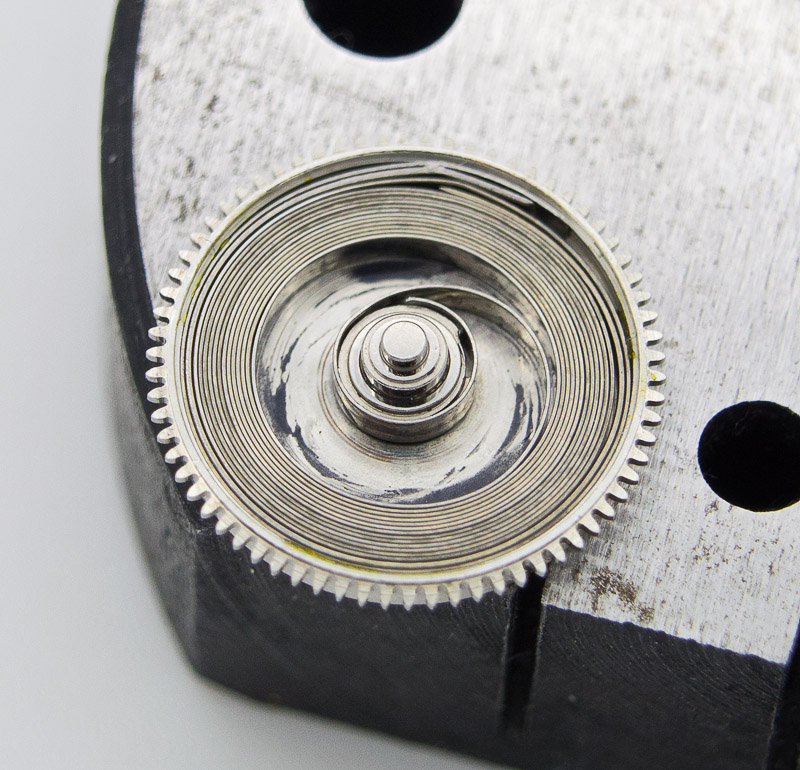
 Dismantling the movement throws up no surprises and no areas of concern other than a sticky balance hairspring. As expected, the second half of that case ring screw head reveals itself sitting adjacent to the third wheel bearing. It had probably jammed against the pinion of the third wheel, stopping the watch in its tracks. Funnily enough, the last time I came across a stray screw head part buried in the depths of a movement was during the servicing of another Silver Wave, that one the later 30m variant (see here).
 The movement is now ready for cleaning and so, having removed the Diashock settings, the balance is temporarily reunited with the main plate before going into the cleaner with the rest of the parts.
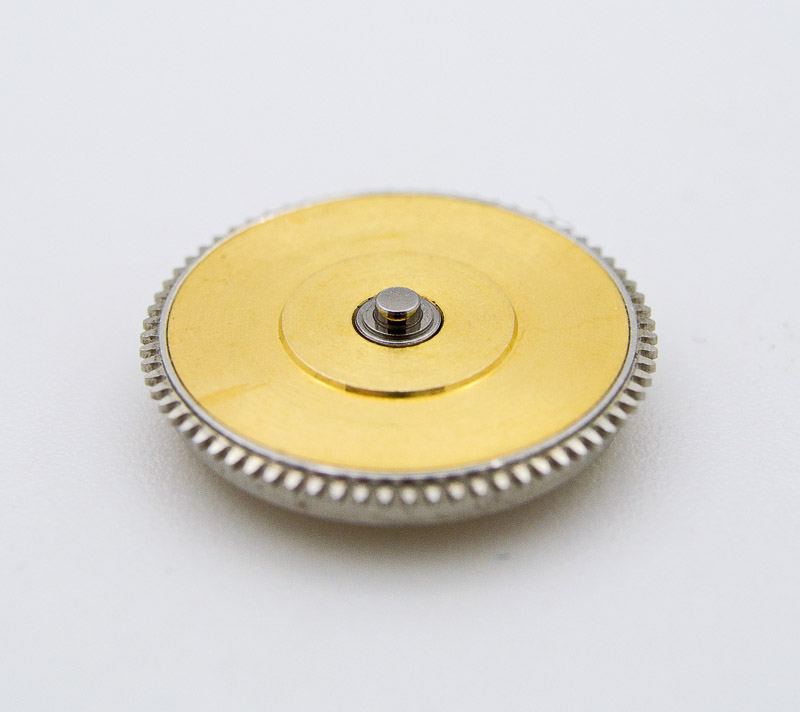
 The mainspring and barrel though have to wait their turn, to avoid cross-contaminating the rest of the parts with molybdenum grease residue.
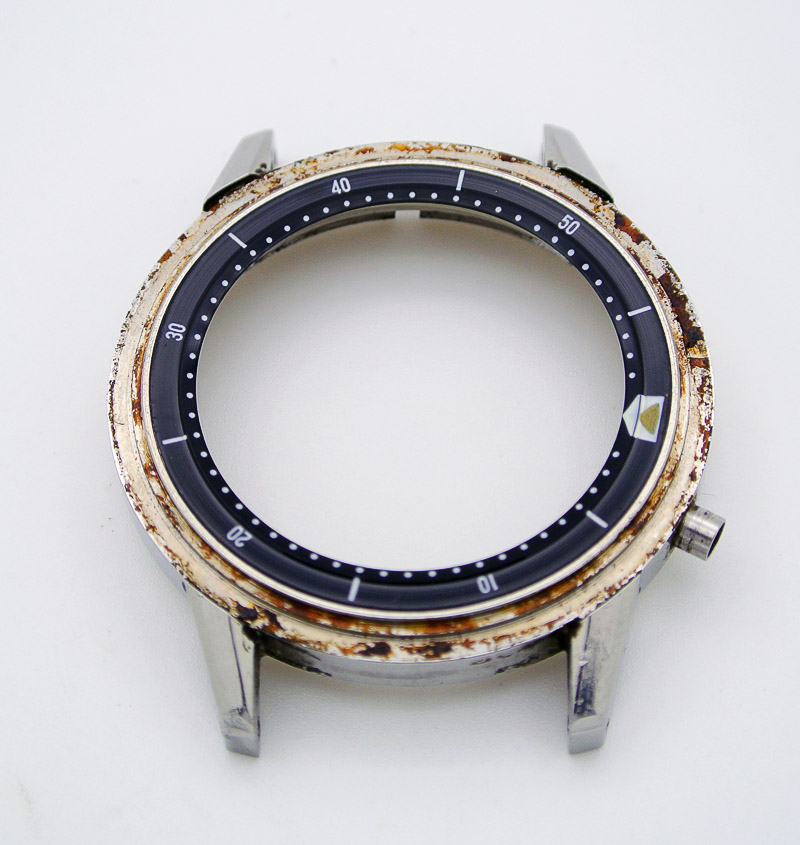
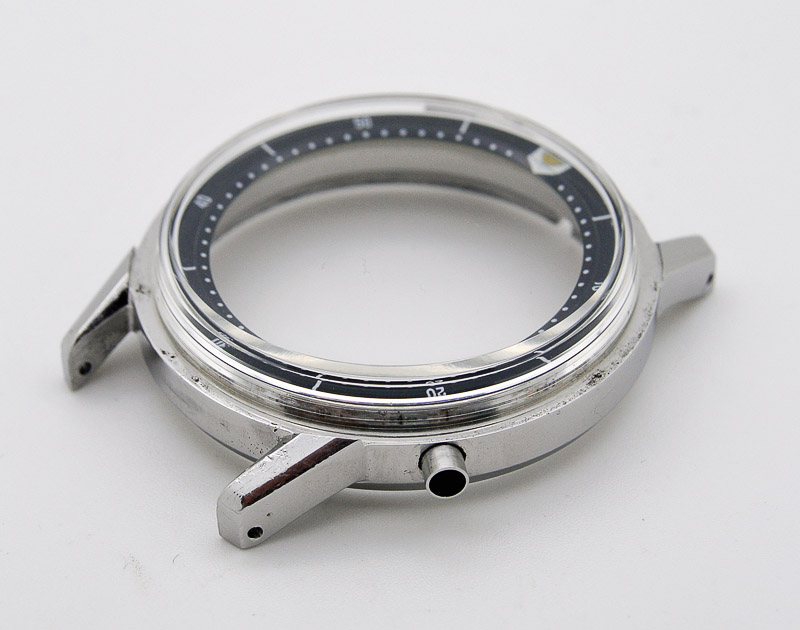
 It is time now to start dismantling the case. The first order of business is to prize off the external bezel which allows us to observe that, rather than using the internal tension ring of the later 62MAS, this earlier watch, in common with models such as the Seikomatic 6206 weekdaters, uses the bezel itself as an external tension ring, pressing the acrylic crystal against a lip on the case.
 Removing the crystal provides access to the internal count-up bezel whose condition is excellent with nice even patina to the lumed triangle and very few signs of aging or wear to its surface.
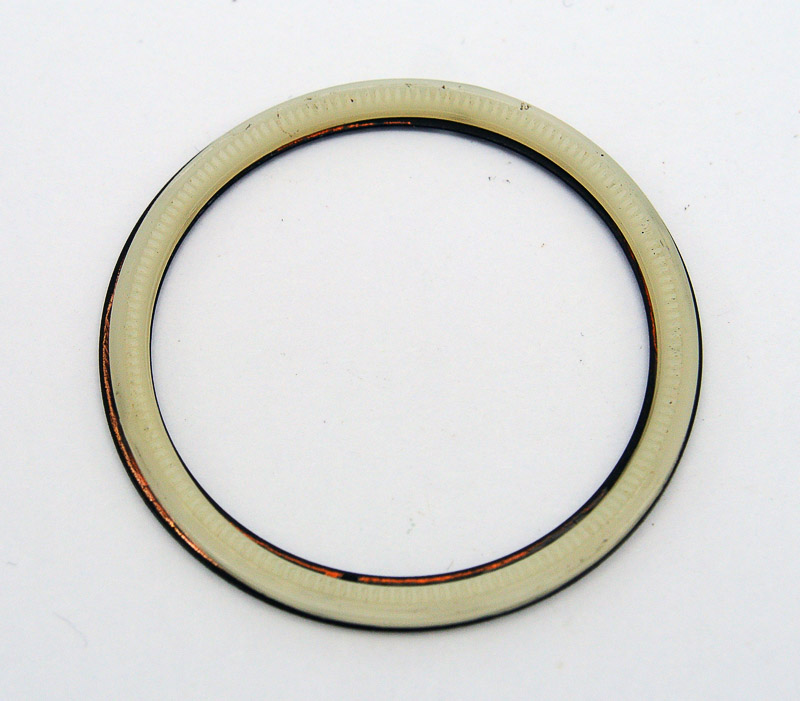
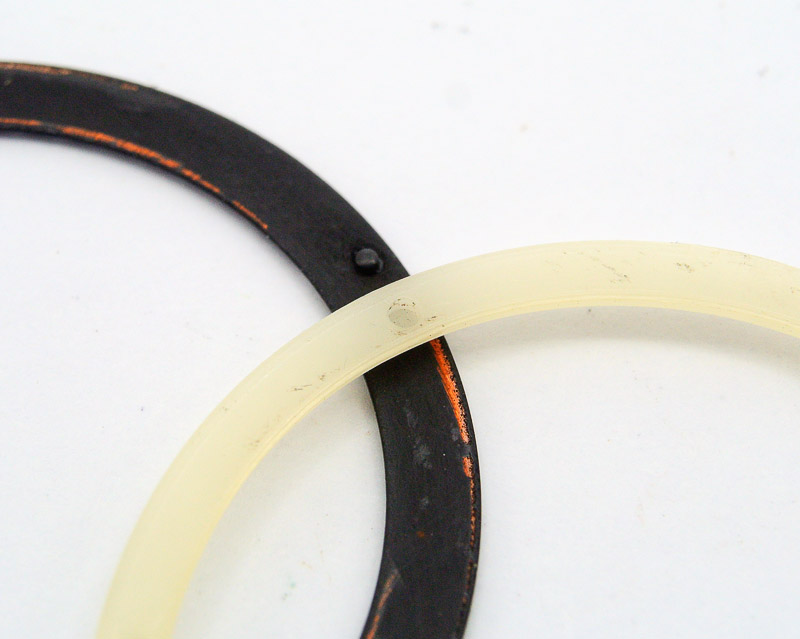
 Obviously, the case itself needs a good clean but is pretty sound otherwise. The bezel comes out as a single piece where normally I might expect the upper part to come away first. This turns out to be because the plastic lower part has shrunk slightly over the years and in order for the two locating pins on the underside of the upper part to locate in the dimples in the lower part, the plastic ring has had to be distorted slightly out of true.
 I wondered at first if they’d been glued together but some gentle encouragement soon saw them parted.
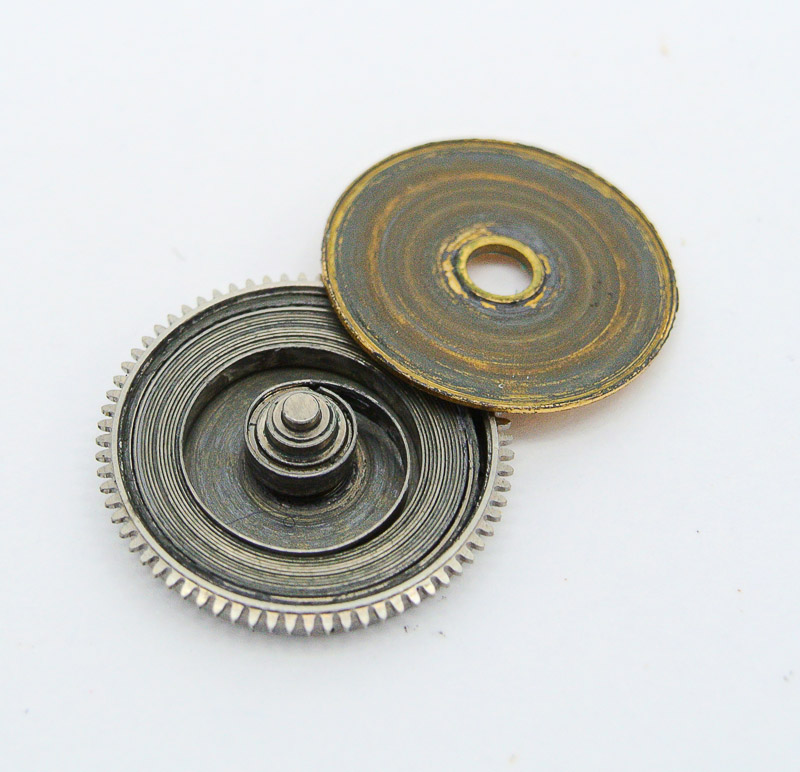
 With the movement parts clean, I start proceedings as usual with the mainspring.
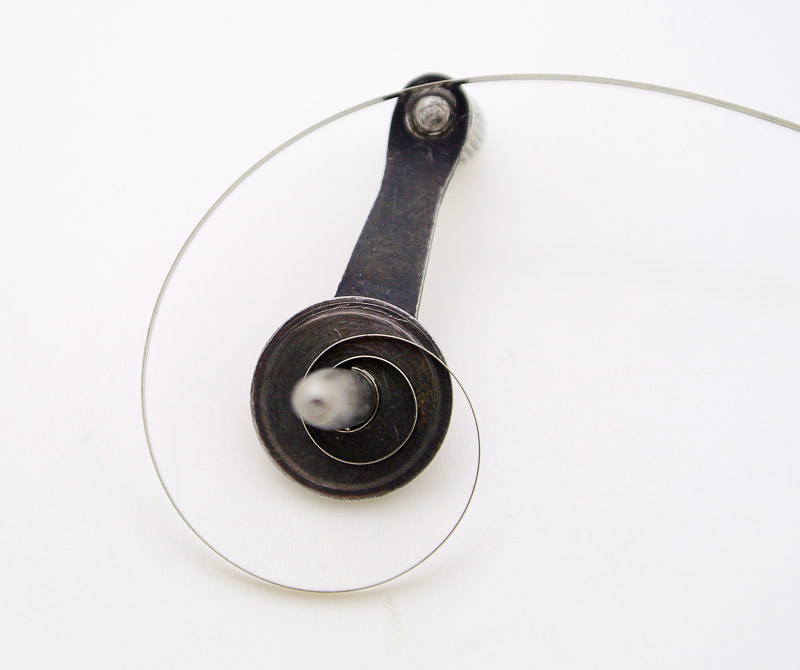
 As you can see in the photo above, the shape of the mainspring looks crisp and even, no kinks, no distortion and the promise that it retains a good portion of its original power. I thought I might document the process of getting the spring back into the barrel in a bit more detail than usual so here we go. The first step is to thread the tapered arbor of a suitably sized winder through the terminal coil of the mainspring, taking care to make sure it goes in from the correct side.
 The arbor has a small raised tab which should find purchase in a rectangular hole at the end of the spring. The winder is then inserted into the handle making sure that the spring finds the slot in the drum through which it needs to be wound.
 A degree of dexterity is required to wind in the spring, a steady even rotation required, with the tip of one’s left little finger keeping a slight pressure on the pusher at the end of the handle to ensure that the spring winds in flat. As we approach the end, we need to thread the bridle into the aperture to avoid bending it back on itself. The winding then continues until the last of the bridle finds itself inside the winder drum.
 Release some of the torque and then gently reverse direction whilst slowly extracting the arbor. Sometimes the blade of a scalpel can help prevent the mainspring coming out with the winder arbor. Once it has been successfully extracted, we are left with the mainspring nicely wound into the winder drum.
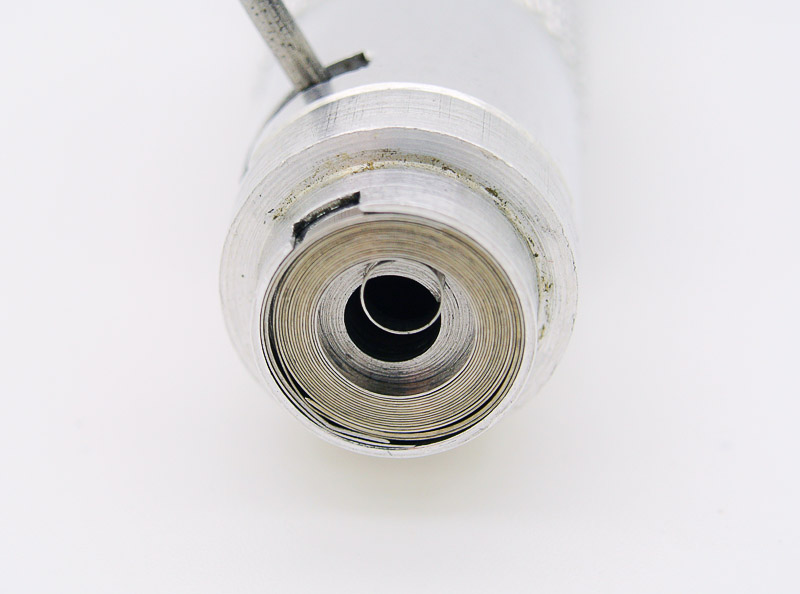 The next part of the process is to insert the winder drum into the pre-lubricated barrel, press down the pusher and in she pops.
 Finally, the lid goes on and we are ready to get on with reassembling the movement.
 Much of what follows is familiar territory but it is worth taking a movement to document the assembly of the setting works. First step is to fit the clutch wheel and stem and then insert the setting lever screw.
 I’ve added a dab of lubricant to the side of the screw to keep it in place for when I turn over the movement to fit the setting lever. This is a bit of a fiddly operation as the lever needs to be held flat against the main plate whilst screwing in the screw from the other side until its thread gains purchase on the lever.
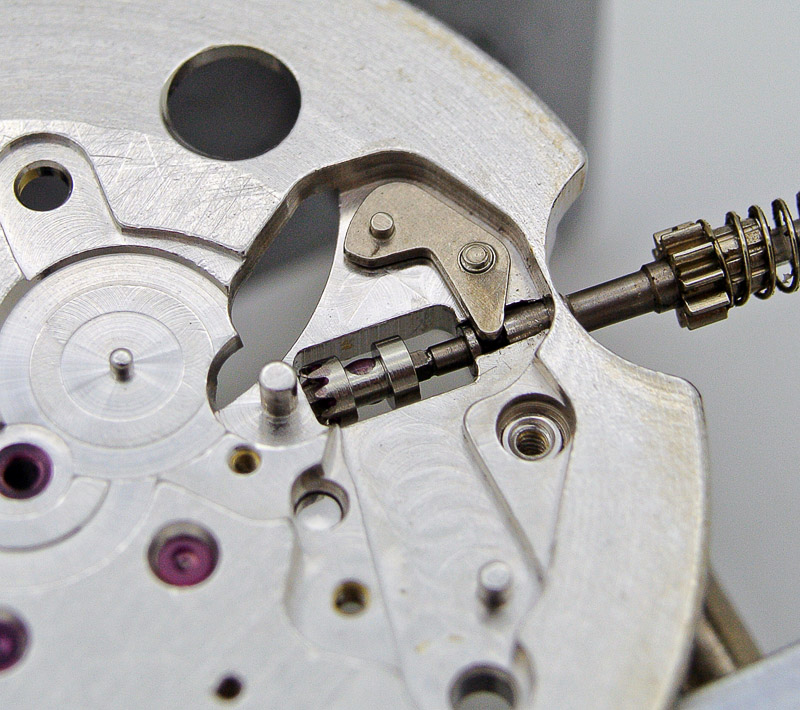 Next, the clutch lever and its spring, again a slightly perilous operation until the setting lever spring can be screwed into position.
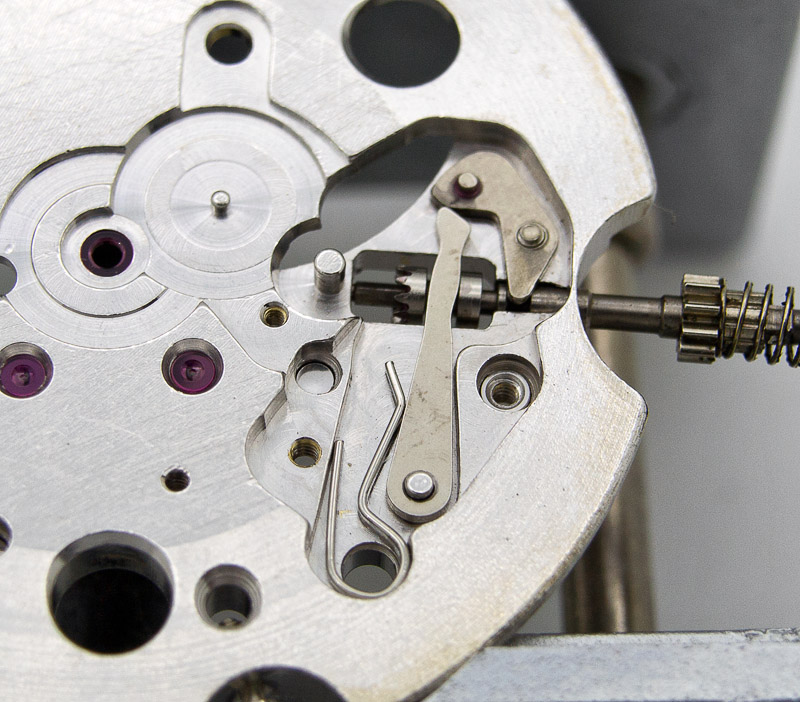 Let’s pause to take in the completed keyless works together with some of the setting train.
 Assembly of the balance side goes smoothly.
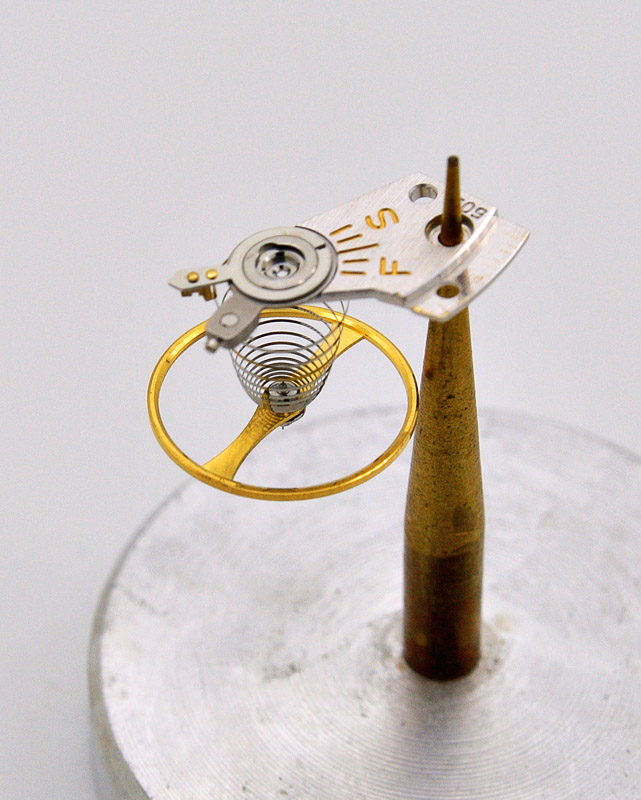
 But a slight snag with a still sticky balance hairspring requires manual intervention, followed by another go in the ultrasonic bath. Here’s the balance cock with balance wheel suspended below whilst I dry it out after its second round in Essence Renata.
 Fitting the balance and shock jewels, a couple of turns of power into the hairspring and the movement springs into life, balance wheel swinging lazily away at a steady 18000 beats per hour.
 Before I can refit the dial and hands, I need to sort the loose 7 marker. One attempt to glue it back into position with GS cement failed, the glue not being fluid enough to flow into the holes into which the pins of the marker sit. Another attempt with lume binder pays dividends and once it is dry we are all set. The dial goes on first, then the case ring, then hands.
 Meanwhile, the case has been sanitized, cleaned and prepped for receipt of a brand new crystal. The correct crystal code for this watch is MA34W but these are only available in Japan and only then only infrequently. The next best fit is the 341W02AN for which there is still a thin supply through watch materials houses and so this is what I opted for. Aside from a minor difference in external profile, the 341W02AN comes with a tension spring whose purpose with this watch appears to be redundant. The only possible role would be for it to sit around the outer edge of the internal bezel, but in position it partly obscures the bezel and prevents it from turning to boot. So the spring remains out of play and the crystal presses into position.
 The case bezel should then press into place but the outer diameter of the crystal is just a shade to large and so I have to reduce it slightly to allow the bezel to press home. We are set now to fit the movement, crown stem and fresh case back gasket.
 And we are finished. The final step is to fit the case back, and find a suitable strap. Rather than going for a vintage tropic, I opt for a caoutchouc natural rubber strap, partly because it is the only suitable 18mm strap I have to hand but mainly because they are so comfortable.
 One more to finish, showing off that dazzling dial to good effect.
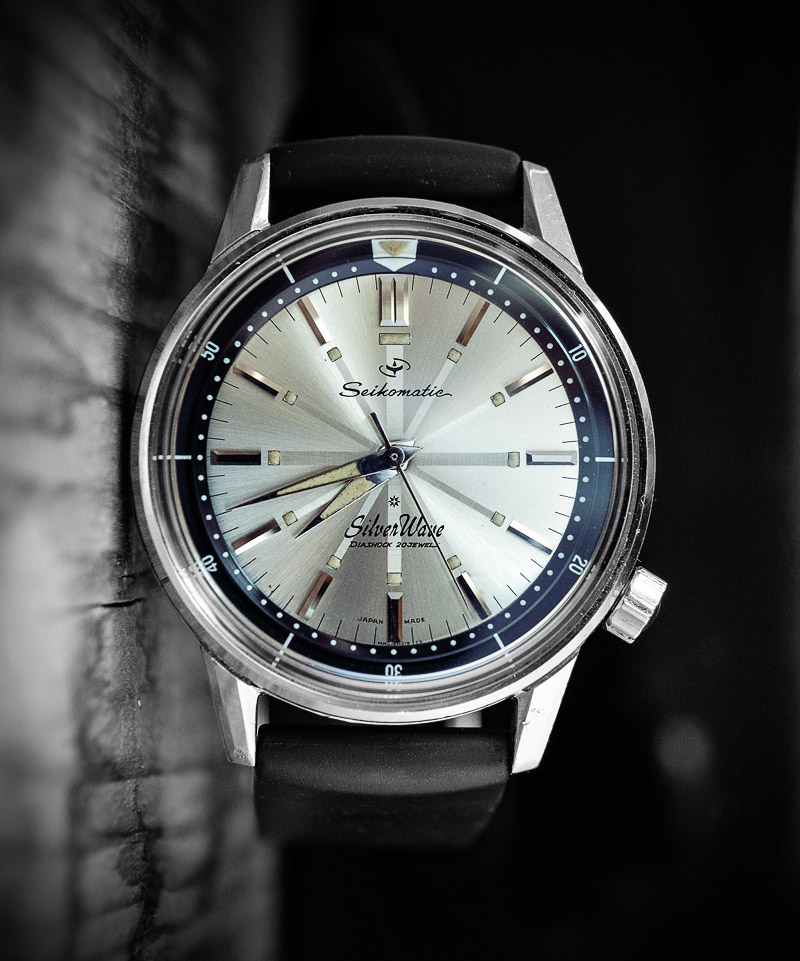 This is one of those watches whose pedigree shines through, whose immaculate design marks it as a proper classic. In particular the star burst dialed versions are truly special, although truth be told, those radial lines render the watch face all but illegible unless your near sight is perfect and the light plentiful. I can forgive it that flaw though because in this watch we have the grand daddy of all Seiko divers’ and a beautiful and remarkable watch in its own right. Bravo Seiko.

This is probably the most elegant yet exciting designs in watches that I’ve seen to date.
I’m humbled by your level of detail in sharing your restorations. Thank you!
My pleasure. I’m glad you enjoyed the post.
marvelous indeed…good job boss!!
I’m not quite sure on which post I should say this, but this seems as good as any – I’m so grateful that I can across your blog. I have long had a love for Seiko, and through your blog I’ve come to realise just how special these early watches were, how innovative in design and how lovely the early movements were. But most of all I have loved your writing and photography, I think that your sharing of all of this gives such a fine body of information to future and present collectors and you do so with generosity and style. You are clearly enormously talented, as a watch person, a restorer and especially as a writer. Thanks so much for making this material available, it’s very special.
Peter, many thanks for this. It is always greatly uplifting to get some positive feedback from time to time and so I am grateful for your comments. The outside perspective of readers of the blog does not necessarily reflect the gory reality of the process from my point of view. Sometimes, things go smoothly, sometimes not and so I don’t really know to what extent talent plays any role. What I do try to do however, is to present this from the perspective of someone who started out wholly ignorant and who has acquired some degree of competence as a consequence of giving it a go and learning along the way. If that entertains or engages, then that’s all I could hope for.
Pingback: The Seiko EL-370 electronic watch | Adventures in Amateur Watch Fettling
such a beautiful watch, not just the dial but the entire mechanism. I’m curious to the dimensions: thickness, diameter and lug to lug. I expect its much more petite than modern watches.
I’ll measure it tomorrow but it’s a decent size – maybe 37 mm diameter.
Wunderful read of a beautiful watch. I have also a J12082 Silverwave, build Oct. 1961, which movement I have rebuild. Came along some problems, (broken pallet fork jewels on the main plate and pallet cock, a faulty second hand wheel). As I do not have jeweling replacement tools, I opted for a movement swap of a junker I had lying around.
Also a 603, but a bit other design. It appears to happen, there are 2 designs of bridges. Your version is the 1 bridge version, the second version is a 2 bridge design (1 for the train bridge, 1 for the barrel). Mine had the two bridge design, but could not swap the bridges. So a 1 bridge design it is now… But it runs great, somewhere between 265° and 280°, depending on position. Can’t complain about that, with the original main spring still in it!
Pretty good indeed. Well done!