
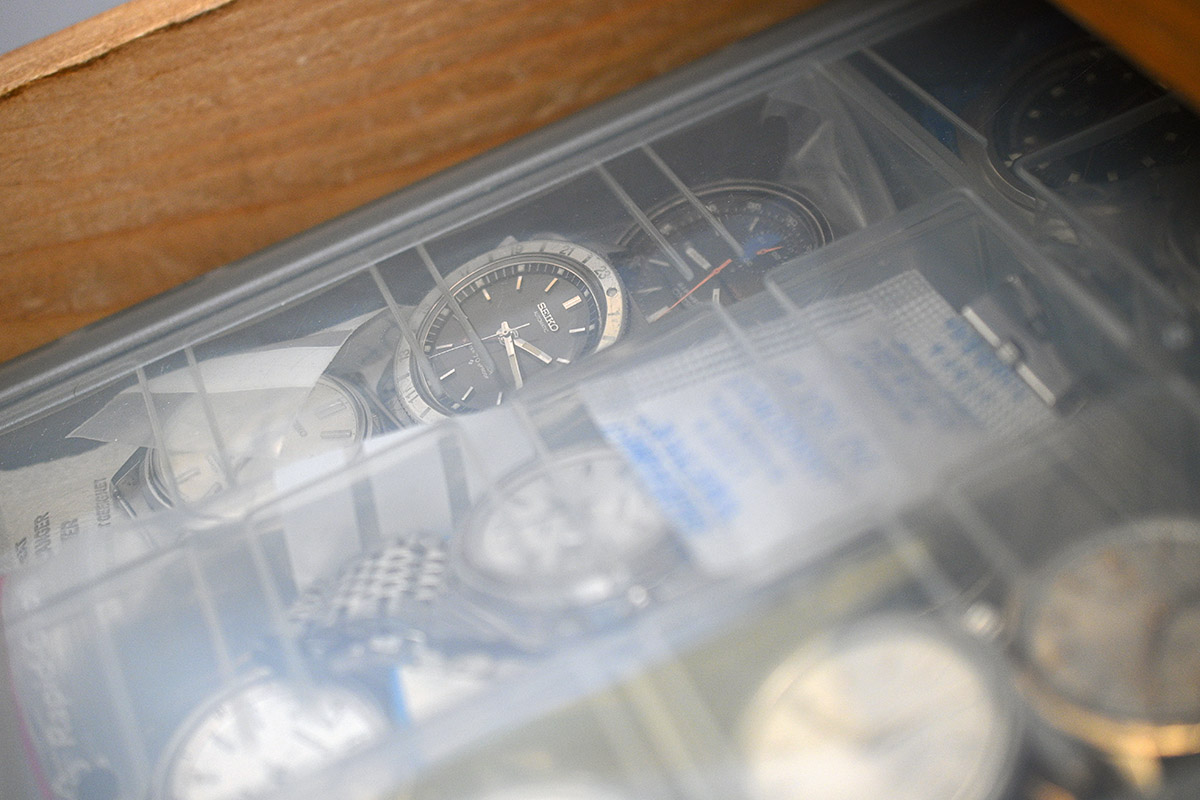
In the second drawer down on the left-hand side of my desk sits a box, thirteen by nine and a half inches (34 x 26 cm). This box is the repository for about four fifths of eighty or so project watches in waiting. As readers of this blog might imagine, the lion’s share of these watches is Japanese. The oldest dates from 1963, the youngest from 1981. They include eighteen Seikomatics of assorted flavours, thirteen King Seiko, eight assorted quartz including two Grand Quartz and three 150m diver’s watches, five Lord Matic, five Seiko 5 Sports, four Grand Seiko including one 44GS, one Self-dater and two 61GS, four Bell-Matic, four automatic chronographs, two Navigator Timers, one Sportsmatic, one Lord Marvel, one Omega Seamaster, one 39 jewel Girard Perregaux, one Seiko Sea horse and numerous assorted sundry that I’ve not catalogued.
That is an embarrassment of riches, but also an embarrassment. At the current rate of progress, I could quite easily have been dead for several years before completing the final project (assuming that acquisition of new projects continues). My diversion into YouTube superstardom (irony alert) has resulted in something of a hiatus in terms of the usual format and mode of presentation and so I felt that a palate-cleansing project or two was in order to get me back into the groove, to find my rhythm once more. There are some splendid watches in the collection detailed above but for me, the pleasure of any particular project bares little correlation with the desirability, rarity or value of the watch. I get just as much pleasure from reviving something humble and tatty as from something rather more elevated in status. The most important factor for me is that each watch talks to me in some way, exudes a personality or a design feature that makes me want to pick it up and run a thumb over its surfaces.
All of this rumination brings us to the first of two warm-up projects, starting, I think appropriately, with the most humble of all the watches residing in drawer number two.
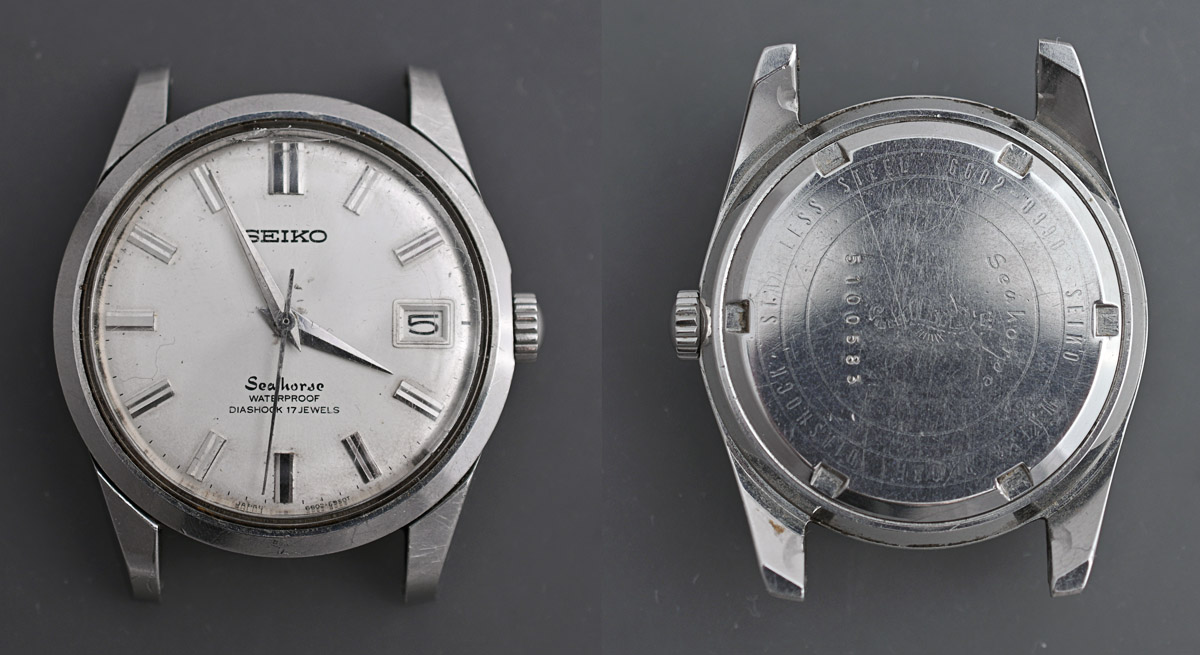
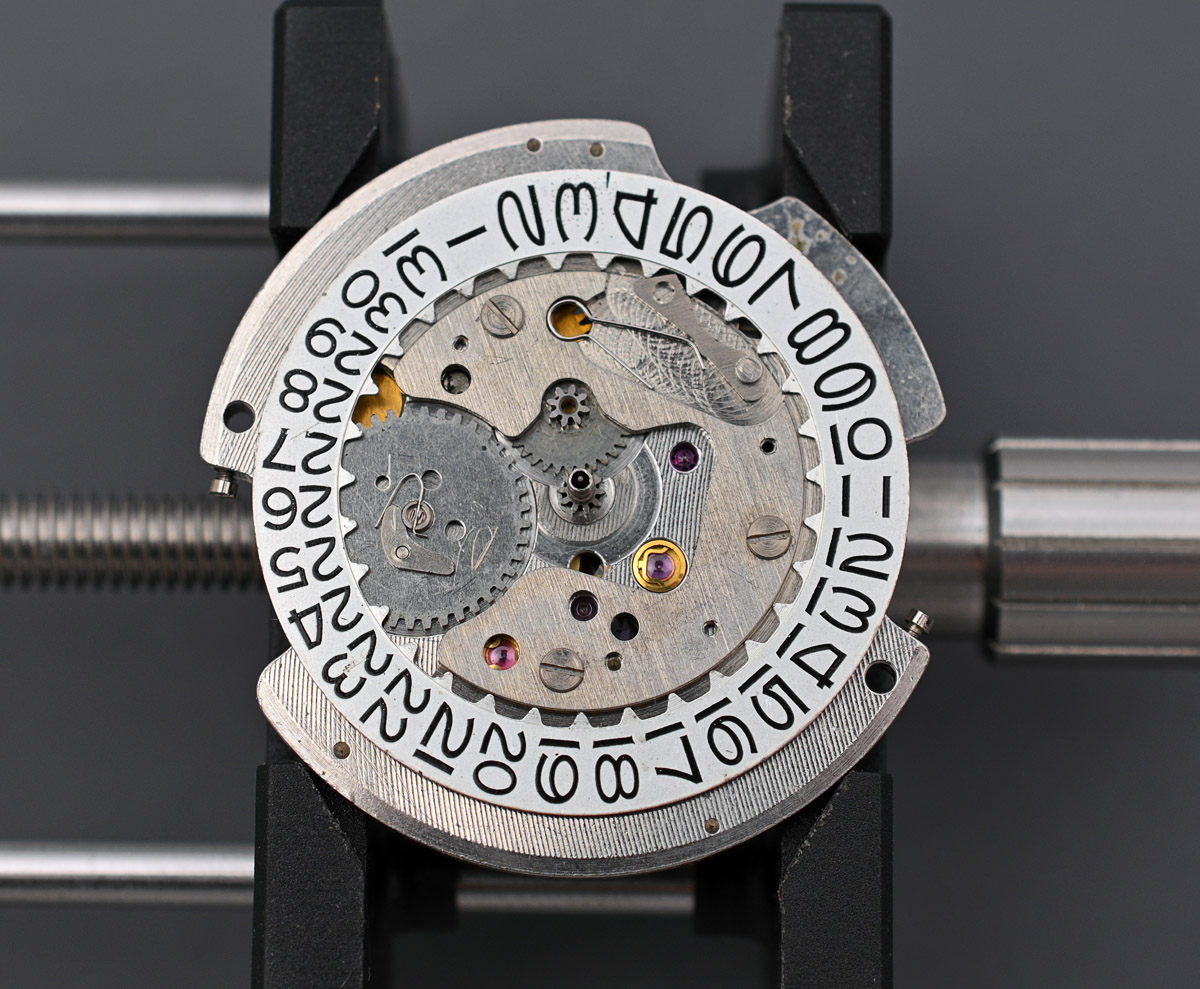
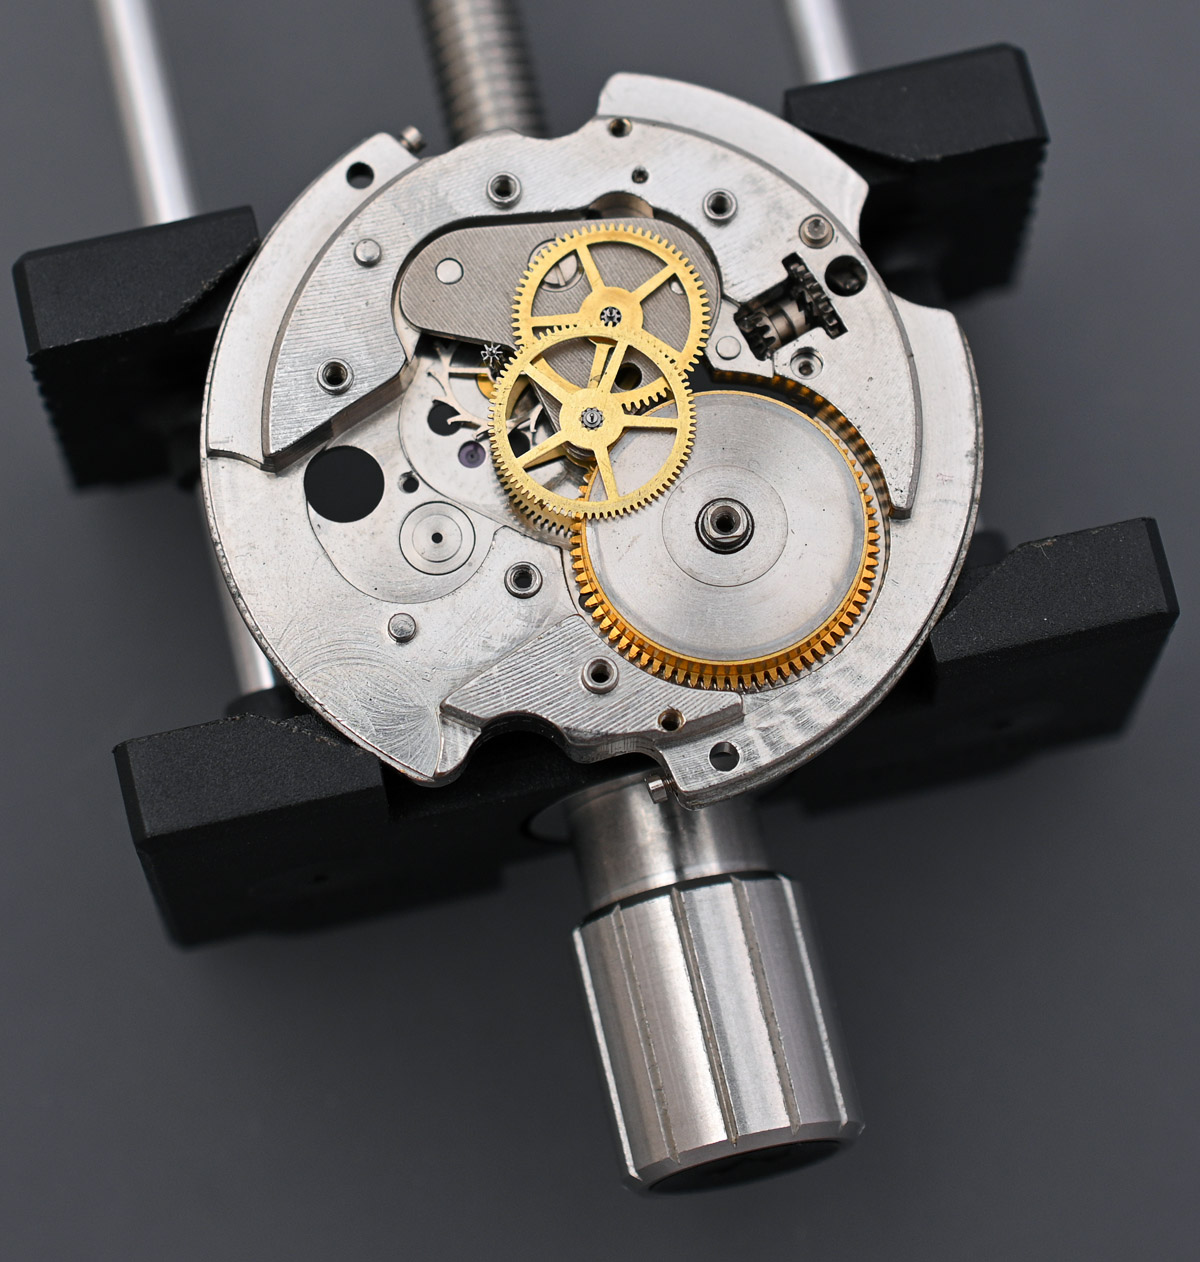
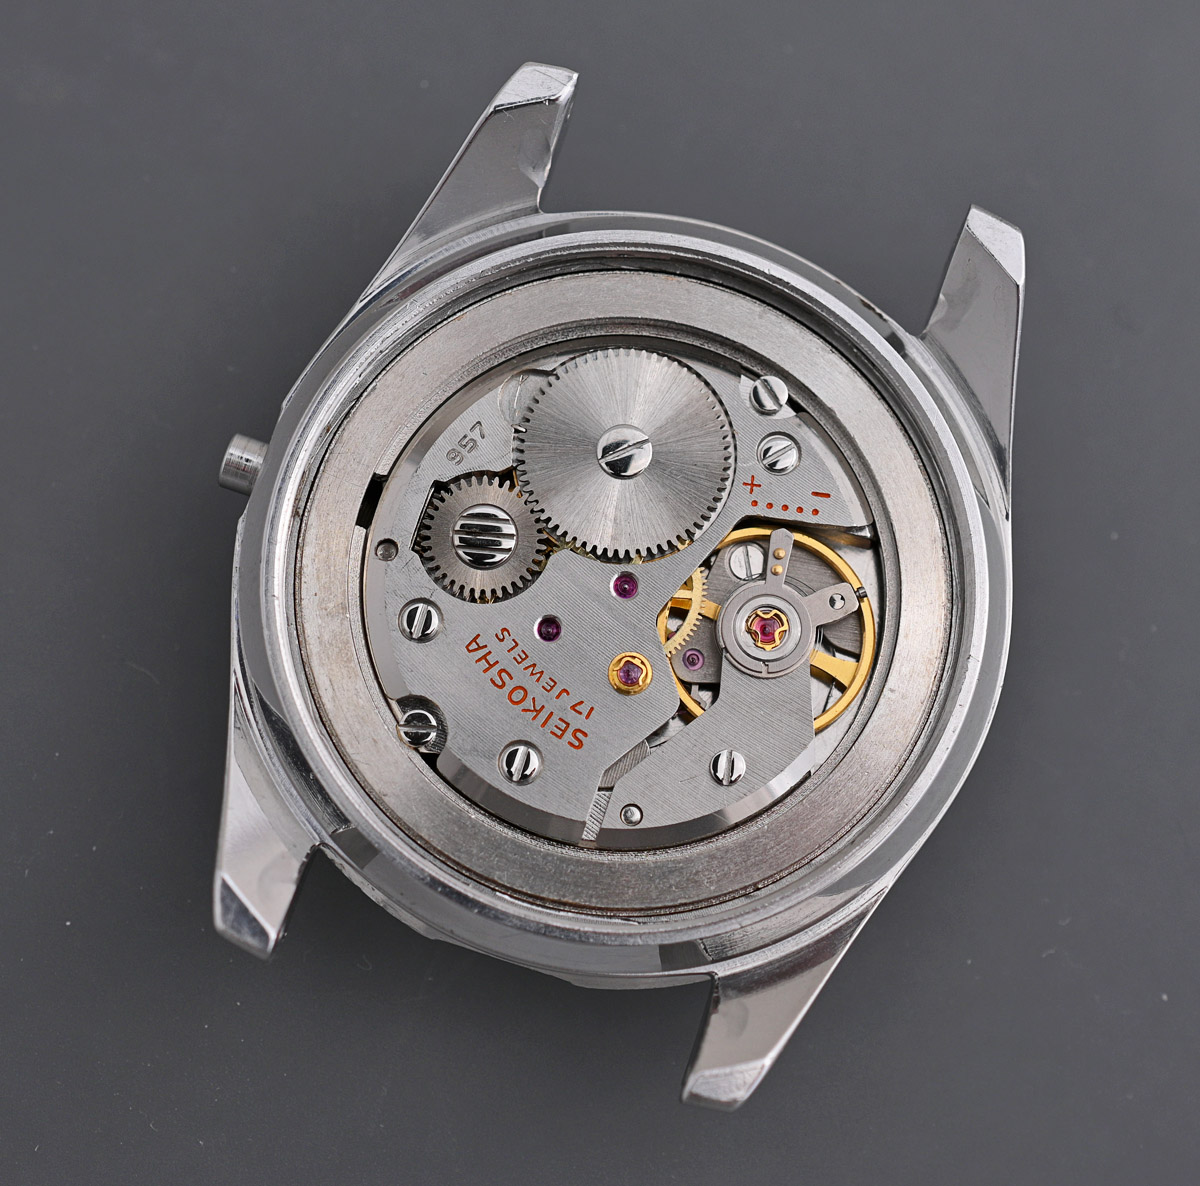
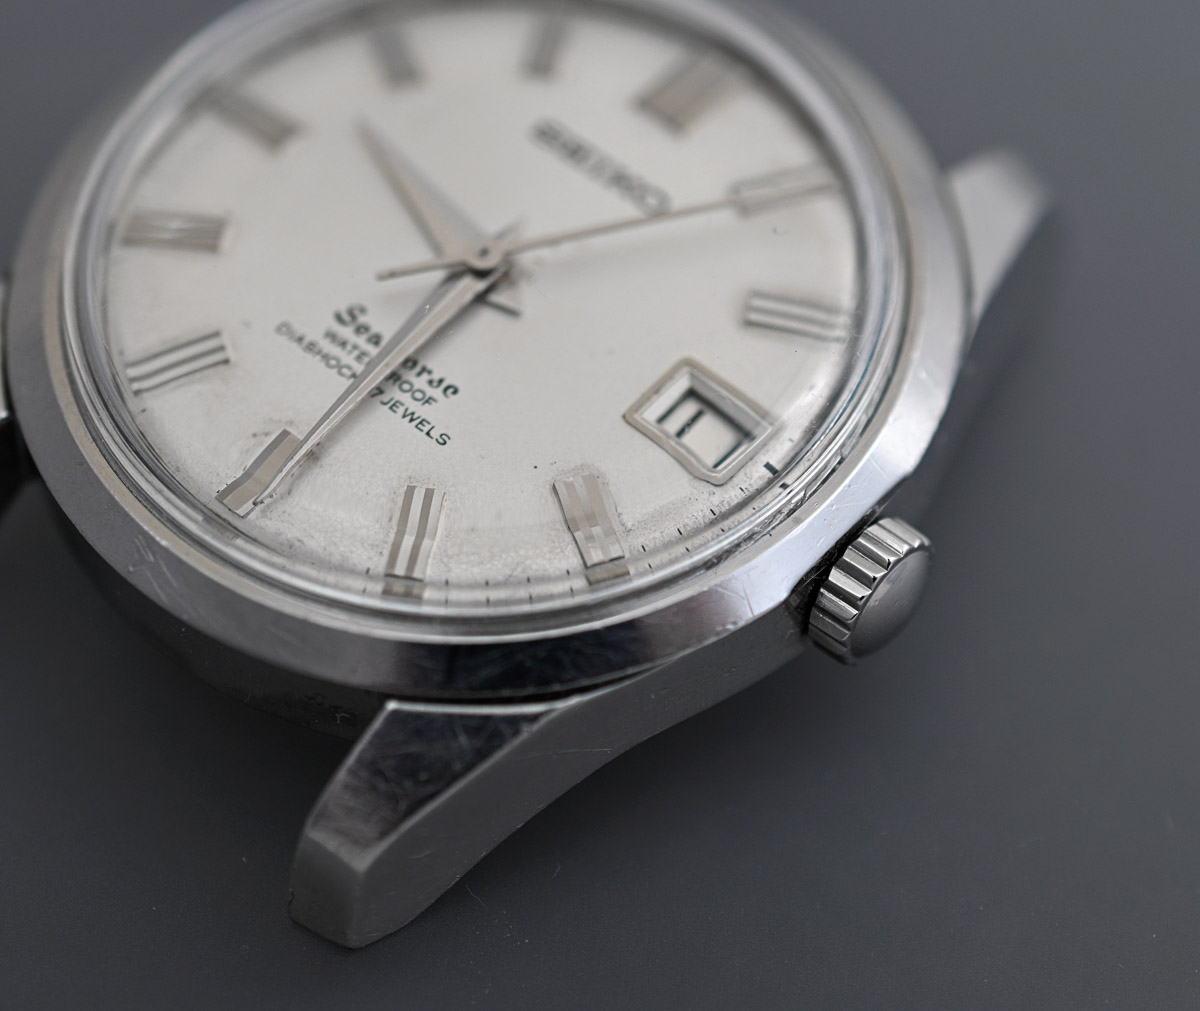
The mugshot you see above is of a Seiko Seahorse 6602-8990 dating from January 1965, fitted with a hand-wind, 17 jewel, 957 calibre, an early incarnation of the 6602A. The 6602 is based on the 66 base calibre and features the addition of a date complication. This watch has been sitting in my watch box for a long time. I cannot remember from where or when I bought it, but I’ve always liked its look and vibe and felt in some ways that it plays the part rather well of a blue-collar counterpart to the Grand Seiko Self-Dater dating from the same period.
In embarking upon this revival, the first point to note is that it is a non-runner. That is, a complete non-runner. Not a breath of life even with a full wind under its belt. So let’s get the lid open, and take a gander.

That all looks neat and tidy and relatively clean. The girthy movement ring suggests the movement is undersized relative to the case diameter but in fact this is a full fat 27.6 mm movement. With the movement out of the case and the hands removed, the rather poor state of the dial presents itself unobscured.

There would appear to be evidence of moisture damage to the whole of the outer circumference of the dial, compromising the integrity of the print potentially and discolouring the lacquer. But it’s not awful and given this watch’s humble position, a bit of outward evidence of life’s trials and tribulations can’t be a bad thing.
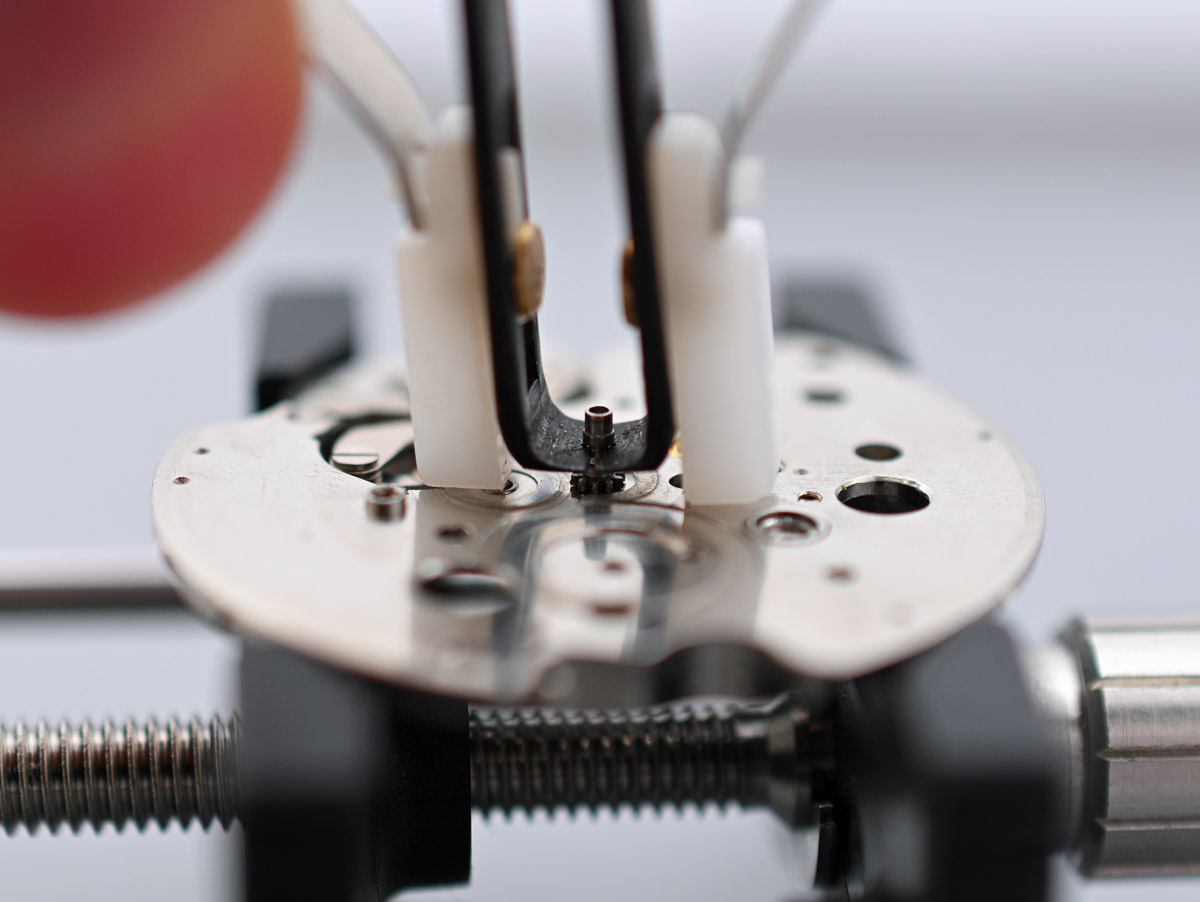
Having removed the movement ring and balance, we can see that the diameter of the movement extends all the way to the edge of the dial.

Time to remove the dial, an operation that requires the loosening of two dial feet screws.
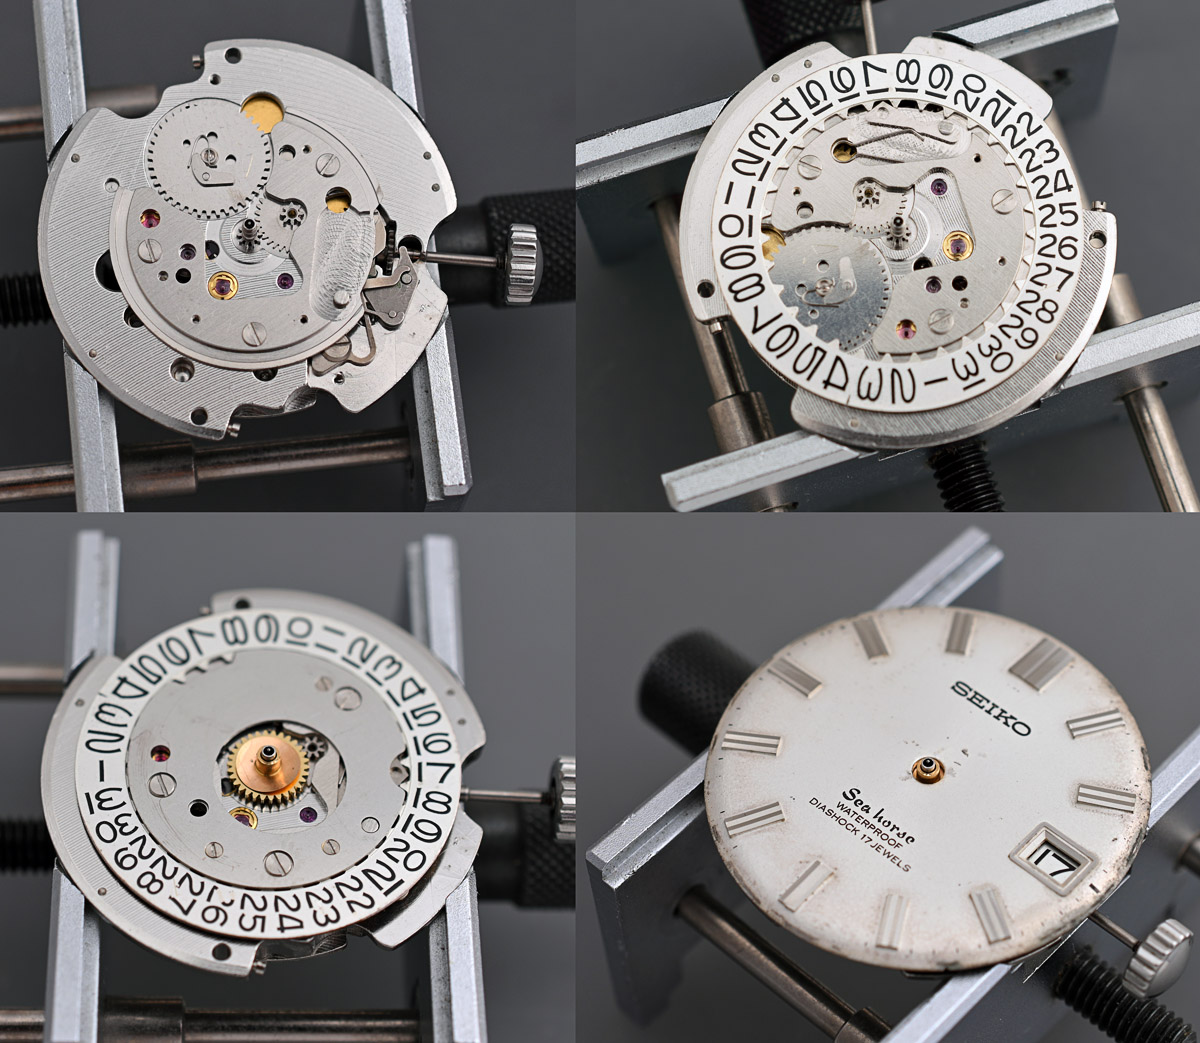
The dial lifts cleanly off to reveal the calendar but also a notably chewed-up hour wheel shaft.
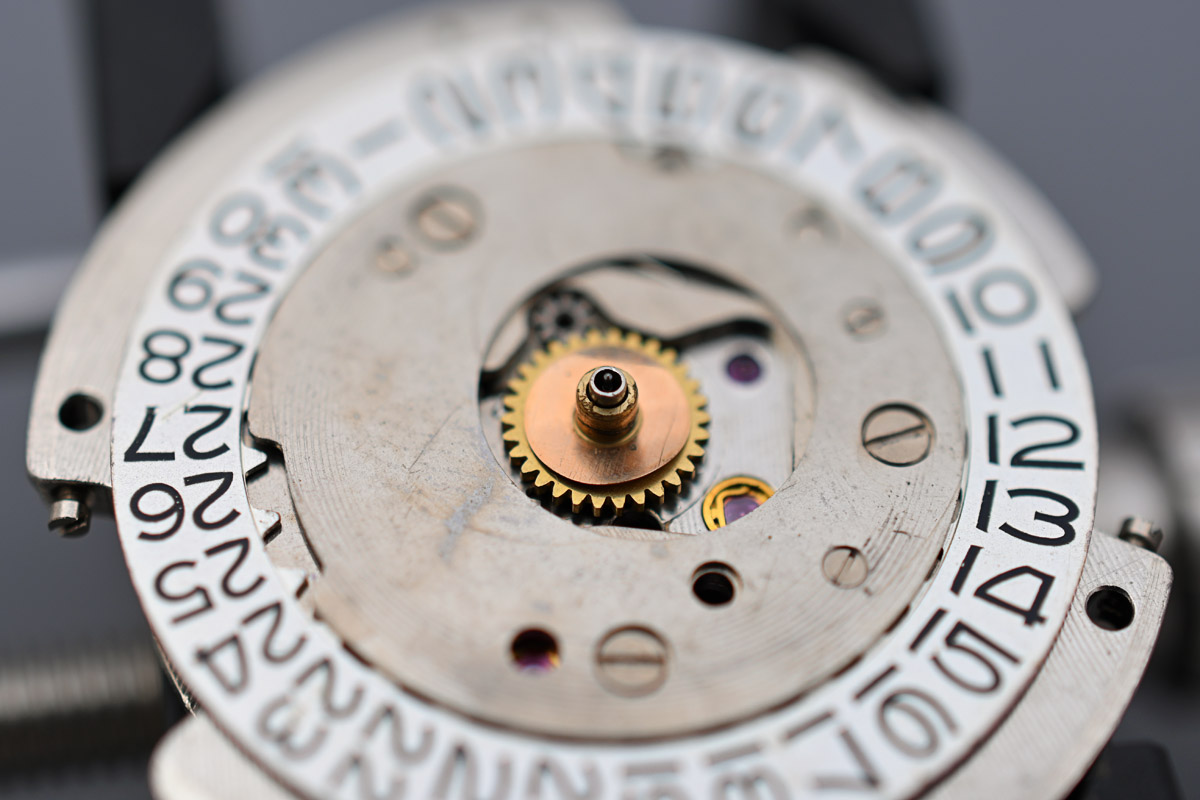
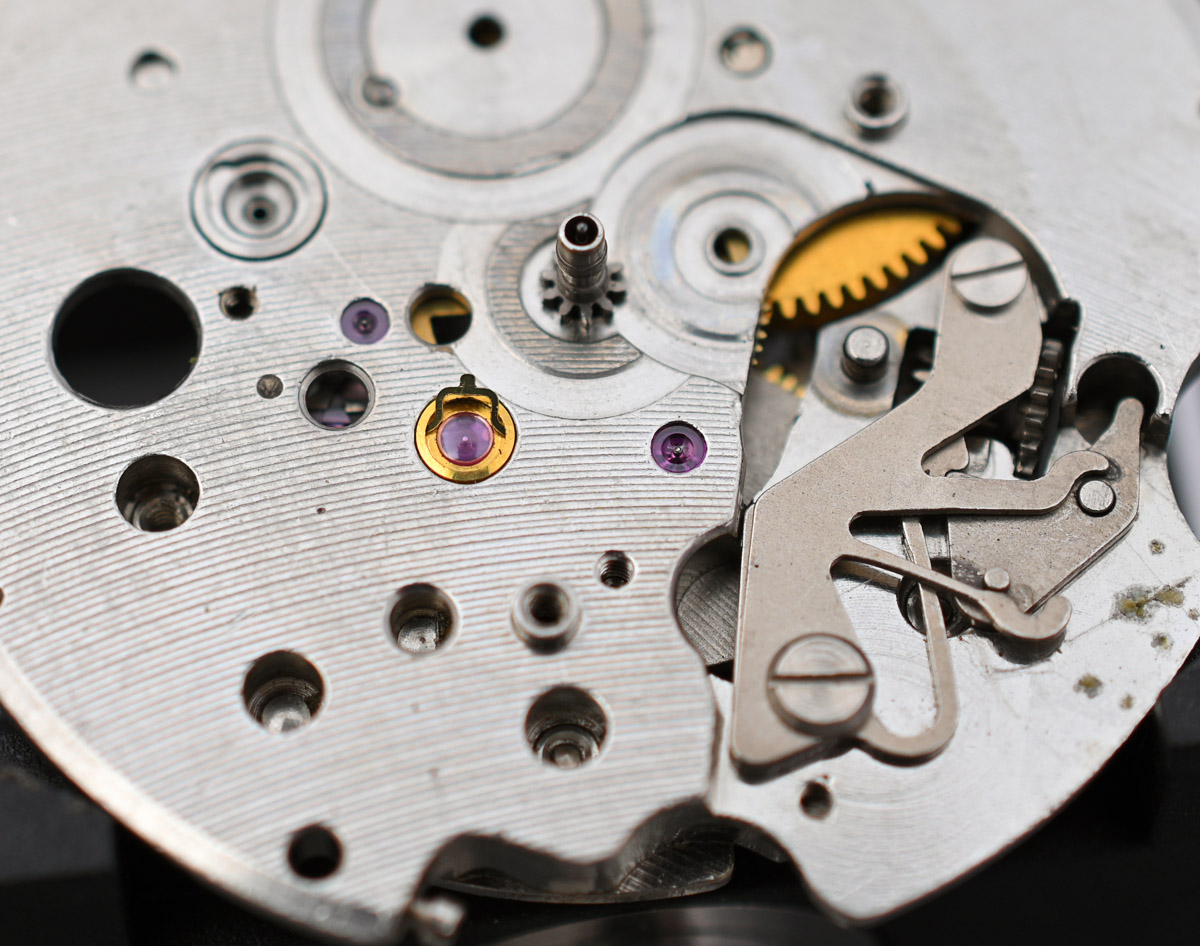
The removal of the date dial guard provides us with a view of the calendar workings and, in particular, of the separate calendar plate whose only purposes are to mount the date disk jumper and its spring and to provide the track in which the inner teeth of the date disk sit (although, granted, it does also serve as a bridge to hold the minute wheel in position). The date driving wheel fits directly to the top of the main plate.
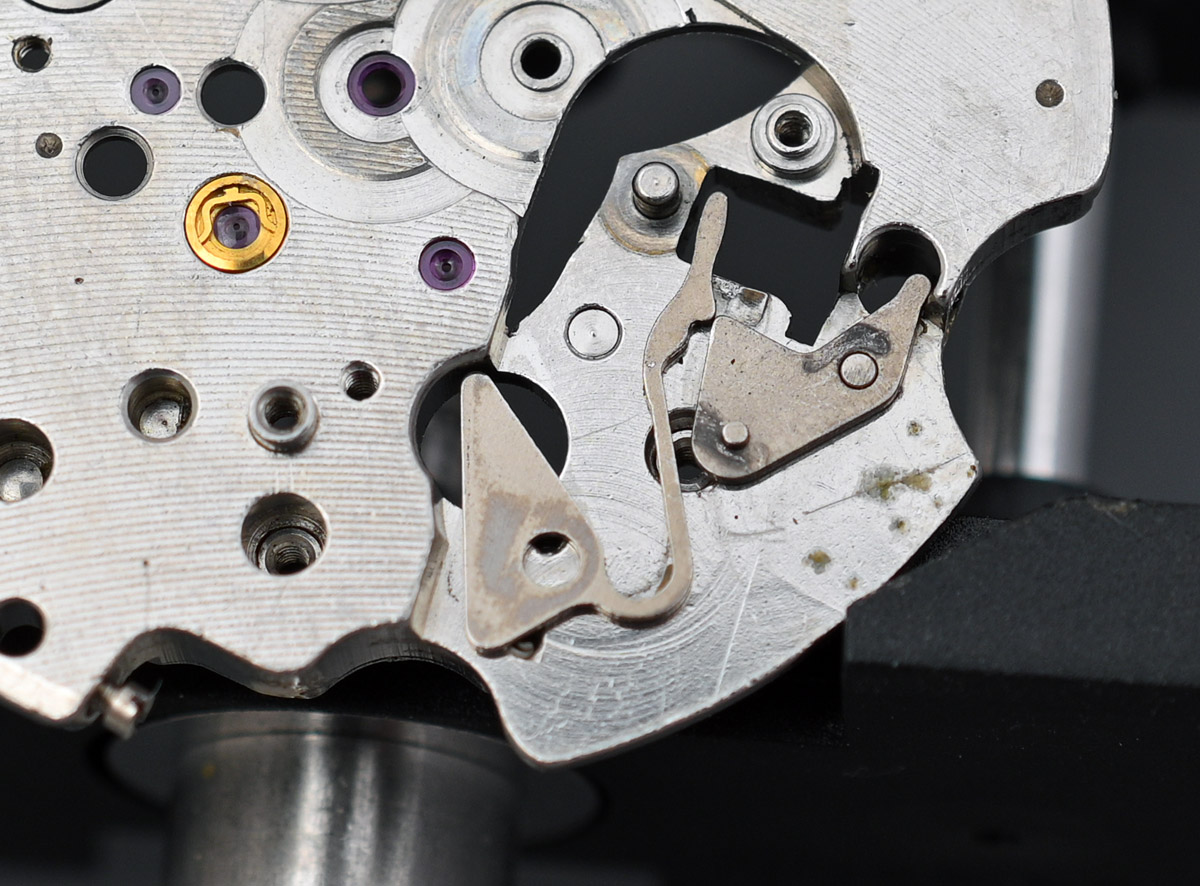
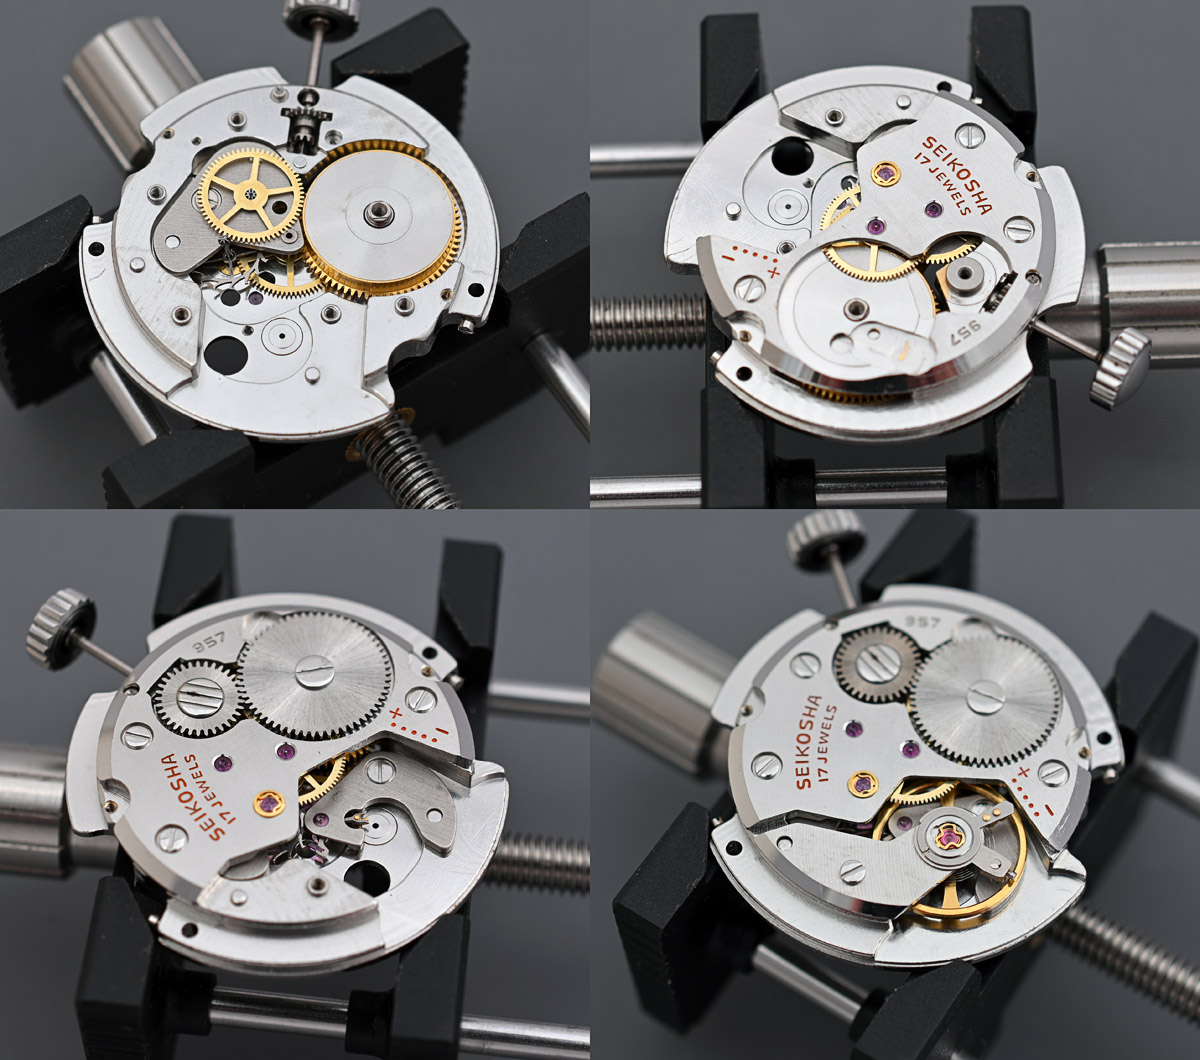
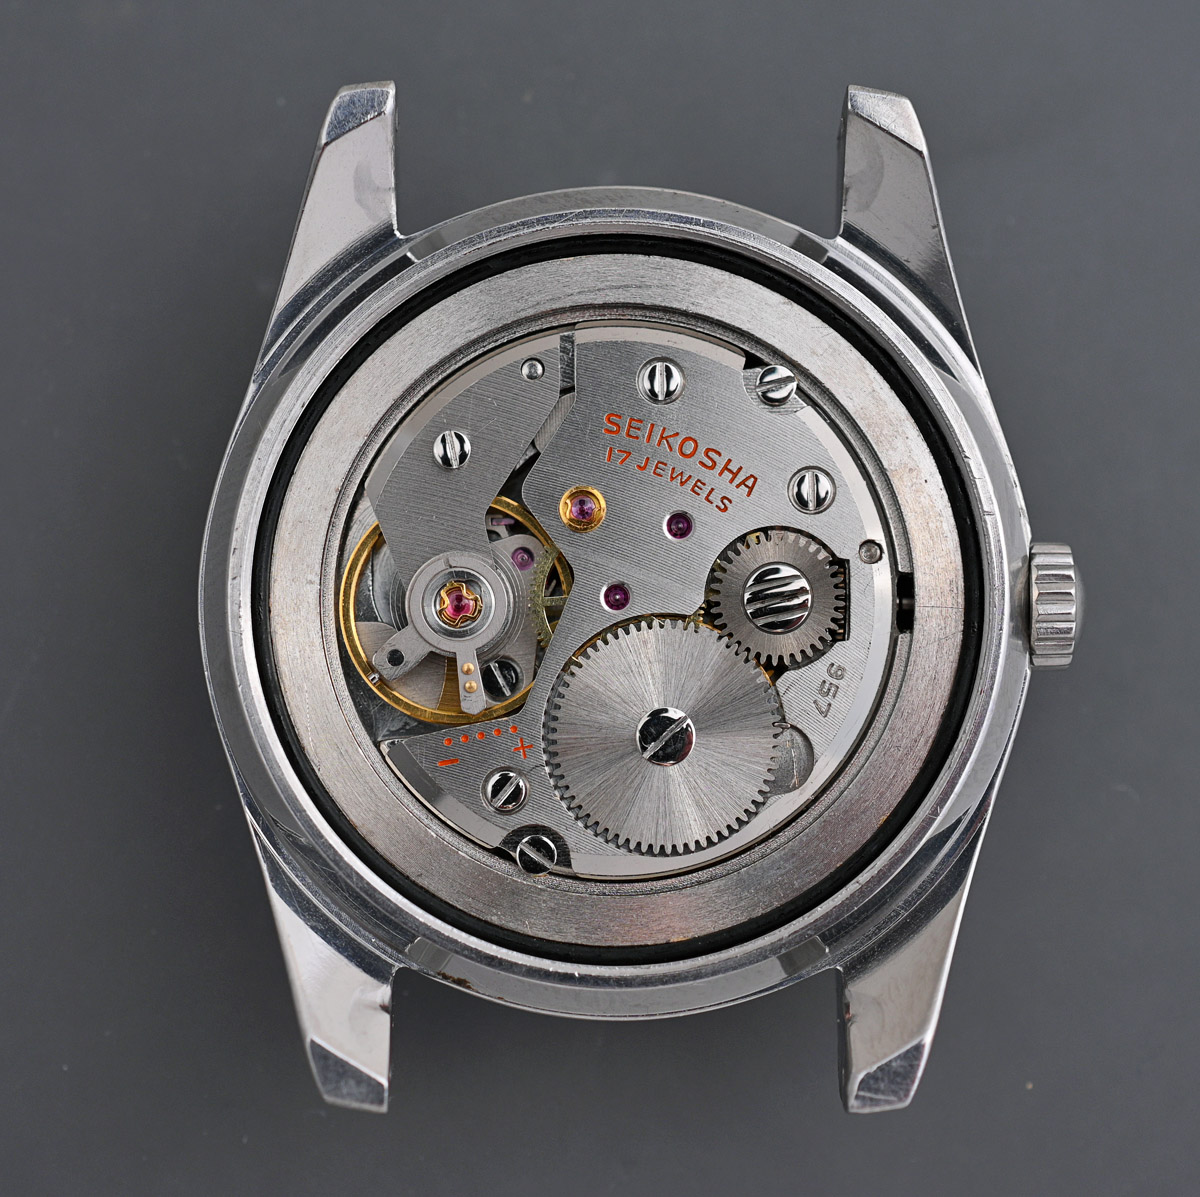
Having removed all of the calendar components and calendar plate, we can survey the naked top surface of the main plate. It is interesting to see that this most basic of hand wind calendar movements is fitted with a pair of Diafix bearings serving the escape wheel. That is good to see but it does rather draw attention to the fact that if the top and bottom escape wheel bearings had been served by a single jewel each, this would be a 15 jewel movement. We can speculate at this point where, in the absence of any Diafix settings, jewelled rather than steel bearings could have been specified to avoid falling short of the 17 jewels that seemed to have been established by the early 1960’s as the minimum jewel count for any movement aspiring to be taken seriously.

Still, the main plate is very nicely finished and does not give off any real suggestion that it has been engineered down to a particular unit cost. The final order of business before turning over to start on the balance side is to set about removing the Diafix cap jewel.
A little bit of investigation of the going train unearthed what I deduced to be the reason the movement had been stopped in its tracks.
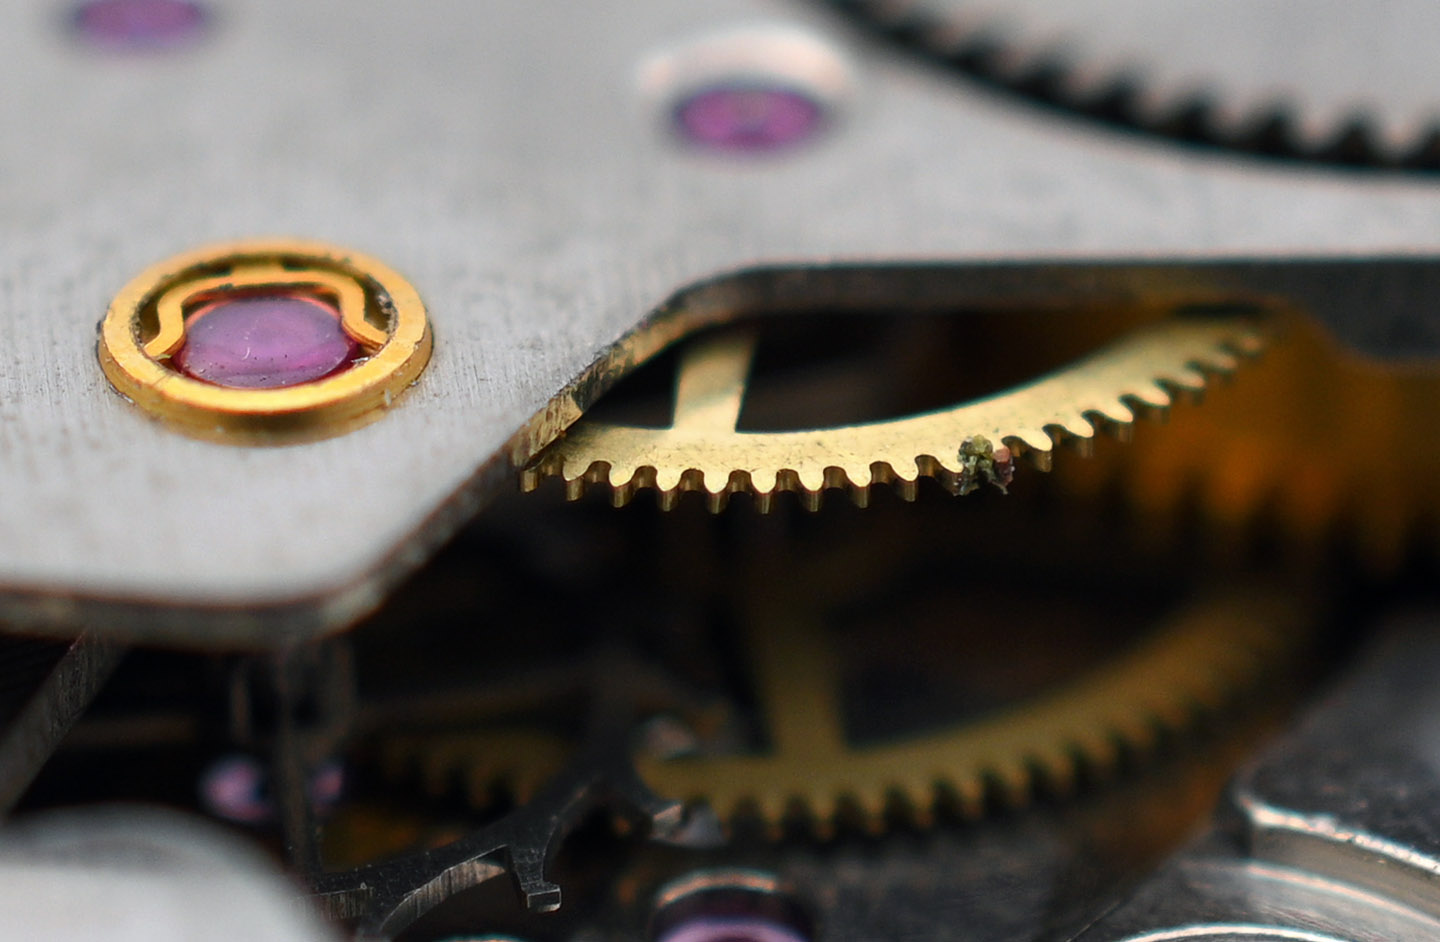
A healthy dollop of gremlin snot gumming up the teeth of the sweep second wheel. Moving on, and I removed the ratchet wheel, exposing the click and its spring. This arrangement has plenty of pent-up potential for zinging disaster (ask me how I know).
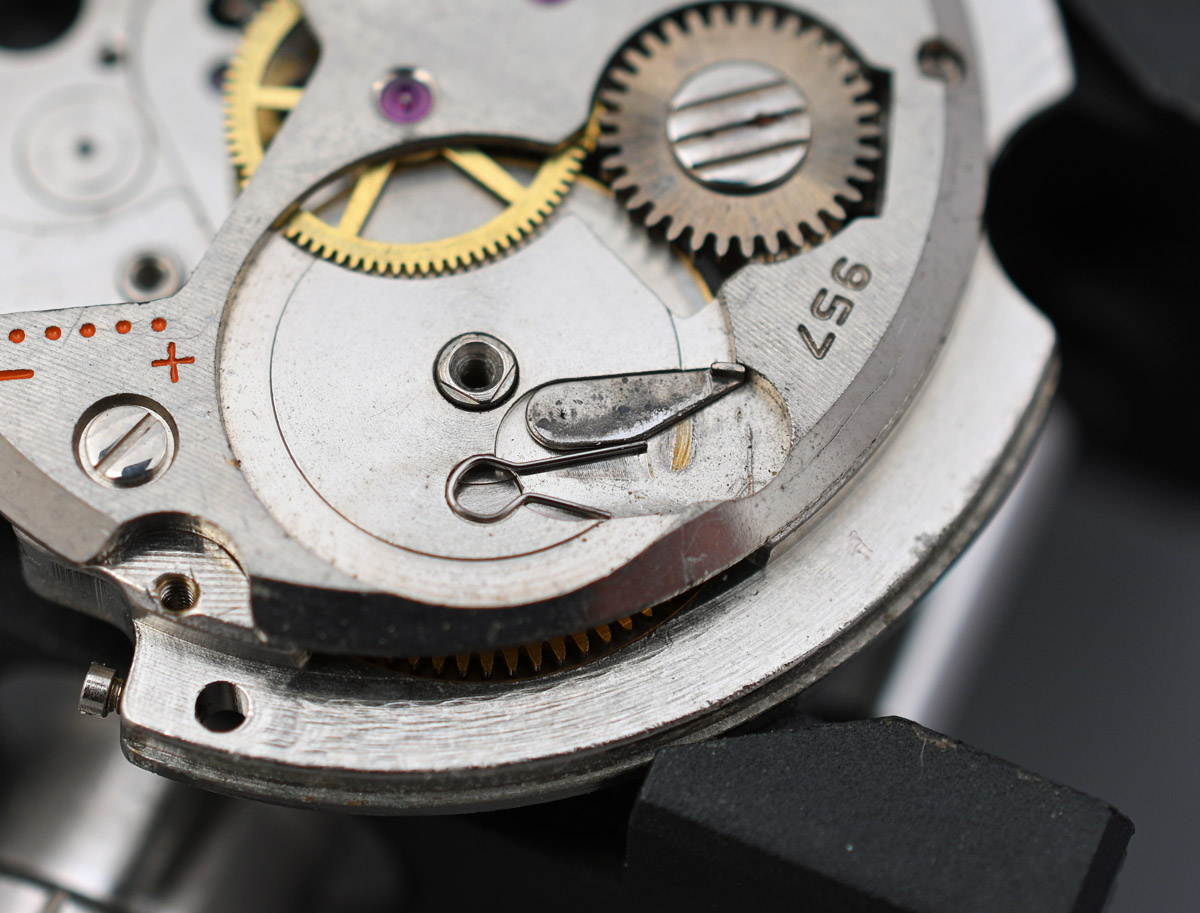
Moving swiftly on, the crown wheel removed (remembering the left-threaded screw) and the barrel and train wheel bridge can be removed.
This is all very conventionally laid out, but the mix of the un-plated barrel with a plated lid adds a very appealing certain something. Having removed the train wheels, we can observe that the centre wheel bridge is un-jewelled, employing instead a steel bearing to serve the upper shaft of the centre wheel. This is the first obvious sign of penny-pinching and the one point where one might reasonably have expected jeweling as a first choice over the use of Diafix settings serving the escape wheel.

Of course, if the Diafix were absent and a centre wheel jewel was present, then the jewel count would be 16, an odd (even) number for a wristwatch movement. It is worth reflecting on this for a moment. All of the hand wind 66 series movements feature a Diafix setting for the escape wheel but the automatic versions of these movements, the 2451/6601 and 6619 dispense with any Diafix settings because they can breach the 17 jewel count through the jeweling required of the automatic winding mechanism. Indeed, in the case of the 2451/6601, the sweep seconds pinion has to make do with a steel bearing and that movement still achieves 17 jewels. Further deconstruction from this point requires first the cannon pinion to be removed.
That releases the centre wheel, once its bridge has been removed and the summit is reached by completing the disassembly of the keyless works.
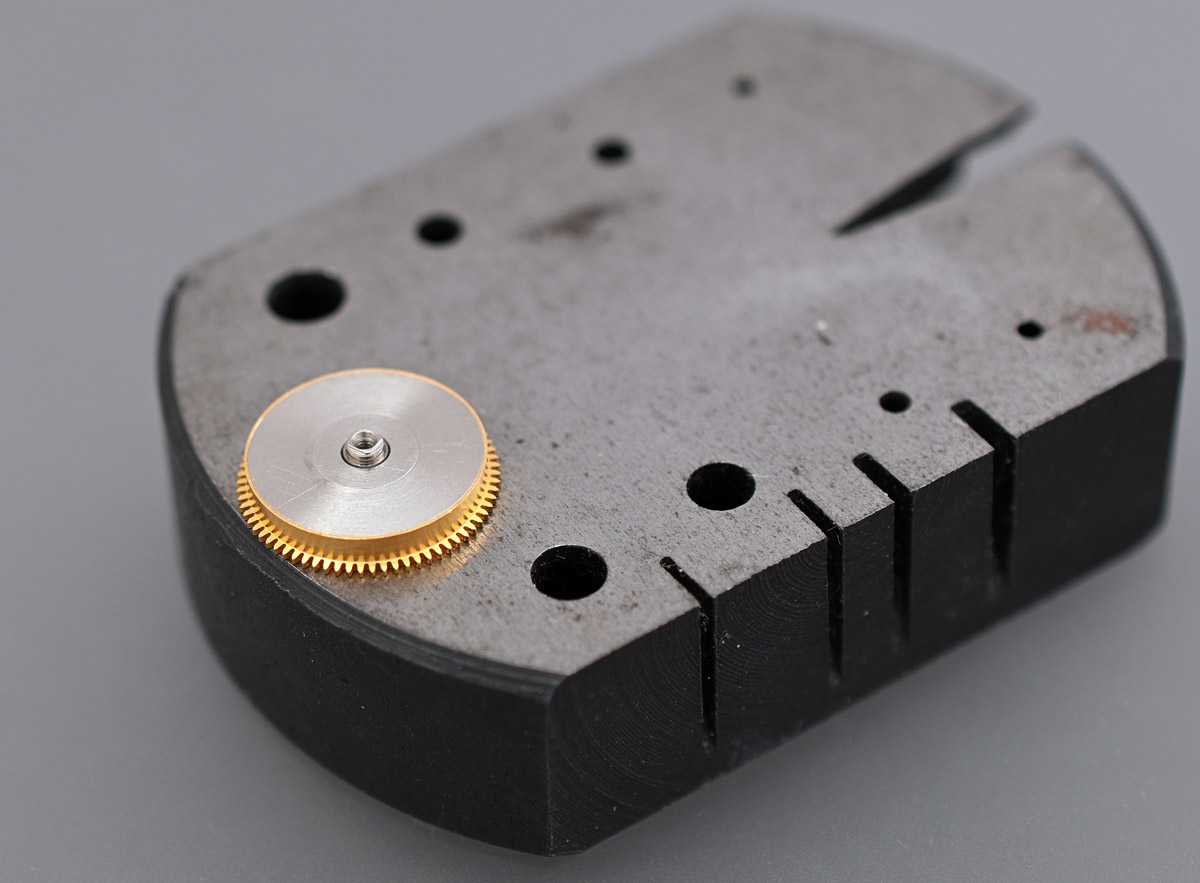
The interior of the barrel looks relatively clean, but we note a clockwise wind which means that the mainspring will need winding into the mainspring winder drum backwards before refitting.
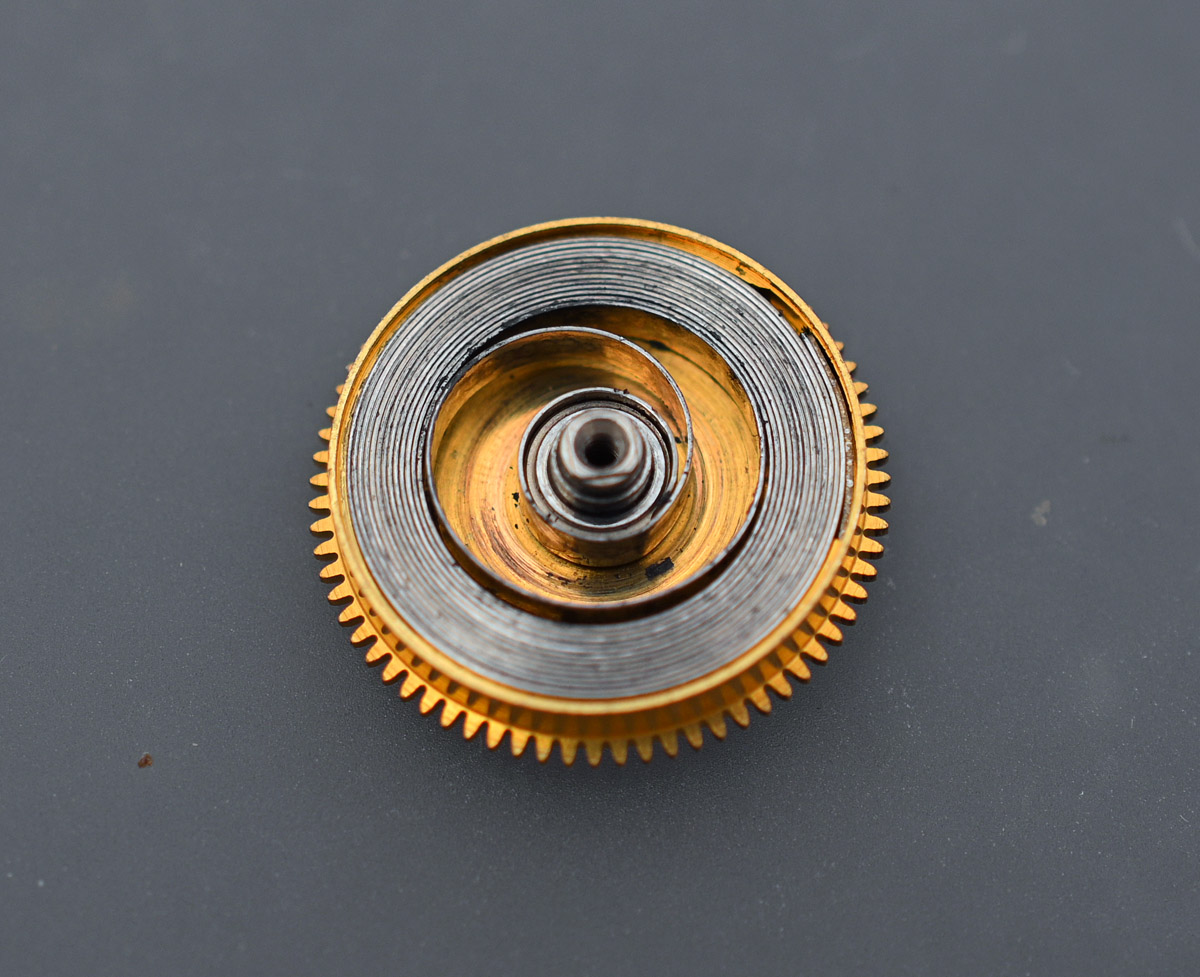
The mainspring itself is flat, free from kinks and maintains a healthy-looking shape.
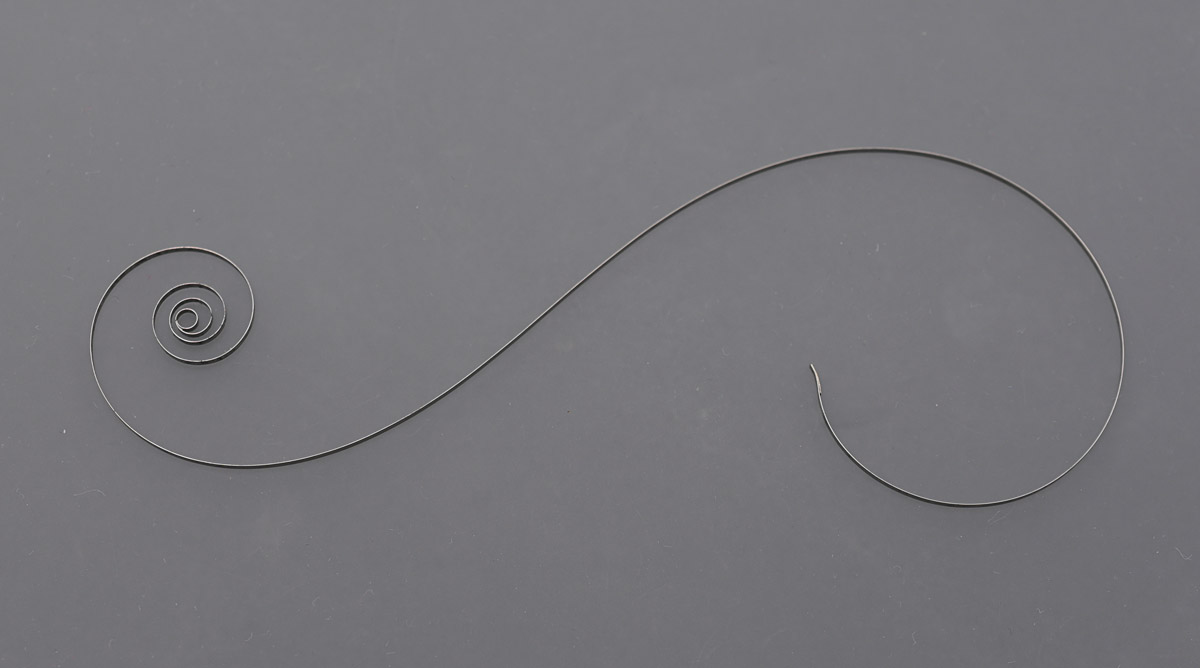
At the half-way point, everything passes through the cleaning process and we prepare to corral once more all of that released entropy and convert our exploded assembly of parts into a unified and functioning whole. As is my habit, the first step requires the refitting of the cleaned mainspring into its barrel. As I noted earlier, the mainspring is wound clockwise into the barrel which requires me to wind it anti-clockwise into the mainspring winder drum.
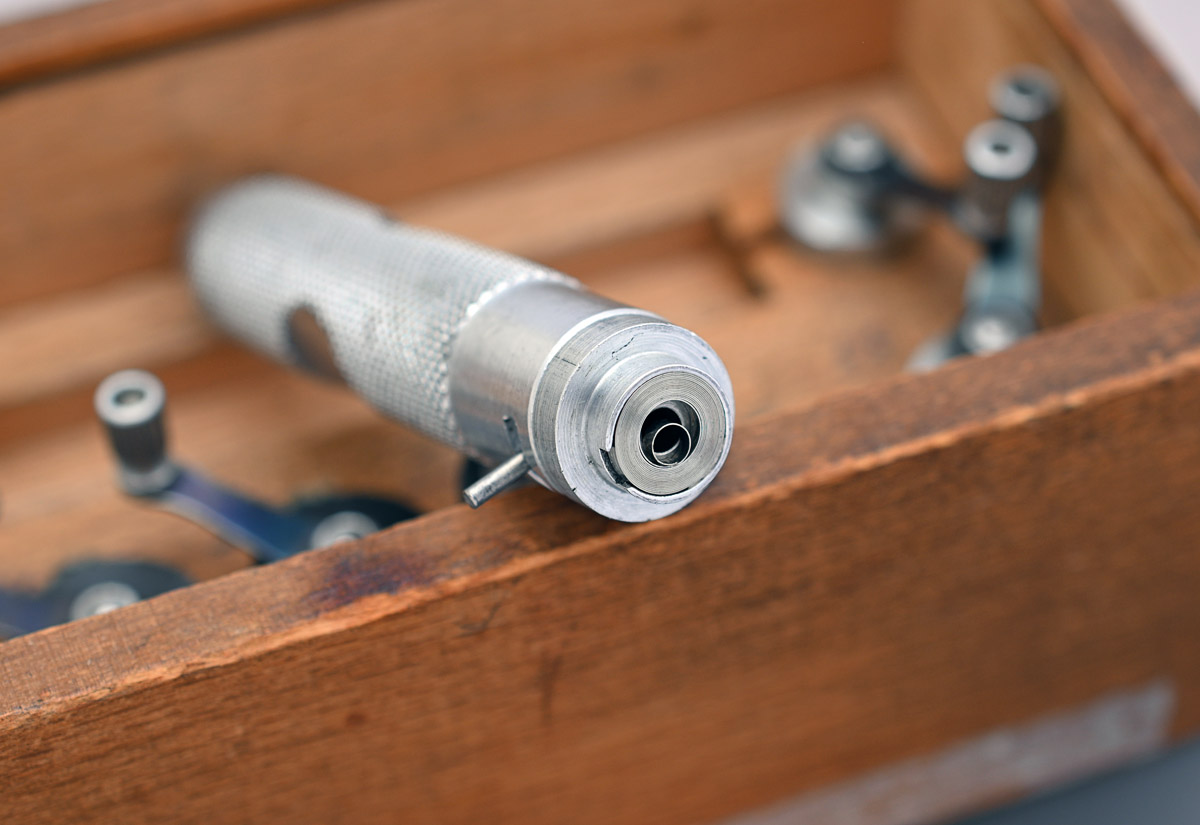
This is accomplished without fuss in spite of my winders all being right-handed. Releasing the spring back into the barrel is achieved with the usual satisfying clunk.

With suitable lubrication of the arbor applied, the lid presses home to complete the task.
The two Diafix settings come next followed by the keyless works.
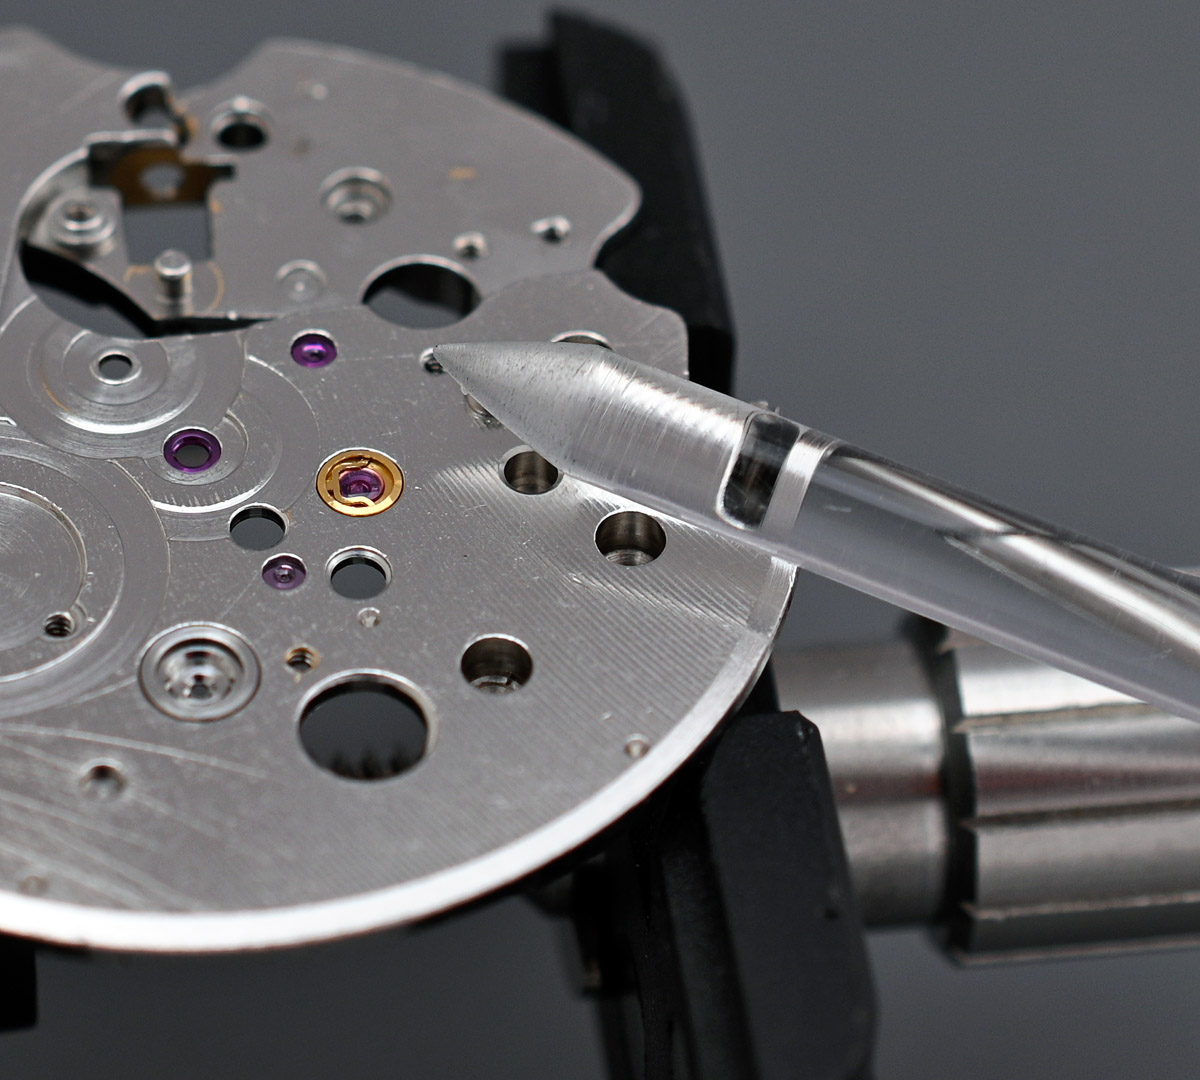
When refitting the Diafix springs this time, I thought I’d try using a sharpened acrylic rod to reduce the amount of debris generated from the procedure when using pegwood or bamboo. This worked very well.
The gear train and bridge all come together fairly easily, barring the immense fiddle required to seat the click and its spring without losing one or other or both in the process.
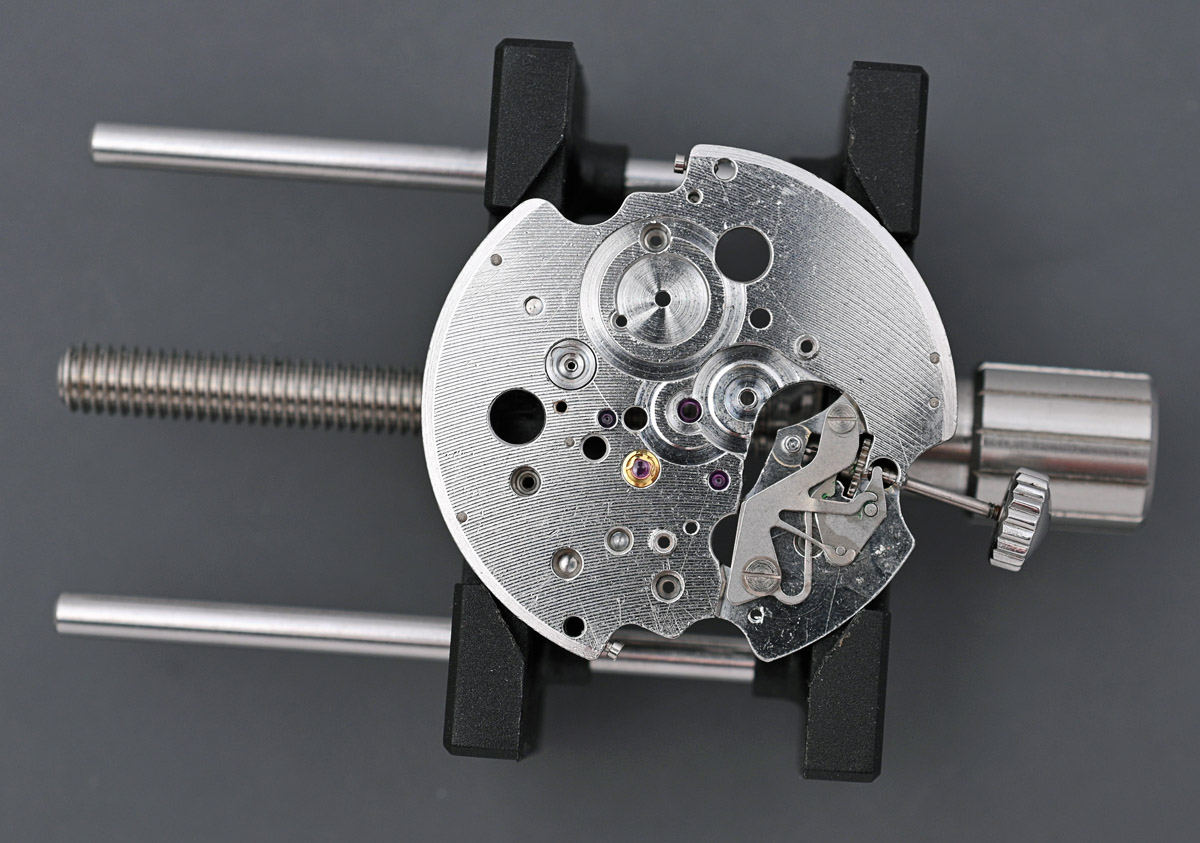
Having already fitted the cannon pinion, I was now in a position to wind in some power and take a look at how the watch is running.
Not so well, as it happens! The amplitude and beat error are fine but there is clearly something amiss in the escapement department. I suspect some sort of issue with the escape wheel teeth and/or pallet fork jewels. So a partial disassembly follows, and then scrutiny of the escape wheel and pallet fork under the loupe and microscope. I can see nothing obviously wrong other than that the escape wheel has a slightly dished look to the spokes of its wheel. I elect to replace both parts to minimise the number of times I have to grapple with the click spring arrangement and test the movement again. The stutter is gone and I can move on to the calendar side.
Reconstruction of all of the calendar parts follows a path well-trod and throws up no surprises or snags.
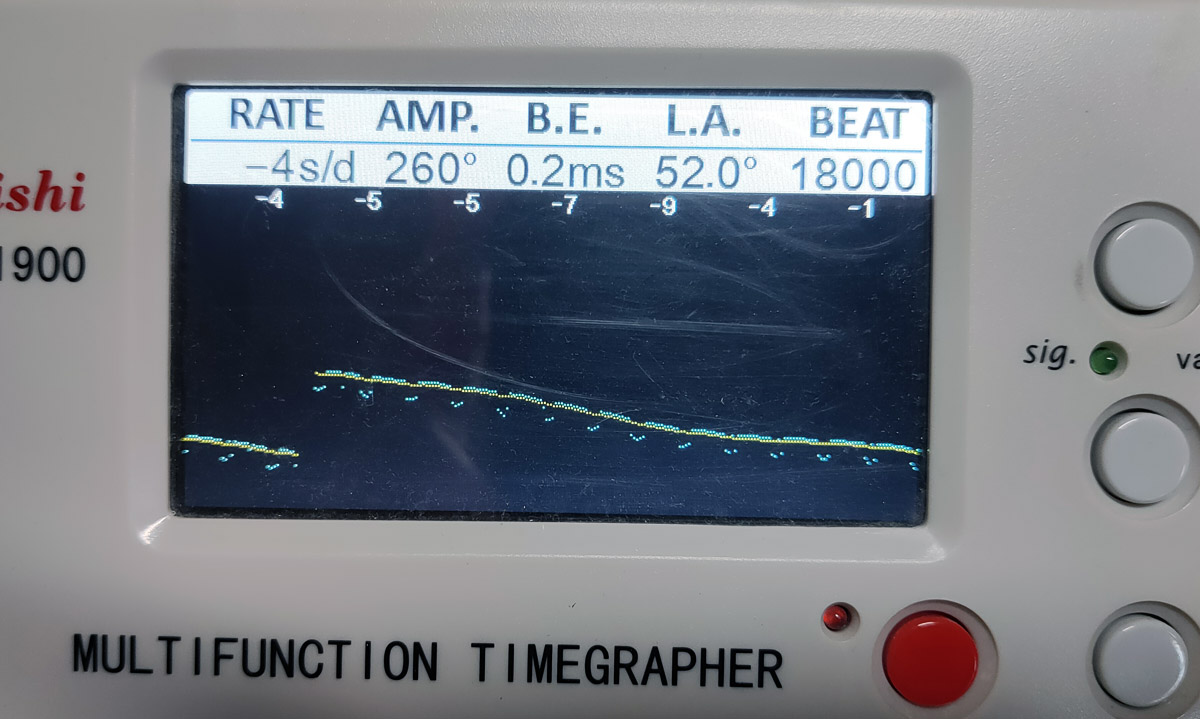
The slight regret though, having reached this point, is that some of the print at the periphery of the dial has not survived the ordeal of some gentle cleaning with Rodico. The integrity of the lacquer and print at the edge of the dial had just been compromised too much by the moisture damage. This would seem like an opportune moment to perform a quick check on the performance of the movement with a full wind on board and with all of the calendar parts fitted. The watch is unregulated at this point other than to the beat error.
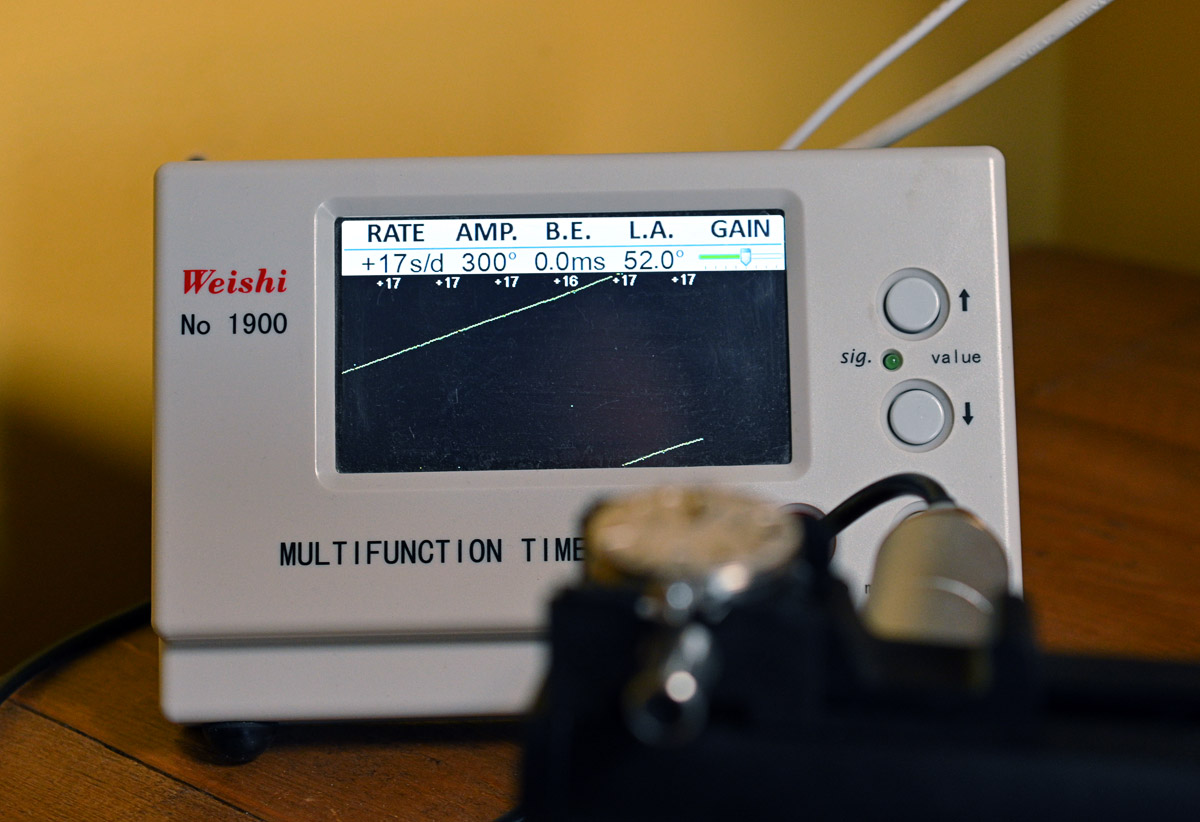
Well, that is more like it. Monster amplitude from its original mainspring, zero beat error and no shake, rattle and roll from the escapement. I’ll regulate the timekeeping once the movement is back in the case.
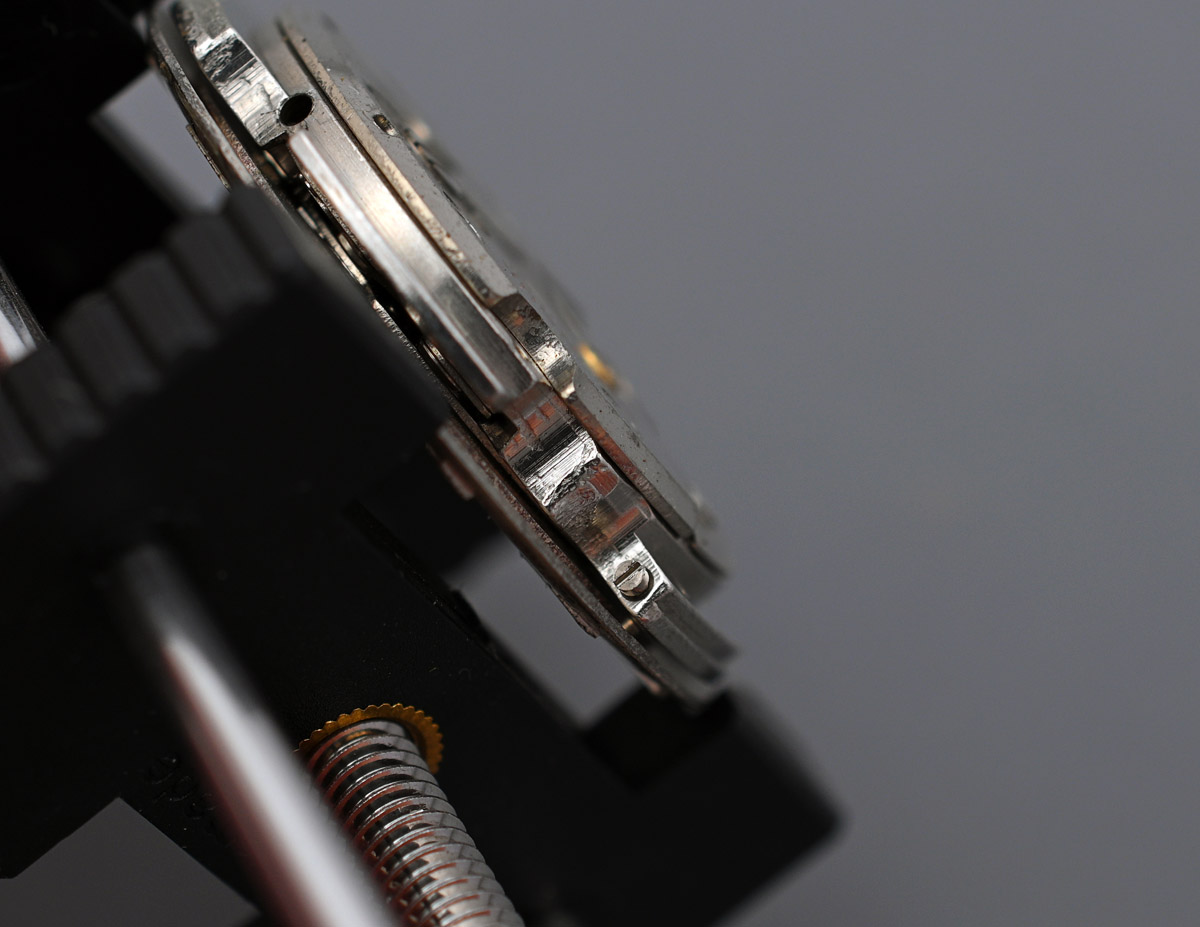
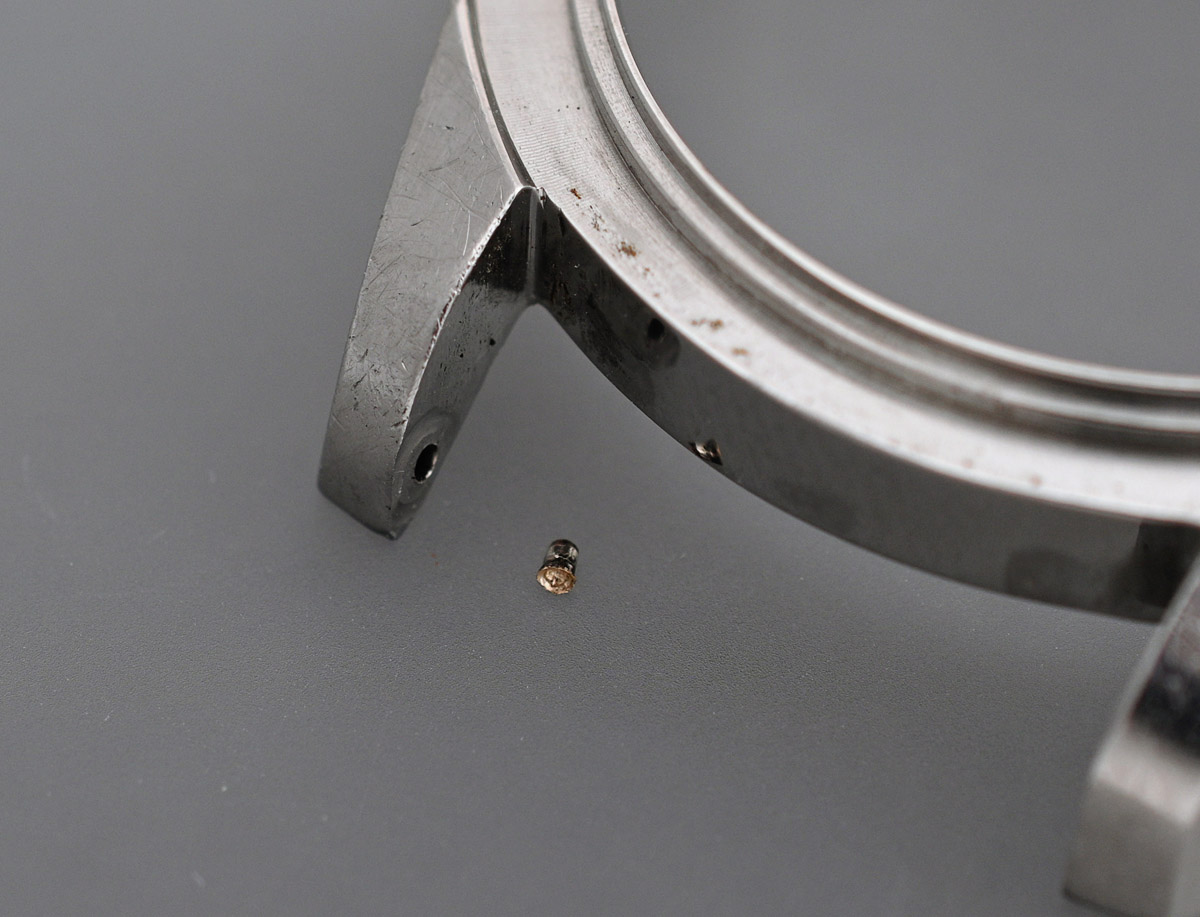
Satisfied at the health of the movement, I turn my attention to the case and encounter a slight snag. Part of one of the spring bar tips has broken off in the spring bar hole of the top right lug.
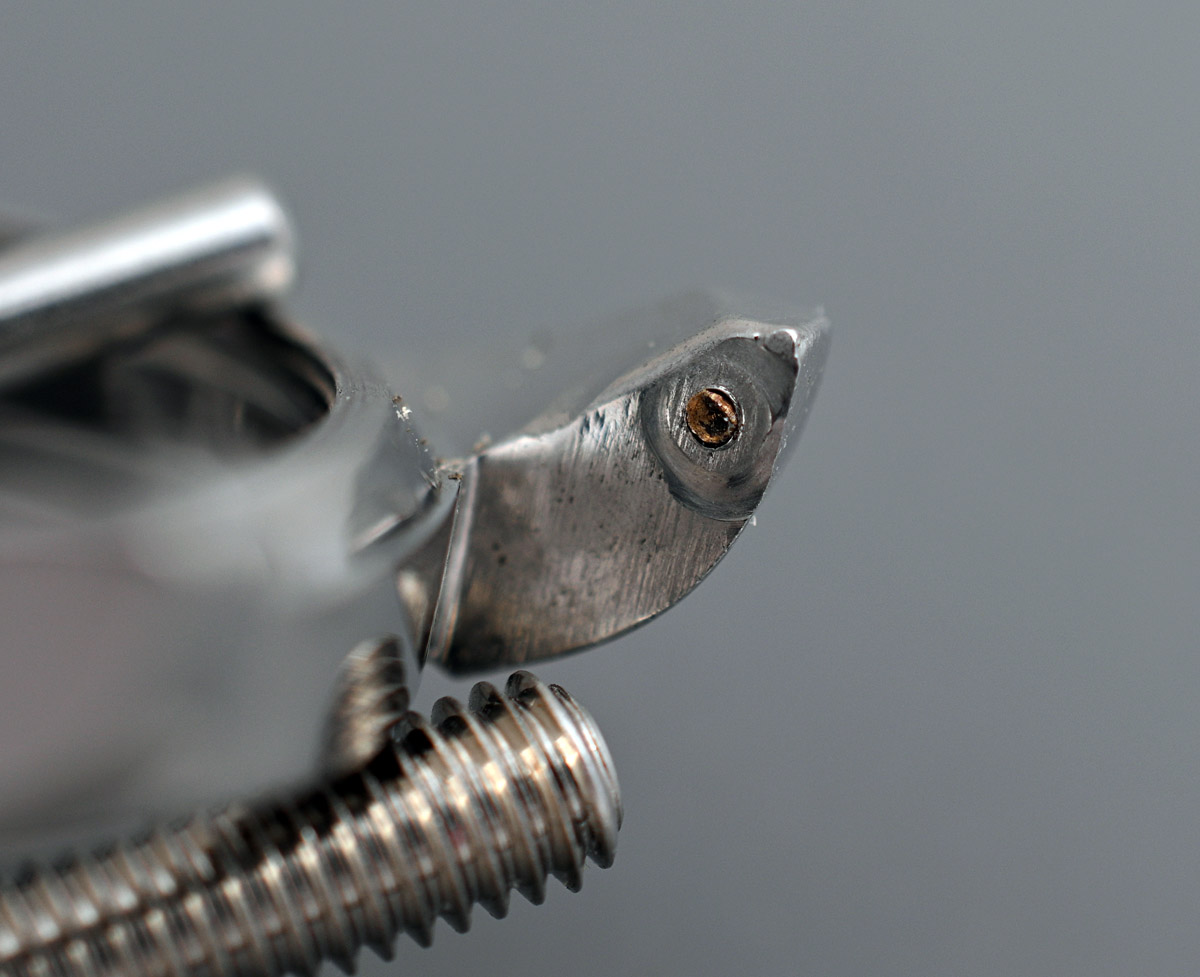
No amount of gentle cajoling will release it and so I resort to some determined effort with my Archimedes drill and a very fine drill bit followed by a scalpel blade to tease the fragment free.
The crystal is designed to sit around the outer edge of the dial aperture lip on the mid-case, with the water seal then provided by external pressure from the separate steel bezel, once fitted. The first step therefore is to seat the new crystal into position on the lip.
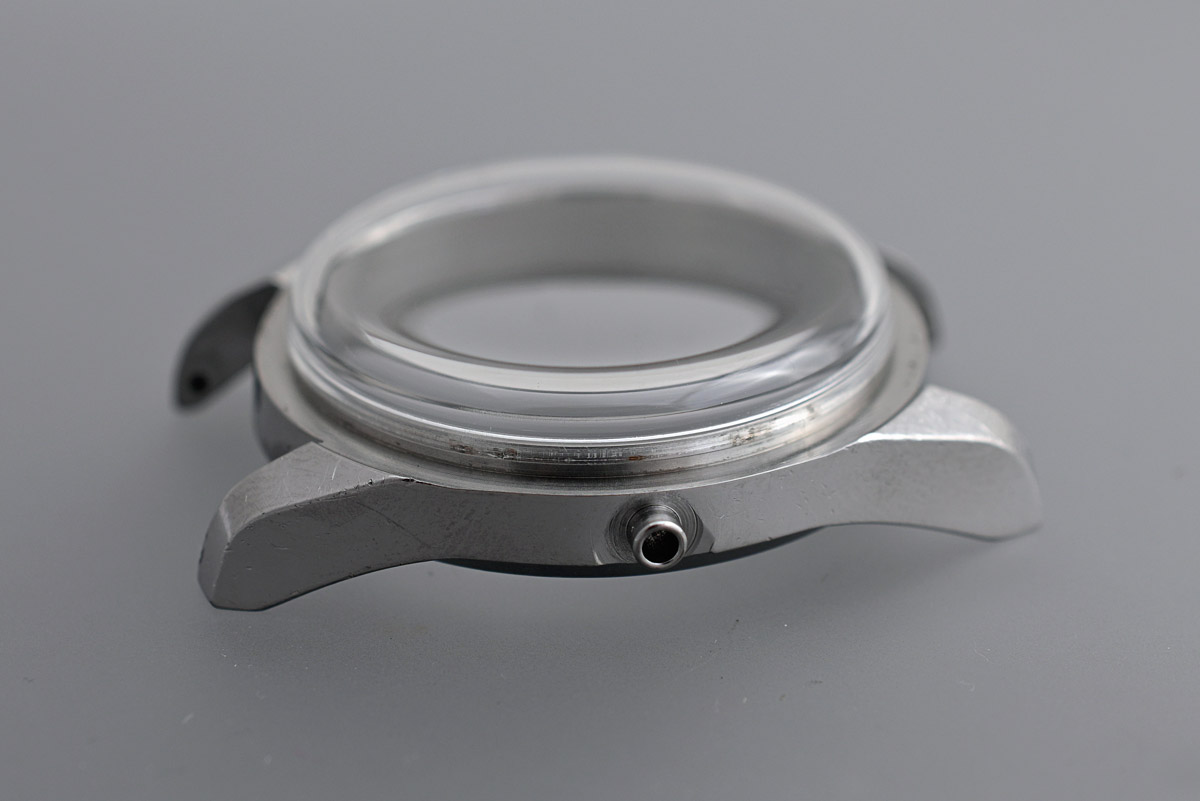
The crystal can be pressed into place with finger pressure alone, but the bezel needs a beefy crystal press.
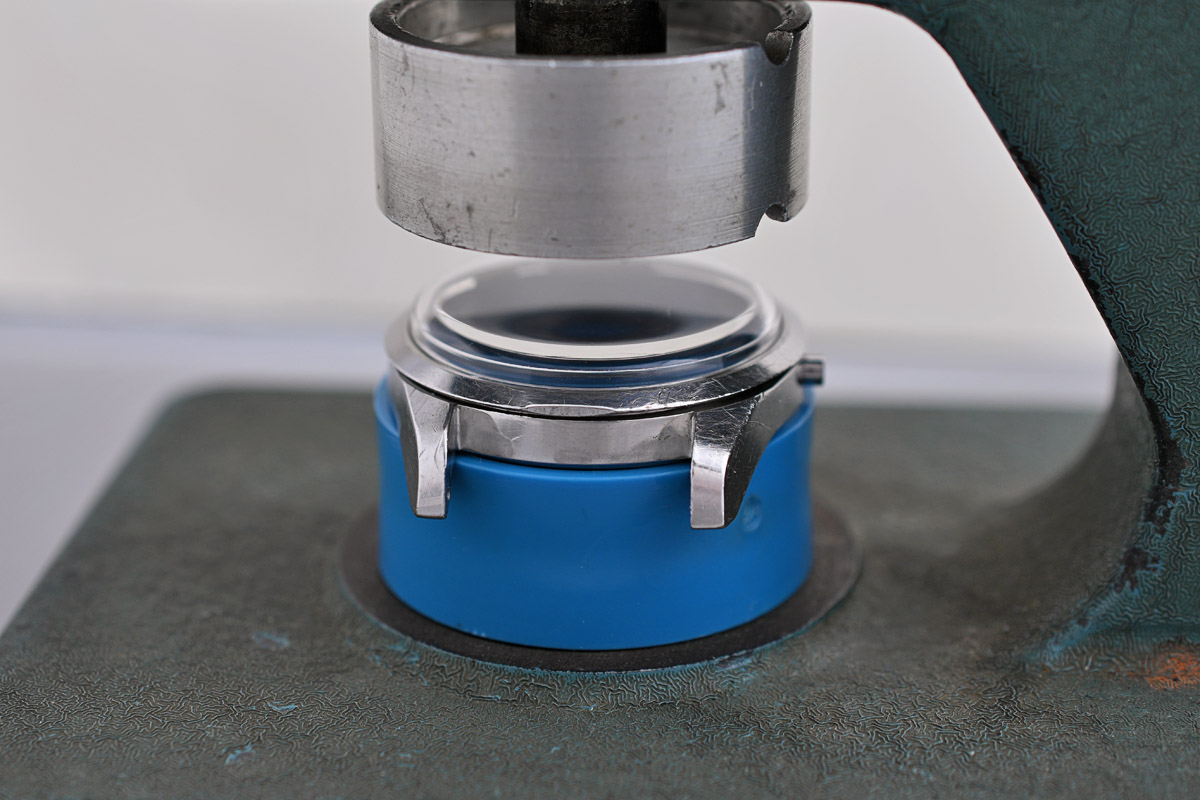
The photo above reveals a presumption on my part that the flat surface machined onto the edge of the bezel was part of a cut-out to ease removal of the bezel. These are typically located between the case lugs and so that is where I positioned it when refitting the bezel. However, as we shall see shortly, the flat is there to allow clearance for the winding crown because the bezel edge protrudes beyond the edge of the mid-case.
The case is ready to receive the movement and so let’s reunite the two.
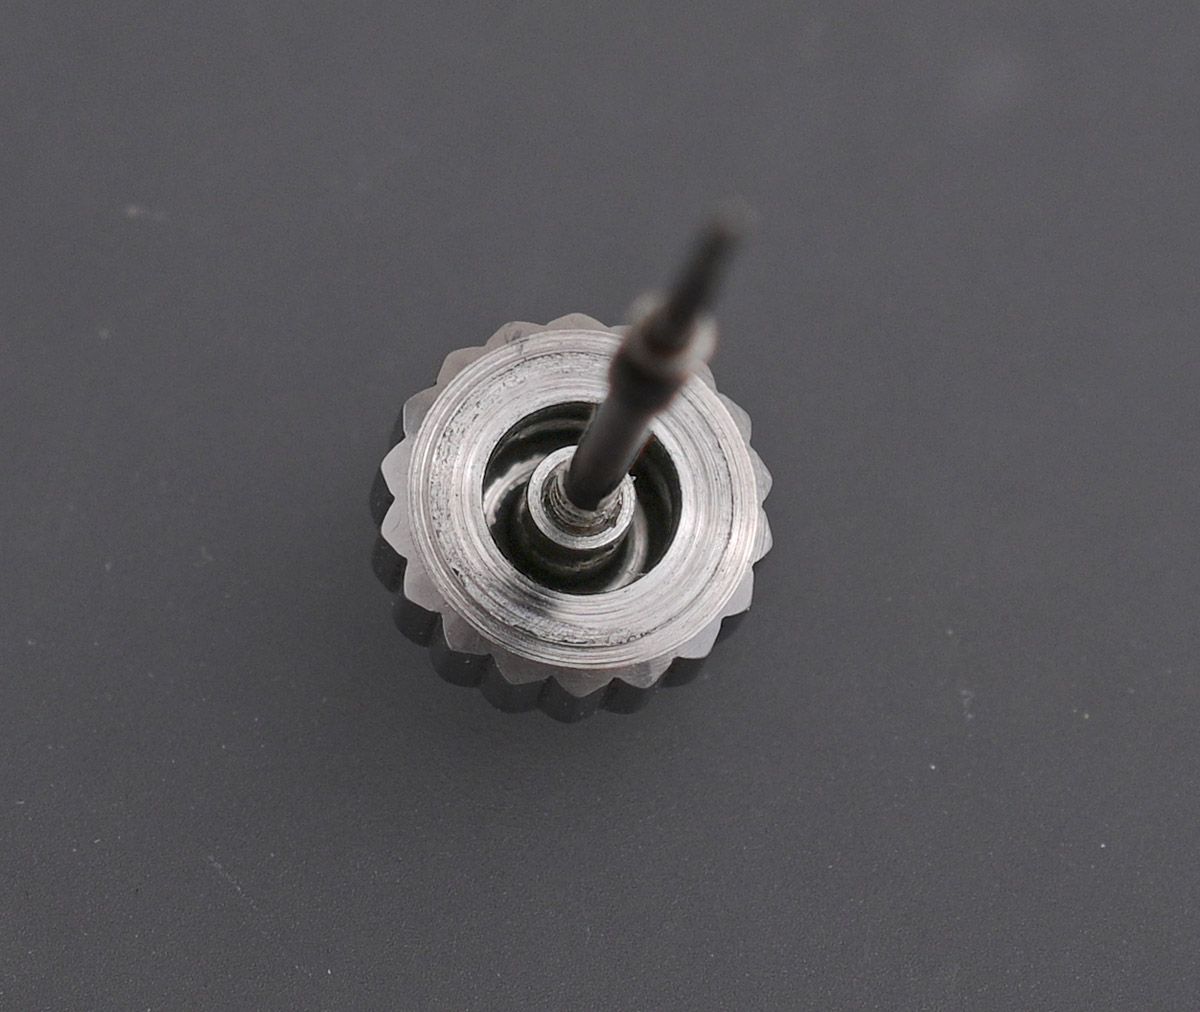
The crown design on this watch is of the captive gasket type and so our choice at this point is either to accept compromised water resistance resulting from a flattened and hardened crown gasket or to attempt to remove and replace the gasket.
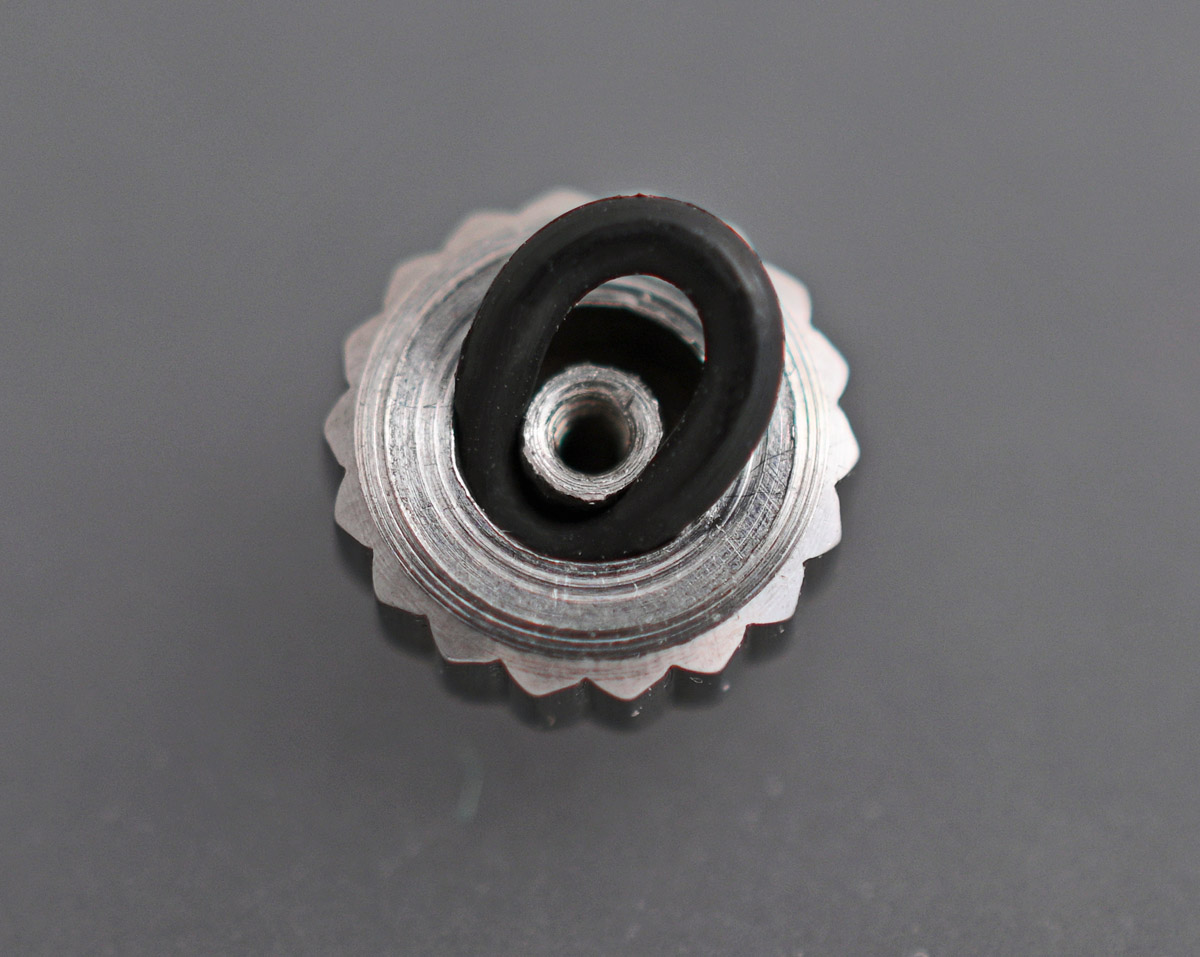
Removal of the gasket is a tortuous and tedious process, but some determined effort resulted in the release of the old gasket in about 10,000 pieces. A thorough clean of the vacancy provided the opportunity to contemplate the most appropriate gasket size to serve as the replacement. In the end, I opted for a gasket whose inner diameter was small enough to achieve a snug fit on the crown tube but whose girth was large enough to press against the outer surface of the crown’s interior but not so large to resist squeezing through the gap between the retaining washer and the threaded crown pipe.
With that completed and the stem refitted, we are ready to refit the crown and stem.

Having fitted the crown, it became clear why that flat surface was present on the side of the bezel: the crown was slightly fouling the bezel edge with the bezel positioned as it was and so I removed the bezel, rotated it 90 degrees anti-clockwise and refitted it.
A fresh case back gasket fitted and the watch is now ready to receive its case back once more.
This is a coherent and balanced piece of design that has resulted in a very handsome watch, notwithstanding the flaws to the dial. The only aspect of the design that raises questions is to have specified an over-size bezel, only to then have to adjust it to clear the crown. The crown could have been profiled to avoid that, or a slimmer bezel used.

But that quirk is charming and in fact arguably adds to the appeal. Given the obvious echoes of the Grand Seiko self-dater in some of the design elements used here, I thought about fitting a black crocodile strap to finish it off but then thought perhaps something a little more down to earth might suit it better.

That works for me.

Wonderful – a reversion to type (no pun intended). As ever, a distinct pleasure.
Thanks Martin.
Ba dum tish! Thanks!
Hooray, another post! A nice watch too, simple and clean. Next time I want to make a change in my collection, I really need to add a proper vintage Seiko. So much charm and quality.
Love your posts. Thanks Martin.
Thank you!
A personally very interesting post! I have a 6602-8050 from April 1970 so it was nice to see the innards of the simple yet attractive movement. The dial is almost identical apart from the dropping of the sea horse branding and any mention of diashock and the case is one piece rather than having a separate bezel.
It’s good to have normal service resumed on the blog!
I wear a near identical style strap on my Lord Marvel 36000. I love the way it gives the watch a slightly less ‘dressy’ look, without taking away from its simple elegance. The seahorse, being a very similarly styled watch, gives off the same look. Very lovely.
Agreed on all fronts! Thank you.
Awesome, good to see a new project! Really interesting that the solution they put forth was a cut out of the overhanging bezel… Thanks for this write up!
No problem. Glad you liked it.
“That is an embarrassment of riches, but also an embarrassment”
This made me feel a lot better about my own backlog. I have implemented a purchasing moratorium though. So many watches, so little time.
And the little time of course also depends on rate of progress!
Had me hanging off the edge of my seat!Will he win through? Yes! A happy ending! From South Africa.
Glad you enjoyed it! Thanks!
A fantastic and detailed piece of work on the Seiko sea horse i have this model and you told me everything i needed to know. Steve.
I am glad you enjoyed it and found it useful – thank you!
To whom ever wrote this article-
I contacted Seiko-no records only date of production-1965. My father purchased this watch while on RR in Japan in 1965.
His watch is in EXCELLENT CONDITION AND IN A PERFECT FUNCTIONING STATE. No scratches disfigurations shoe of wear.
Crystal is flawless.
My main question is what the band looked like on this model?
Any information about this watch would be greatly appreciated.
I don’t see an email address so I can attach photos ? Thank you in advance-
Hello Diane,
If you click on the Contact tab on the top of the page on a PC/Mac or via the drop down menu on a smart phone, you will find my email address (amateurwatchfettler@gmail.com). I can send you a catalogue photo of the watch on its original bracelet. Feel free to send me any photos you have of your father’s watch.
All the best
Martin
Hi, Great write up and result. I interested to know how you can wind the mainspring anti clockwise with a clockwise arbor. I think that I have just bought the same winder set on eBay (marked with a B and what looks to be an e above that on the handle, no idea what the manufacturer is, maybe you know?) . Will be great if it can wind both ways. Steve.
It works if the nub on the winder shaft has enough meat on it to gain purchase on the slot in the mainspring but it is not really using it as intended. Needs must though in the absence of a left-handed winder!
Thanks Martin, Appreciate your reply. Steve.
Hey mate. Nice read.
I’m just bidding on a seahorse tonight. Hopefully I snag it. I’ll give it a clean up and hopefully it will be a worker.
Rob.
Hi. Amazing article.
Do you know if the date disc on this watch is same as on 6206B ? Part # 801870
No, there is almost no parts intercompatibility between the 62 and 66 series. The date disk part number for 6602 is 801880.
Hey Hey mate
By the way I bought that gold seahorse watch as well.
Rob D B.
Hey mate
Another great
I’m currently having a problem relocating the crown on my 6602-9905 Re release tab is stuck down and therefore won’t relocate/lock back in. So my crown is loose and I can’t operate the watch. Can you tell me how to fix so I can lock the crown back in correctly.
Rob D B.
Hi Rob,
The likelihood is that either the yoke has been displaced on the setting lever spring is broken. In either case, you can only deal with the problem by removing the dial and hands and resetting the parts, replacing anything broken. No short-cuts I’m afraid.
Good luck!
Martin
Thanks mate.
Yes. I just had it fixed yesterday. I didn’t want to damage it any further so I took it to my watch maker. What is done was pushed a little too hard on the button when releasing the stem. He was able to simply push it back into shape. Good result.
Thanks very much for your reply.
Rob D B.
What was your truck to removing the bezel?
What was your trick to removing the bezel?I believe it’s the same design on the 6602-7040 as well.
No trick that I can recall. Just the usual case knife inserted between the lower edge of the bezel and the case. I don’t have the watch to hand so cannot remember whether there is a cut-out to help that process.
beautiful restoration! I have the same seahorse and the bezel came off randomly – what kind of crystal press did you use to refit the bezel? will a cheap press like this work? thanks in advance
https://www.esslinger.com/watch-tool-crystal-press-and-case-closer-combination-12-reversible-dies/
Hi Elliott, I have three different crystal presses and the one I turn to the most often is the cheapest! In fact, having just looked at the Esslinger link, mine is the same model as that. Many years of service and rarely defeated!
thats great to hear, do you have a preference for the aluminum dies vs the nylon ones? thanks
Generally, I am happy with the nylon dies – my choice depends more often than not on how much clearance a particular die offers.
fabulous and so interesting I have one with original al bracelet but looses times and won’t do a full wind :-(( wish you could fix it
rockyln6969@yahoo.co.uk
do you happen to remember the size of the case back gasket for this watch? thanks
Hi Elliot,
My records suggest that the correct gasket is OB2910B for which a Cousins 802915C may be an effective substitute if you can’t find OEM.
Hi Martin,
I am working on a seiko cronos special and having issues with a loose bezel. The crystal fits into the bezel and then the bezel fits onto the case however the bezel is very loose on the case. Have you ever encountered this? Can I use some light glue to secure the bezel to the case? thanks in advance
Hi Elliot,
Does the crystal rotate with the bezel if you rotate the loose bezel? I wonder if the crystal is not seating against the ridge in the case? I’m not sure what the design is in that watch but I had similar issues with the Alpinist project. In the end I had to find an alternative crystal and modify it to get the whole assembly to fit properly.