
Tags
Well, I could hardly leave the poor thing ticking away, whilst laboring against the possible impediment of increasingly viscous 40 year old oil and so, motivated by an offer to buy my watch, I’ve set about the task of giving the movement its first service. I tend to approach the servicing of quartz movements with a certain amount of trepidation, not because they are any more mechanically complex than the mechanical pieces I favour – they are evidently not – but because their operation depends so much on the correct functioning of key parts over which I have no facility to exert influence. A blown circuit or a failed coil will not bend to my will. They will remain blown or failed and the watch inoperable unless I can source replacements. However, with this particular example functioning correctly, the task at hand reduces to dismantling the movement, cleaning it, and reassembling the parts, freshly lubricated, as required.
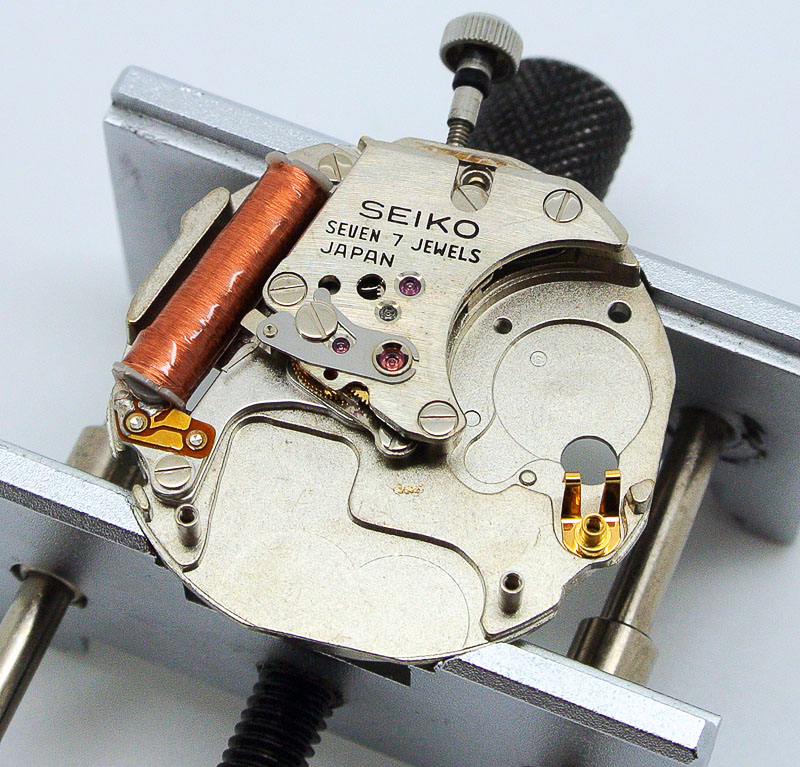
So as usual, we start with the movement out, and the hands set to 12 to aid their removal:

The removal of the hands requires some care both because of the immaculate state of the dial but also the fact that, being effectively new, they are a little more reluctant to release their grip on the hour wheel and cannon pinions. Removal of parts from the calendar and train sides of the movement proceeded without incident but in familiarising myself with its architecture, I was left with the impression that this is a modern and sophisticated design including some neat features.
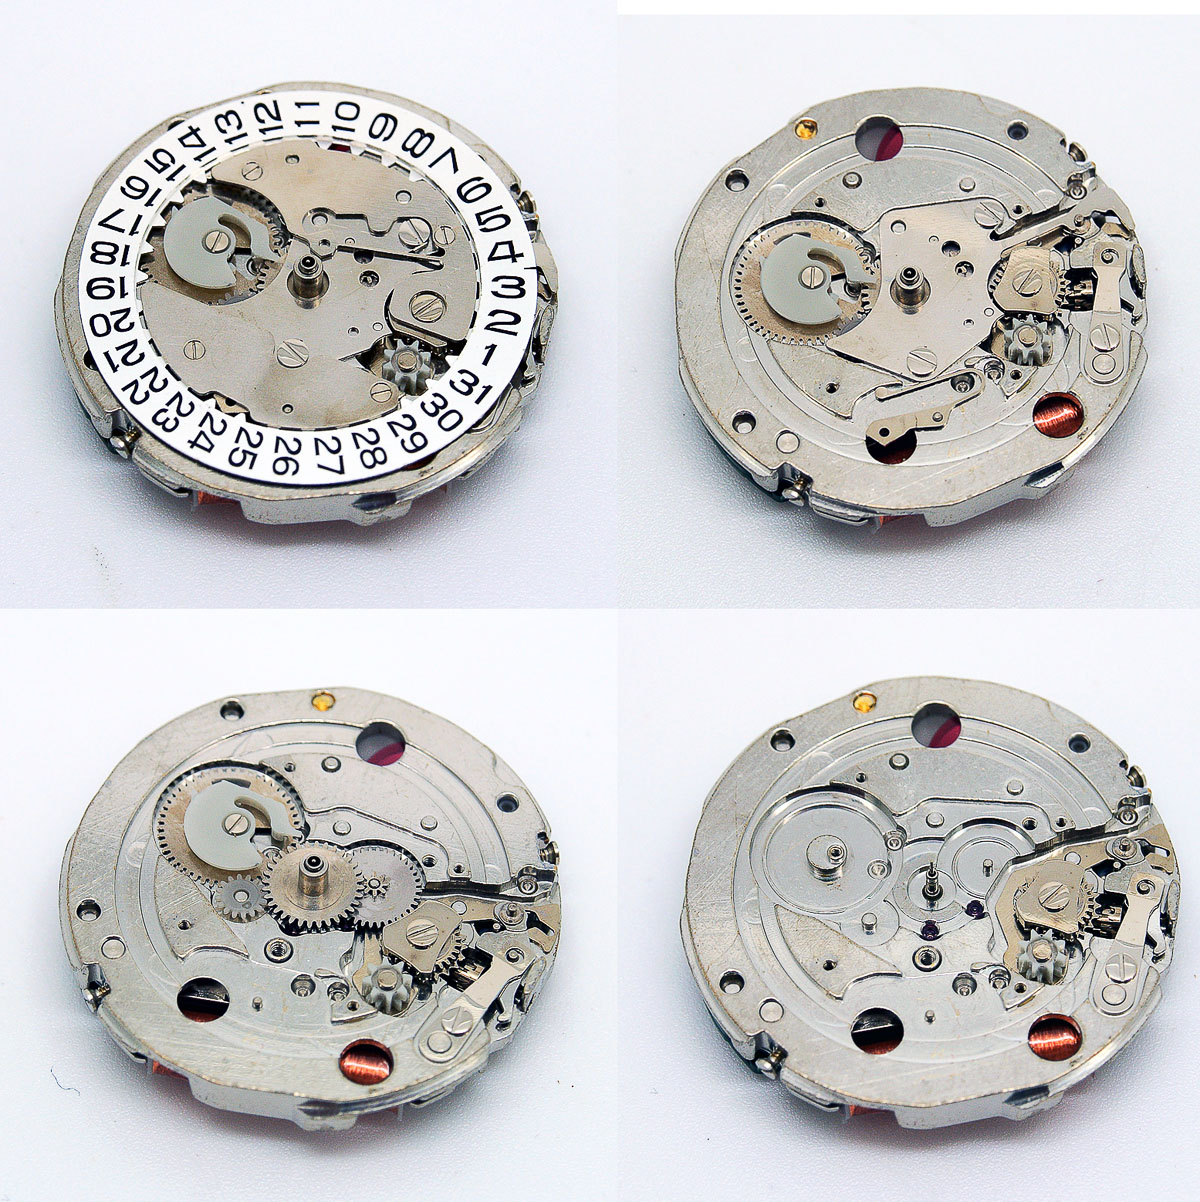
Some of the layout on the calendar side is familiar but the keyless works is quite different from that of any of the Seiko mechanical movements I’ve worked on from the same era. The train side is less familiar of course because the operational heart is the quartz oscillator, circuit and coil rather than mainspring, escapement and balance.
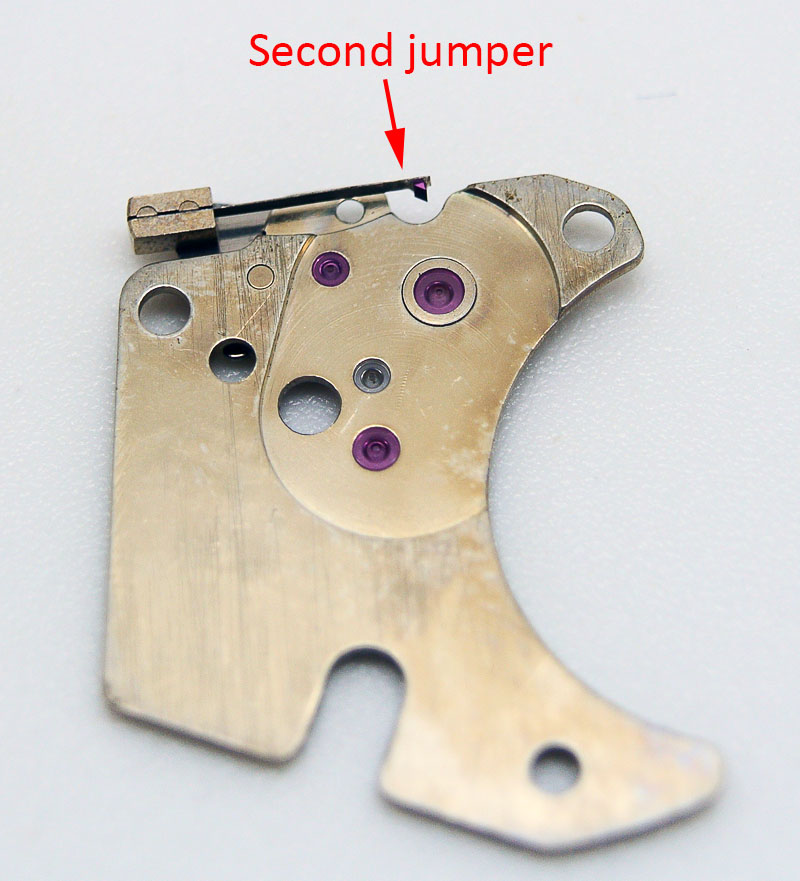
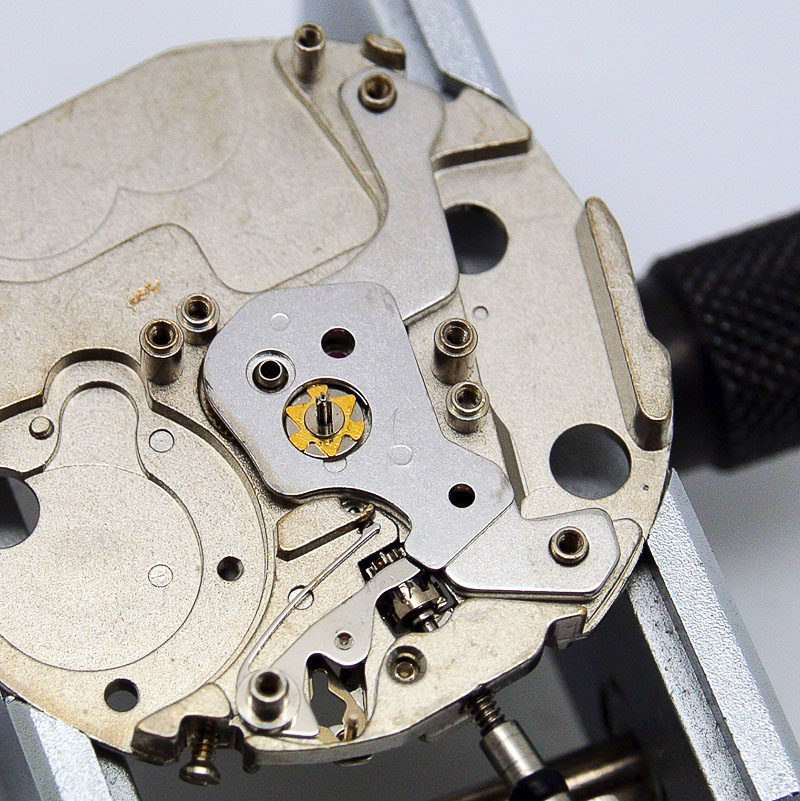
One particularly striking feature of the watch design can be found in the third wheel bridge, seen top side in the photo, top right, above. The appearance of the bridge looks somewhat unusual, in particular the additional plate sitting atop the fourth wheel jeweled-bearing – not something we would expect to encounter on a mechanical watch. In looking at the underside of the bridge, we can see what’s what. The plate supports a jeweled jumper, there to regulate the movement of the seconds hand, acting as it does upon the teeth of the fourth wheel.
The half-way point then it reached with the mainplate naked, free from all its fixtures and fittings.

Into reverse gear with the parts now clean, we start by placing the stem and clutch before fitting the date corrector rocker and wheel, the setting lever axle and lever.

The intermediate wheel for date correction and the setting wheel move into position next, secured by the setting wheel ring, with this part of the process completed by fitting the setting lever axle spring.
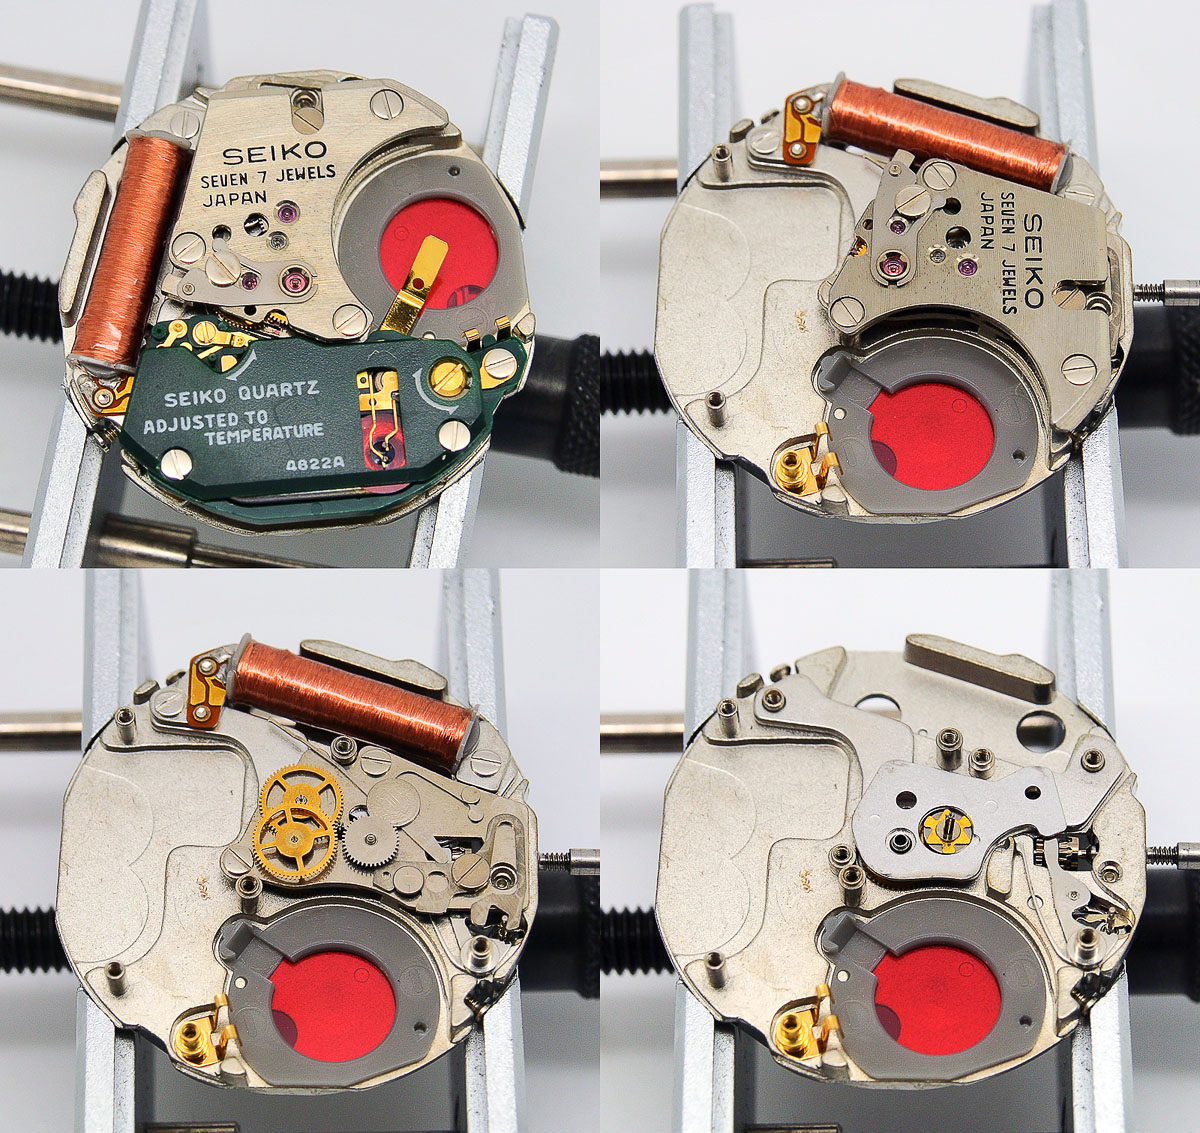
The whole shebang looks very neat and robustly engineered, with no obvious weak links. Turning the movement over, we start with the centre wheel, followed by the rotor stator and step rotor.
In cleaning and handling the magnetic step rotor, we have to be very careful to make sure no magnetic debris has adhered to the rotor. In this instance, it’s clean as a whistle. The centre wheel bridge comes next and in fitting it we need to take care to make sure that the driving pin emerging from the rear of the setting lever is correctly engaged with the second setting lever.
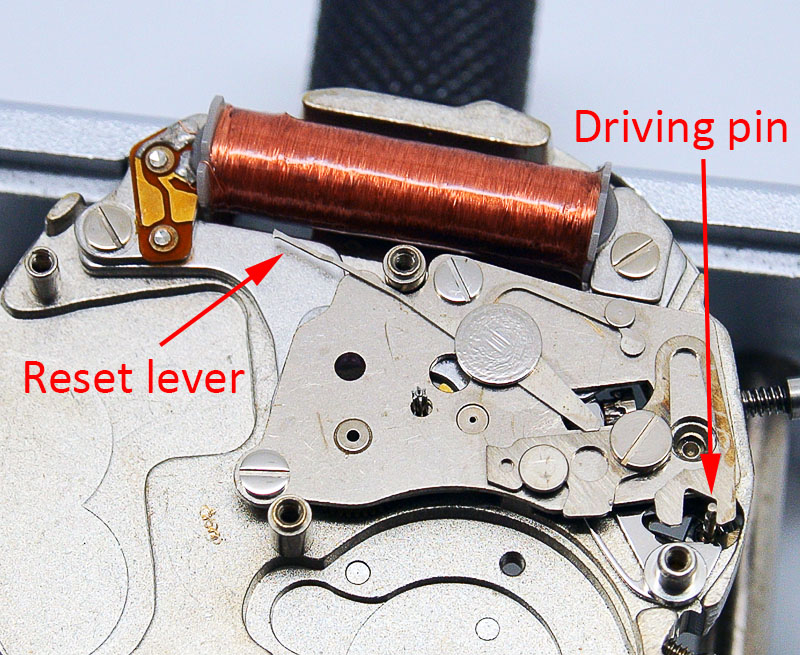
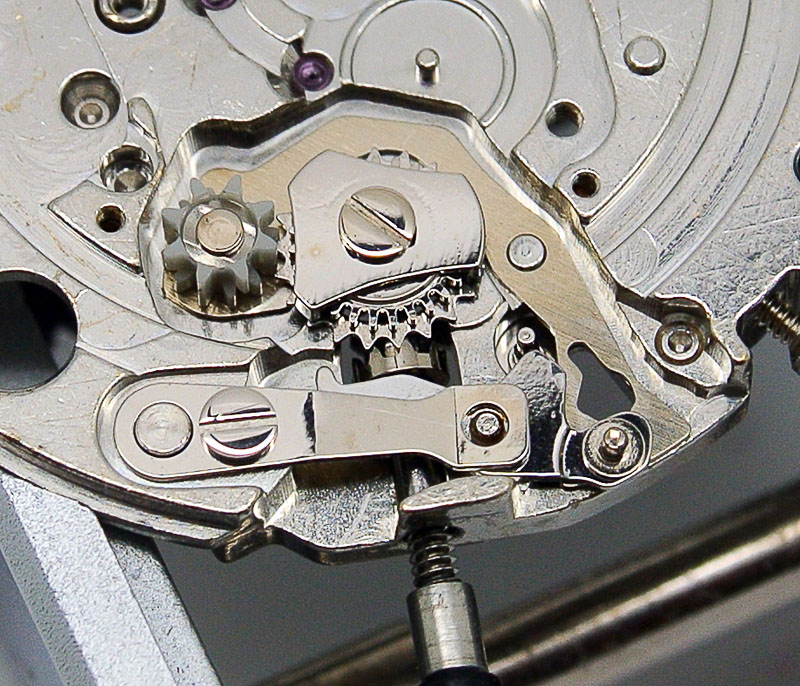
This arrangement provides the key to the rather clever rapid advancement of the seconds hand when the crown is pulled out to the time setting position. In pulling the crown out, the driving pin acts upon the second setting lever, moving its hammer against a cam on the rear of the second setting wheel.
Depending on where the seconds hand is on its journey around the dial, interaction of the hammer with the cam will move the seconds hand onto the next 10 second position (10, 20, 30, 40, 50 and 60). Thus, if the crown is pulled out at 51 seconds, the seconds hand will leap forwards to the zero position, saving you the tedium of having to wait those extra 9 seconds. The second part of this operation is the simultaneous movement of the reset lever against the reset pin on the electronic circuit, stopping the watch.
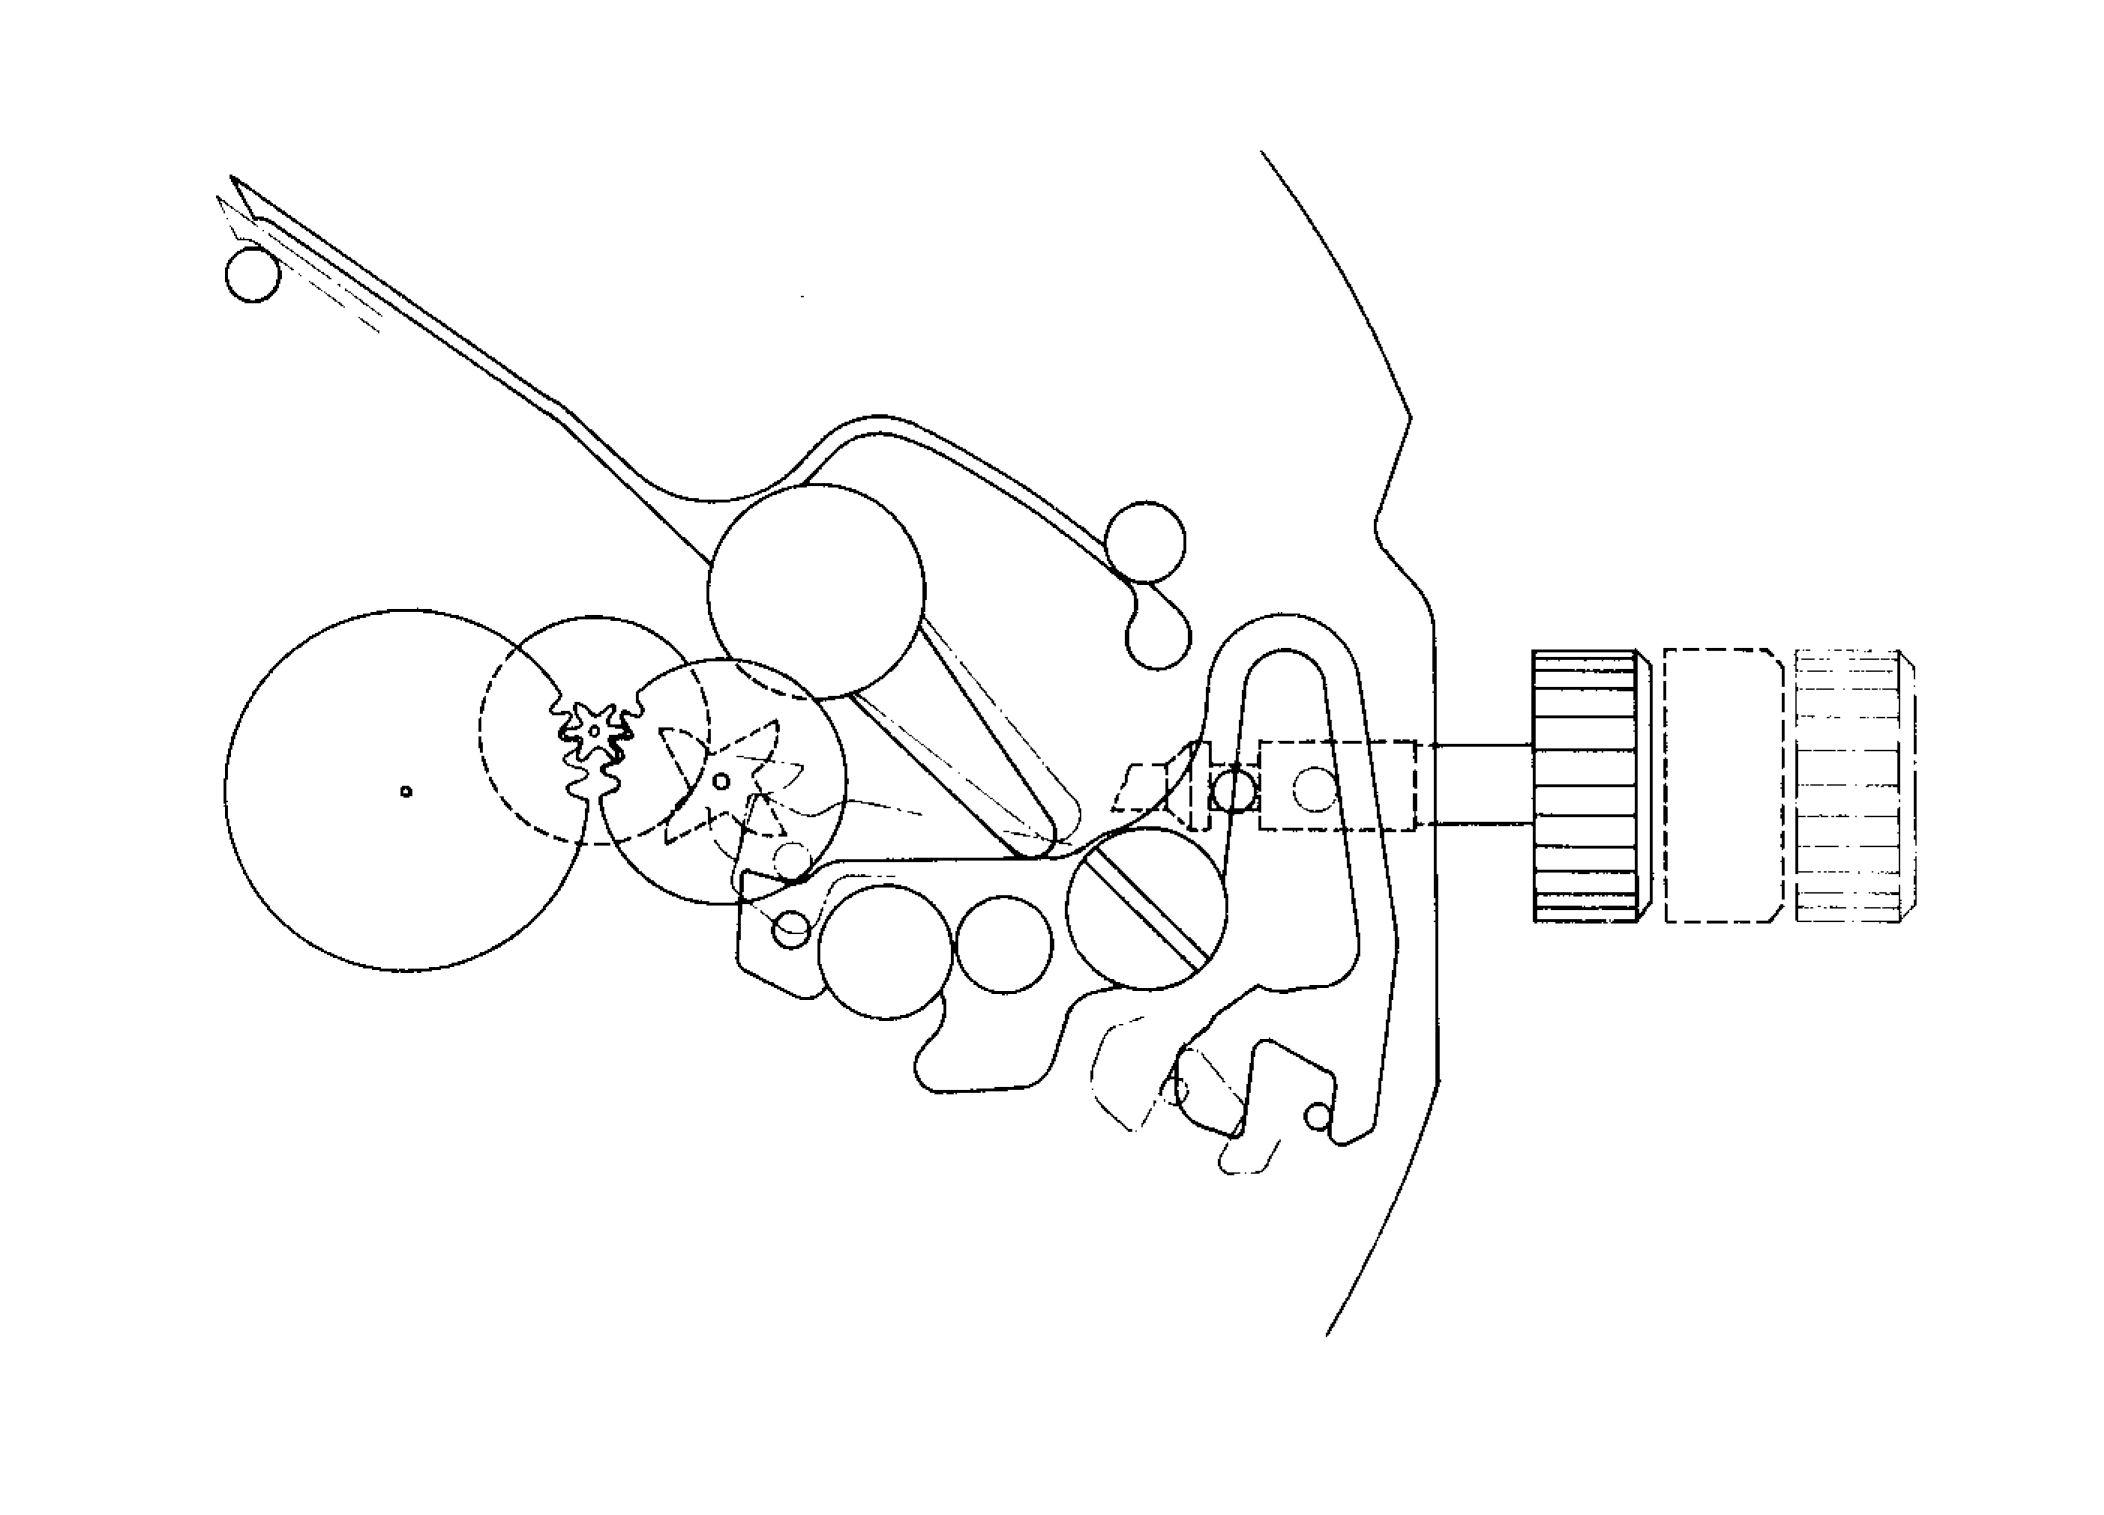
The fiddliest bit now follows. In go the third and fourth wheels

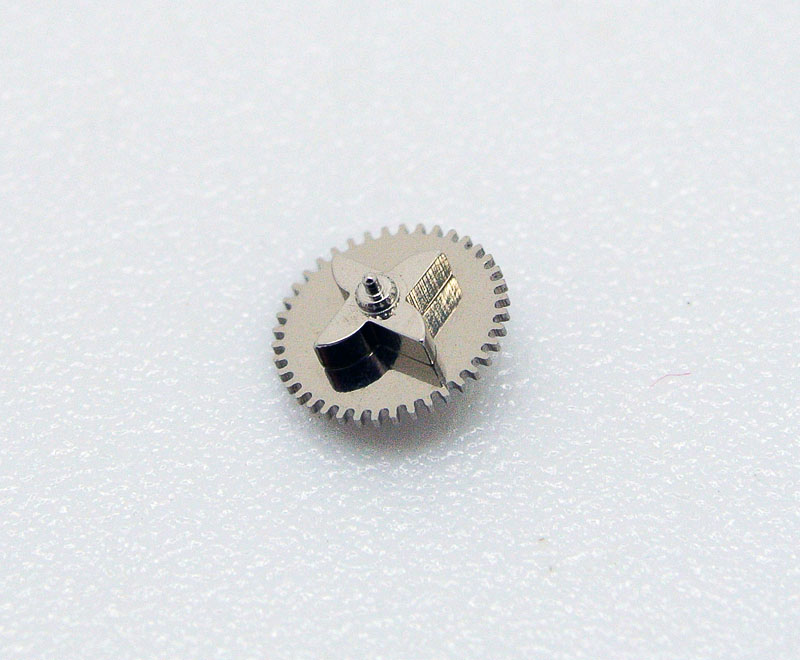
followed by that cool second setting wheel and its cam

and several minutes cursing follow while I try to will the third wheel bridge to engage with the arbors of four separate wheels, without having the means to manipulate them in the way you can in a mechanical watch by rotating the mainspring barrel. Somehow though, they all eventually locate and I rather gingerly tighten down the bridge in stages making sure that everything is properly in position.
With no fowl-ups, the only remaining task is to refit the circuit and battery insulator, the cannon pinion, minute, hour and date driving wheels,

followed by the setting lever spring and remaining calendar parts. The dial and hands complete the deal before refitting the movement to the case. We finish by making sure that all of the functions work correctly (which they do) and we are done.


Thank you. Another great post.
Hi Martin, always love seeing your posts and your experiences with disassembling, cleaning/fixing, and reassembling. This watch is a lovely example of Taro Tanaka’s Grammar of Design! The deep blue hue of the dial is gorgeous.
I know you probably get a thousand questions like this one, but would you ever consider selling any of your pieces? I’ve been specifically looking for a Seiko that fits the Grammar of Design with it’s sharp case sides and high polish surfaces. This one is beautiful and I’d definitely enjoy wearing it.
Other ones I’ve been trying to search for are either a King Seiko 4502 or a King Seiko 5626 (with day and date) both that fit the Grammar of Design. I don’t know why I don’t mind the day and date display. Perhaps it makes the watch feel more like a daily wearer.
If you have a price, let me know! I understand that your time and your work is worth a lot.
Cheers!
Chris
(You don’t have to approve this comment if you don’t want to, I just don’t know how else to contact you)
Hi Chris, I have your email from your comment and will contact you tomorrow (it is late here). All the best Martin
Hello Martin,
Thank you for this excellent info regarding the Seiko 4822A.
I just received one yesterday and the function of my second hand when the crown is pulled out is not indexed properly to land on the “tens”. My second hand always lands on the “sixes”.
Is there a proper method to index the second hand to the “tens” during assembly of the gear train and setting wheel or is the proper indexing simply achieved when the
Second hand is pressed onto its pivot?
Also based on the illustration I see in your posting I wonder if you have any Seiko technical info on this movement, I would very much like a copy if possible.
Hi Ken, I suspect that your indexing problem derives from the seconds hand not having been correctly set when refitted. It needs to be set at one of the 10 seconds markers with the crown pulled out to the second position. If you do a search for “Seiko 4823 parts list” the first hit should be the document that I referred to.
Thanks Martin, please correct me if I am wrong…the 4823 is the same as 4822, the only difference being 4823 adds the day function ?
That’s correct.
Hello Martin,
My 4822-8000 has an incorrect crystal, very tall acrylic, and I would like to correct this. I have located a listing from a material supplier for the crystal however I can’t find any information about how the crystal is retained in the case. I’m assuming that there should be a nylon-type gasket ring involved that the crystal is pressed into but am not 100% certain on this. I’m wondering if you have any information on this that you can share with me?
Thank You
Ken
Hi Ken, the crystal part number is 300W88GA and I think this is a style of crystal that uses a nylon gasket. However, some of the W-type crystals are seated using a rather complex collection of rubber and nylon gaskets with separate retaining rings (see my post on the 0853). If the gaskets are not there then you may have a struggle to locate the correct originals.
In your opinion, is the jeweled second hand jumper simply there to keep the ticks firmly and cleanly landing in 1/60 increments? I just finished servicing a 4823 and that jumper completely off the teeth despite having a running watch. I haven’t installed the hands and dial yet and wanted to sort this out first.
thank you for this post as well ! very helpful.
I think it’s to prevent backlash and make sure the seconds hand aligns consistently on each marker. There are plenty of quartz movements that do without and no reason why the 48 should not run with it not fitted.
Thank you Martin! You’re documentation has helped me on countless occasions.
Hi Martin. Thank you for the annotated photographs. I’ve just started dabbling into old watches. I can’t seem to get the case back off one of the examples I got. It’s a 4822 8000 series I believe. Did you have to pry it at a certain spot? And also any clue what was the notch in the case back cover for? Cheers!
From memory, I prised it off with a case knife, inserting it into the groove between the lugs.