
Tags
Two and a half years ago, I won a Yahoo Japan auction for a lot of seven watches, all but one of which at least of passing interest to me. Regular readers of this blog may recognise three of this magnificent seven as having received some attention from me, the results of which have been posted as entries here (and here and here). Two of the three finished projects have since found new owners (the King Seiko 5626 and the Seikomatic) and the one watch from this group that held no real interest for me, the 8T63 quartz chronograph in the centre, I sold on eBay in the same (working) condition as received.
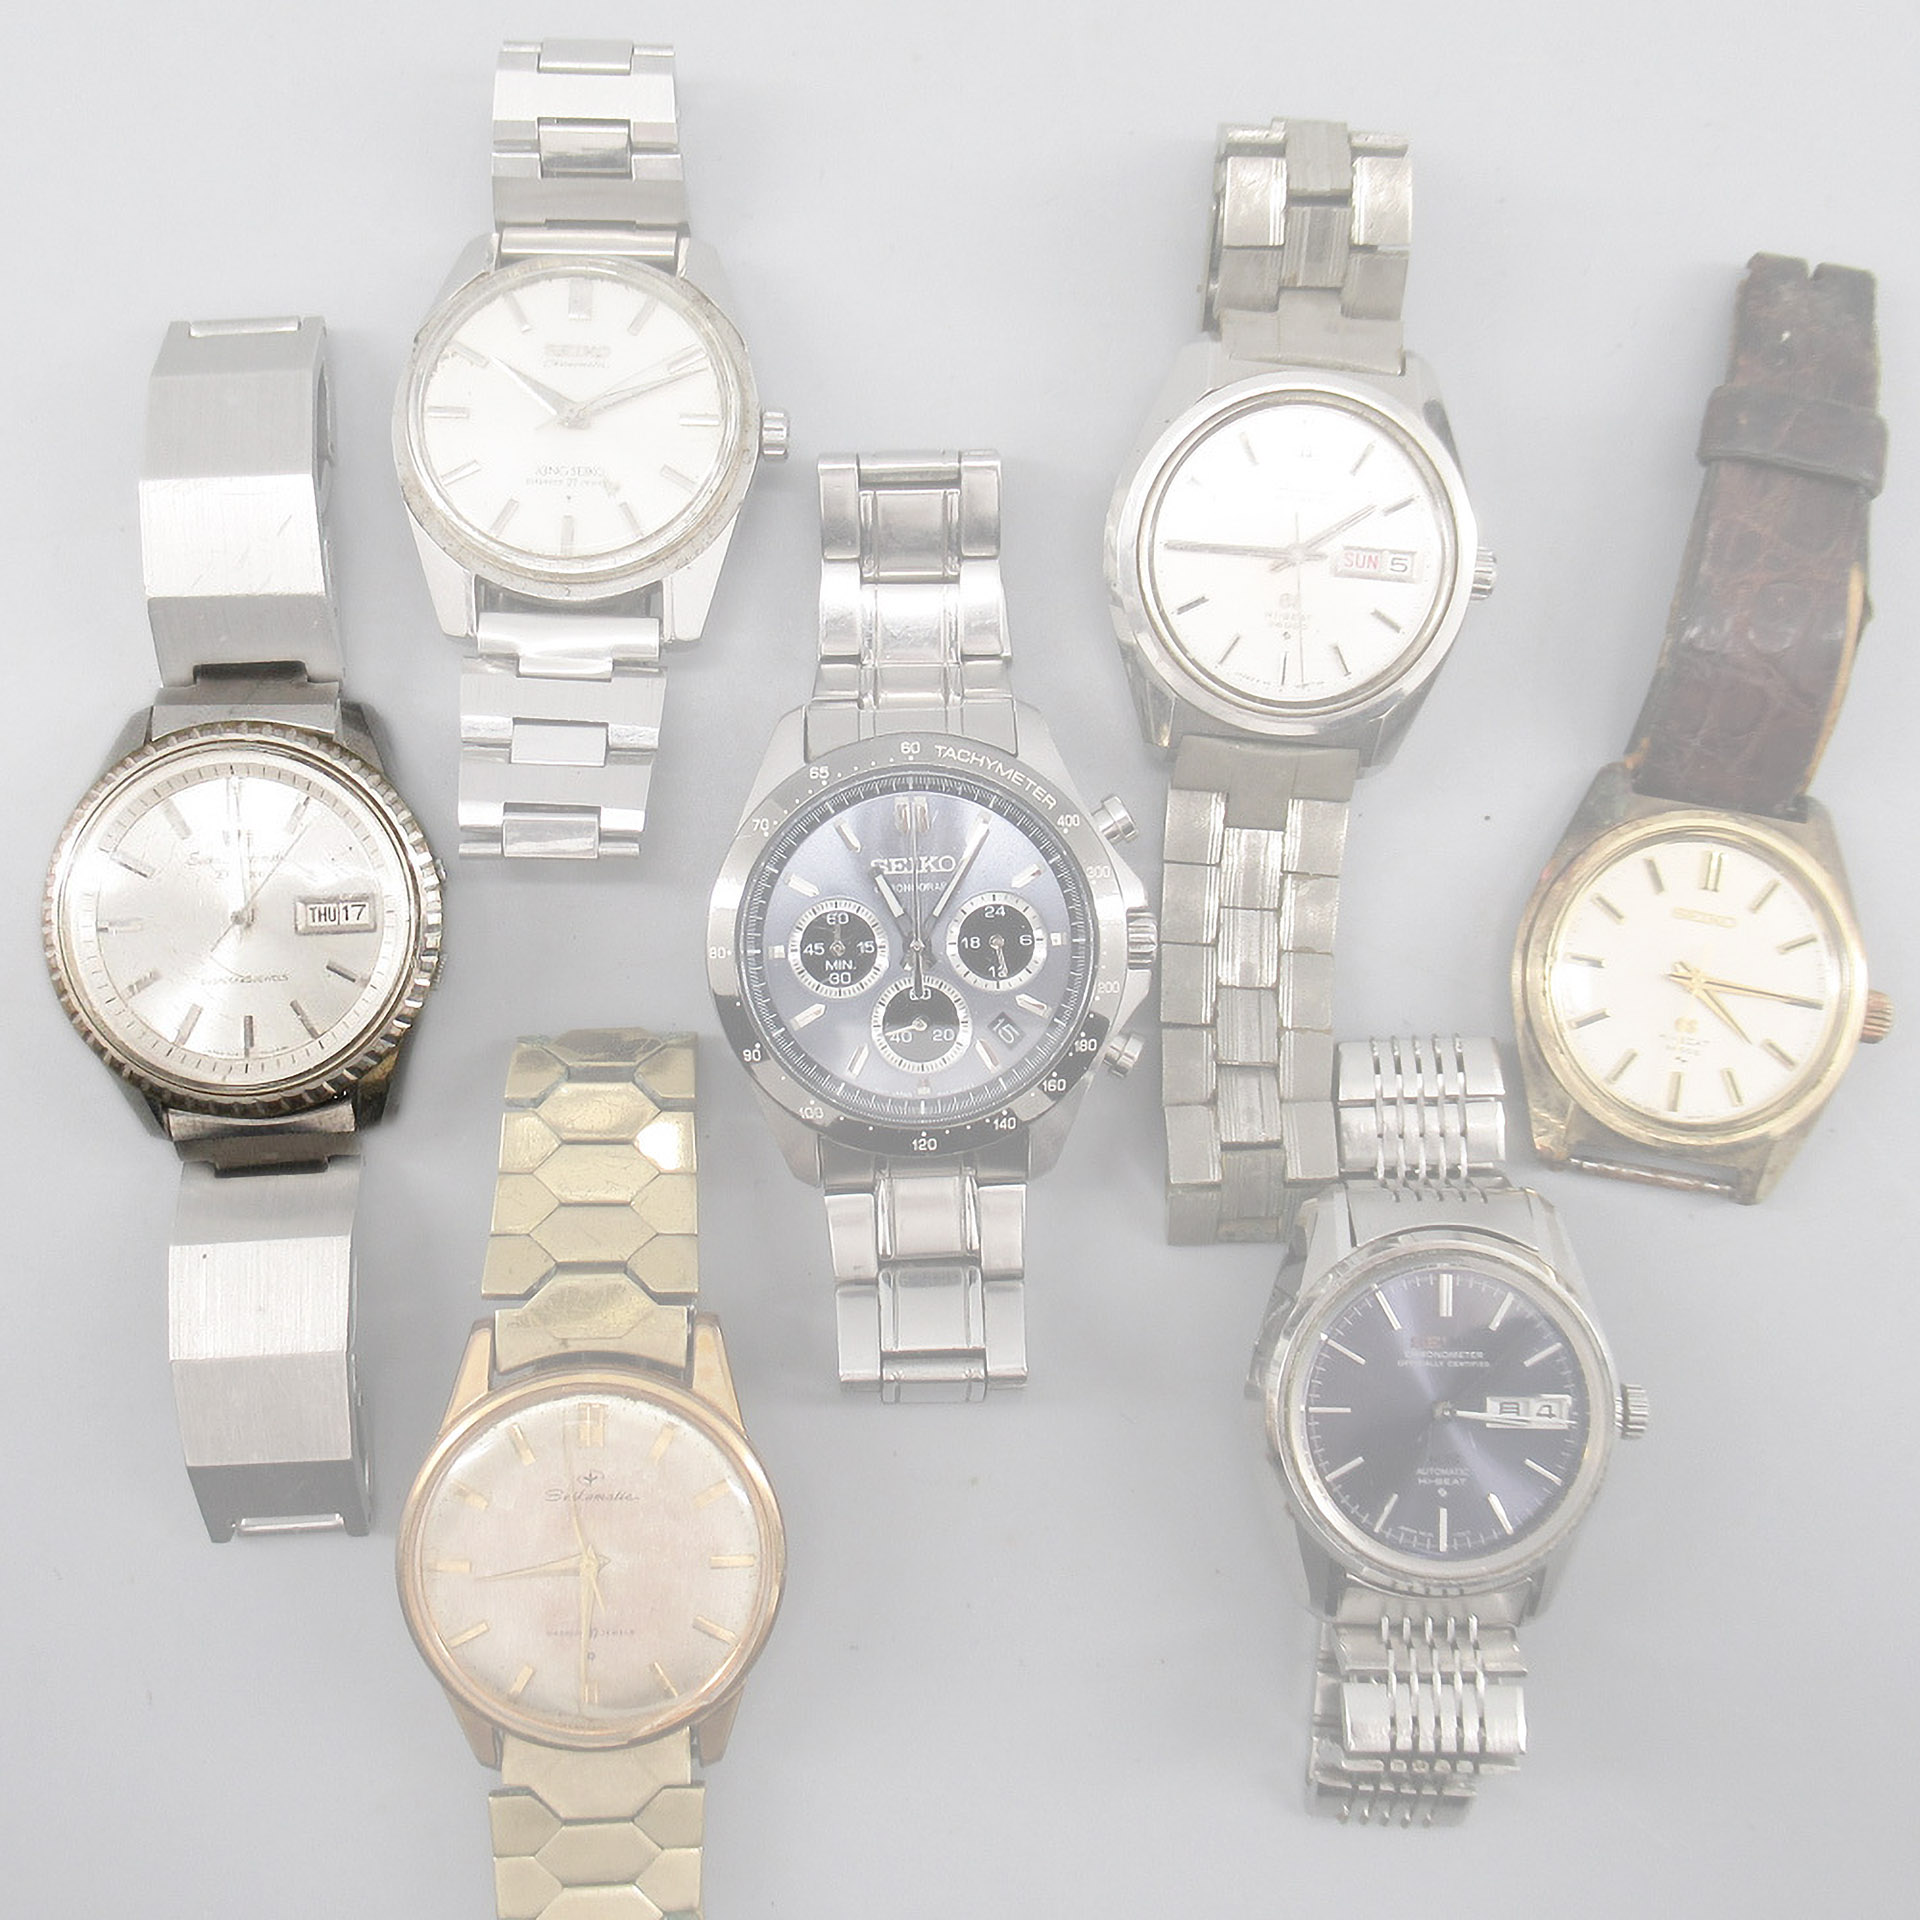
Of the three that remain, the hand-wind King Seiko will feature at some point in the next few months as part of a sequence of posts celebrating the evolution of the King Seiko, and the 61GS will join a small pile of similar watches waiting attention. This leaves the watch to stage left, somewhat bleached out in the auction photograph. A close-up set of photos from the auction reveals a little more of the potential offered by this prospect.
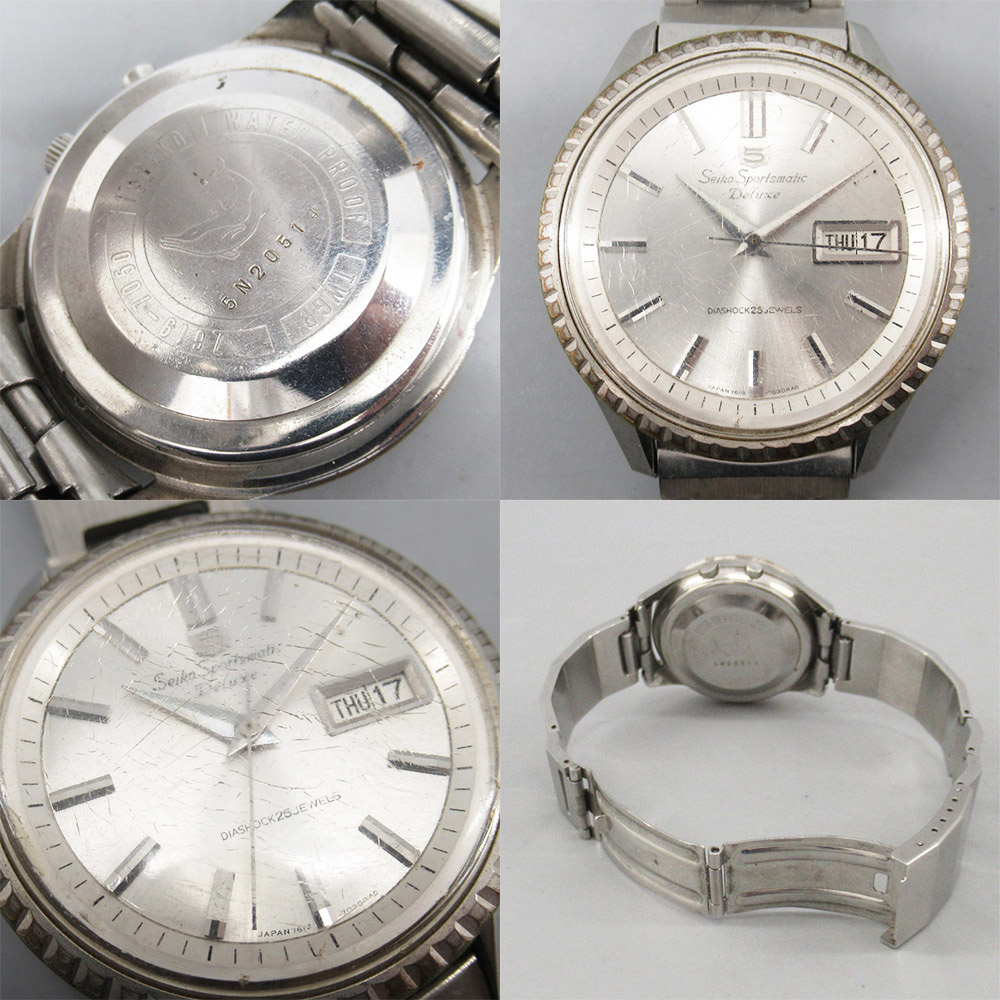
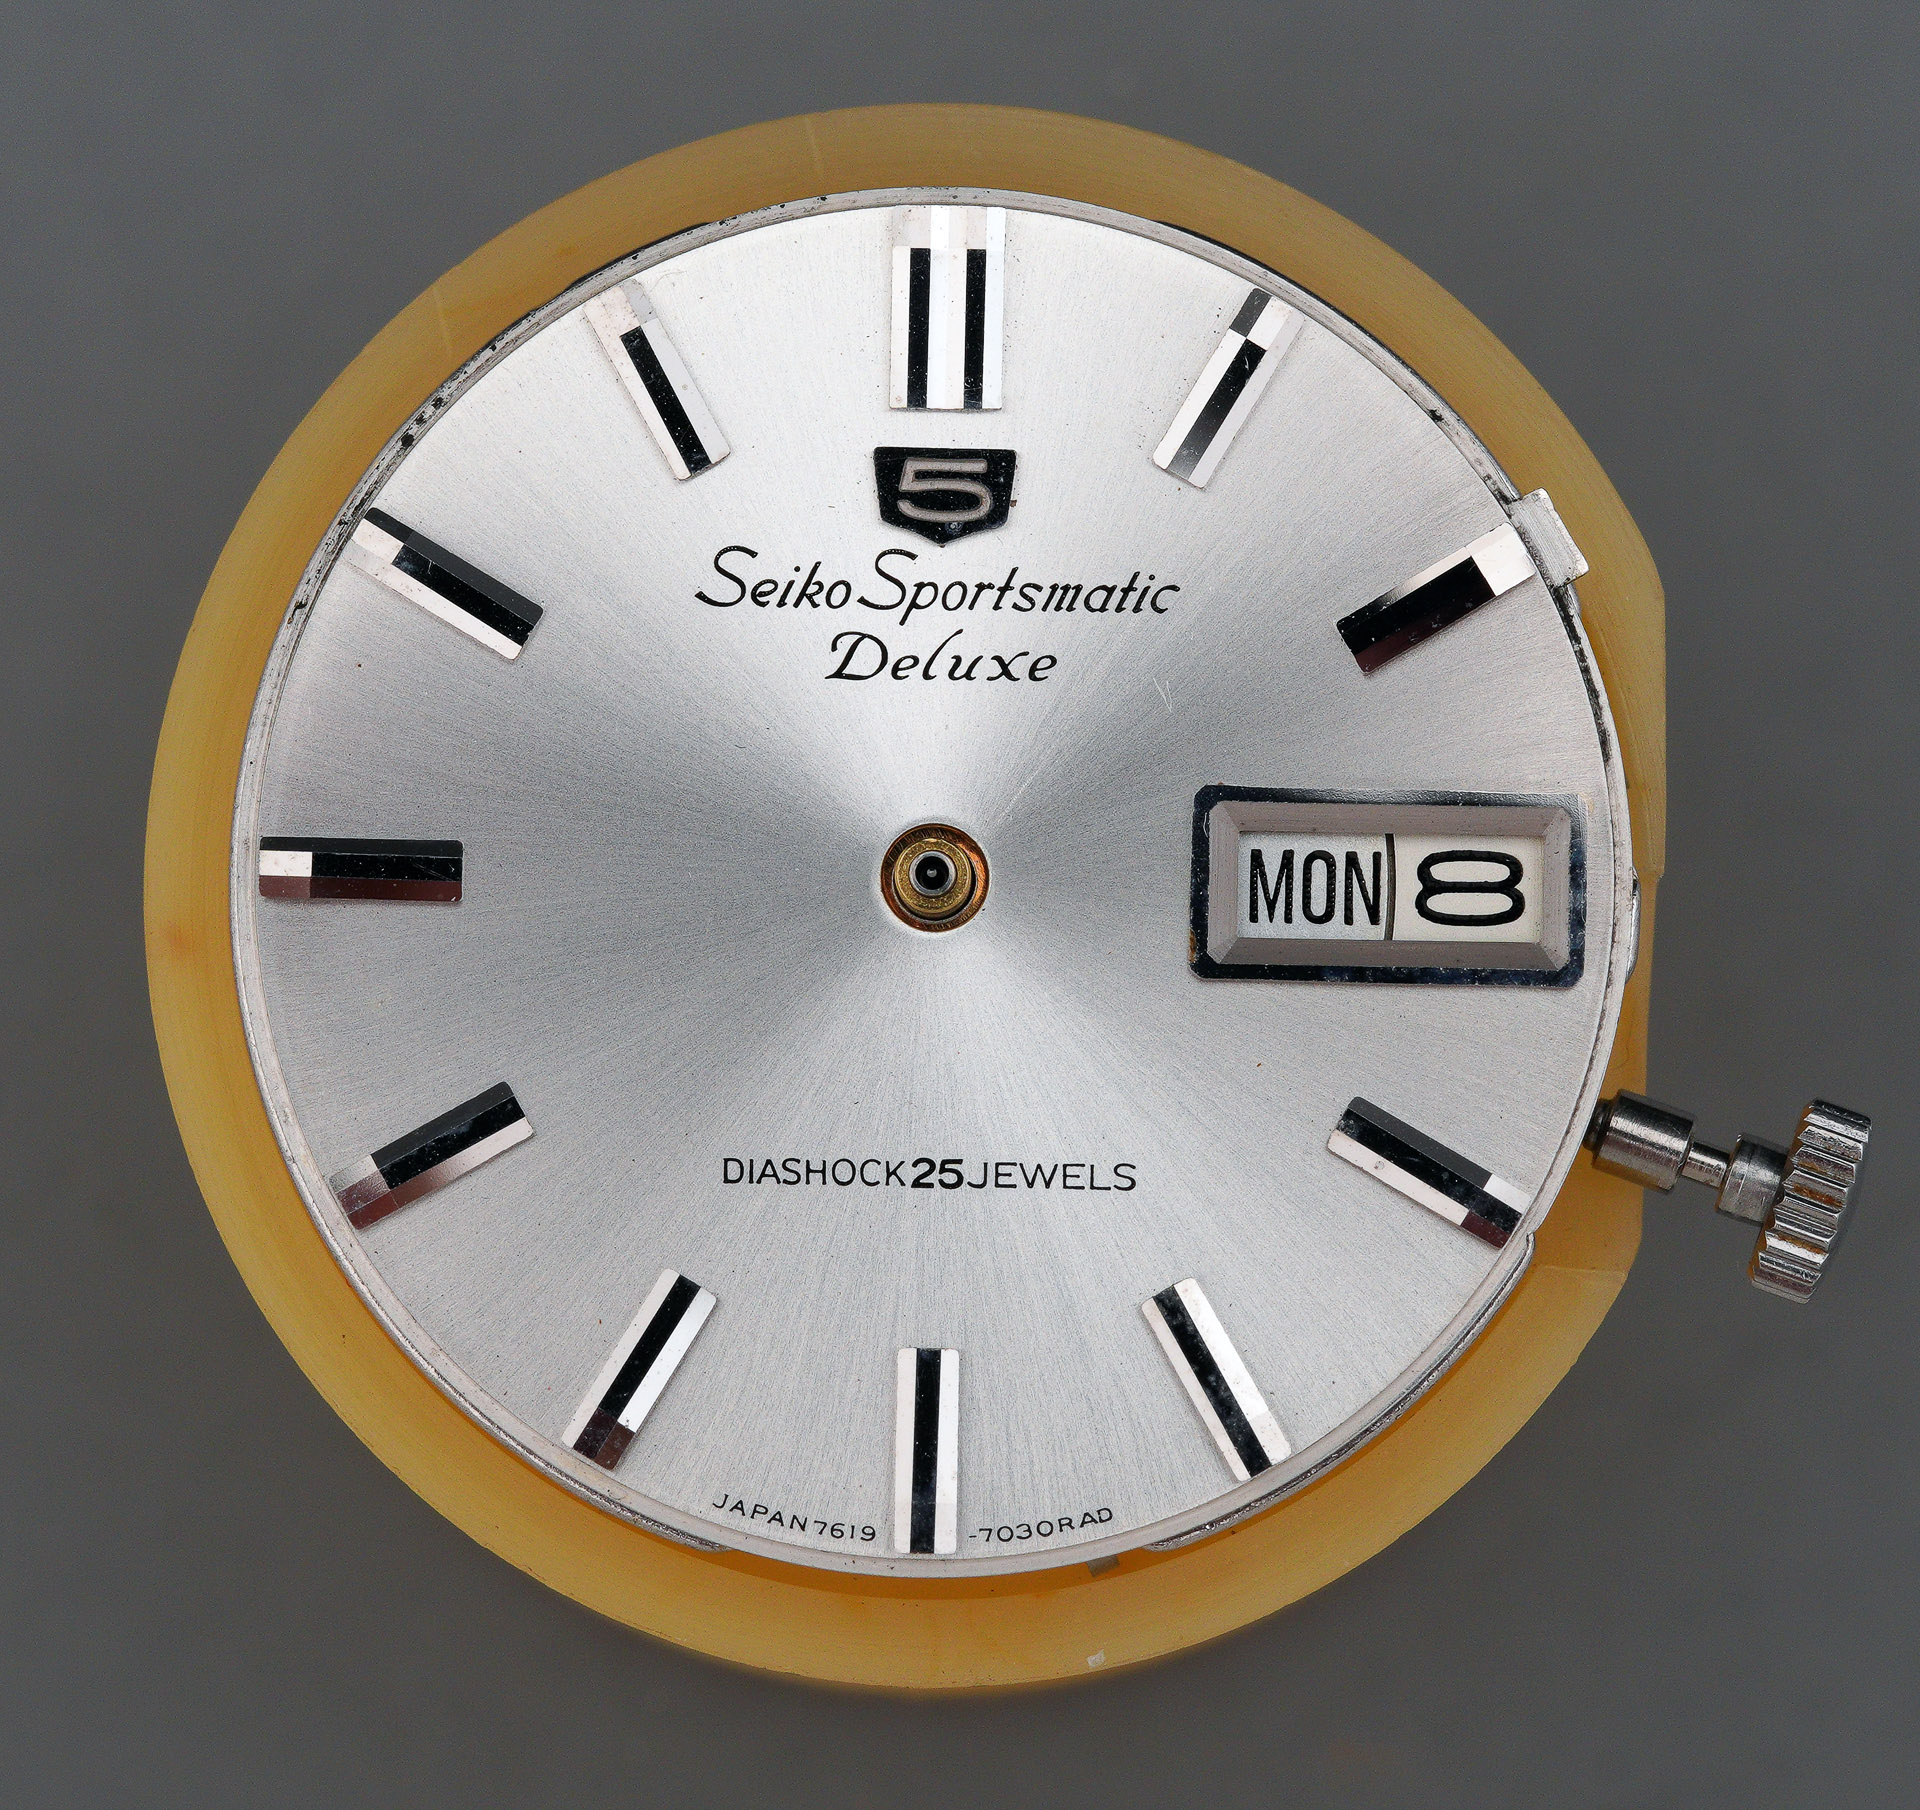
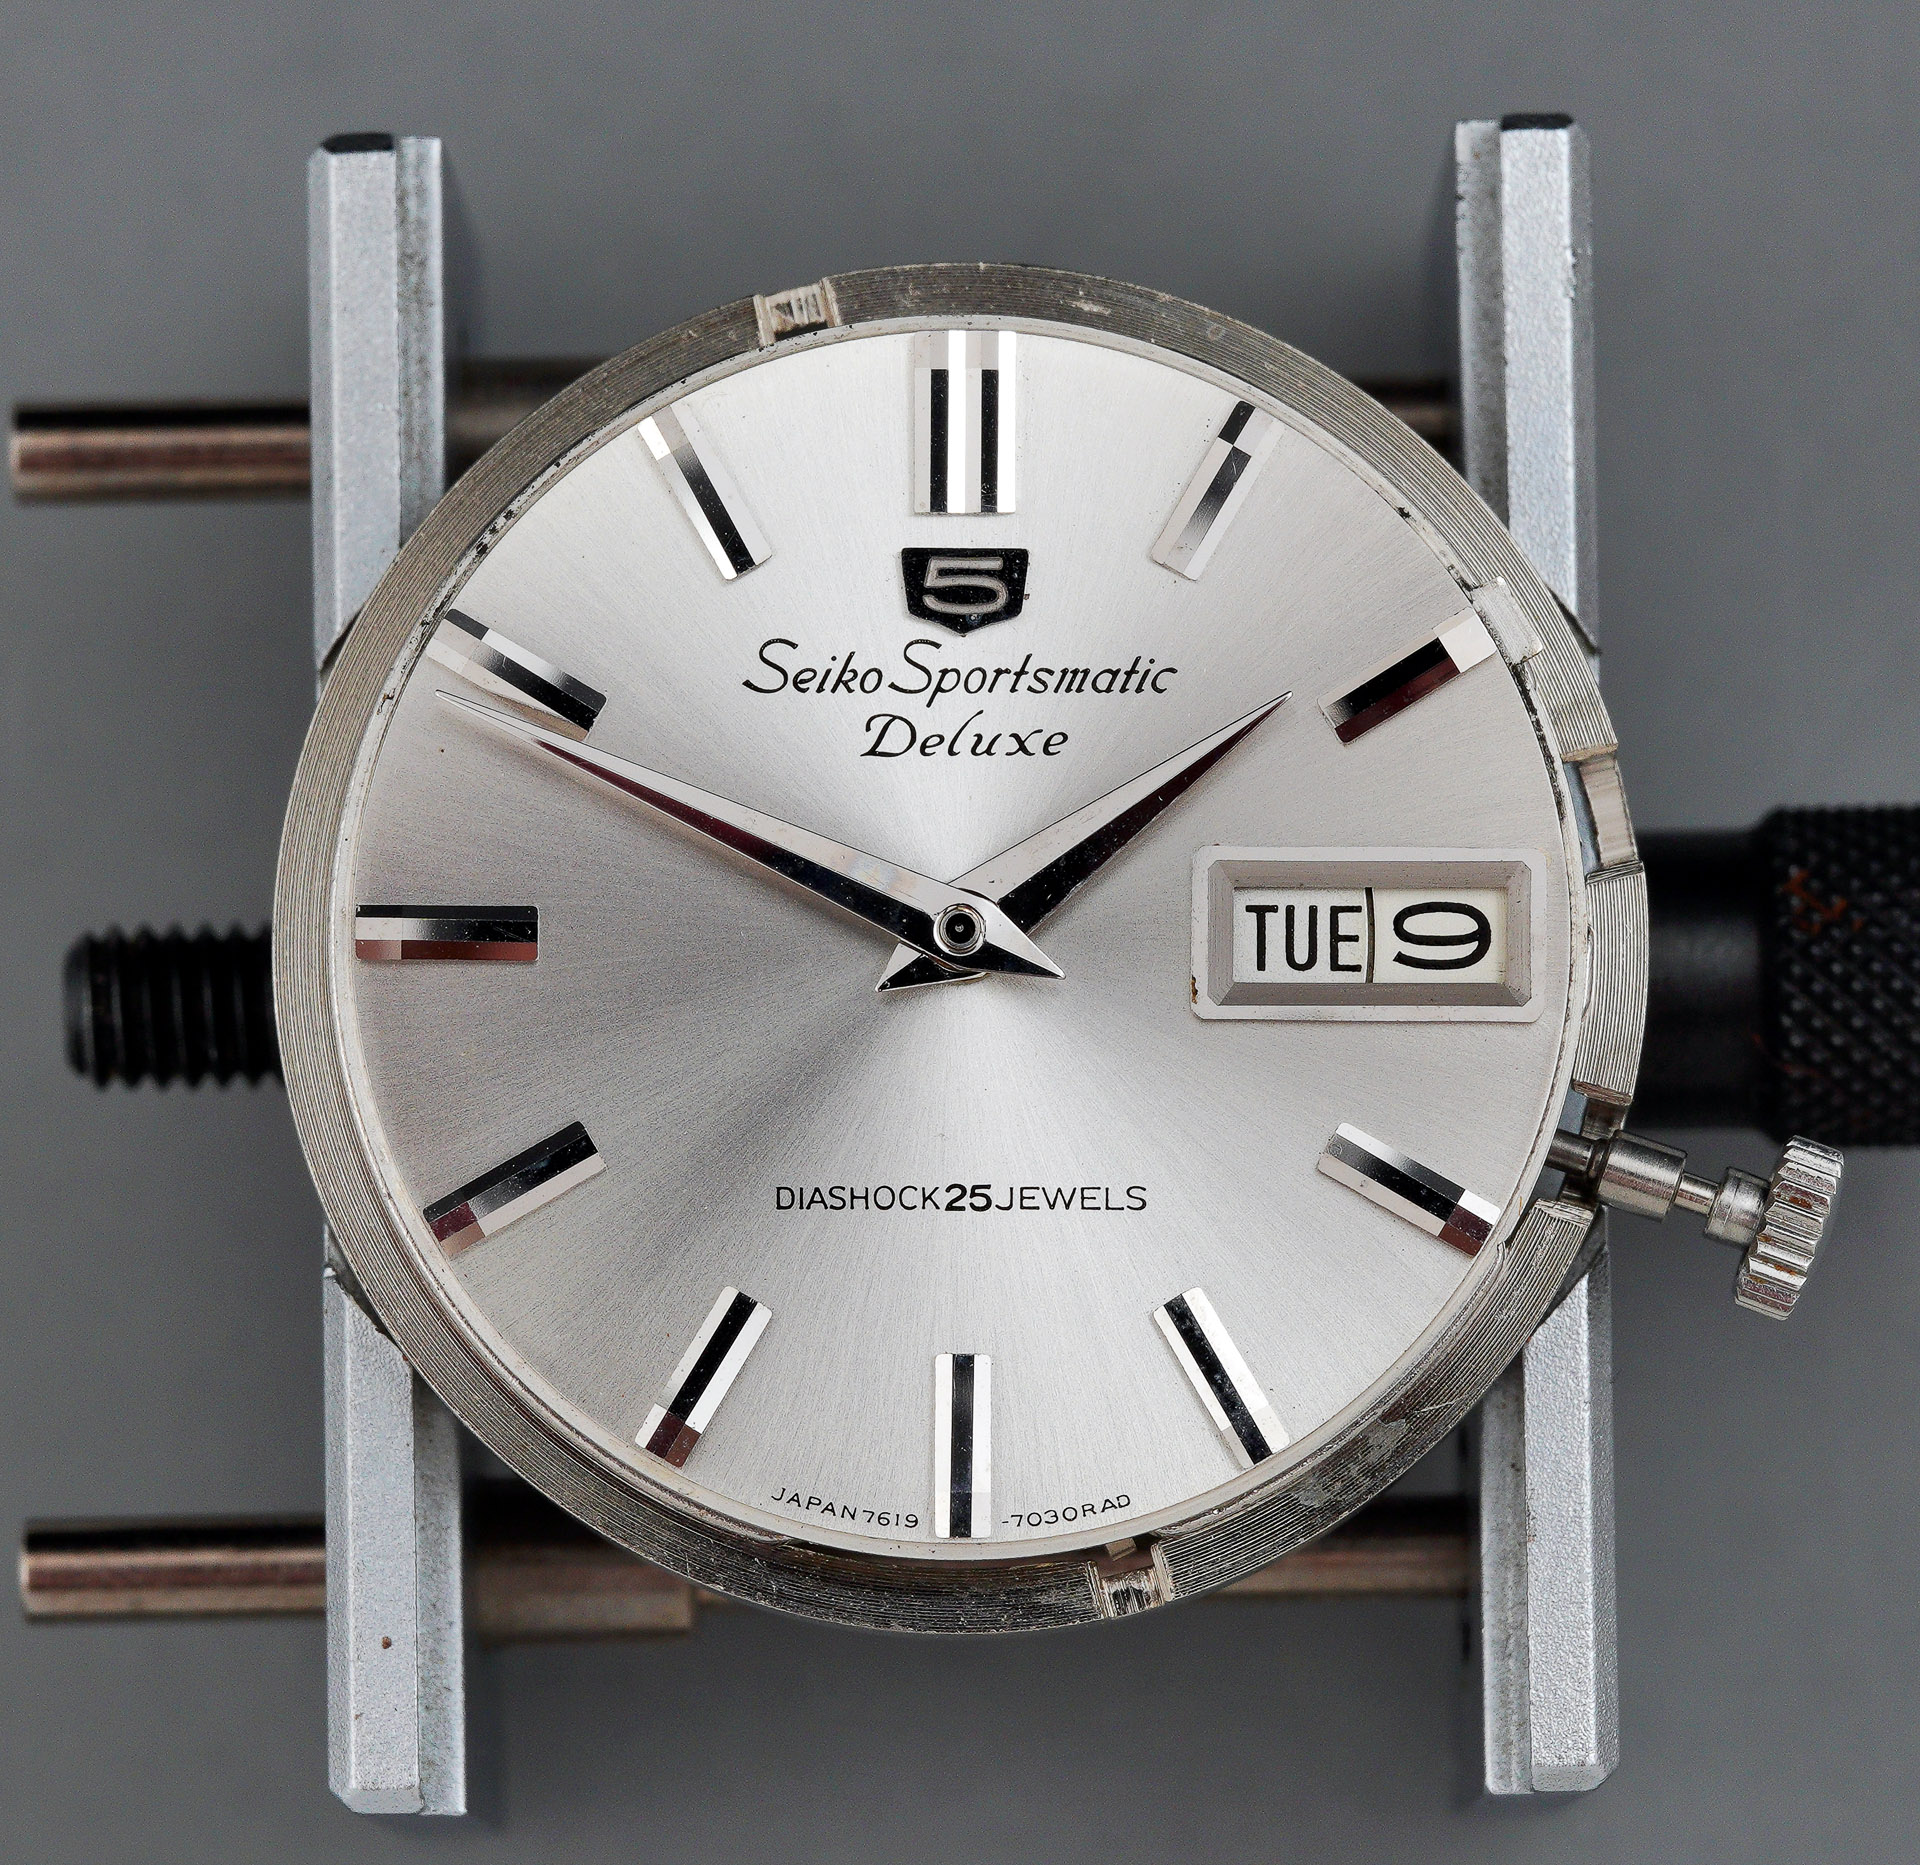
As you may be able to discern from the full frontal and case back shots, this is a Seiko 5 Sportsmatic Deluxe 7619-7050 from November 1965. The auction photos are decent enough to suggest that the dial, chapter ring, and hands are all in very good condition, barring one fly in the ointment: a missing hour marker at the 2 o’clock position. You may wonder what is ‘Deluxe’ about this particular model. Well, the answer to that question is, in part, provided by the ‘TWGP’ embossing on the case back. This tells us that the castellated bezel is white gold-plated rather than nickel. The mid-case itself is stainless steel so presumably it is this trace amount of white gold that elevates the status of this watch. Trace amount is pretty accurate at this point because much of it has worn away during this watch’s lifetime.
As a potential project though, the condition of the bezel was a sticking point. Eroded plating comes hand-in-hand with worn brass substrate and with very little prospect of the bezel being redeemable to anything approaching its former glory. Replating in nickel could conceivably have restored a degree of presentability but that would not have been an economically sensible course of action for a watch of this calibre and so I turned instead to exploring other options for a bezel substitute. There was also the small matter of the missing hour marker. In the month following my receipt of the watch, I cast about on Yahoo looking for potential donors of a replacement marker and fairly quickly I identified the following as a prospect:
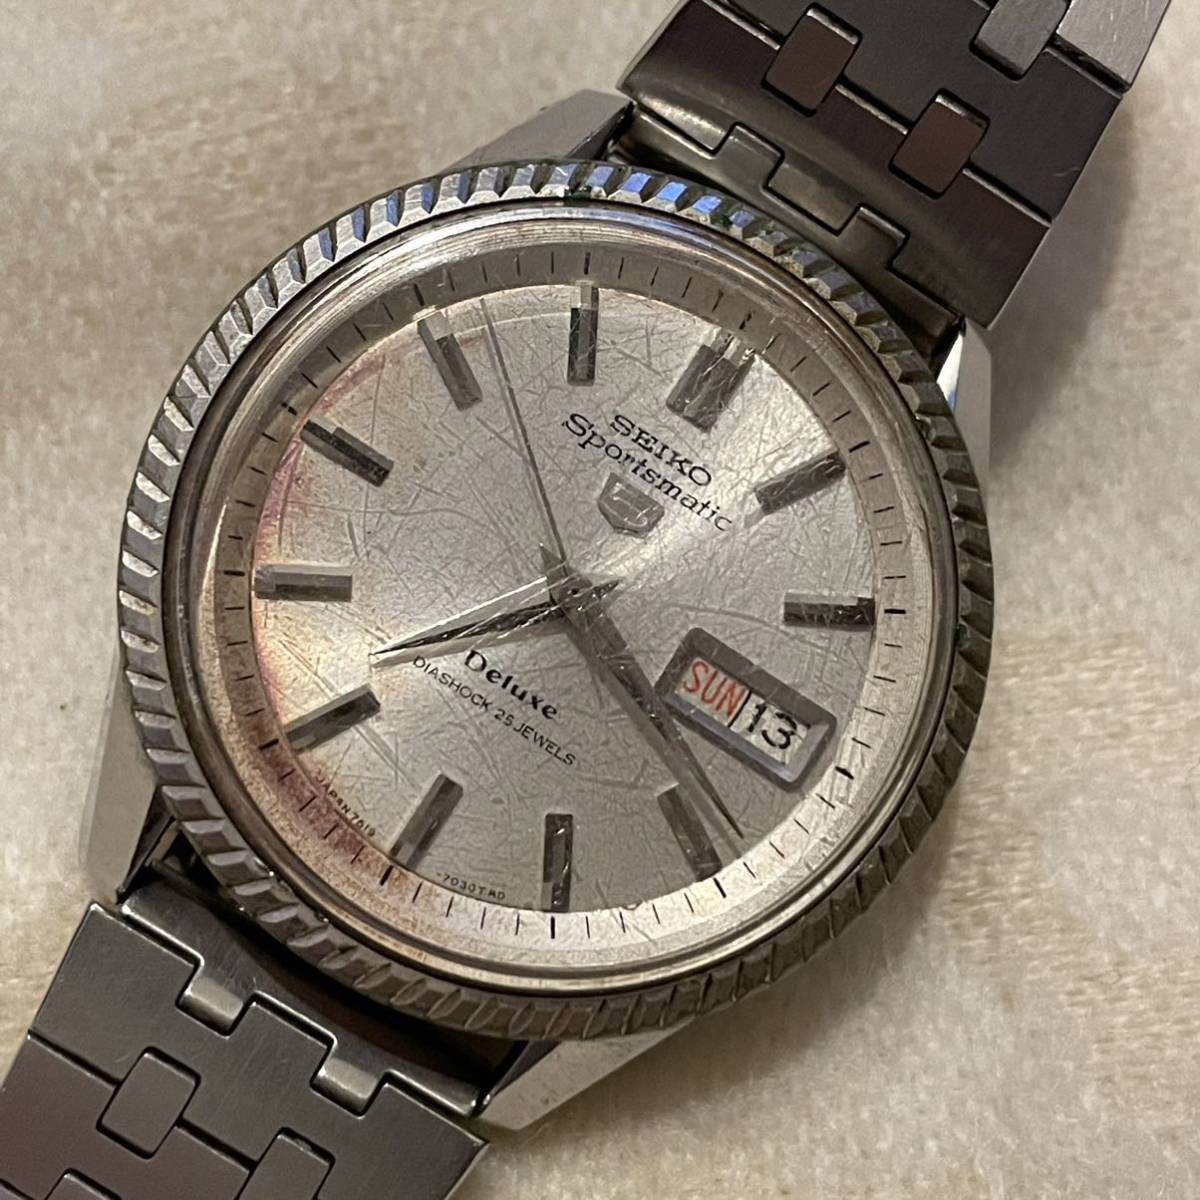
Interestingly, this Sportsmatic is also branded with the ‘Deluxe’ moniker but the type of bezel-plating is not actively promoted on its case back. That may be because it is not white gold-plated or it could be that, it being a later watch (September 1966), Seiko had stopped including reference to the plating type. It may seem a bit of an extravagance to buy a whole watch just to source a single hour marker but in my defence, this second watch cost me £12 plus postage, and I was also hoping that the bezel might be in better condition than the one on my project watch. It turned out that while it was indeed better, it was not sufficiently better to prompt me to use it as a substitute. My search for a bezel continued. And continued for more than a year until I encountered a sale on eBay for a lot of three new old stock cases, all of which I would have use for.
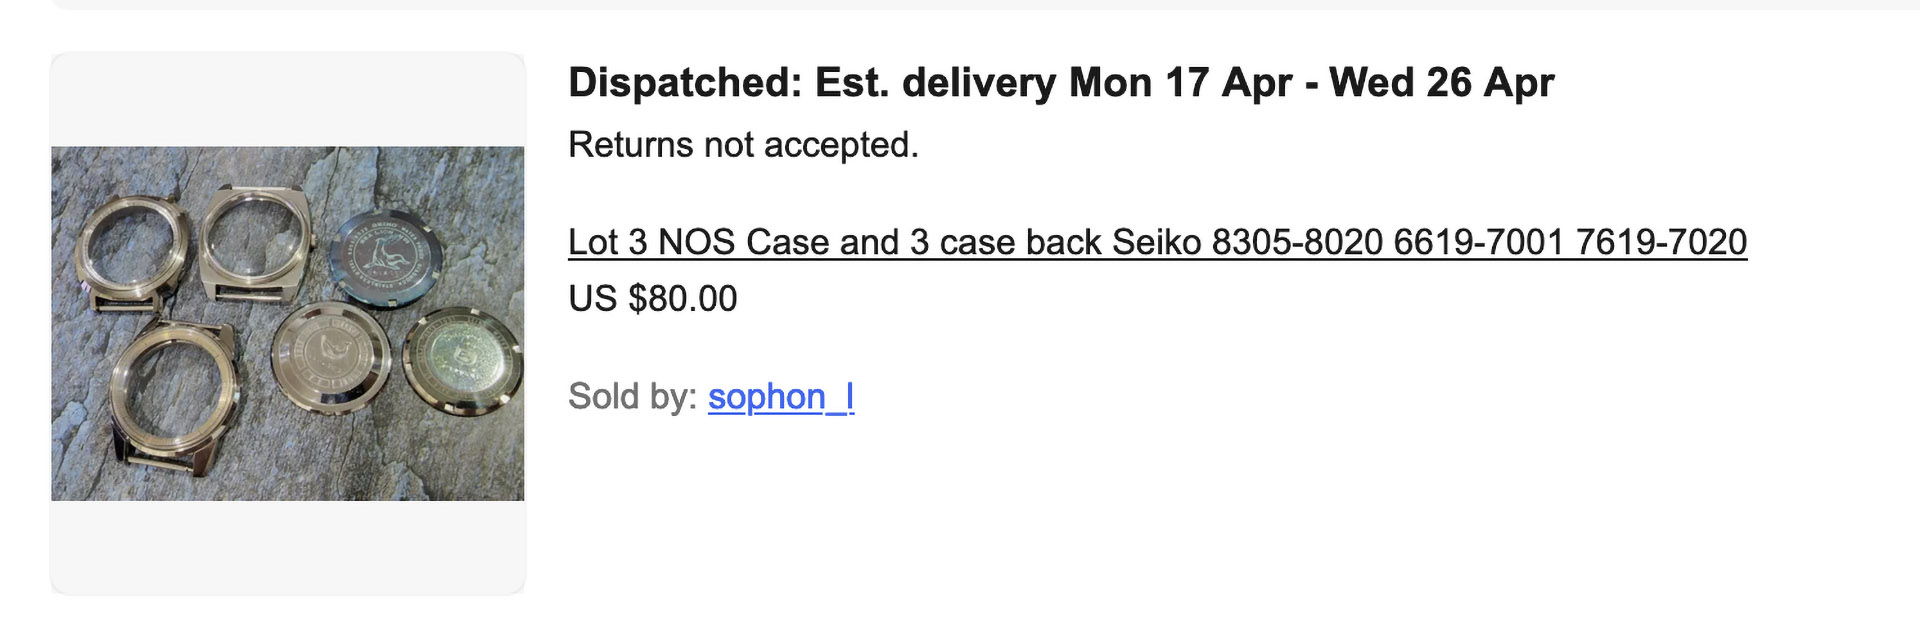
One of these three was a Sportsmatic 7606-7991 (I think) but paired with a damaged and incorrect caseback from a 7619-7020. The case held appeal for this project because of its potential to donate its smooth, stainless steel bezel to the 7619-7050. Here then are the participants in this three-into-one hybridisation of Sportsmatic Deluxes.
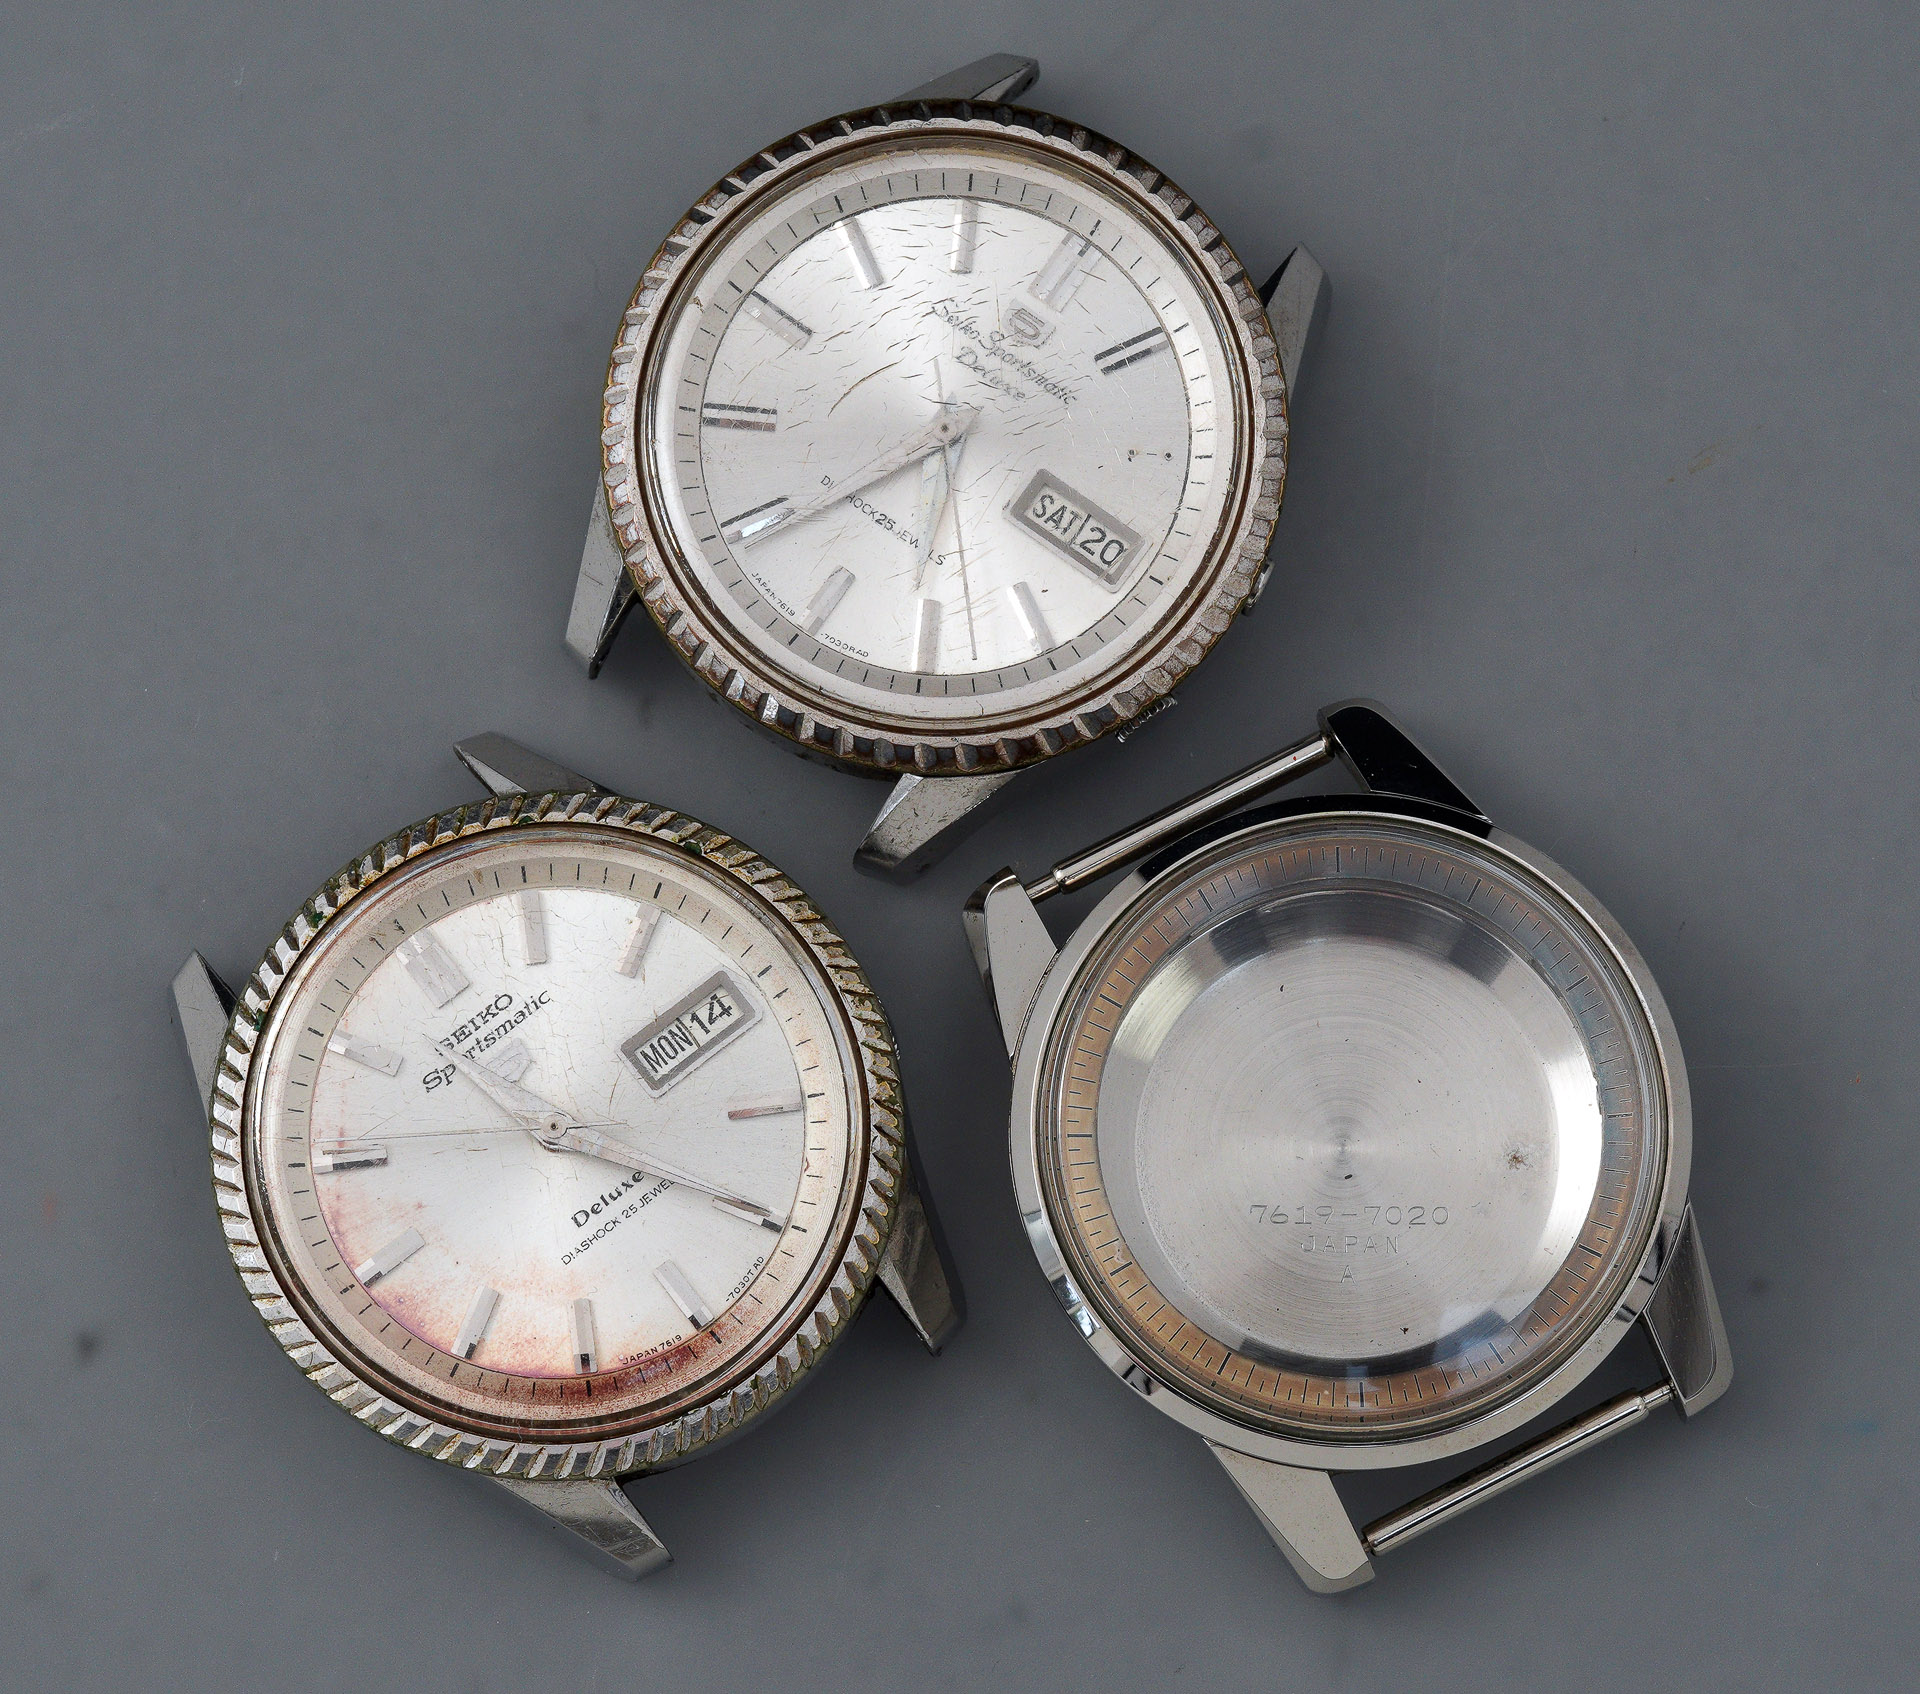
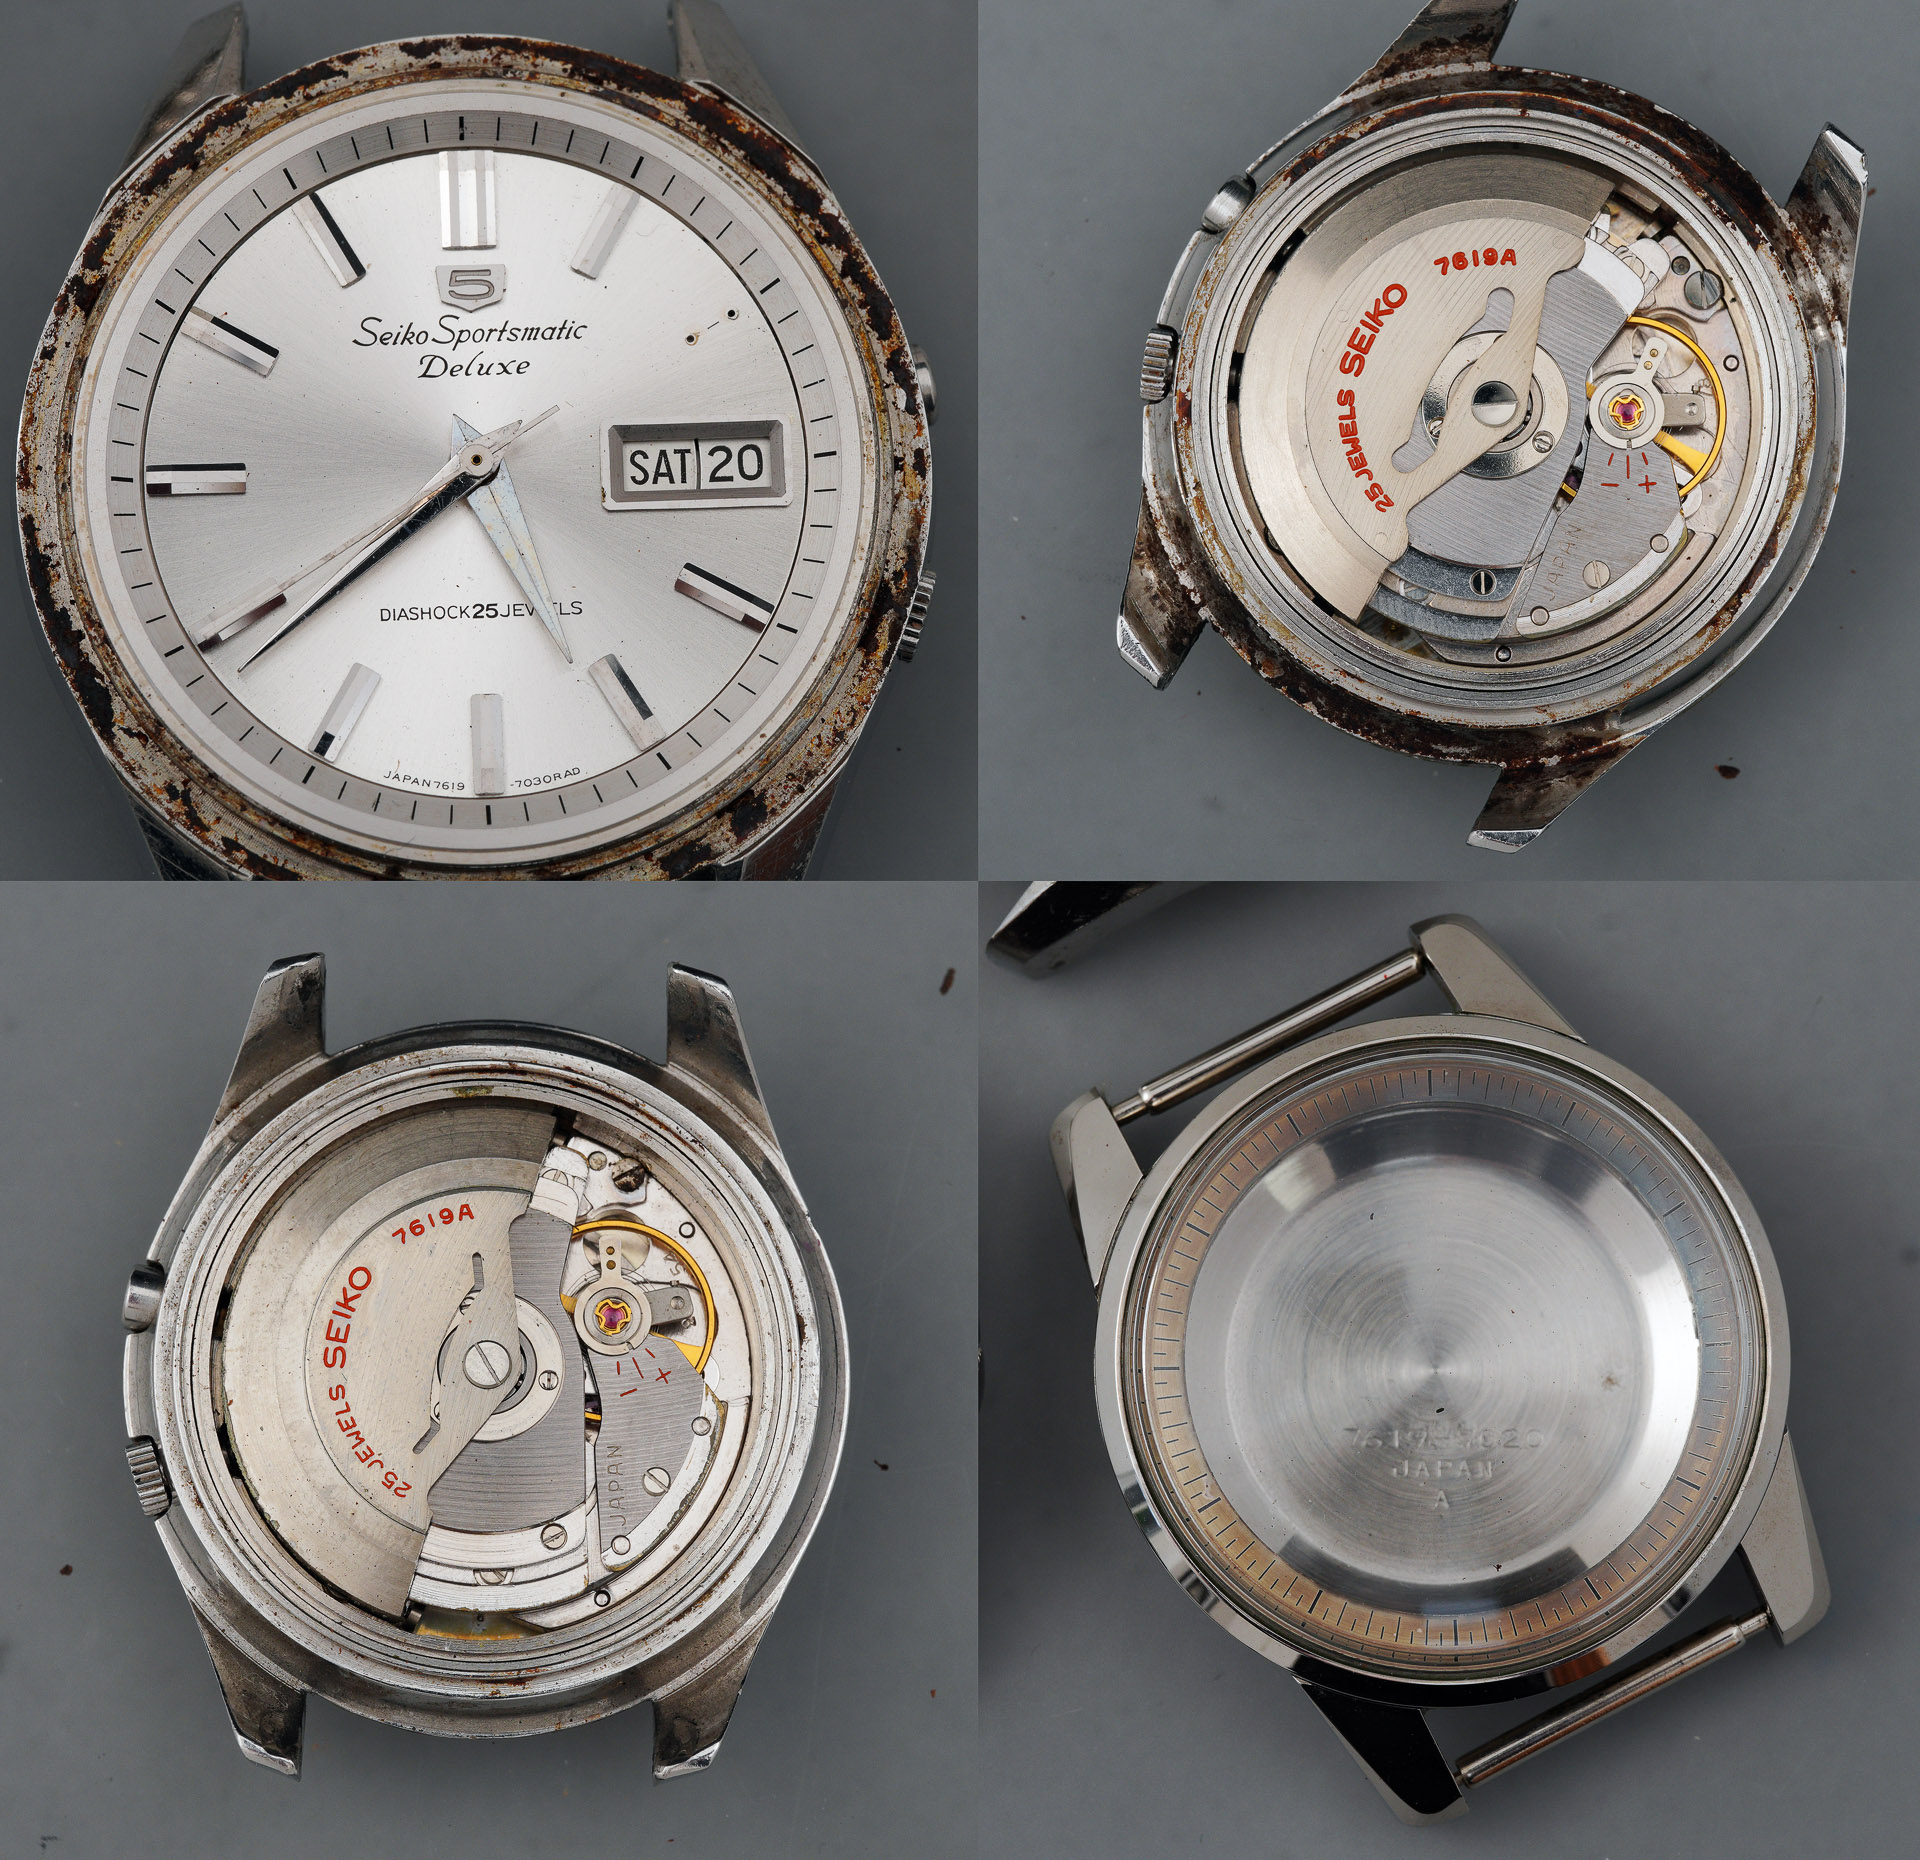
From this assortment of complete and incomplete watches, I need to assemble a coherent whole. After inspecting the ingredients, I have determined that the best movement is the one from the second ‘donor’ 7619 (top right, below); the best case is the original 7619-7050 (bottom left, below), as are the dial, hands and chapter ring (top left). The 7606 (bottom right) will donate its bezel.
Before pressing on, I wanted to confirm my hope that one of the hour markers from the donor 7619 would be a suitable donor for the missing one on the principal. First impressions are that they appear to be an almost perfect match and so I started by prying one of the markers from the 7619-7040. Unfortunately, the spacing between the pins on the donor marker is wider than the spacing between the holes in the dial and so I decided to remove the pins and glue the marker to the dial.
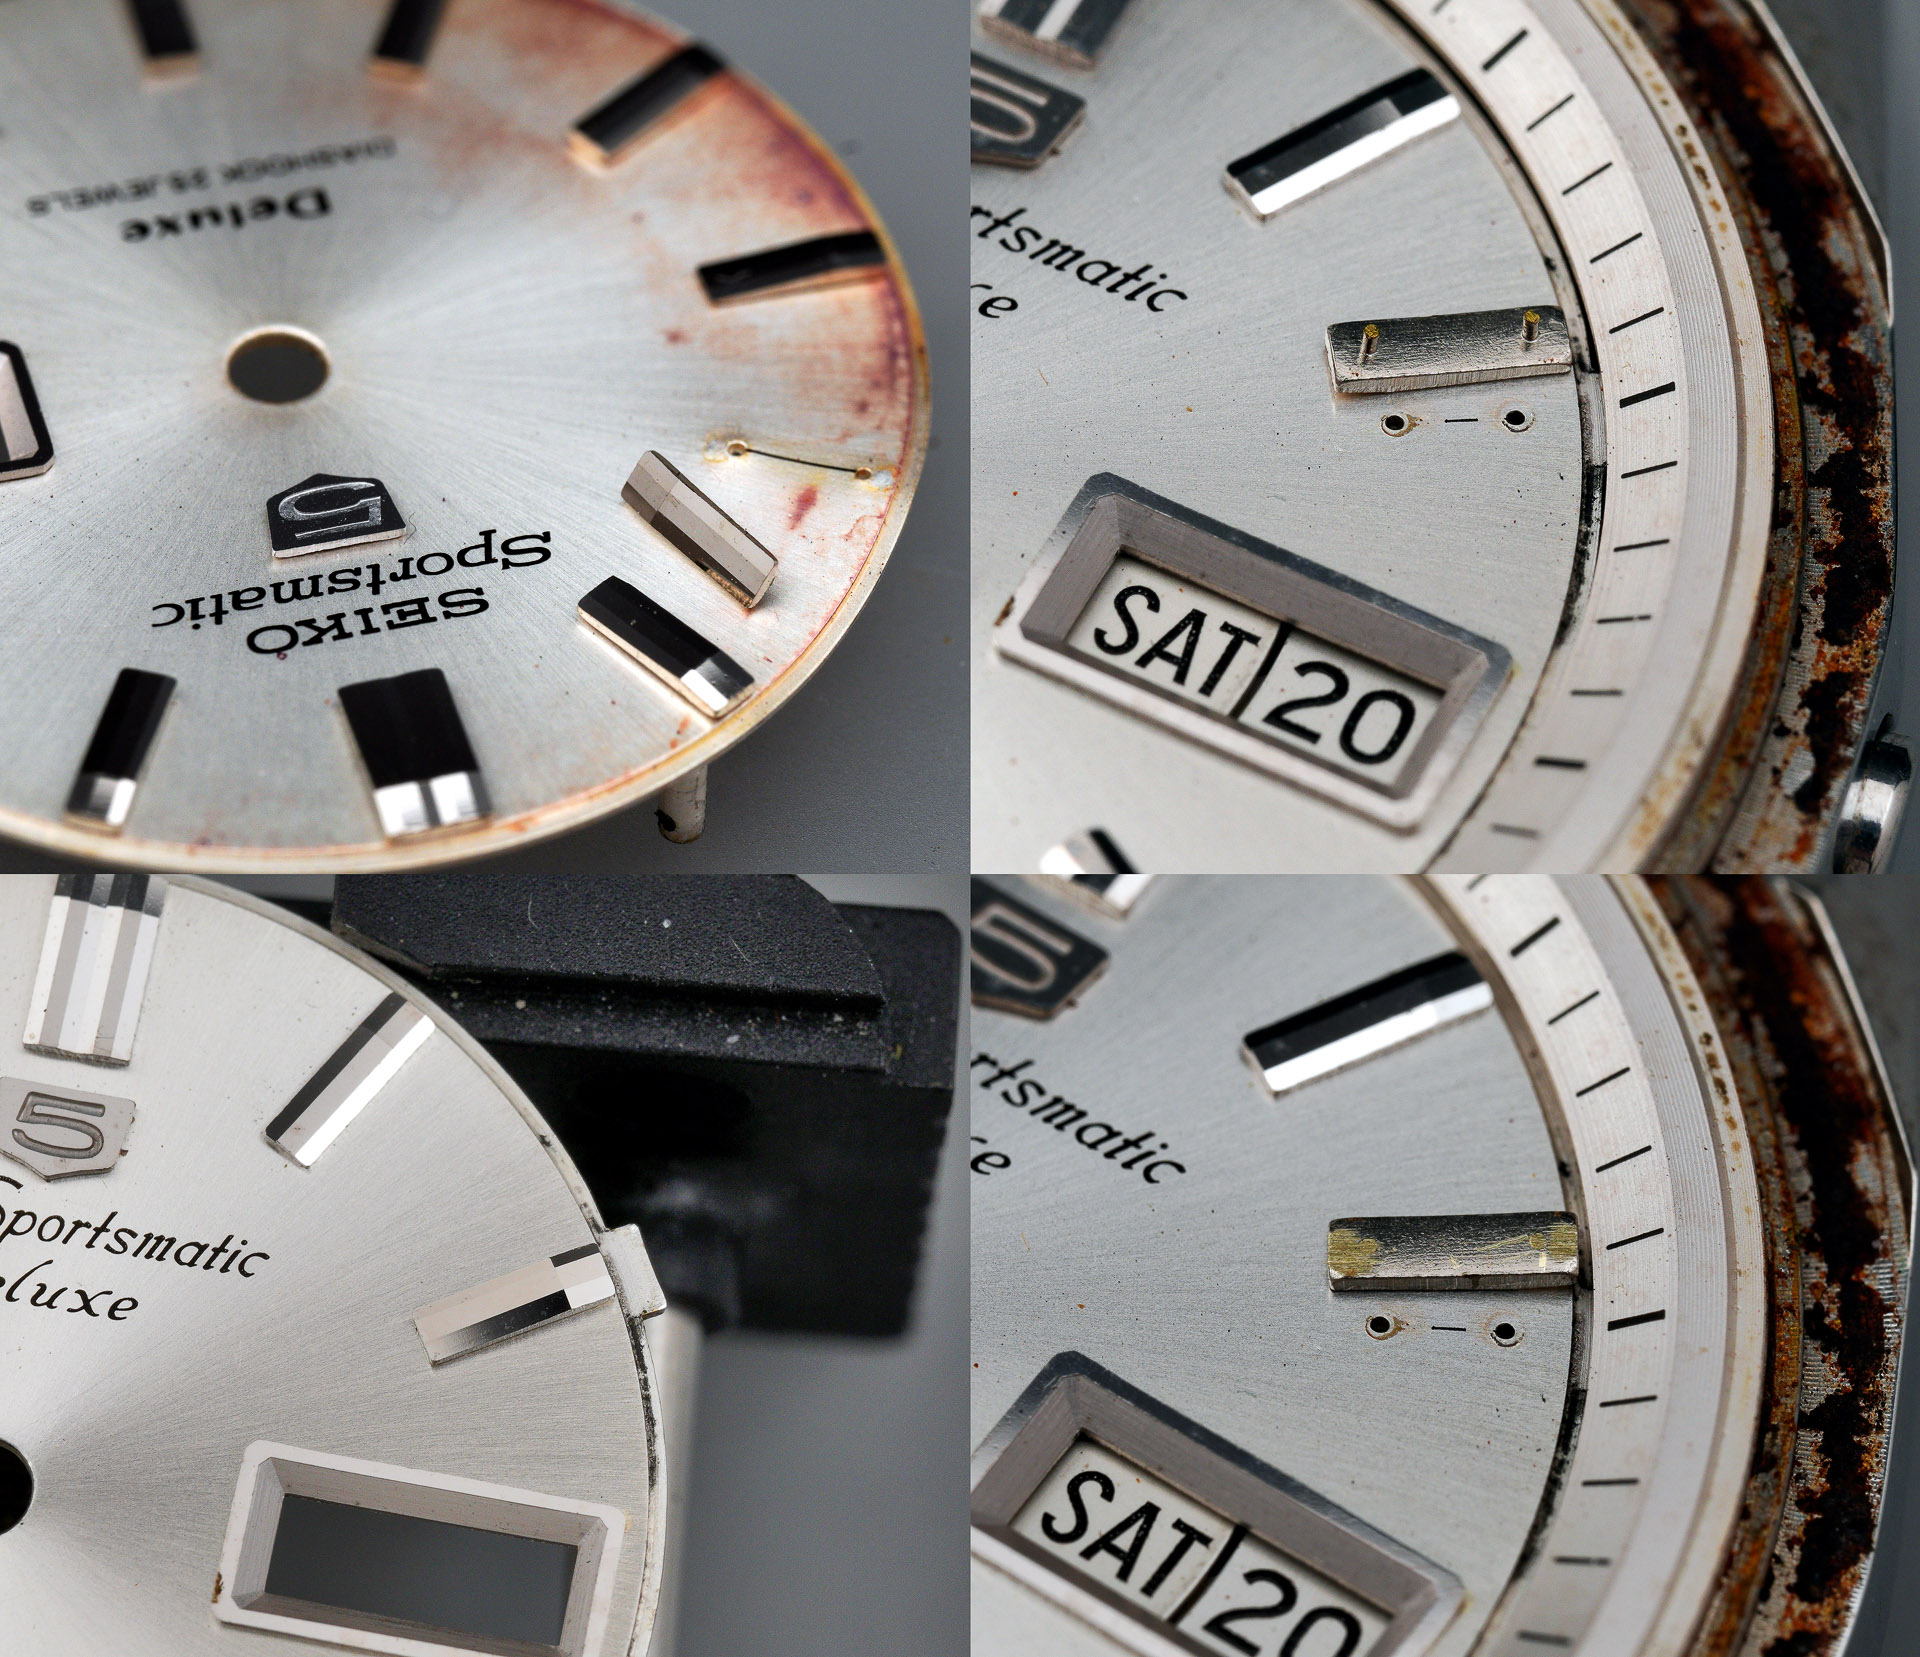
Aside from the spacing between the pins, the marker is also a little too tall and the light does not play off it in quite the same way as it does with the other markers on the dial but in the absence of other options, I think it will do quite nicely.
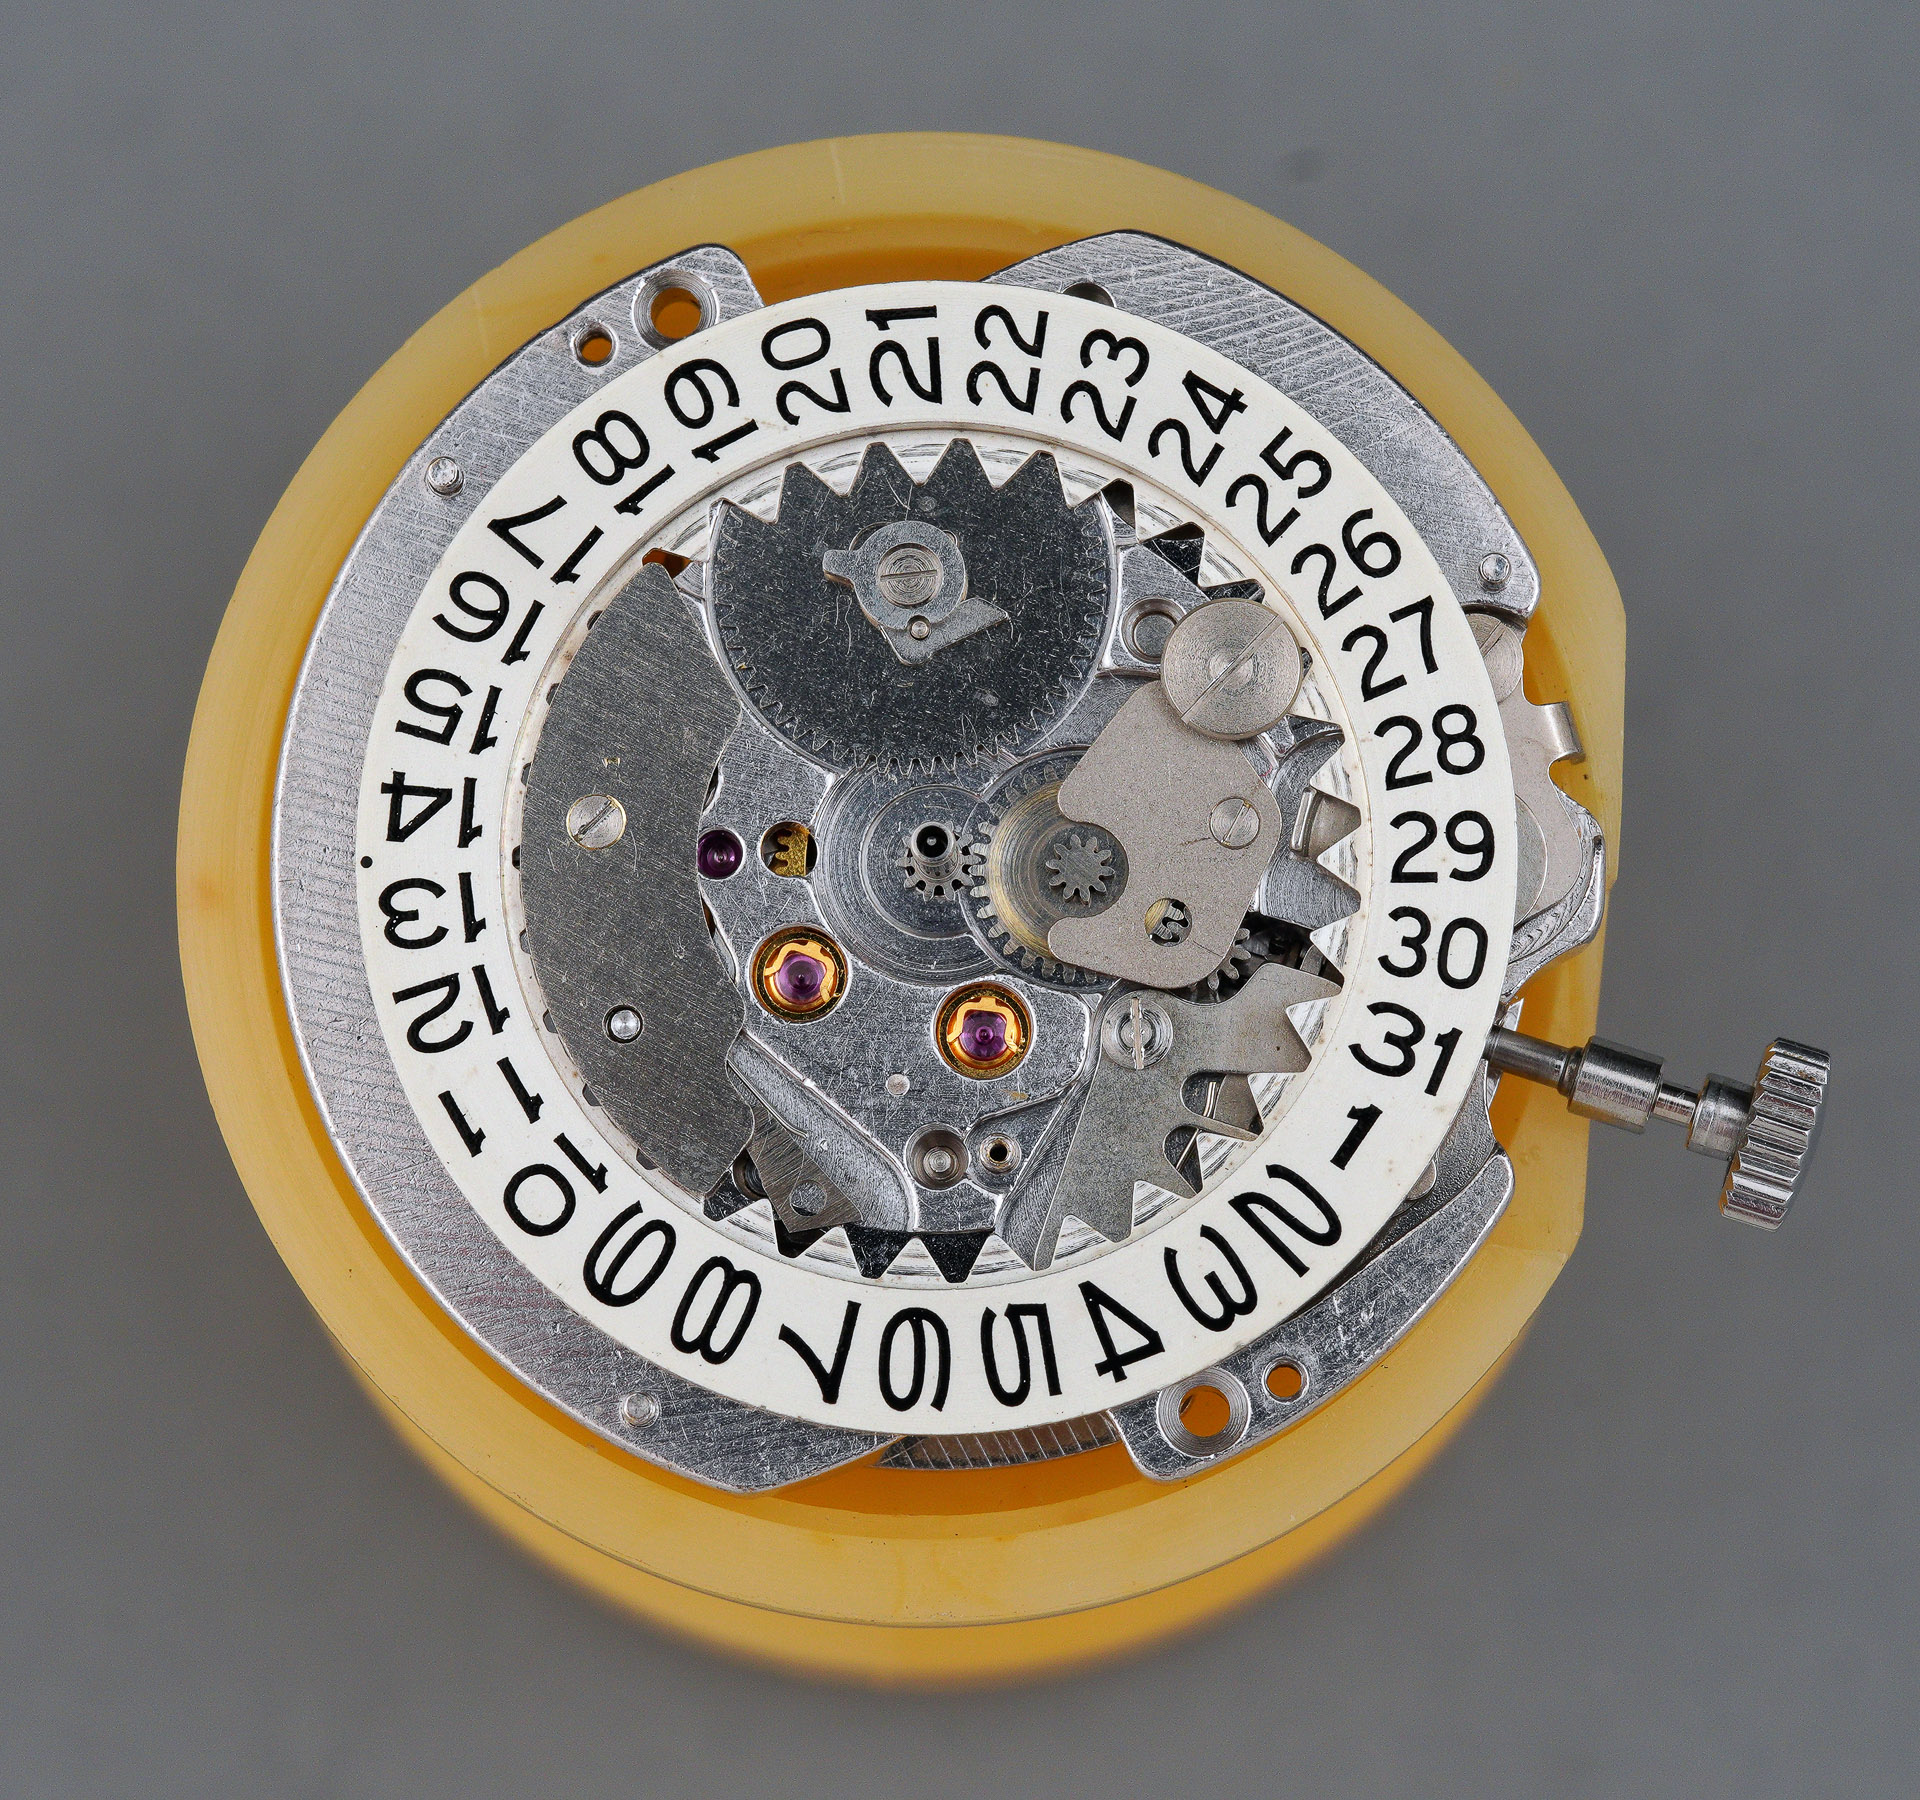
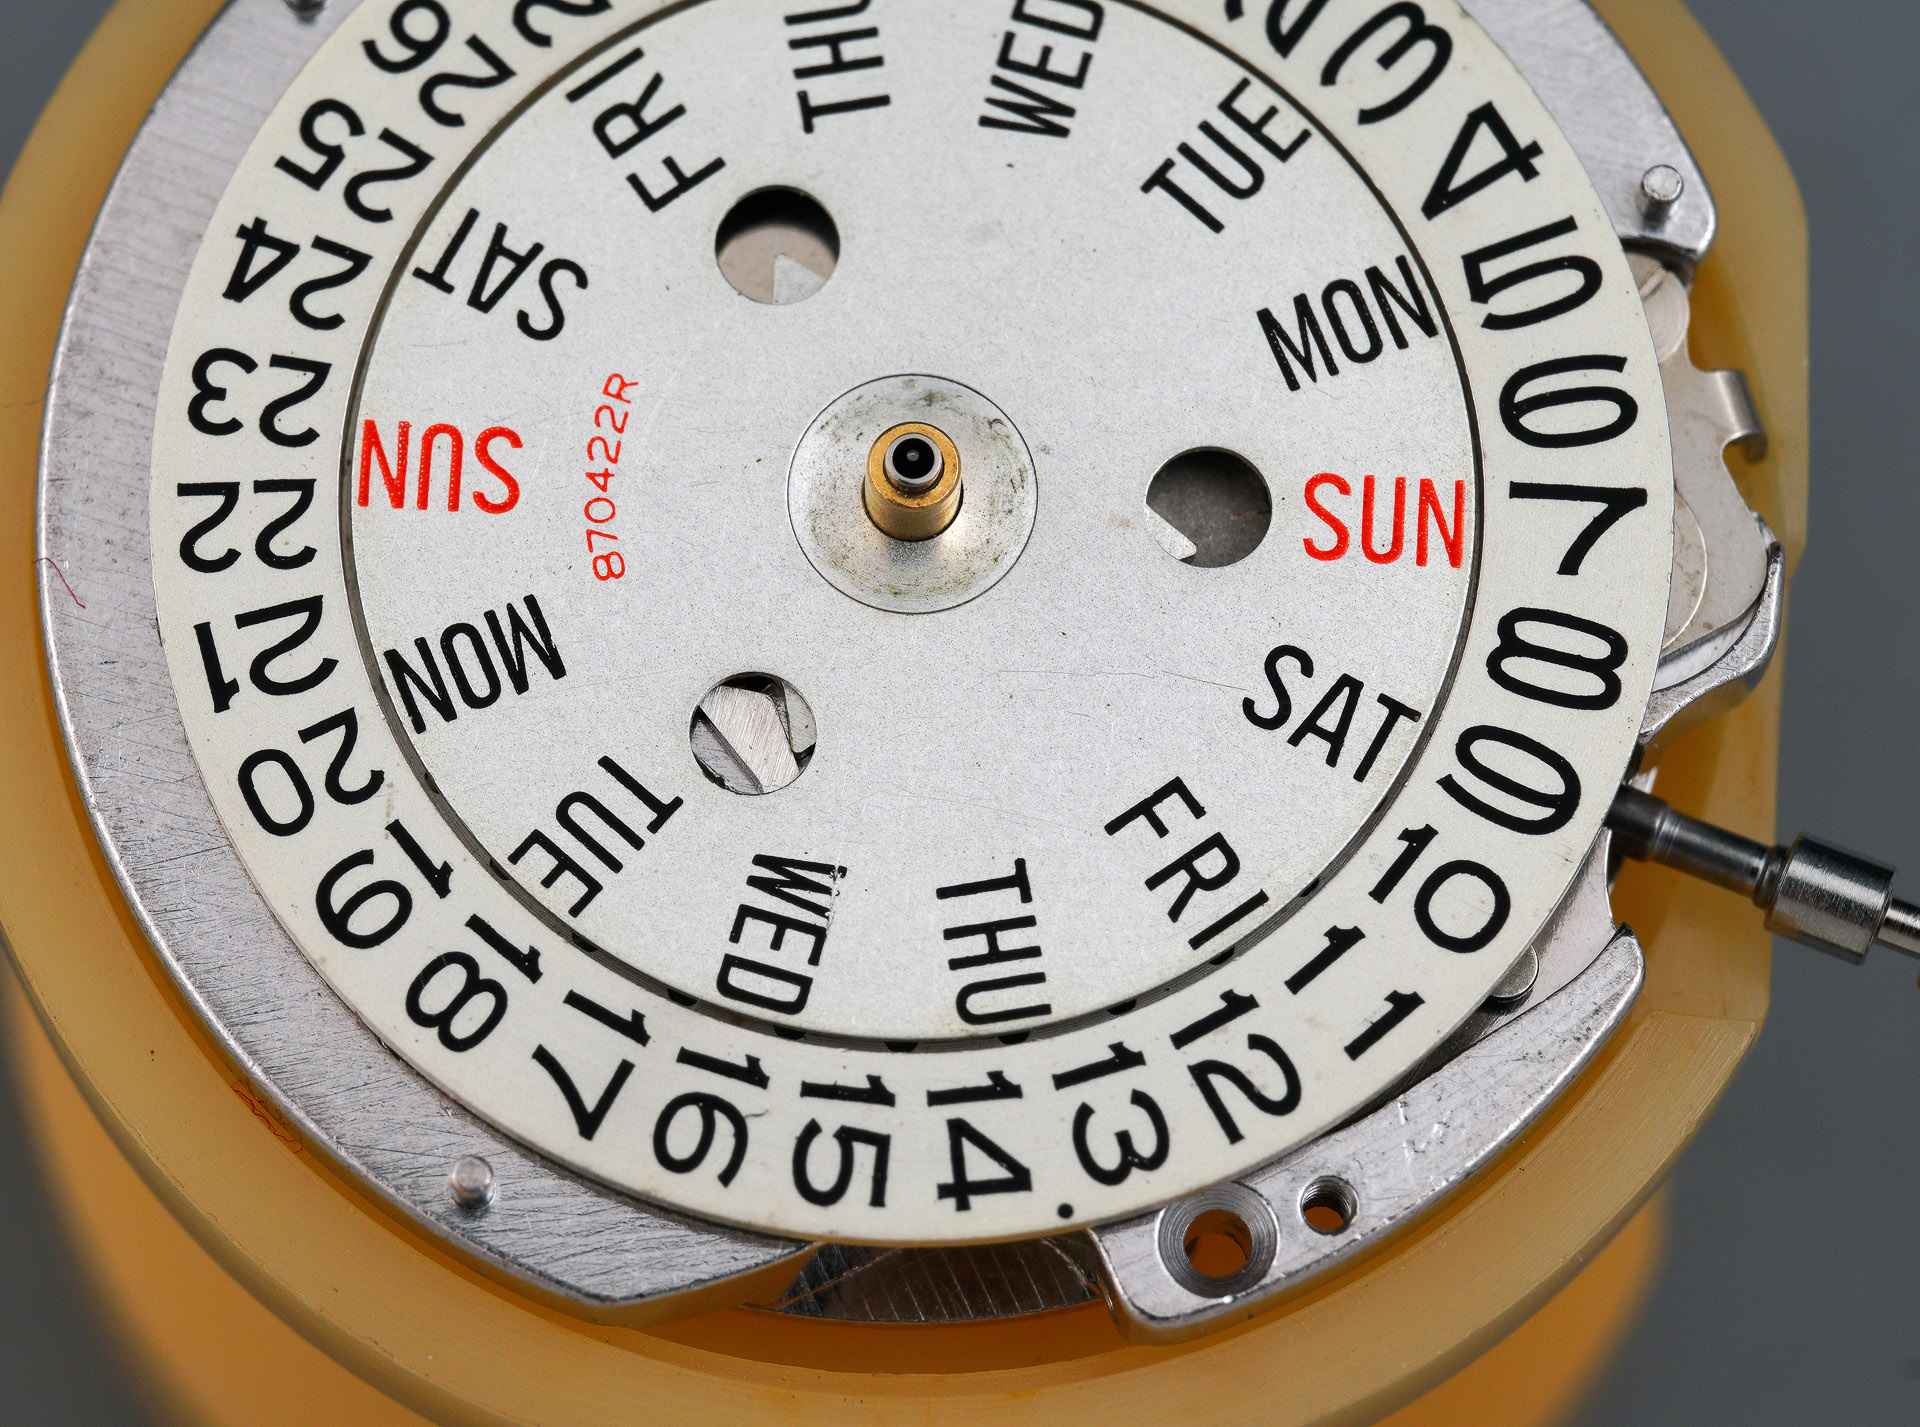
With that settled, time to press on with the movement, starting with an appraisal of the calendar parts.
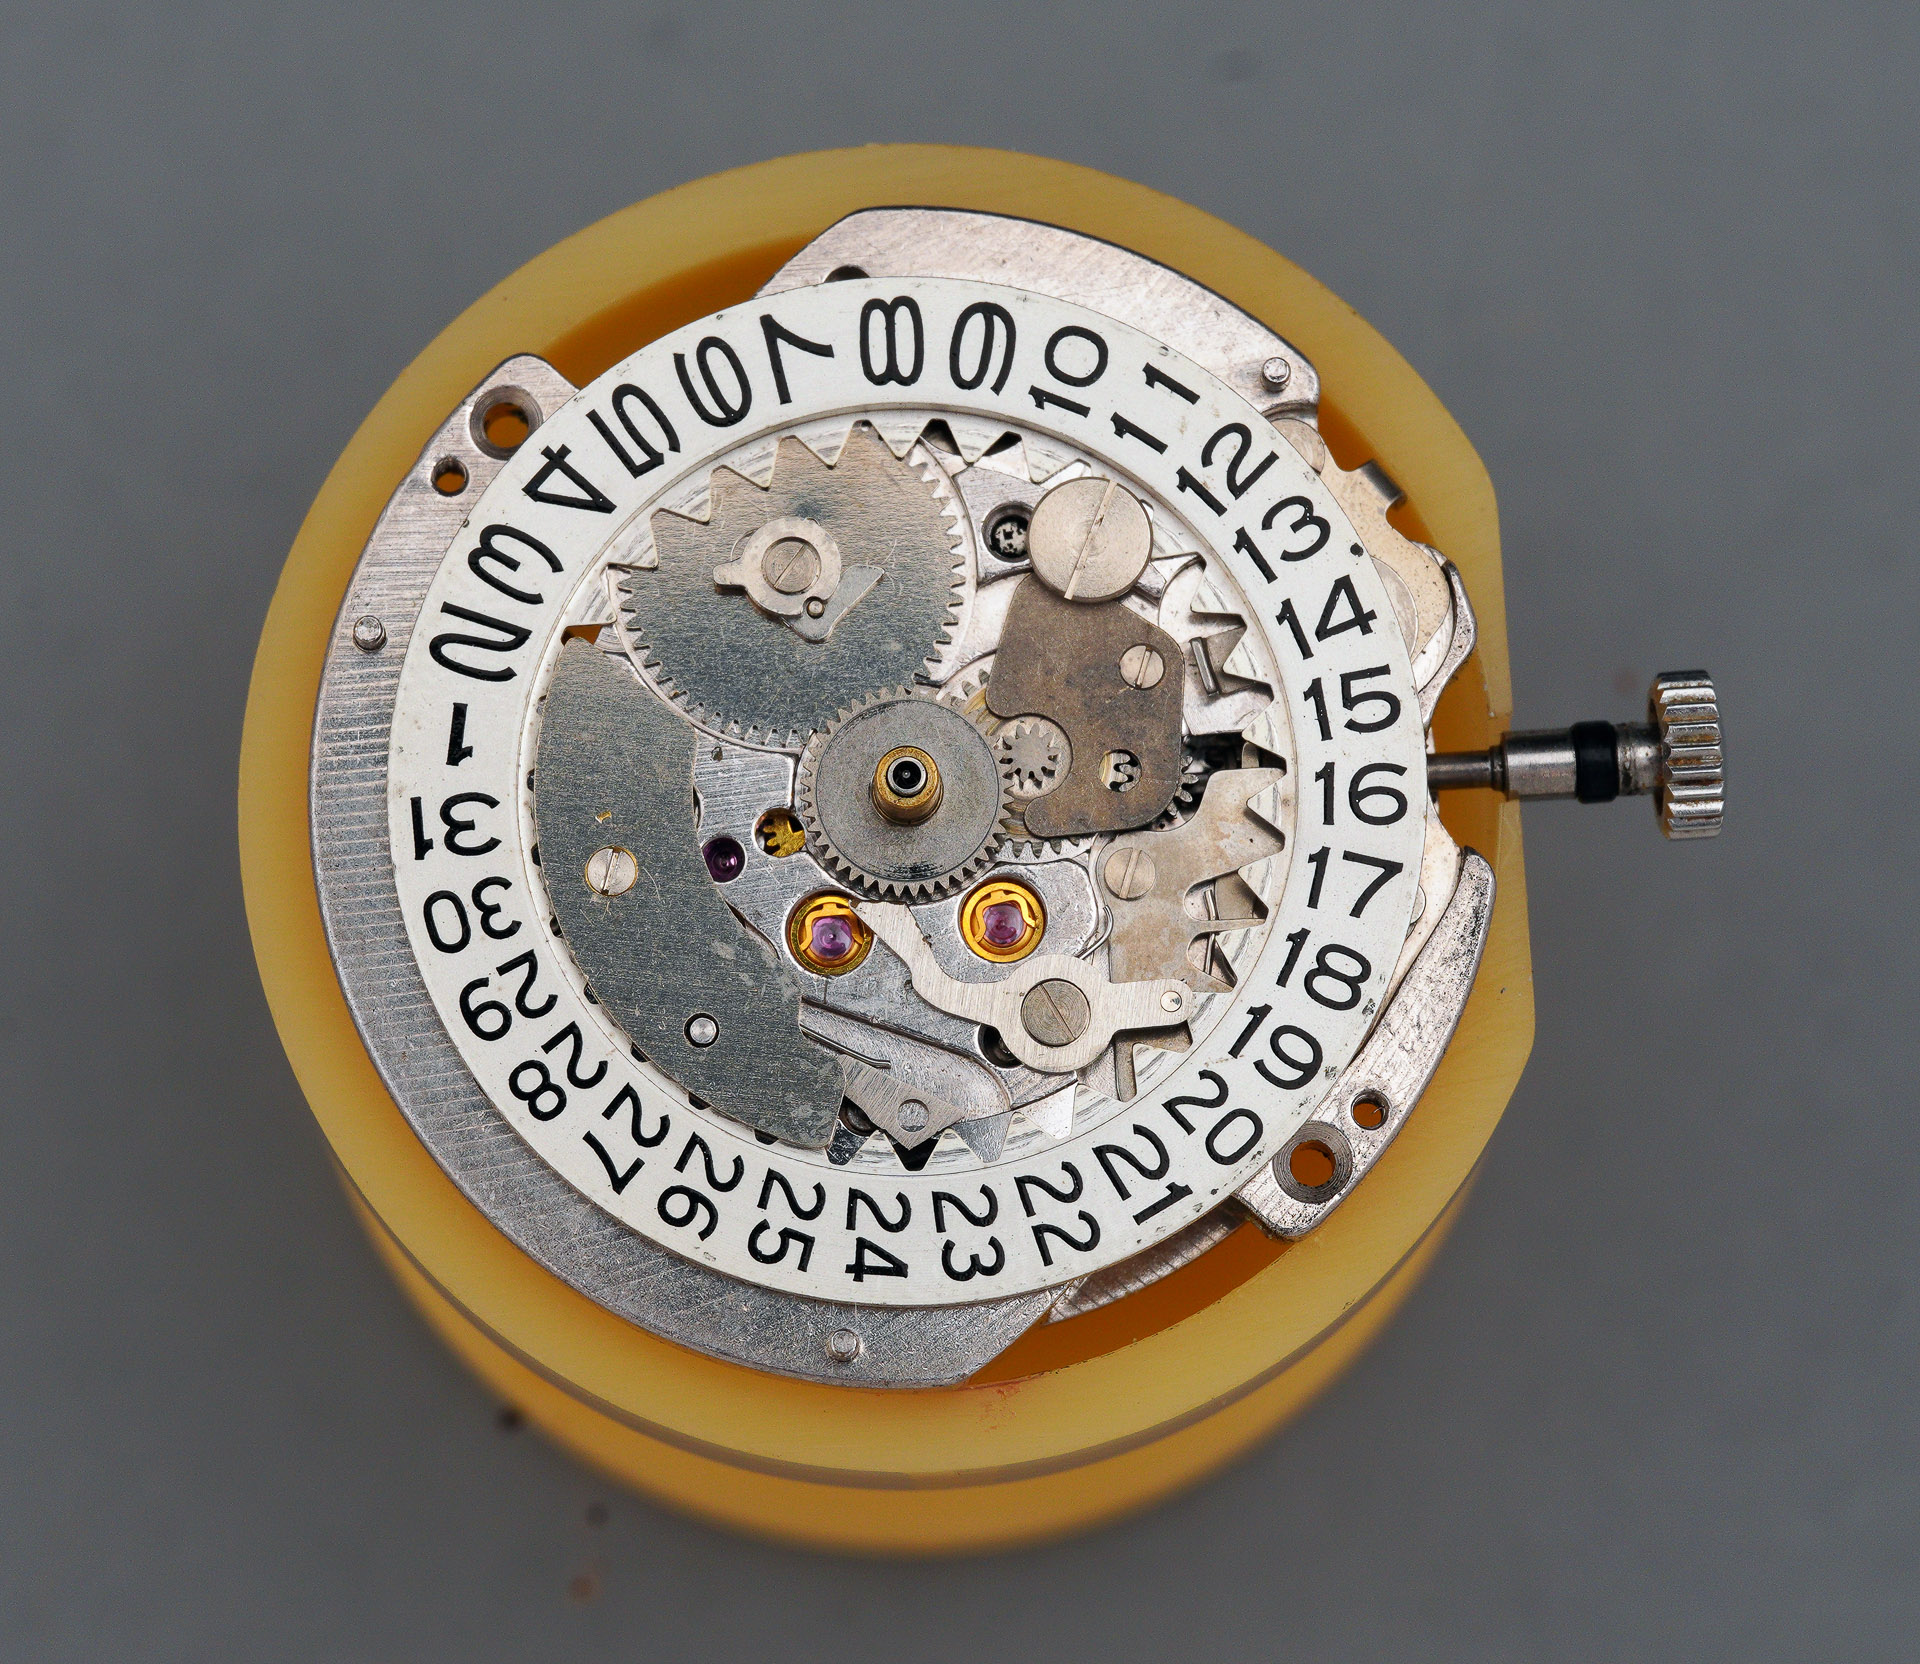
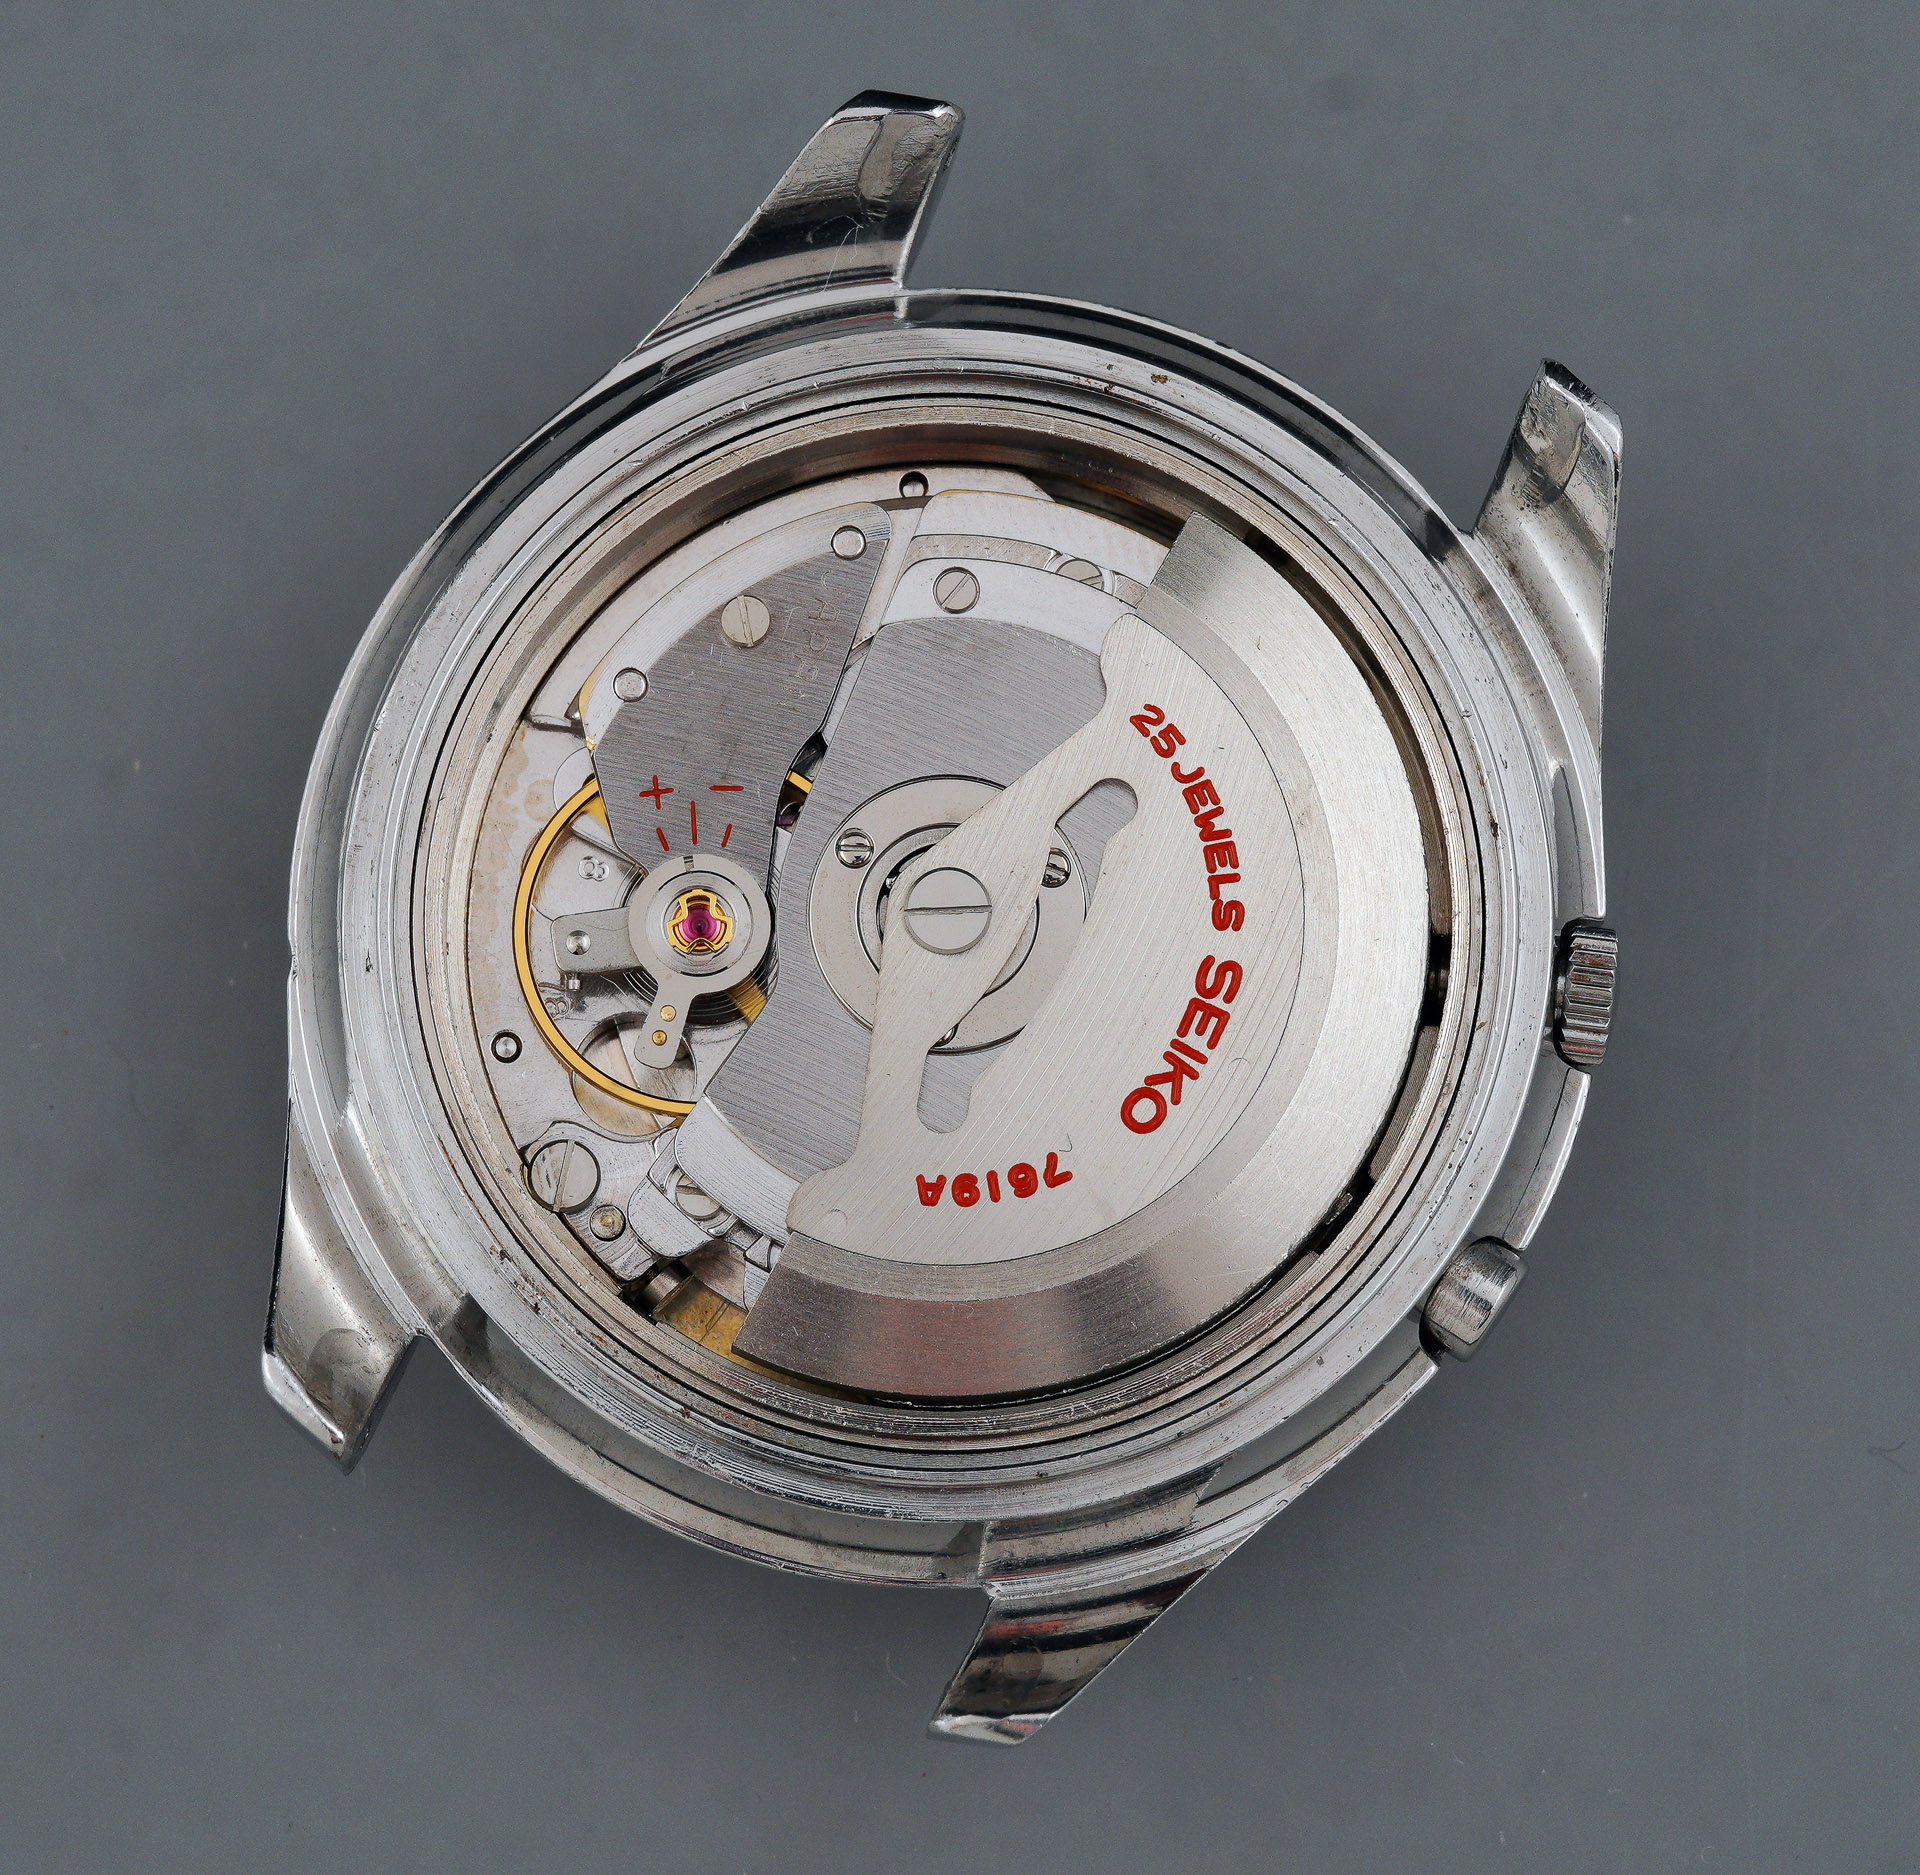
I have the general impression that the 76 series was considered one of Seiko’s lower-end movements of the period, and yet it features a complexity in the construction of its calendar components that belies its price point at the time of its production. Much of this complexity derives from the inclusion of a date quickset mechanism operated by a push-button but more generally, the approach taken to the incorporation of a day and date calendar in the early 1960s appeared to have been driven by the designers having the freedom to flex their creative muscles rather than being limited by the diktats of the management accountants. Incidentally, for those of you who might not know, the 76-series family of movements is the direct descendent of the Champion 850 that was used most notably in the celebrated Alpinist model, about which you can read more here.
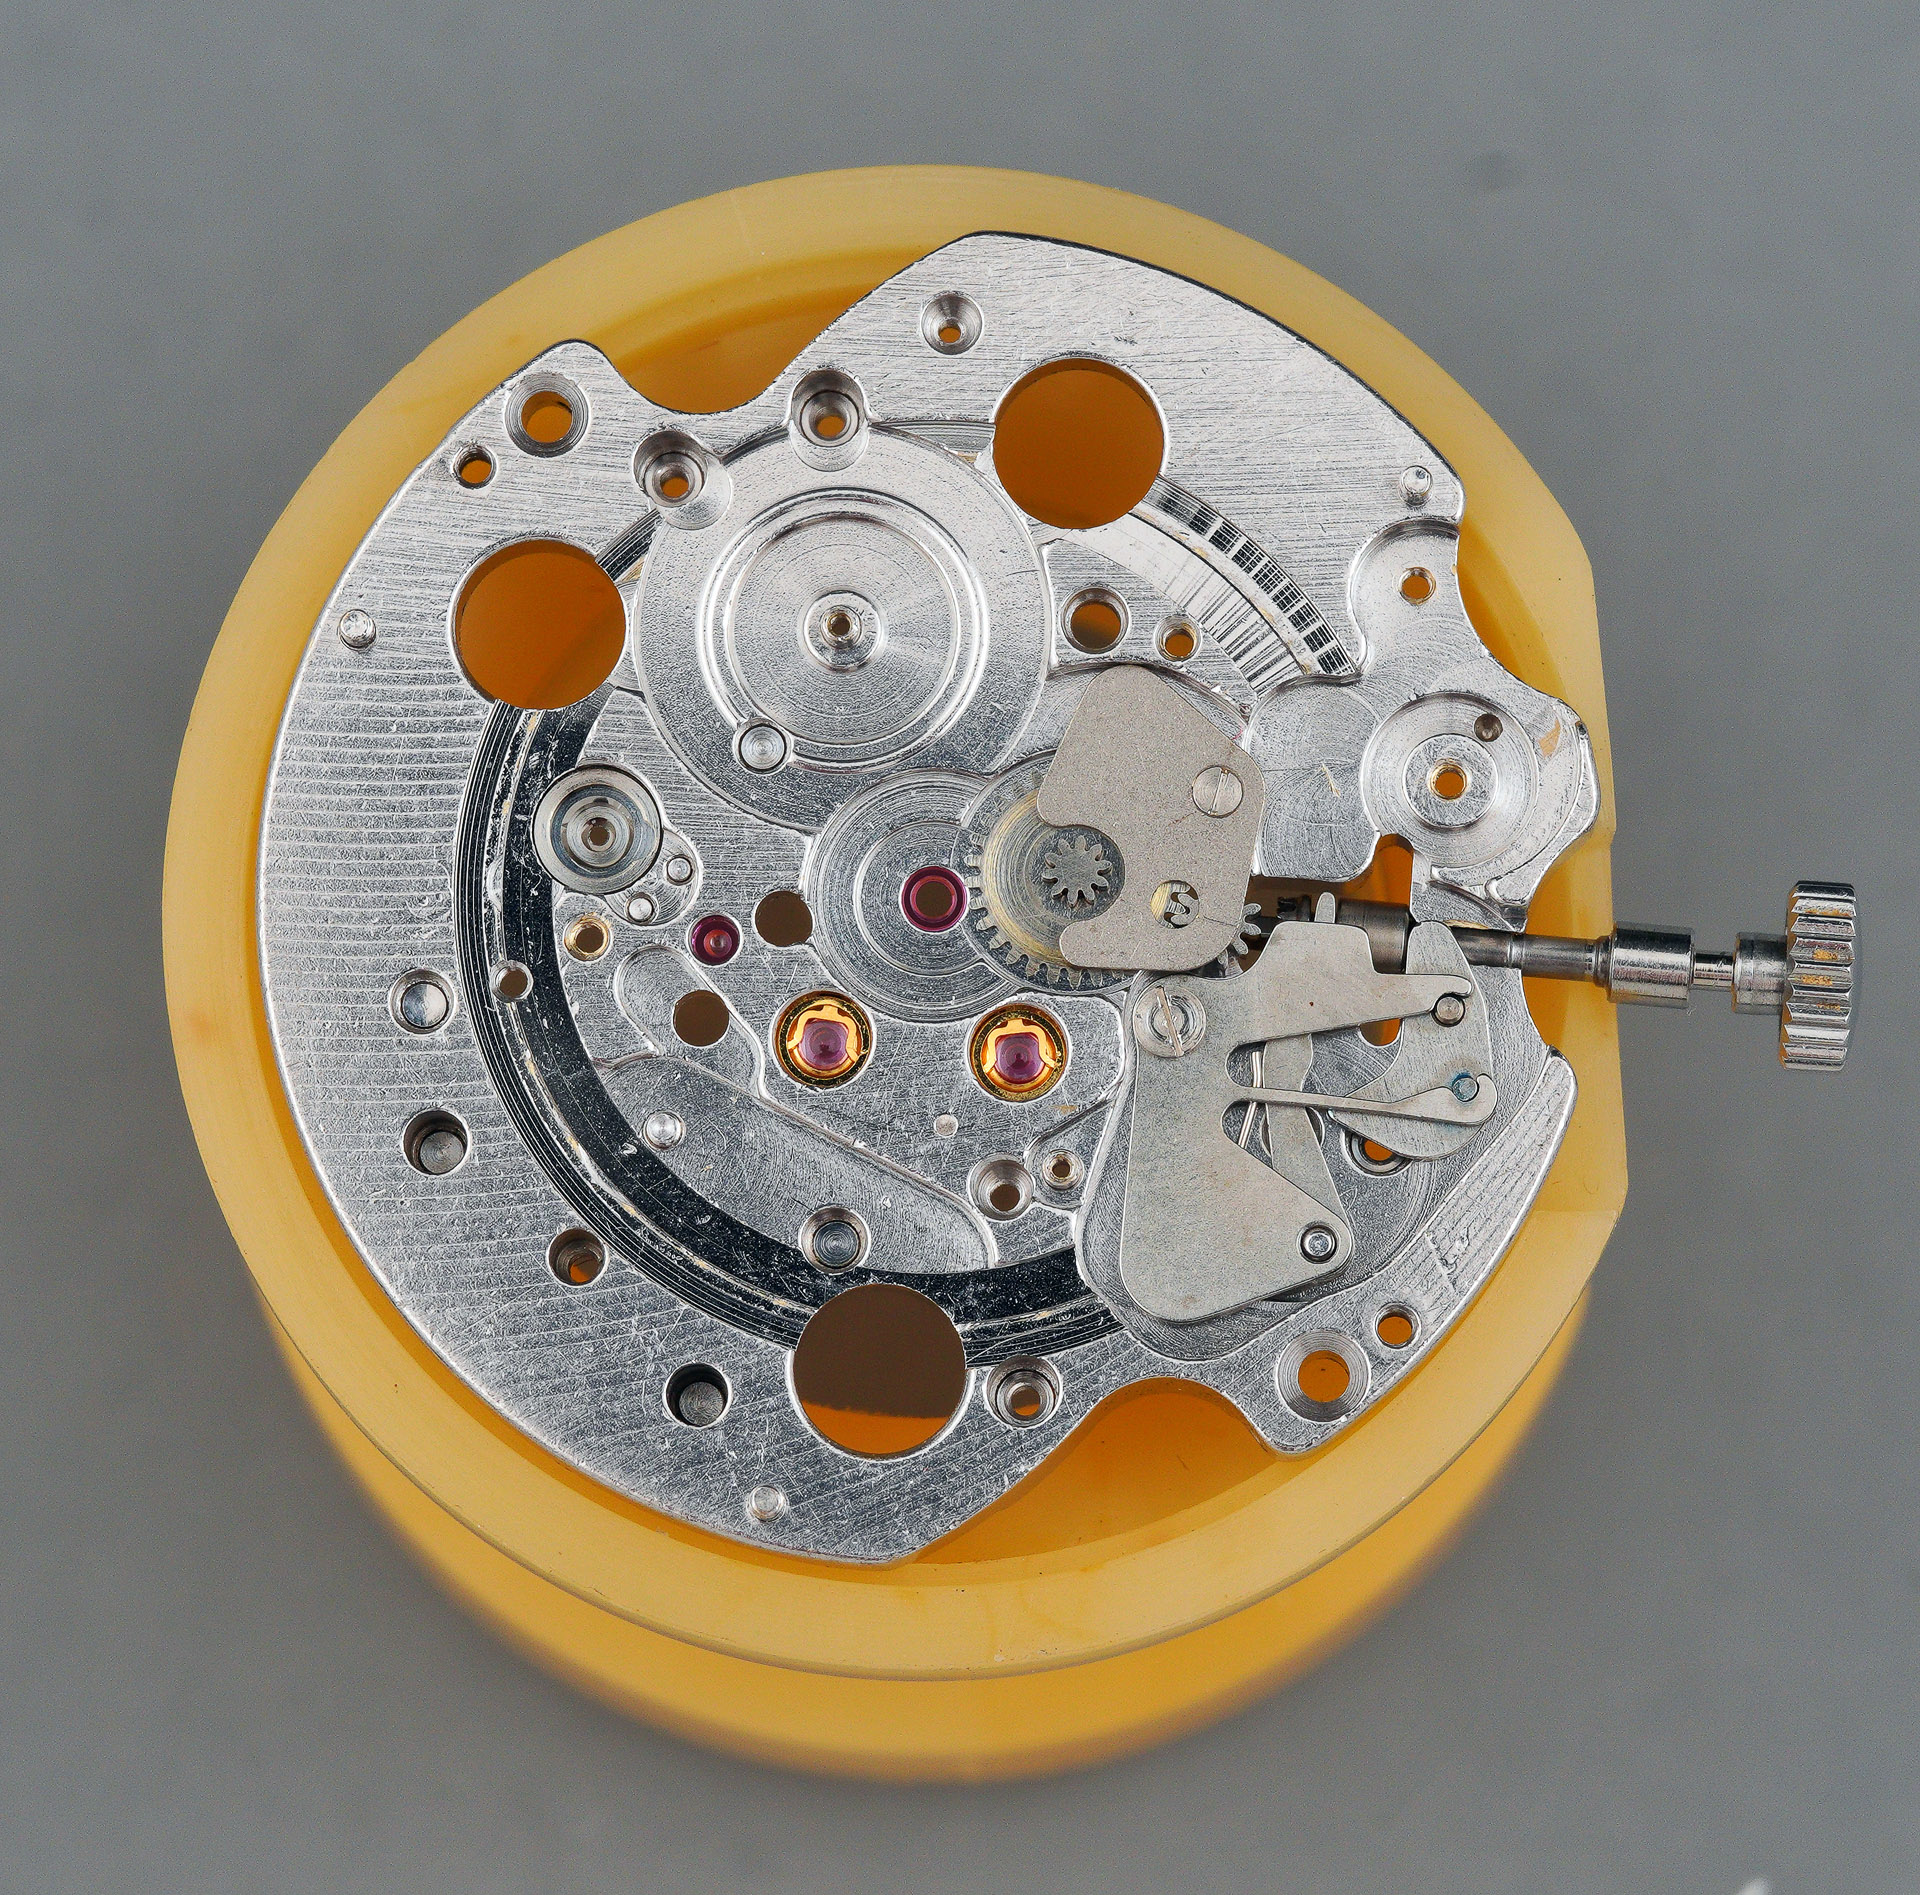
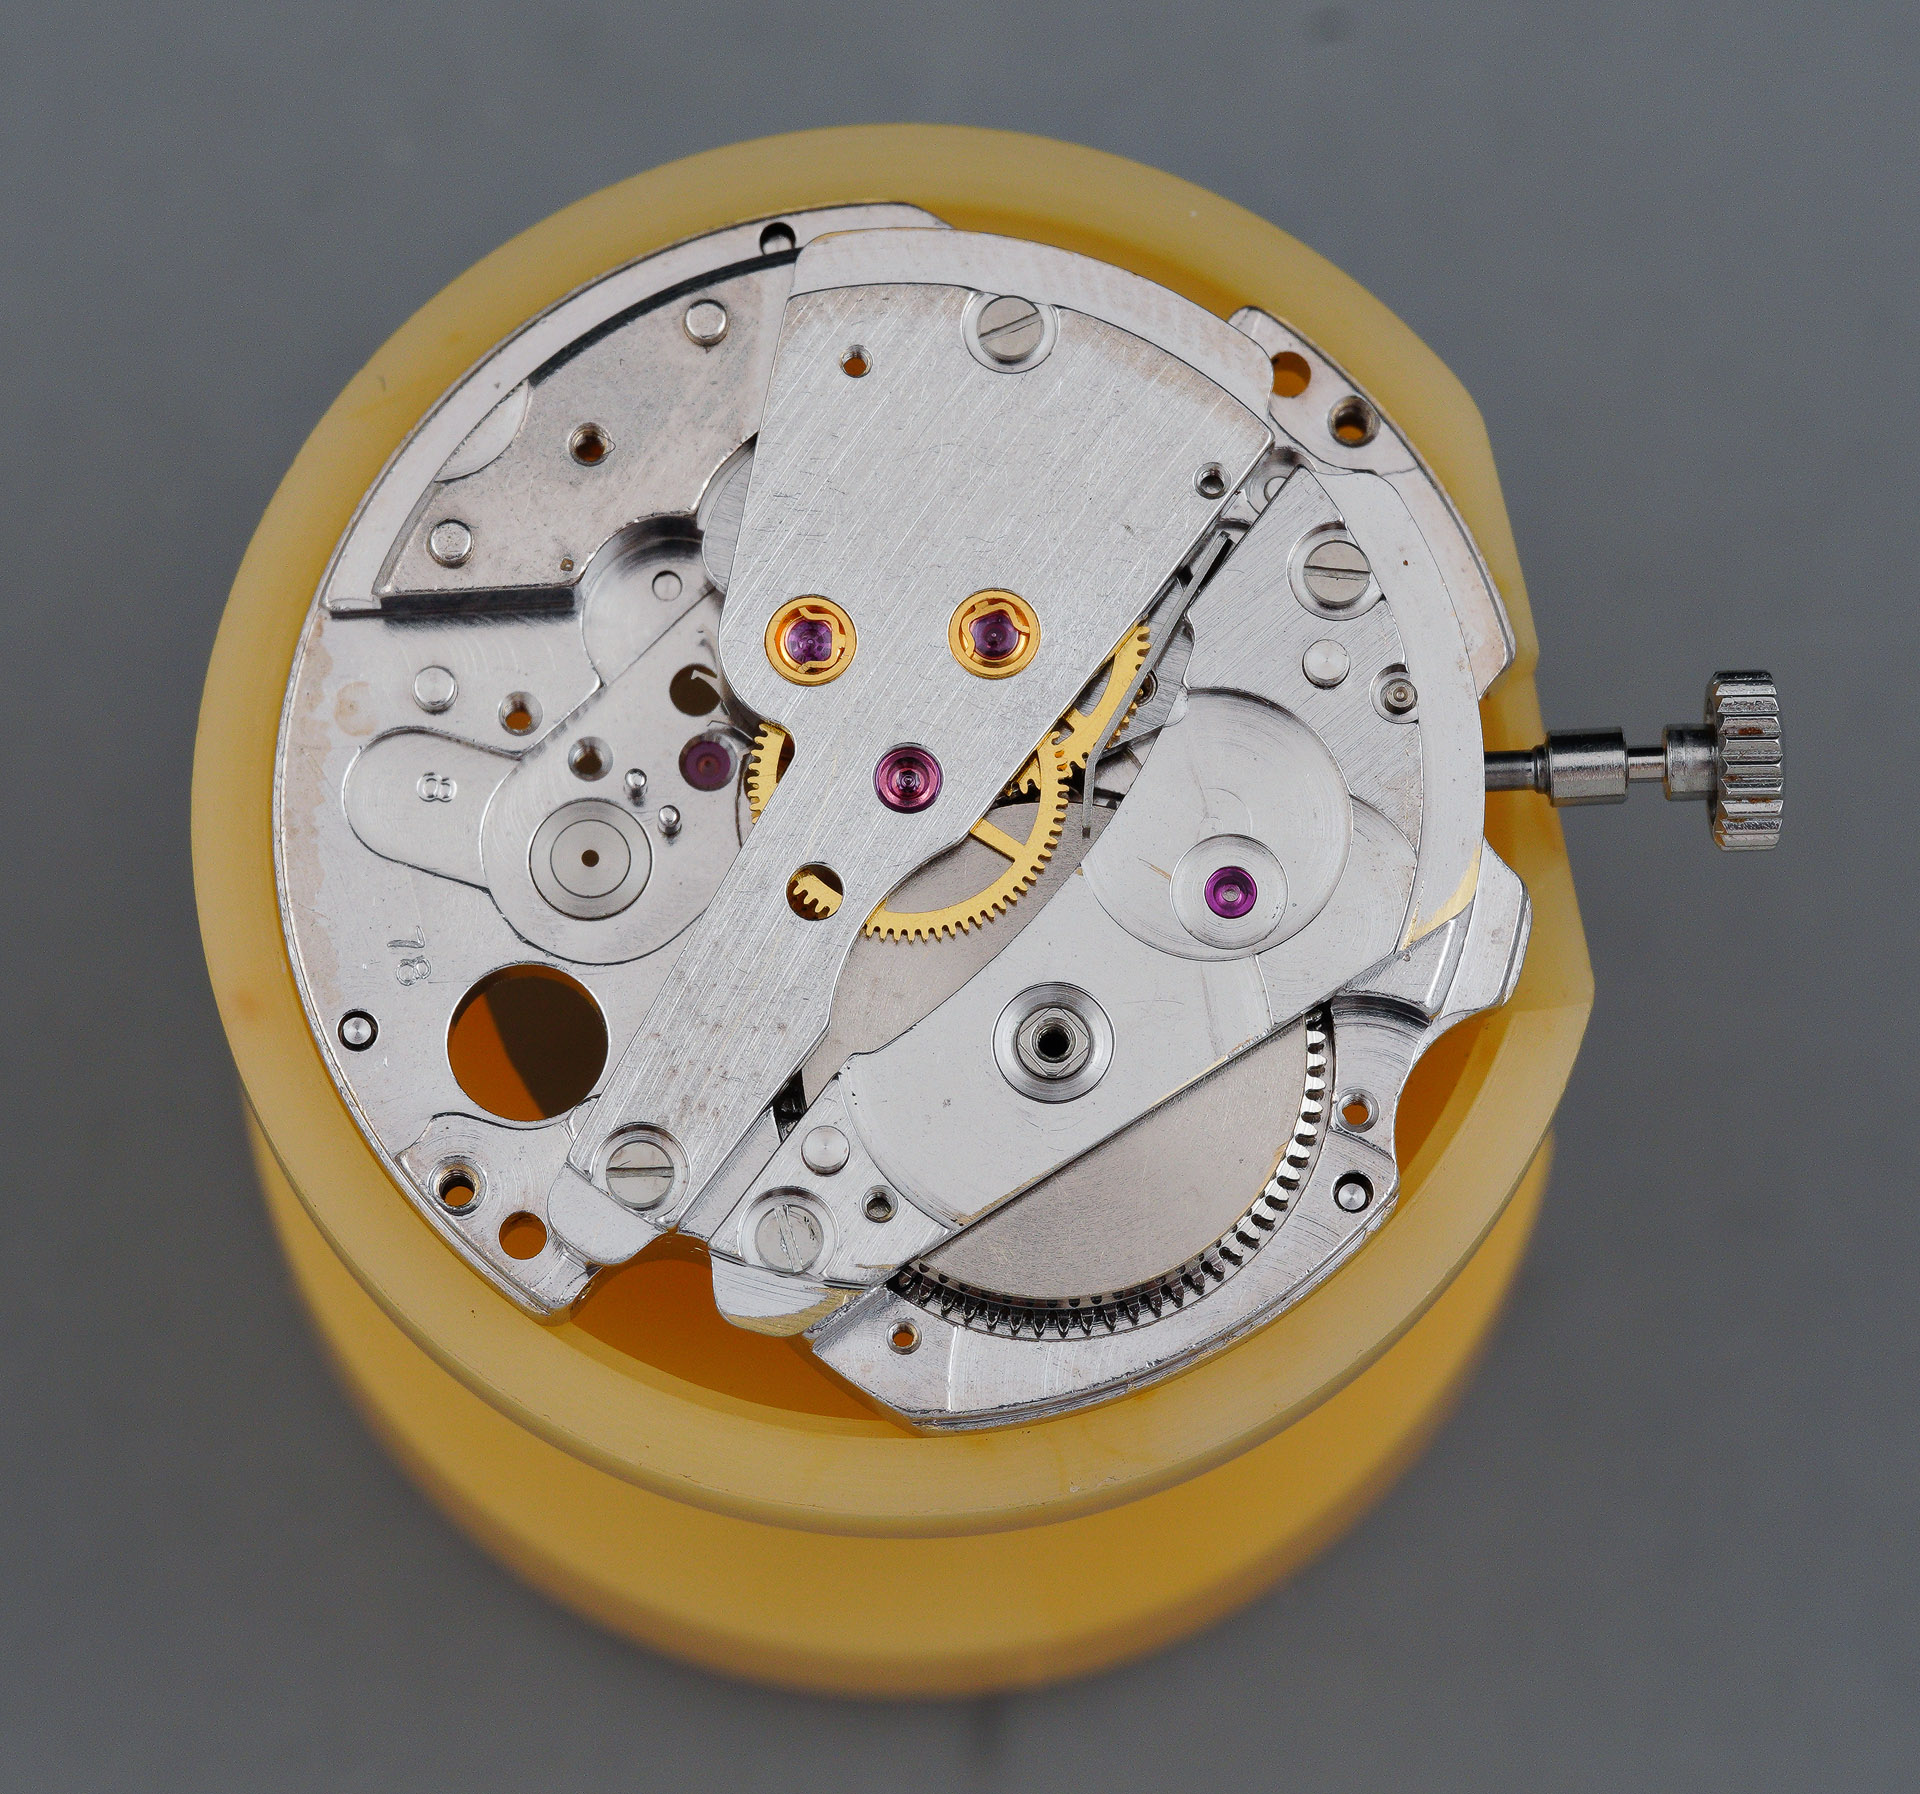
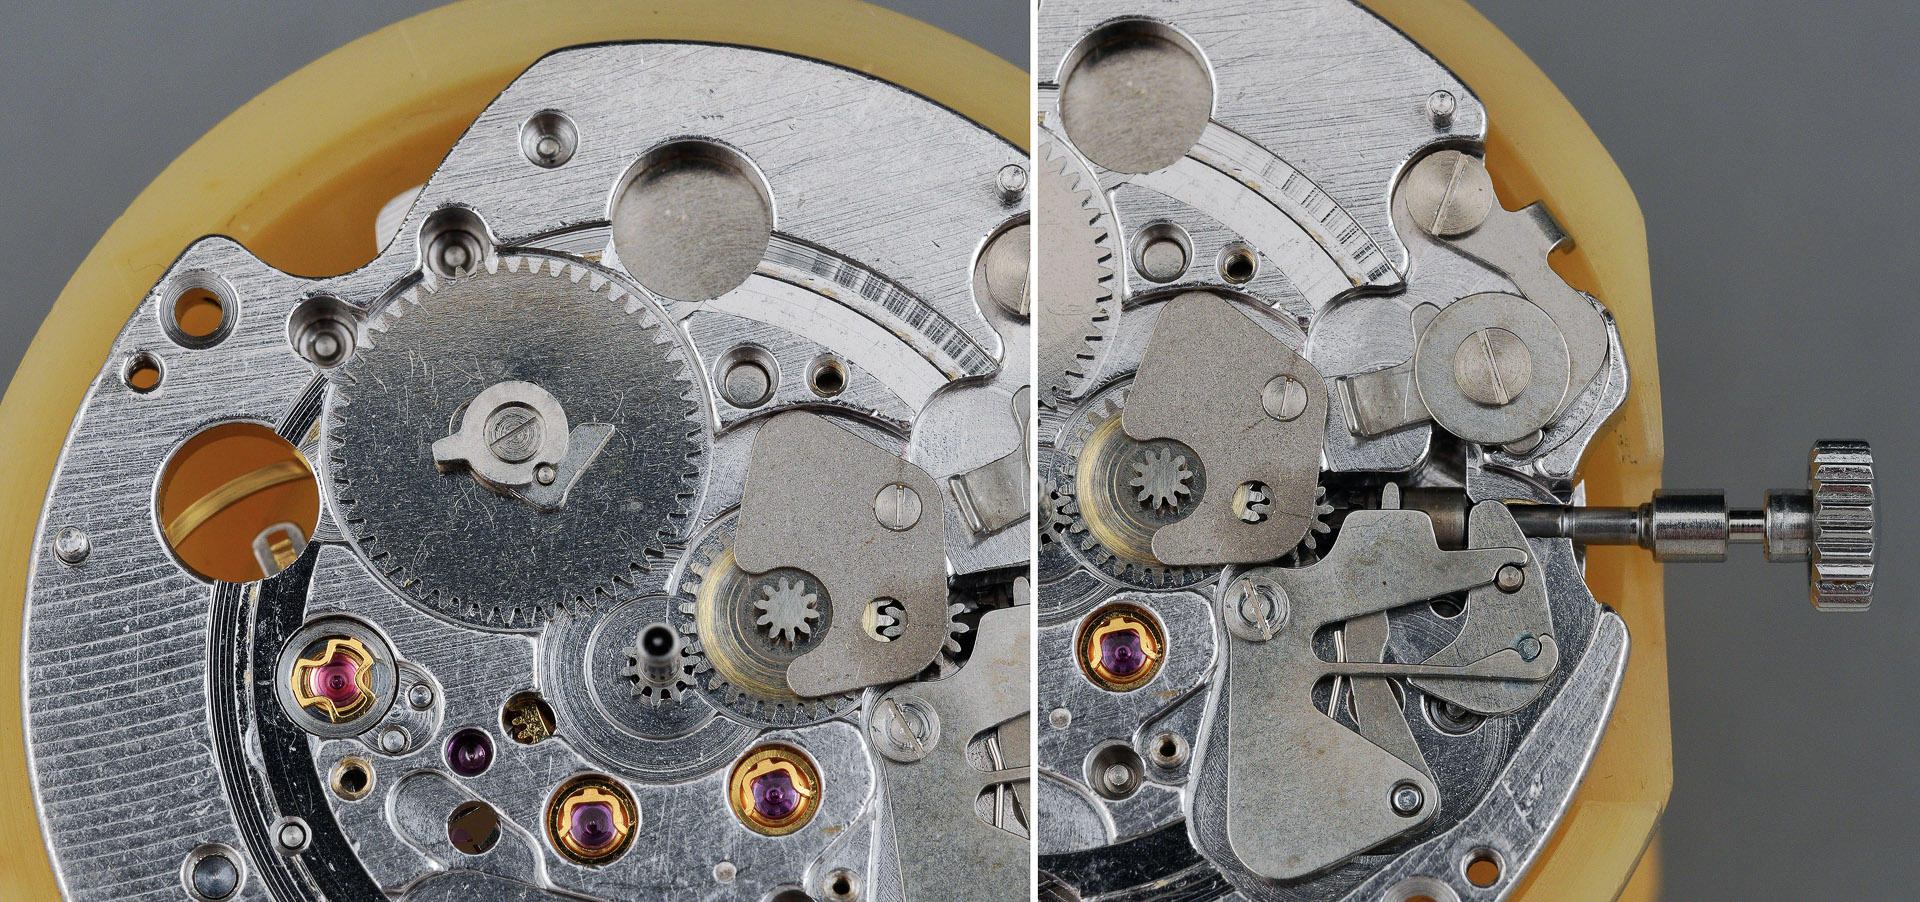
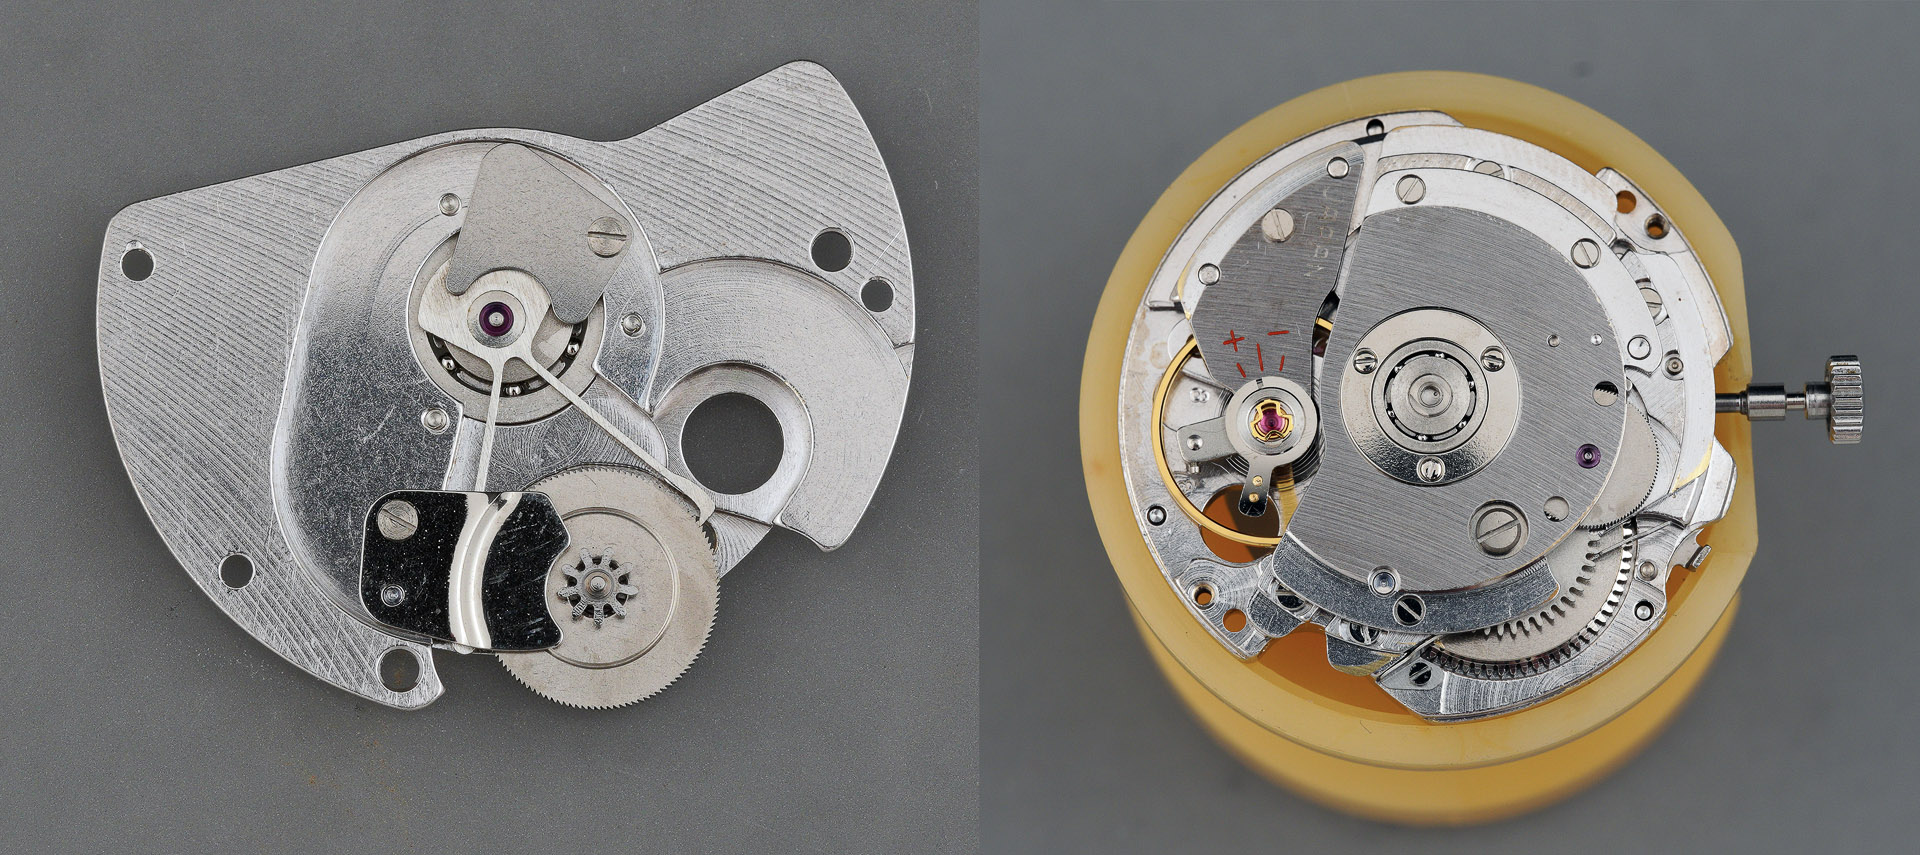
In the photograph of the calendar side of the movement, it is clear that the movement has acquired a significant degree of tarnish. That applies equally to the balance side and moreover, general patination is augmented by lashings of grime from solidified ancient lubrication combined with dirt.
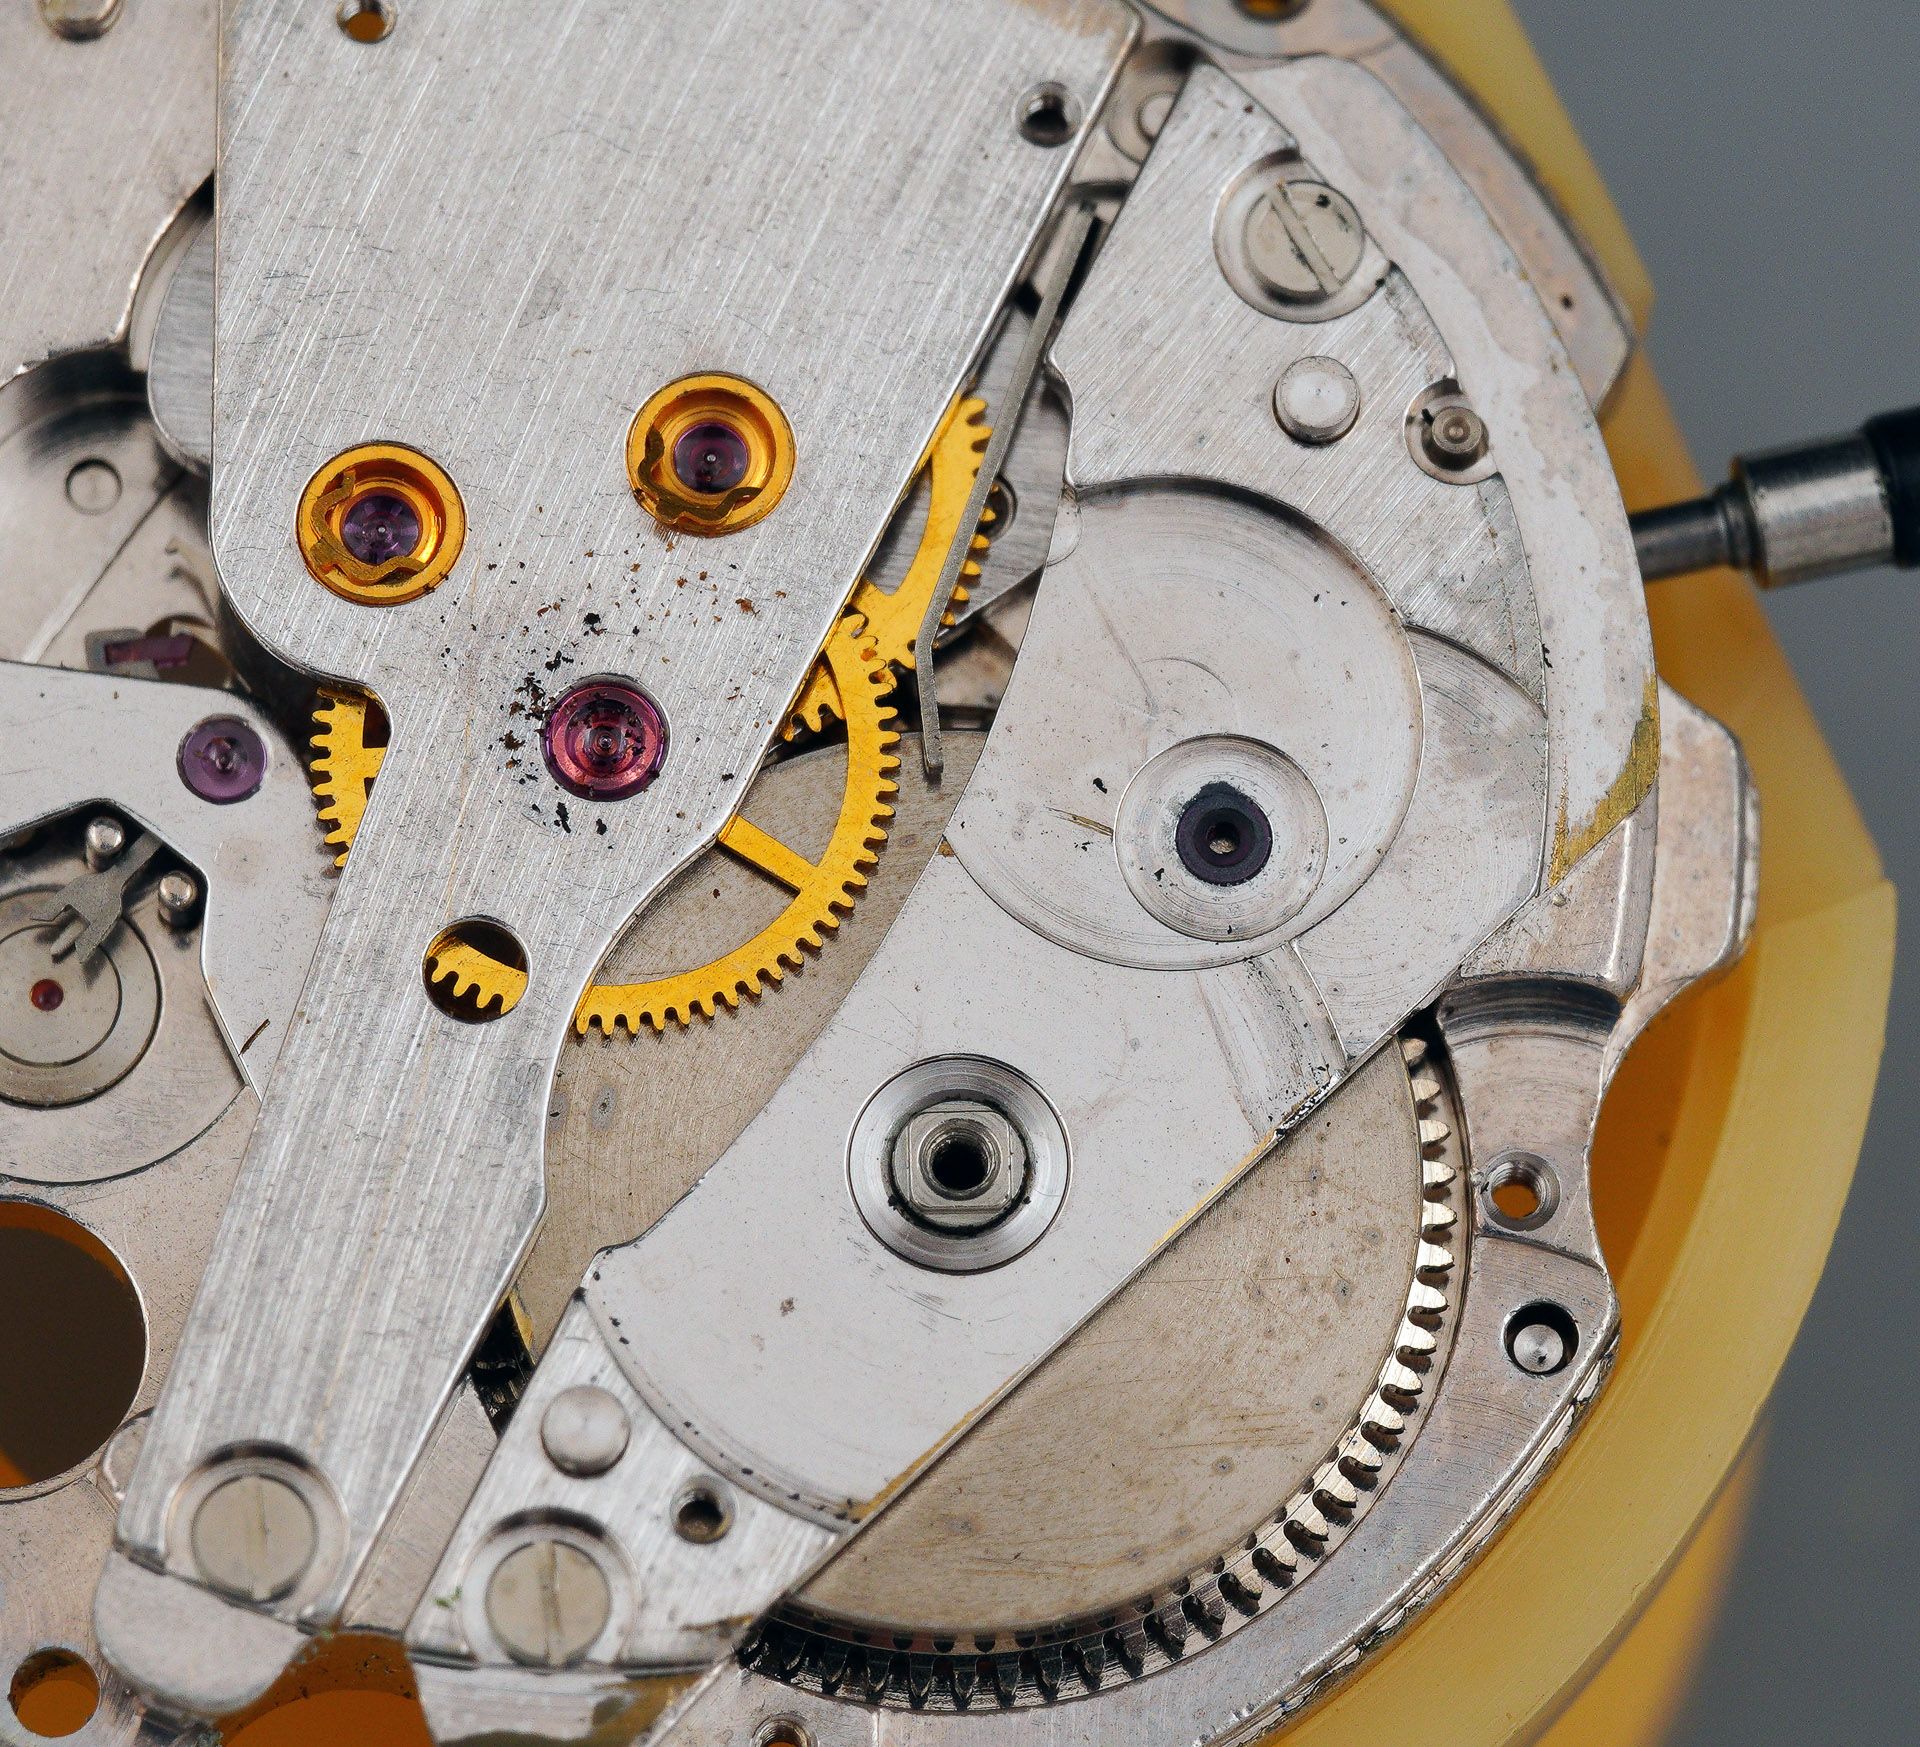
The debris that litters the region around the centre seconds bearing comes from the pawl lever pivot on the underside of the autowinder bridge.
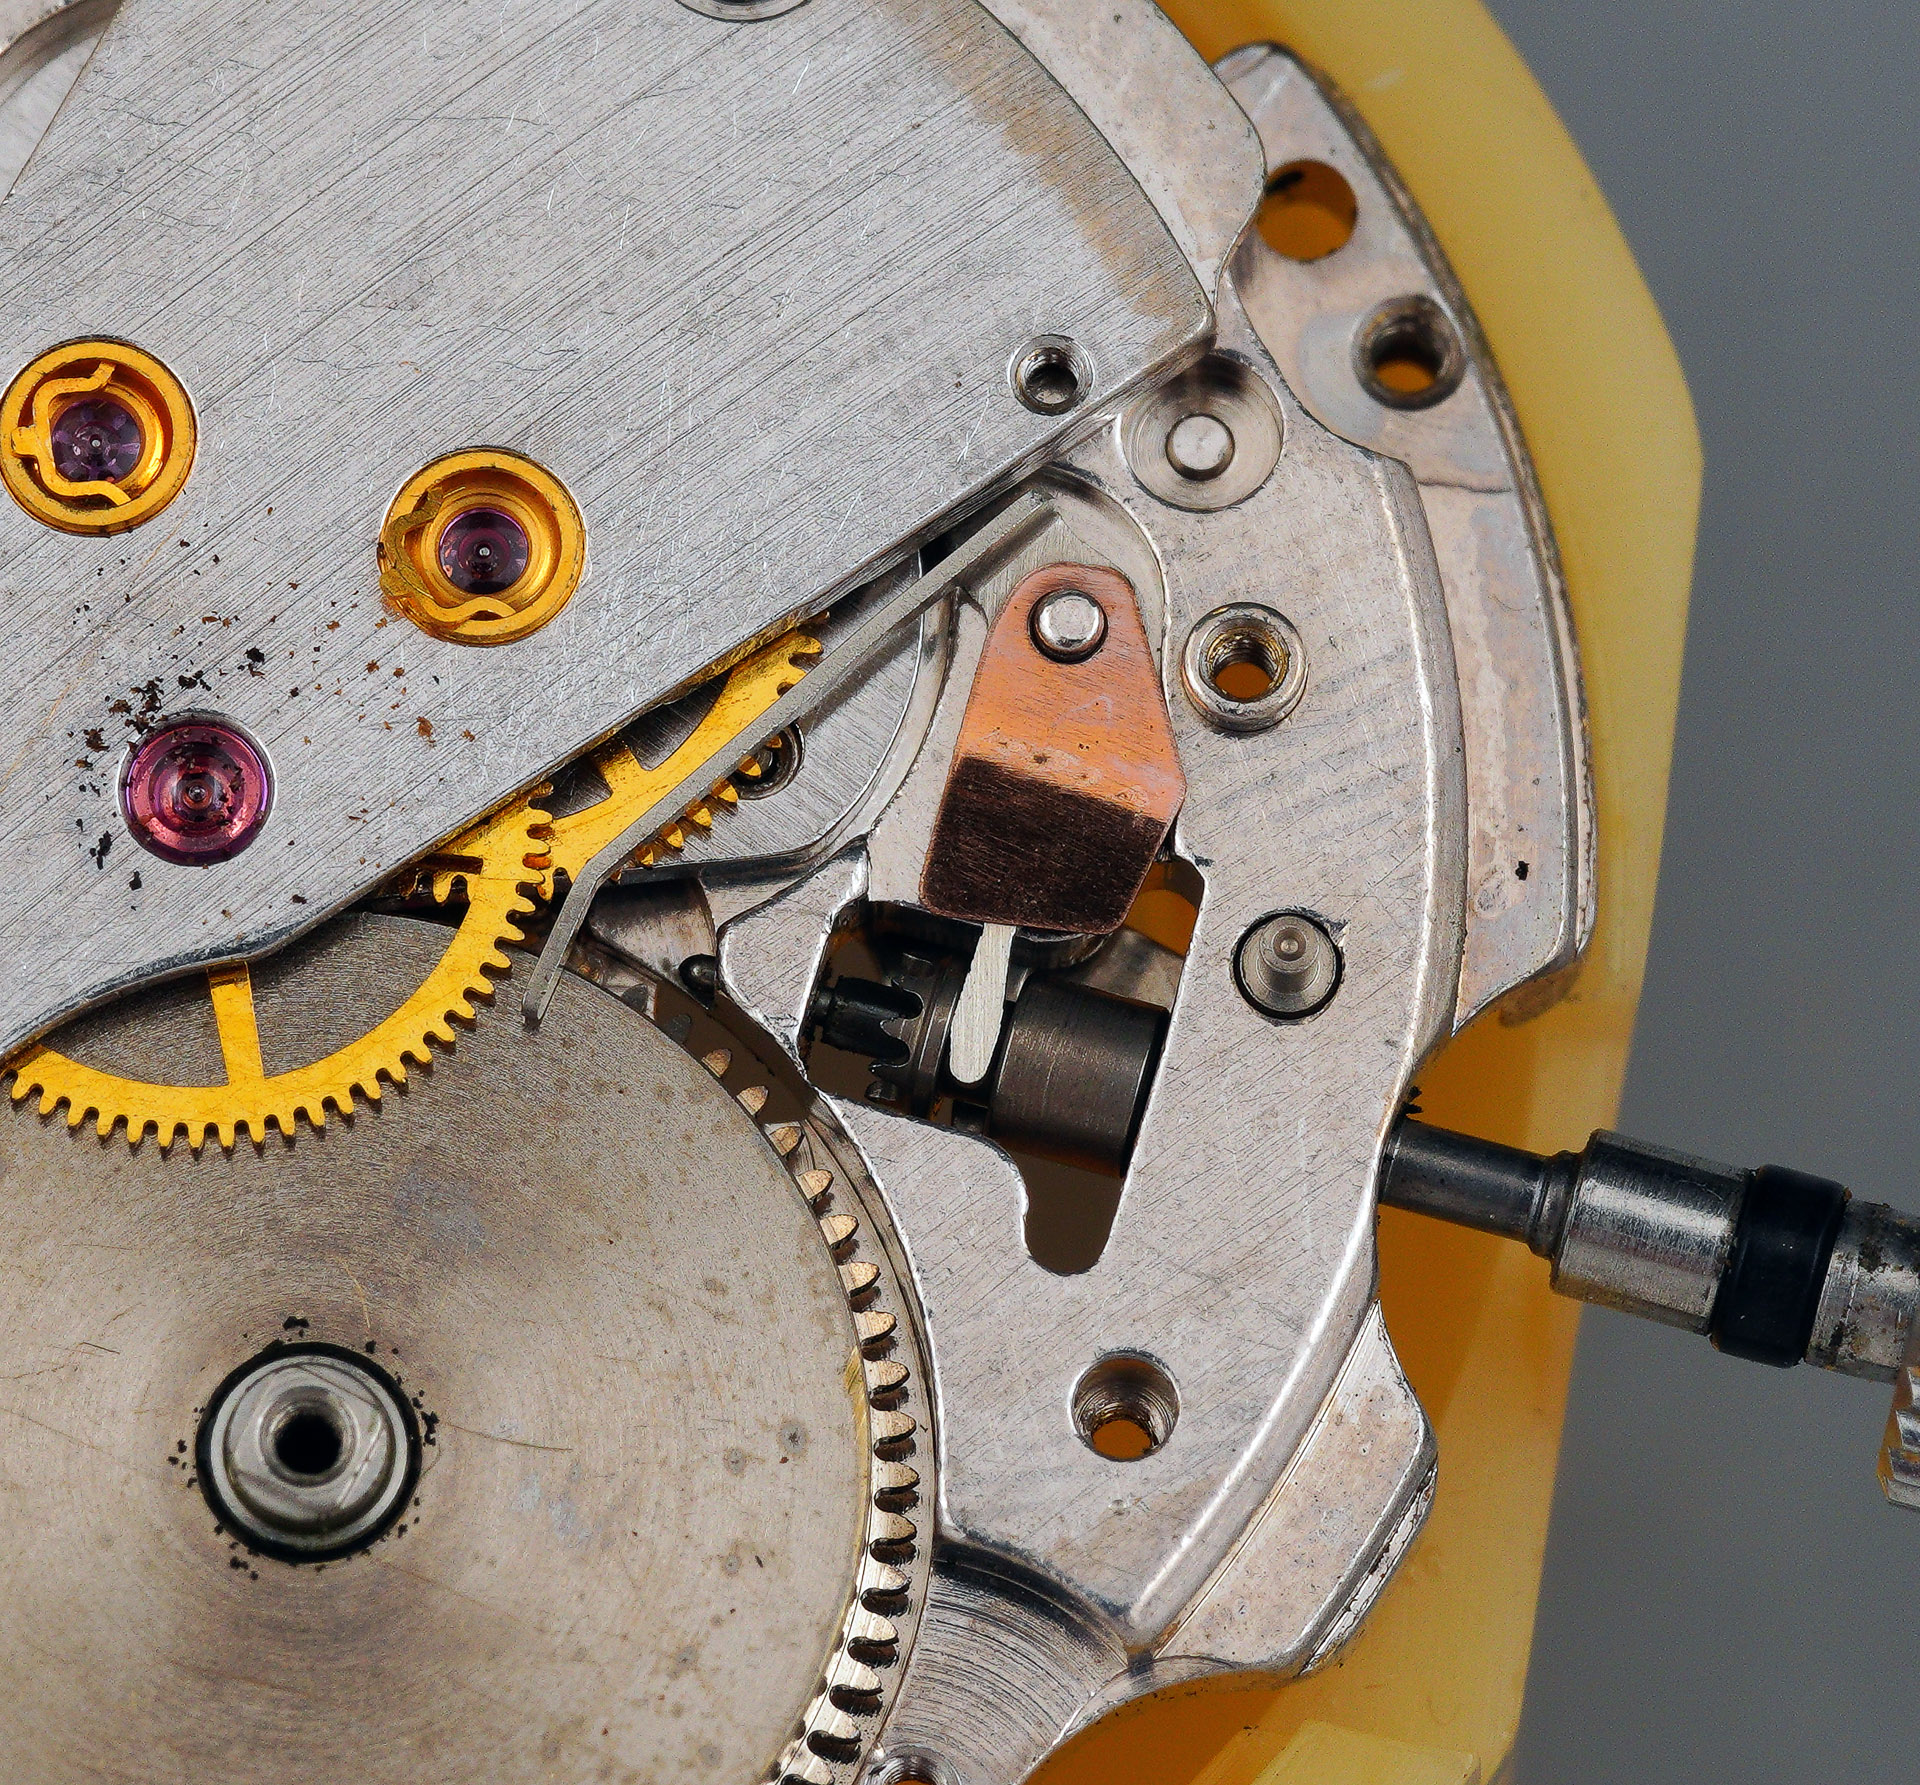
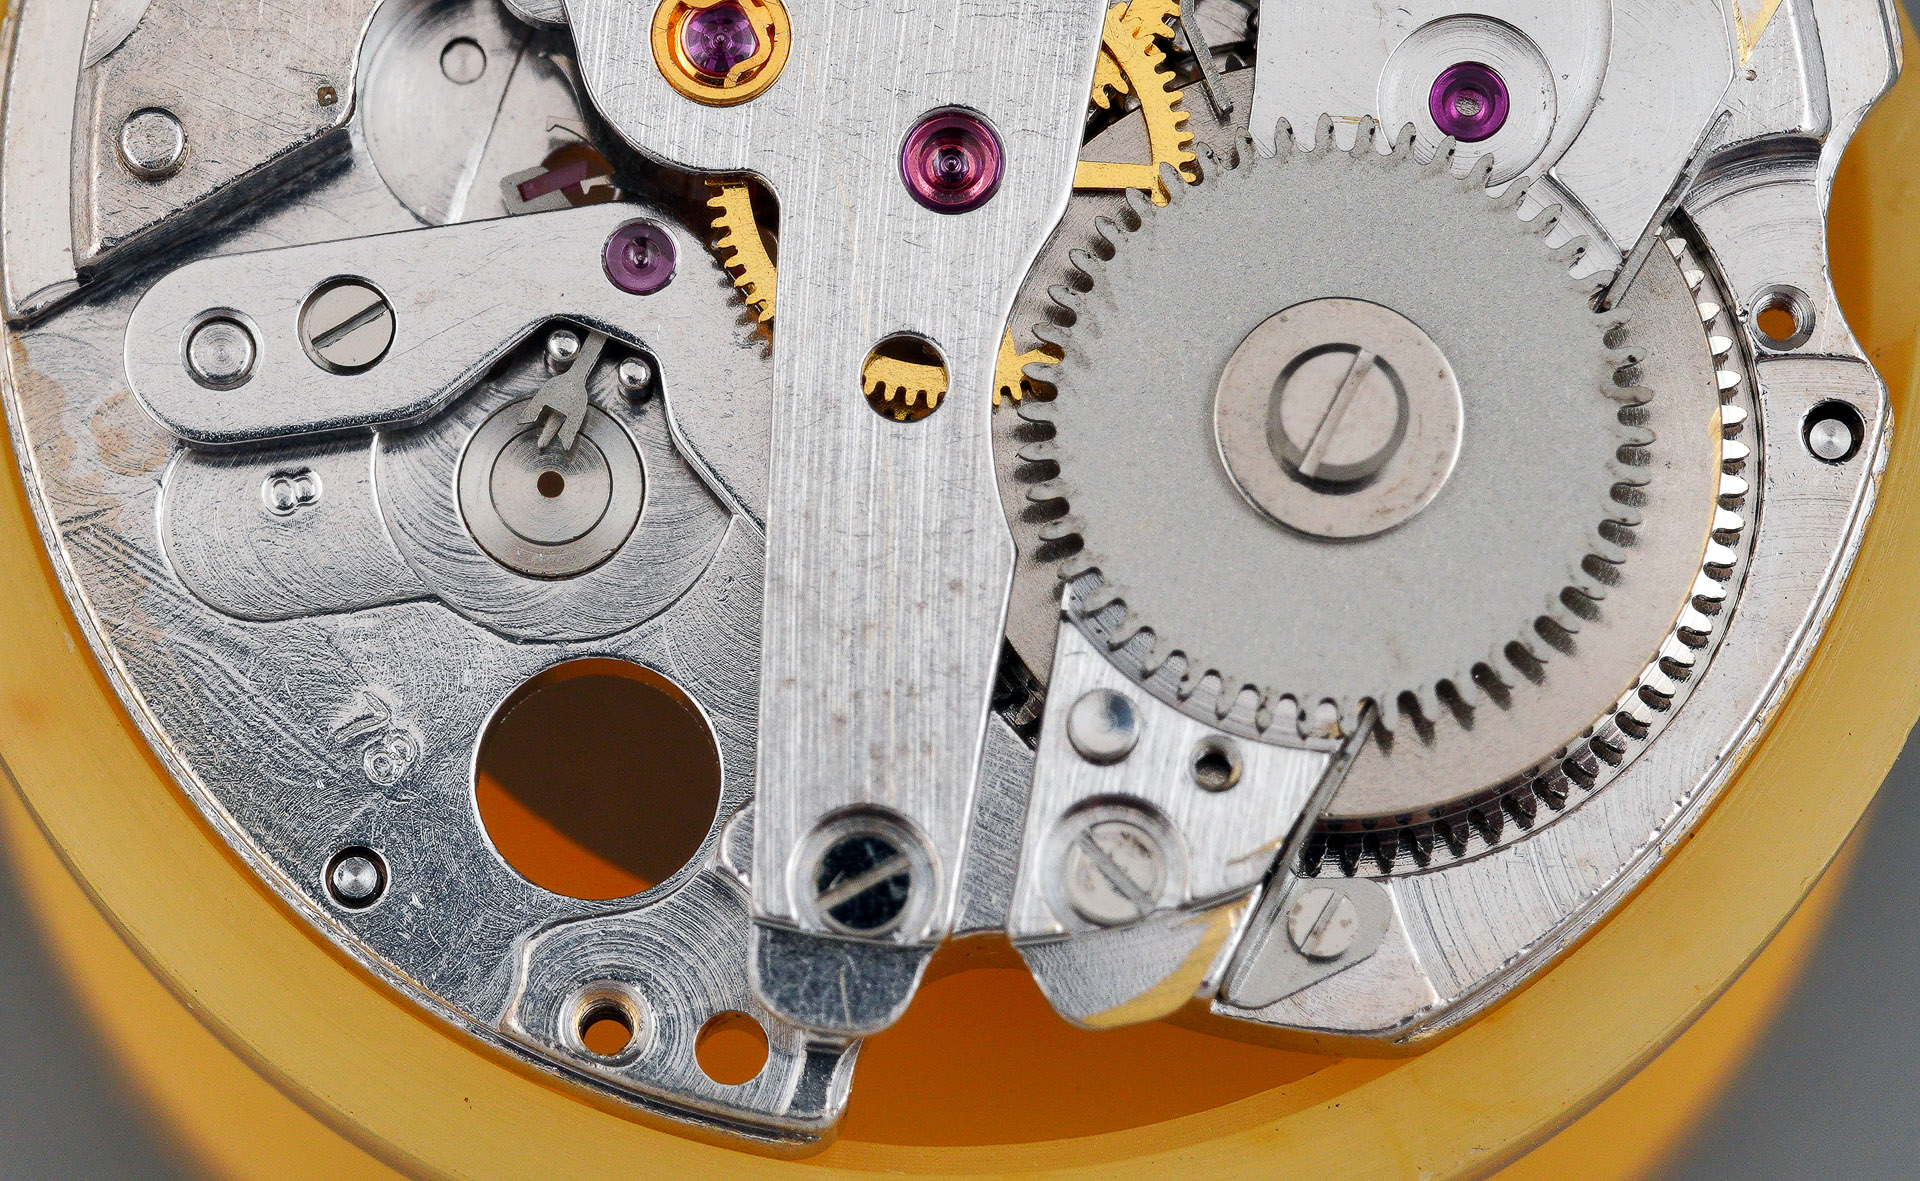
As we delve further into the interior of this movement, so we uncover just how well specified it is in terms of features. In addition to day and date calendar complications, and a quick-set date mechanism, you may have noticed the presence of a stop seconds lever that acts upon the centre wheel.
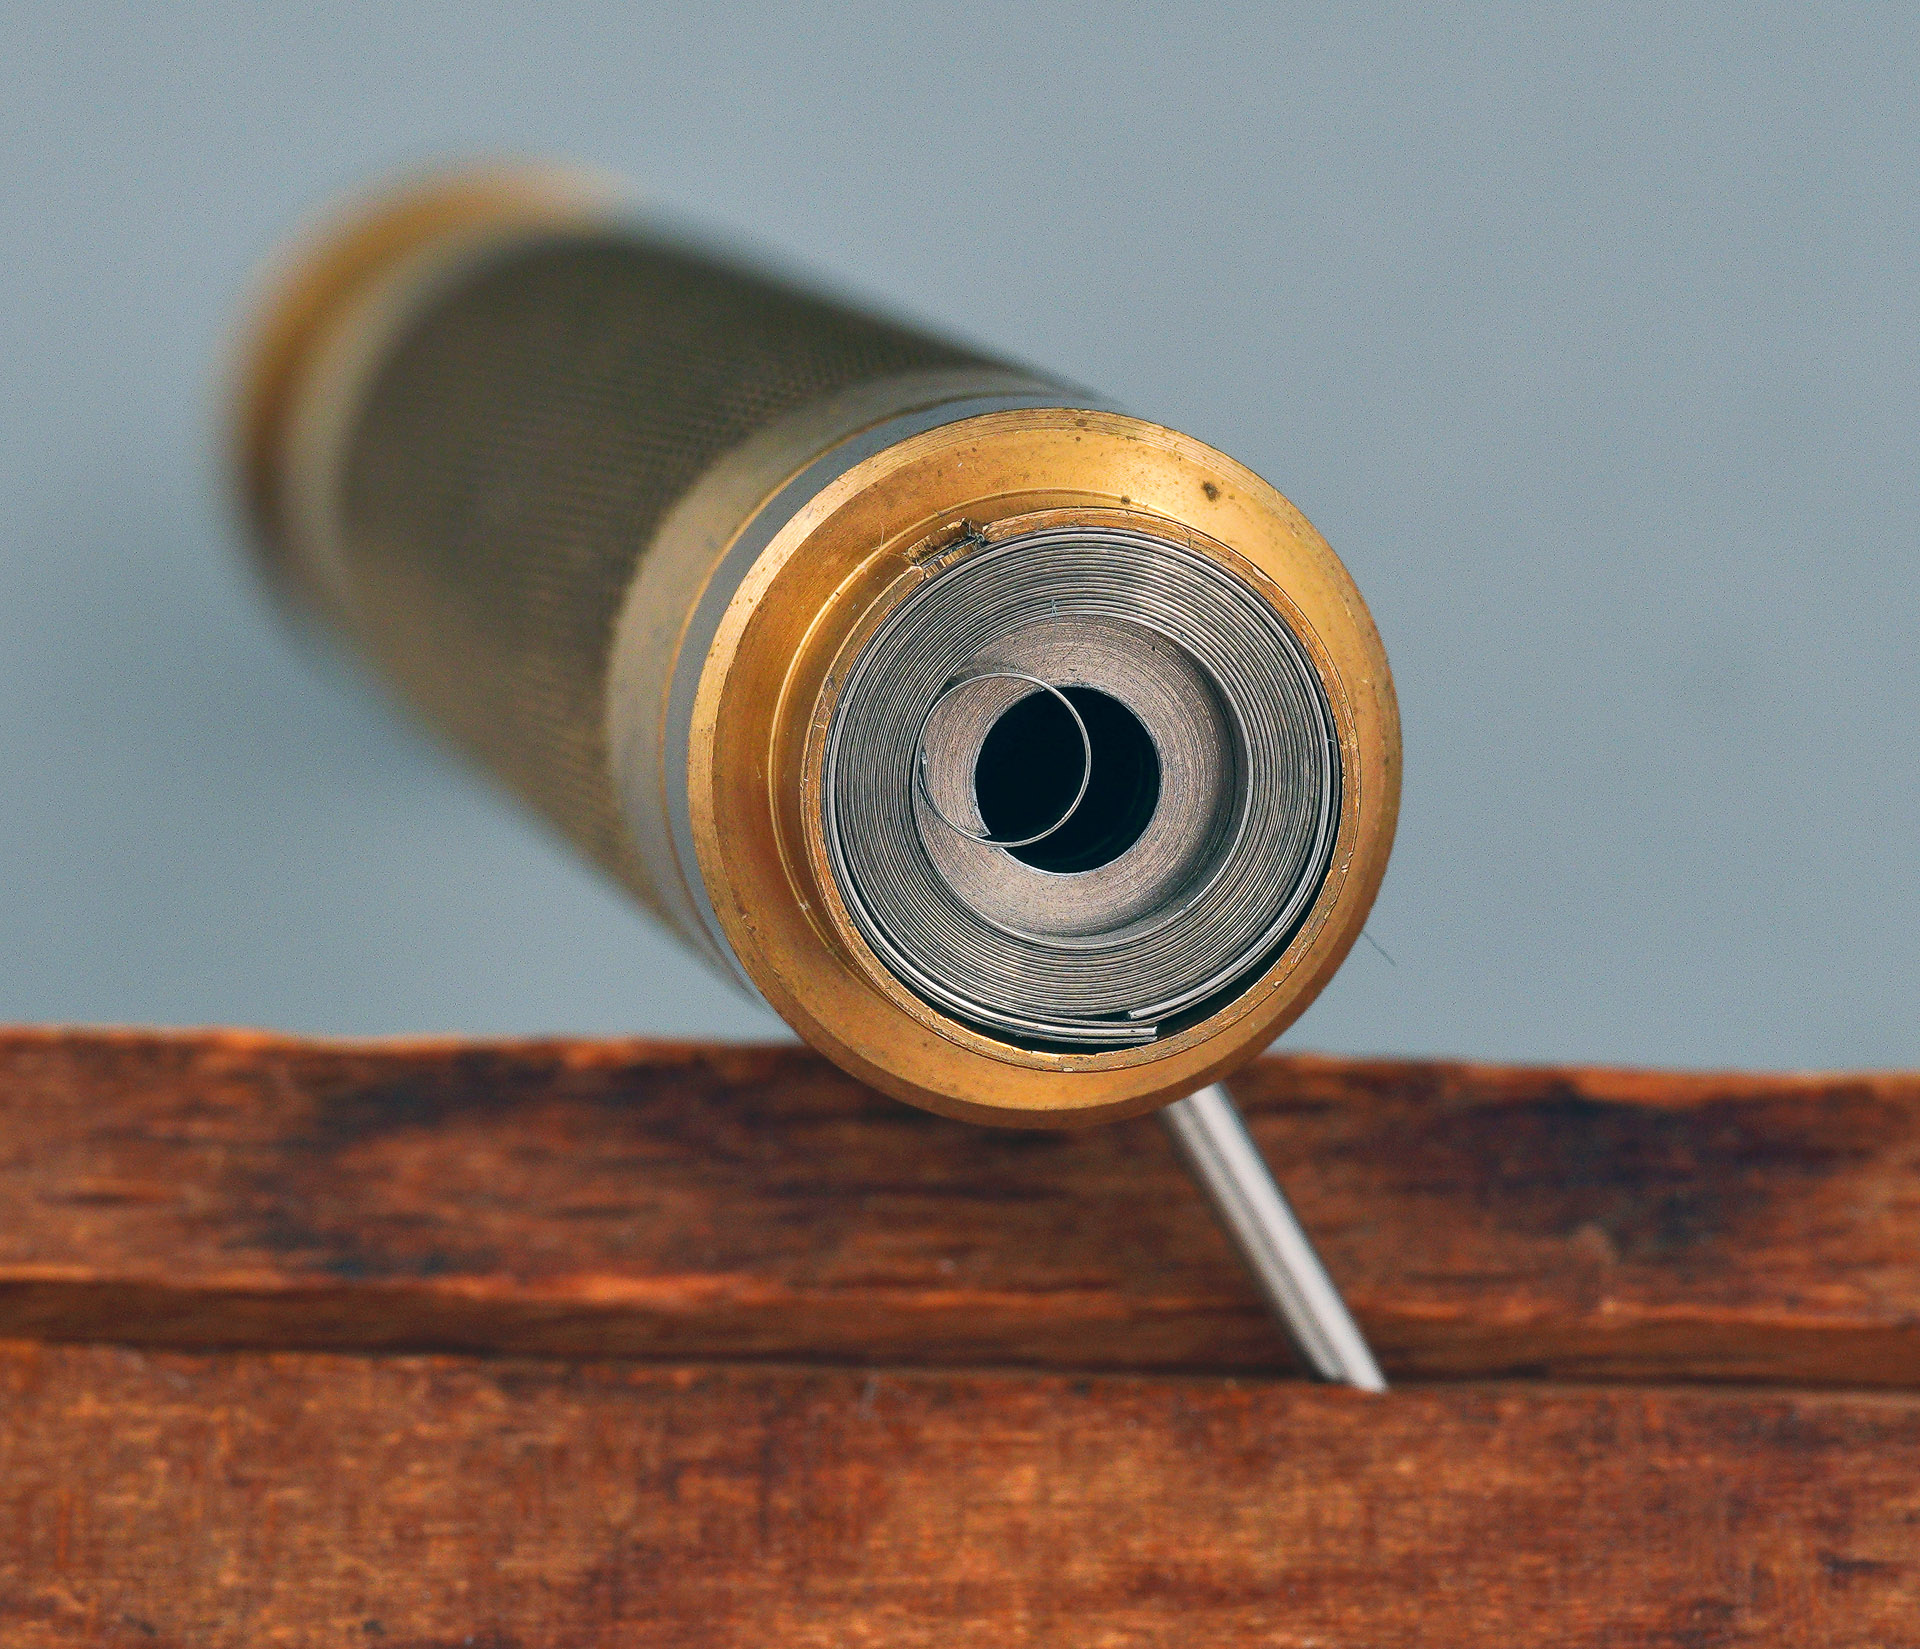
Our survey of the accumulation of grot continues with the barrel arbor hole and mainspring itself.
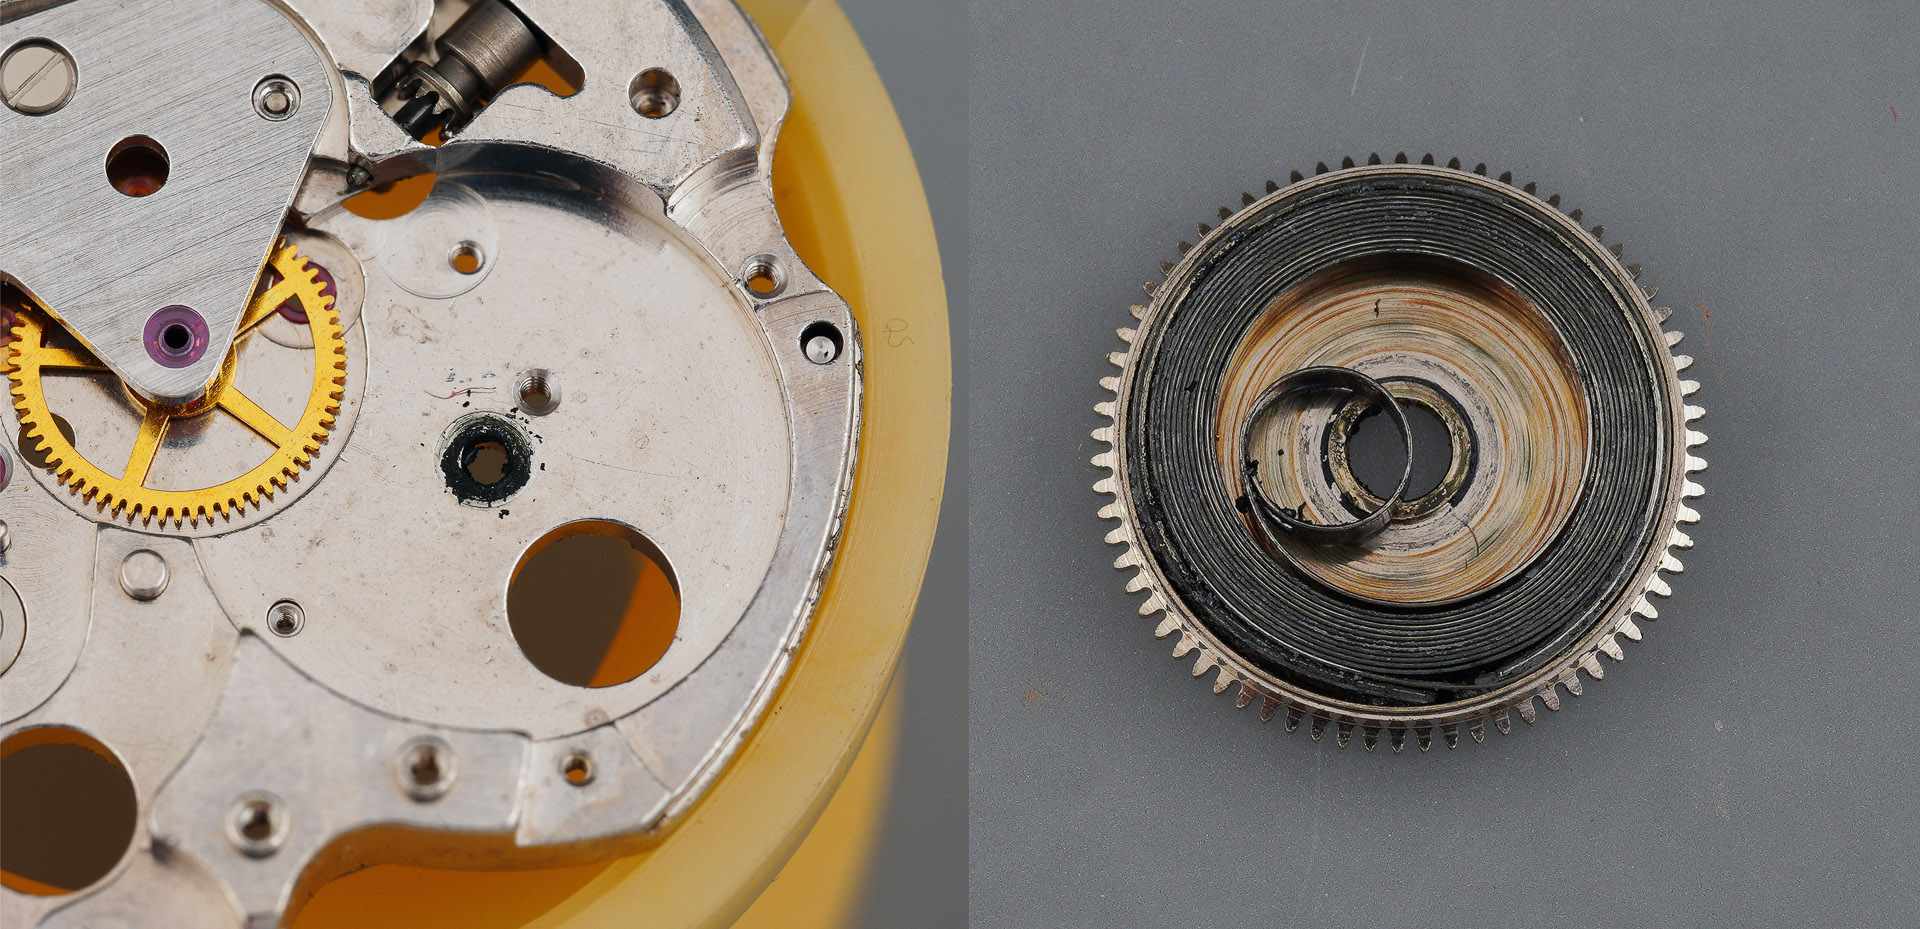
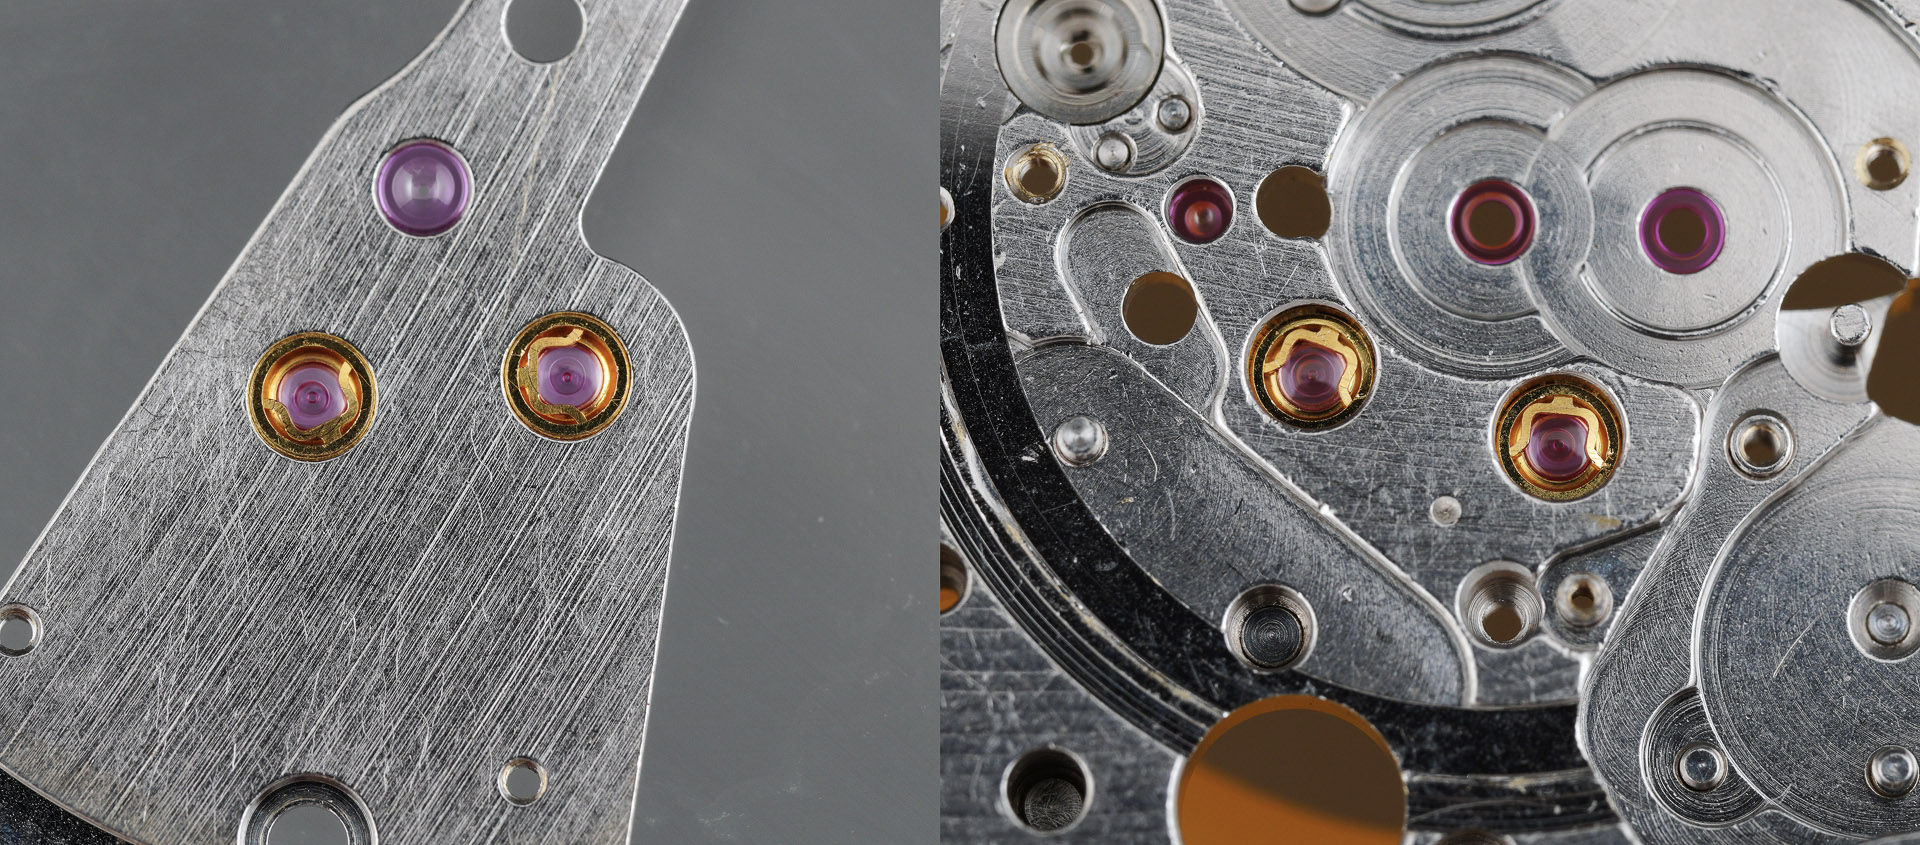
The leeching of molybdenum grease from the interior of the barrel to the barrel arbor hole in the main plate is typical of Seiko movements of this era for which a service is long overdue. We are at the summit of our climb and so after a pause to catch our breath and take in the scenery, we can begin our descent. This being a movement that is reasonably well-endowed with jewellery, we start the reassembly process by attending to the Diafix cap jewels on the dial side of the main plate and on the train bridge.
Assembly proper starts with the setting parts, for which the layout is comparable to other Seiko contemporaries of the time.
Flipping over, and we can lubricate and fit the centre wheel, secured in place by its bridge.
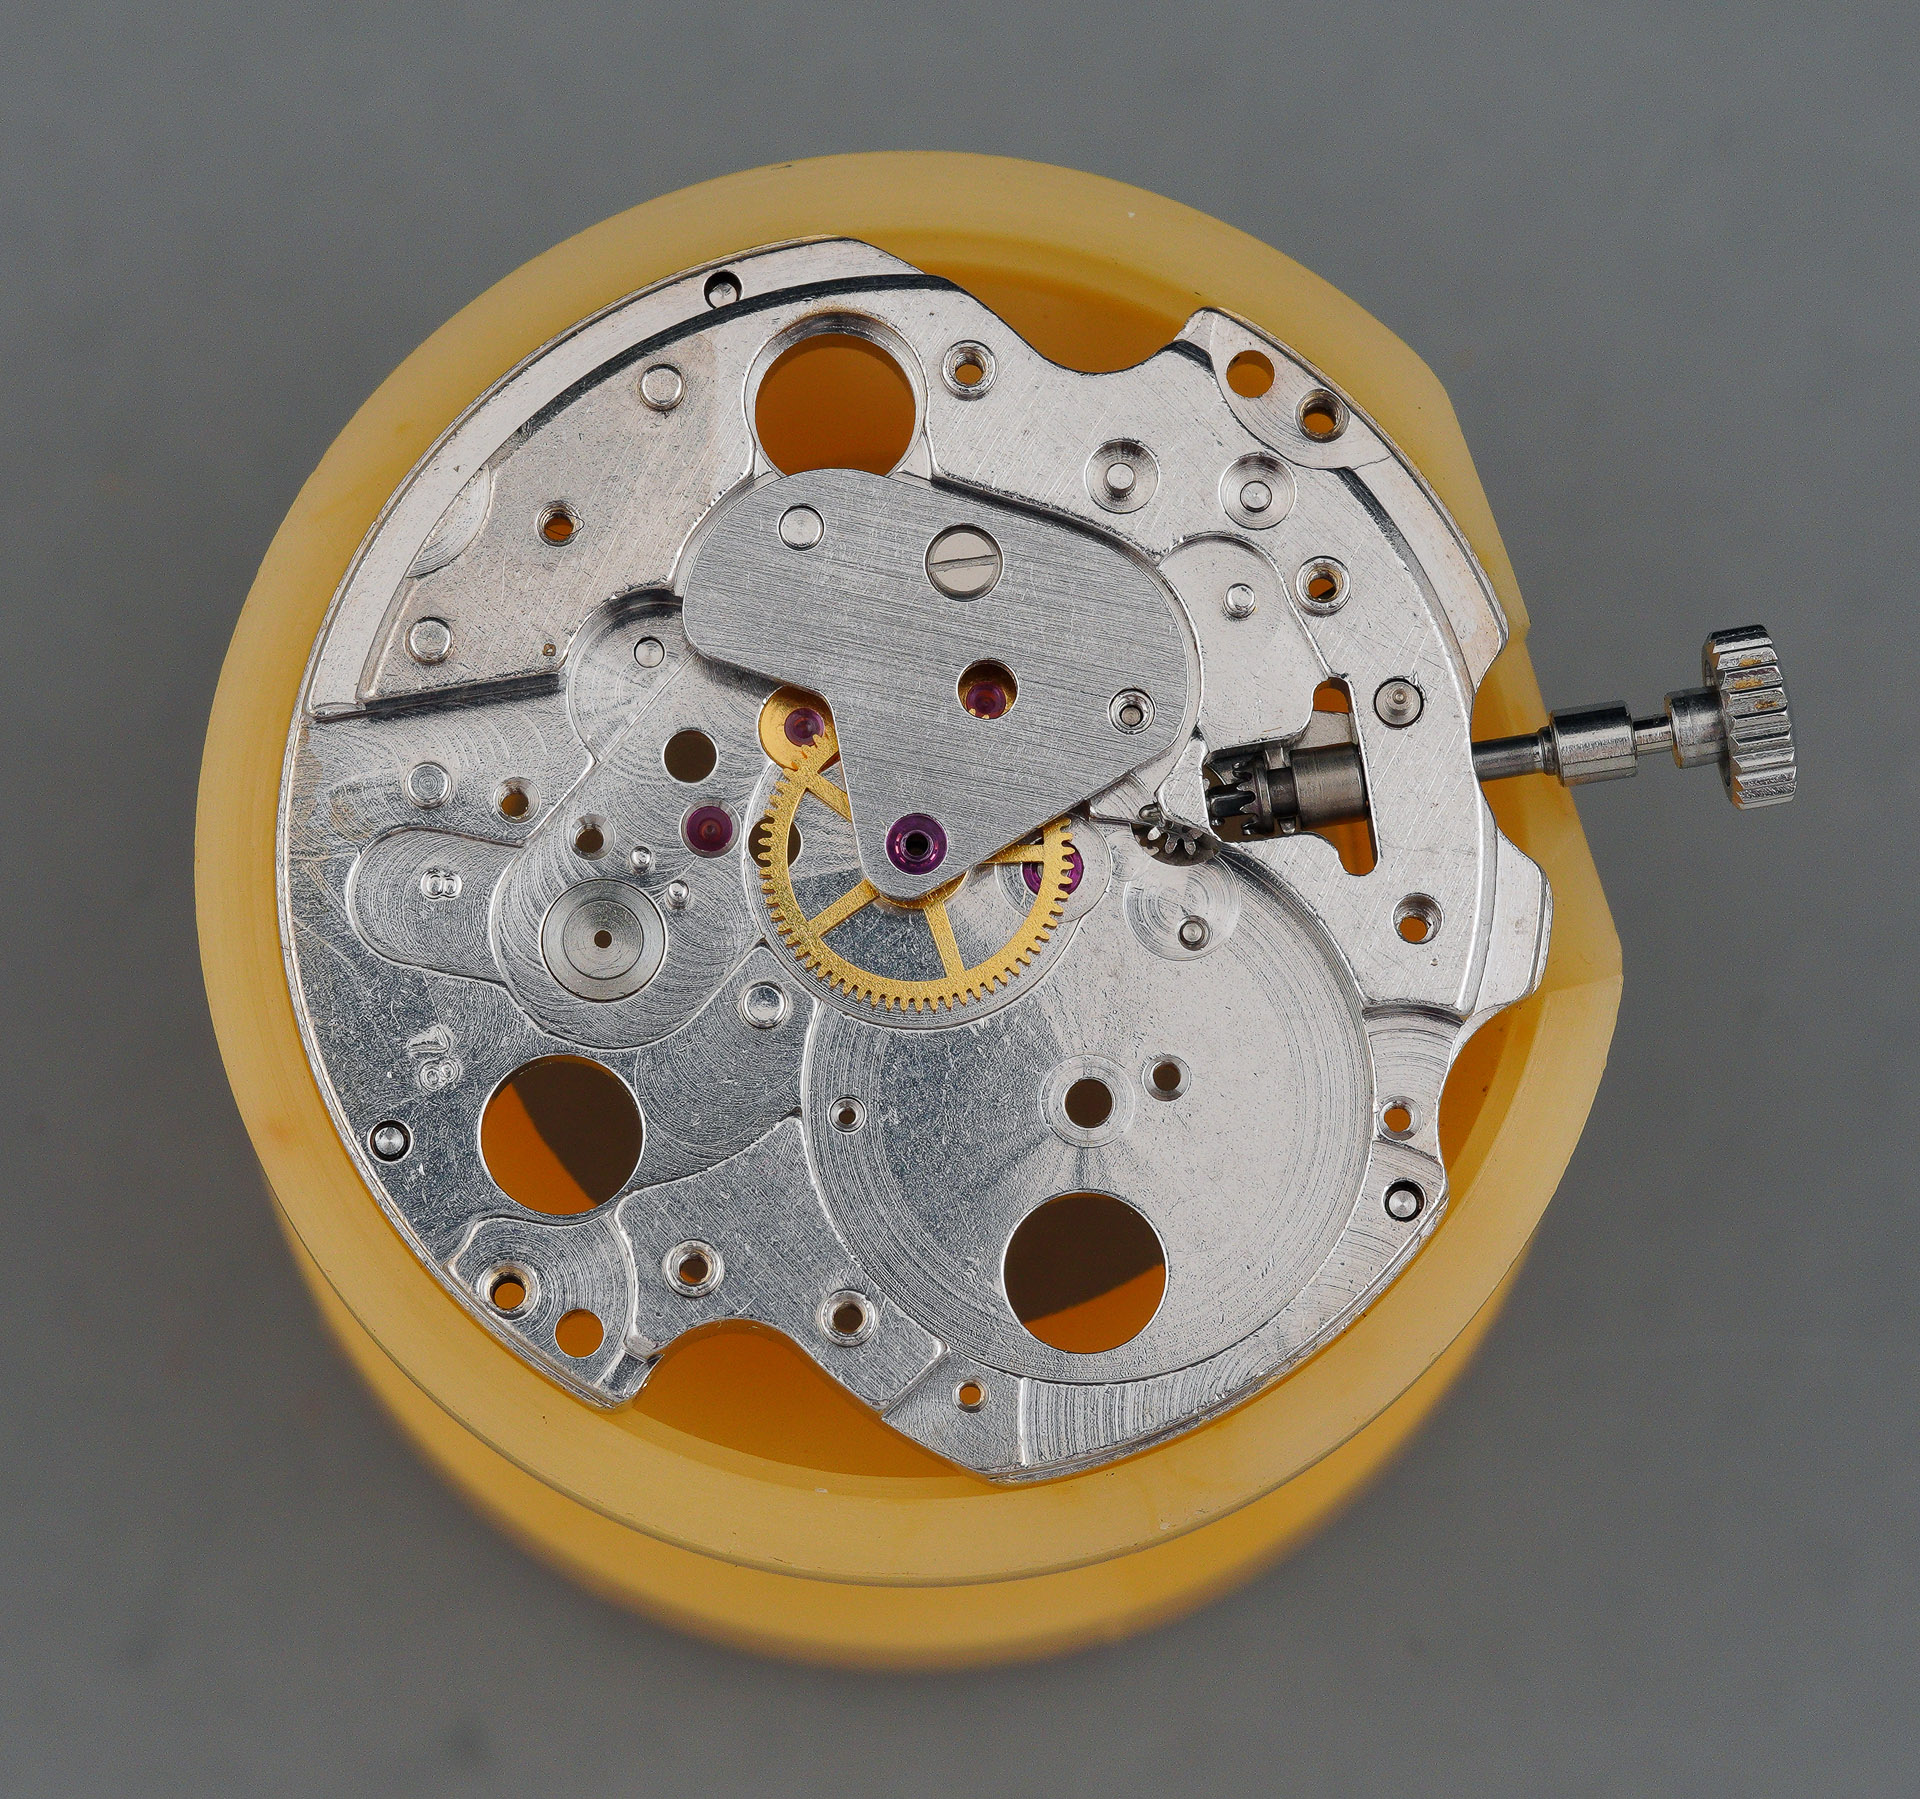
Again, all very familiar territory. Where the layout deviates from pretty much every other Seiko automatic movement that I’ve worked on is in its separate train and barrel bridges, a characteristic much more typical of hand-wind movements. In this case, the train bridge is fitted first, a task simplified by the need only to locate three pinions.
Before fitting the barrel bridge, we have first to fit the cleaned mainspring back into its barrel. This task is complicated by the fact that the mainspring spirals in a clockwise sense when viewed from the lid-side of the barrel (the bottom) which means that it needs to be wound into the mainspring winder drum anticlockwise. In other words, strictly speaking, it requires a left-handed mainspring winder. In the absence of such, and with this particular mainspring refusing to grab onto the nub of my right-handed handle, I have to load the mainspring via a two-step process. In the first step, the mainspring is wound clockwise into the mainspring winder drum.
The handle is then placed over a spare mainspring retaining ring of the correct size and pressed into place.
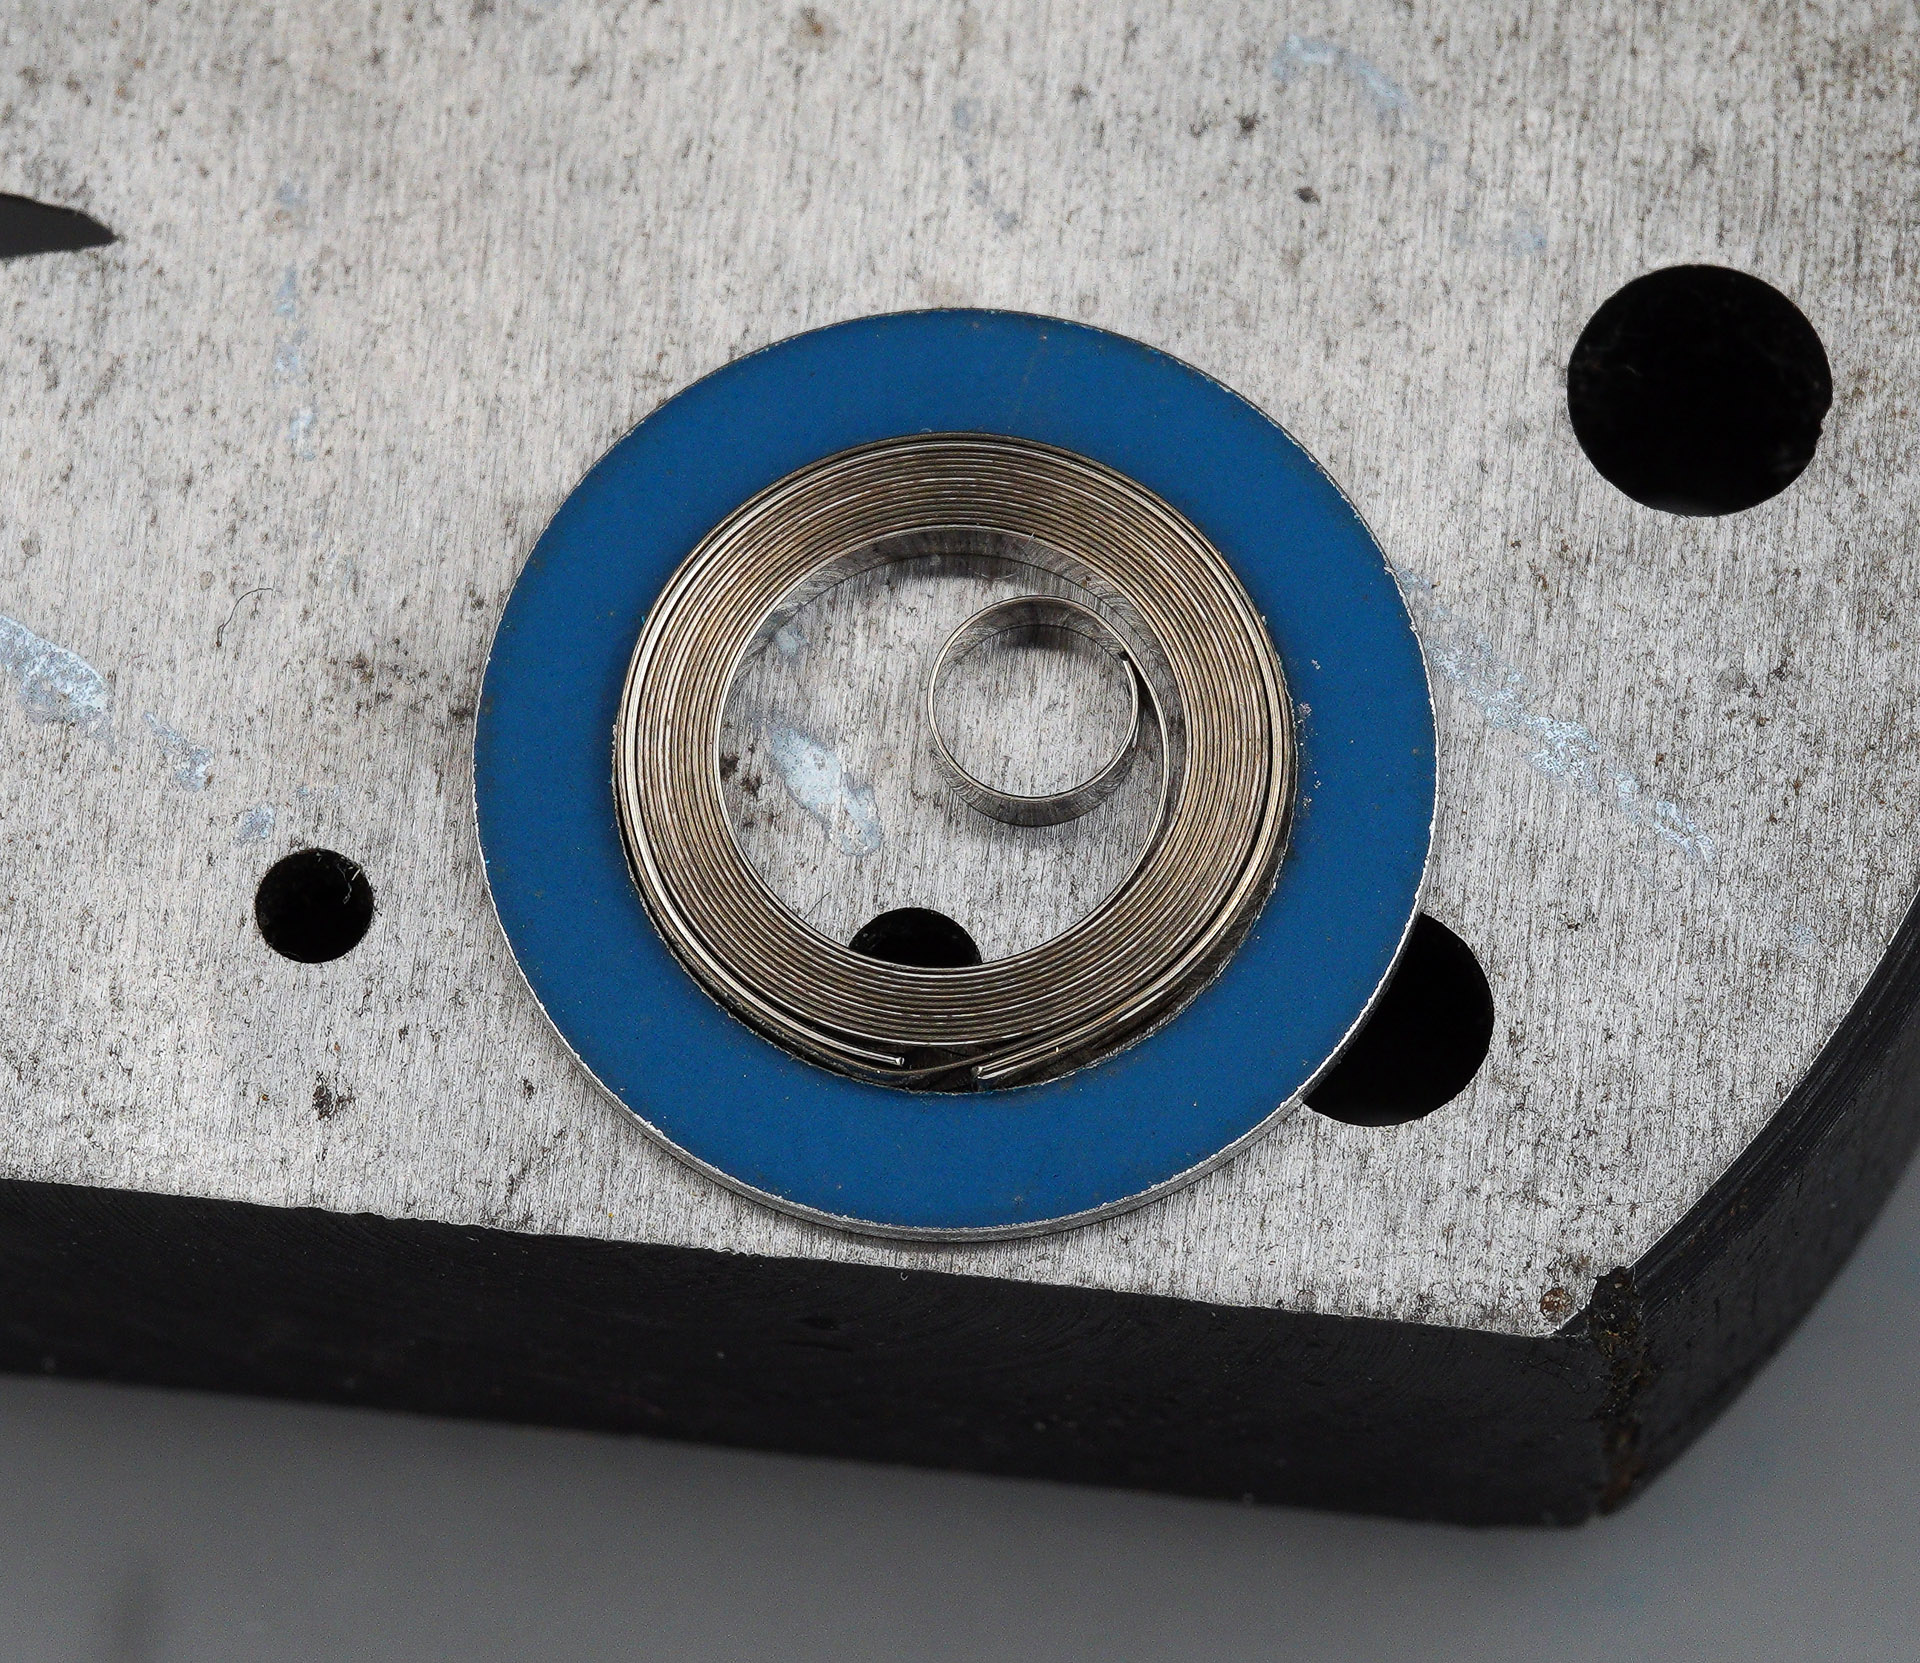
The photo above is taken from the side from which the spring was fitted to the ring and you can see that it is oriented with its winding anticlockwise. The next step is to flip the ring over and then press the spring into the barrel in the same way that you would with a brand new spring. That having been accomplished successfully, I fit the barrel and its bridge having first refitted the stop seconds lever.
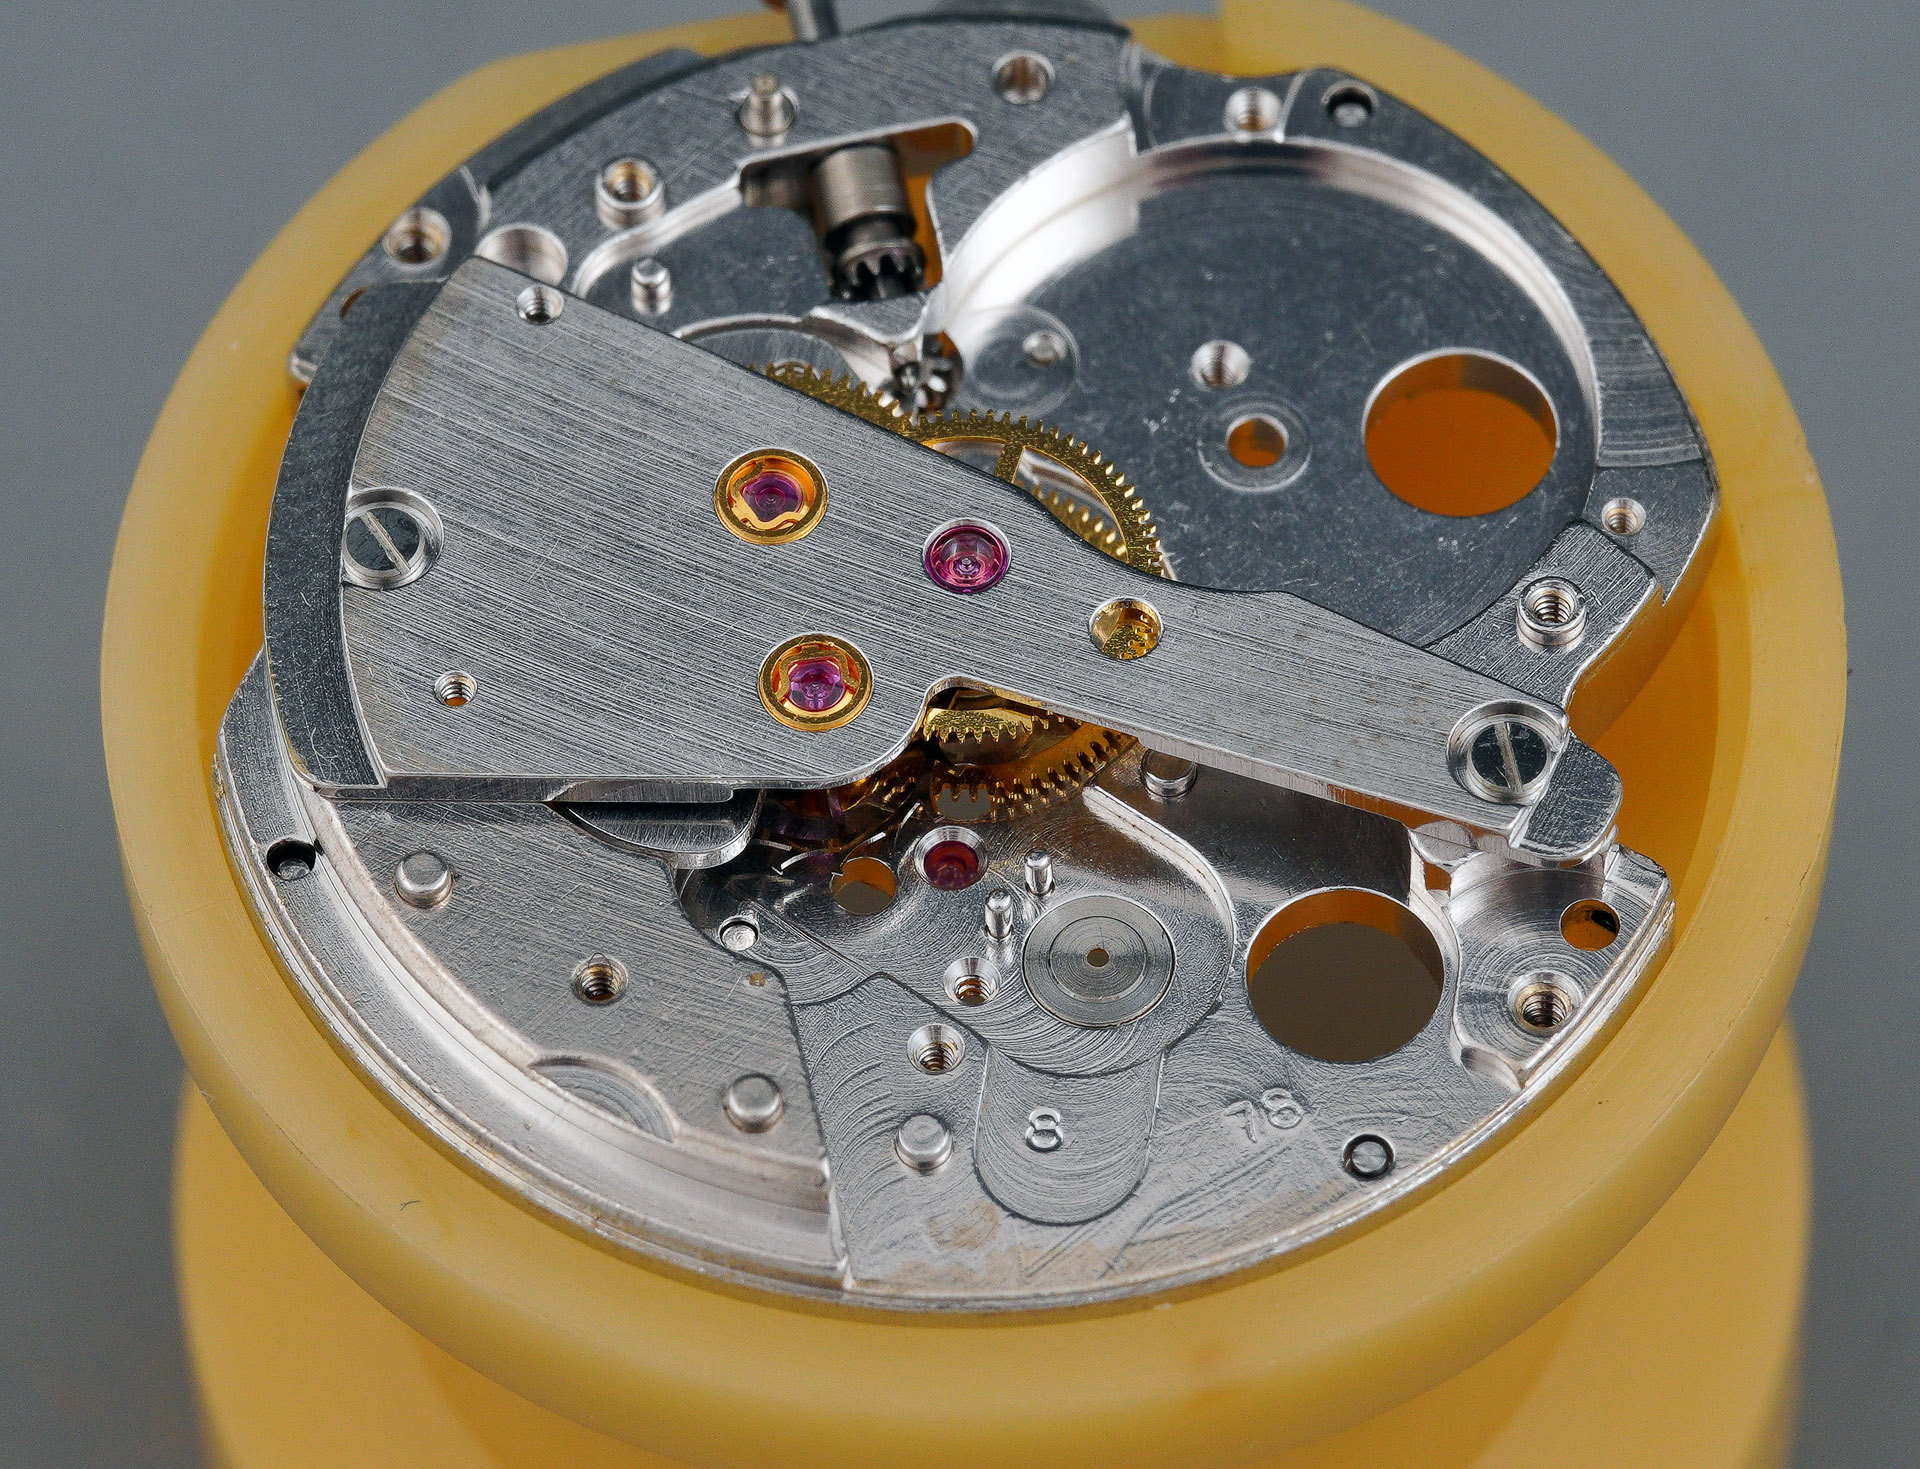
Next we fit the ratchet wheel and its click, followed by the pallet fork and its cock.
As is my method these days, I lubricate the exit pallet stone in situ with Moebius 9415 with the aid of a stereo microscope. The dial-side Diashock comes next, the penultimate action before refitting the balance and kick-starting the movement into motion.

The balance is fitted next, topped with its Diashock and we can wind in a full wind and make an initial assessment of how well the movement is running.

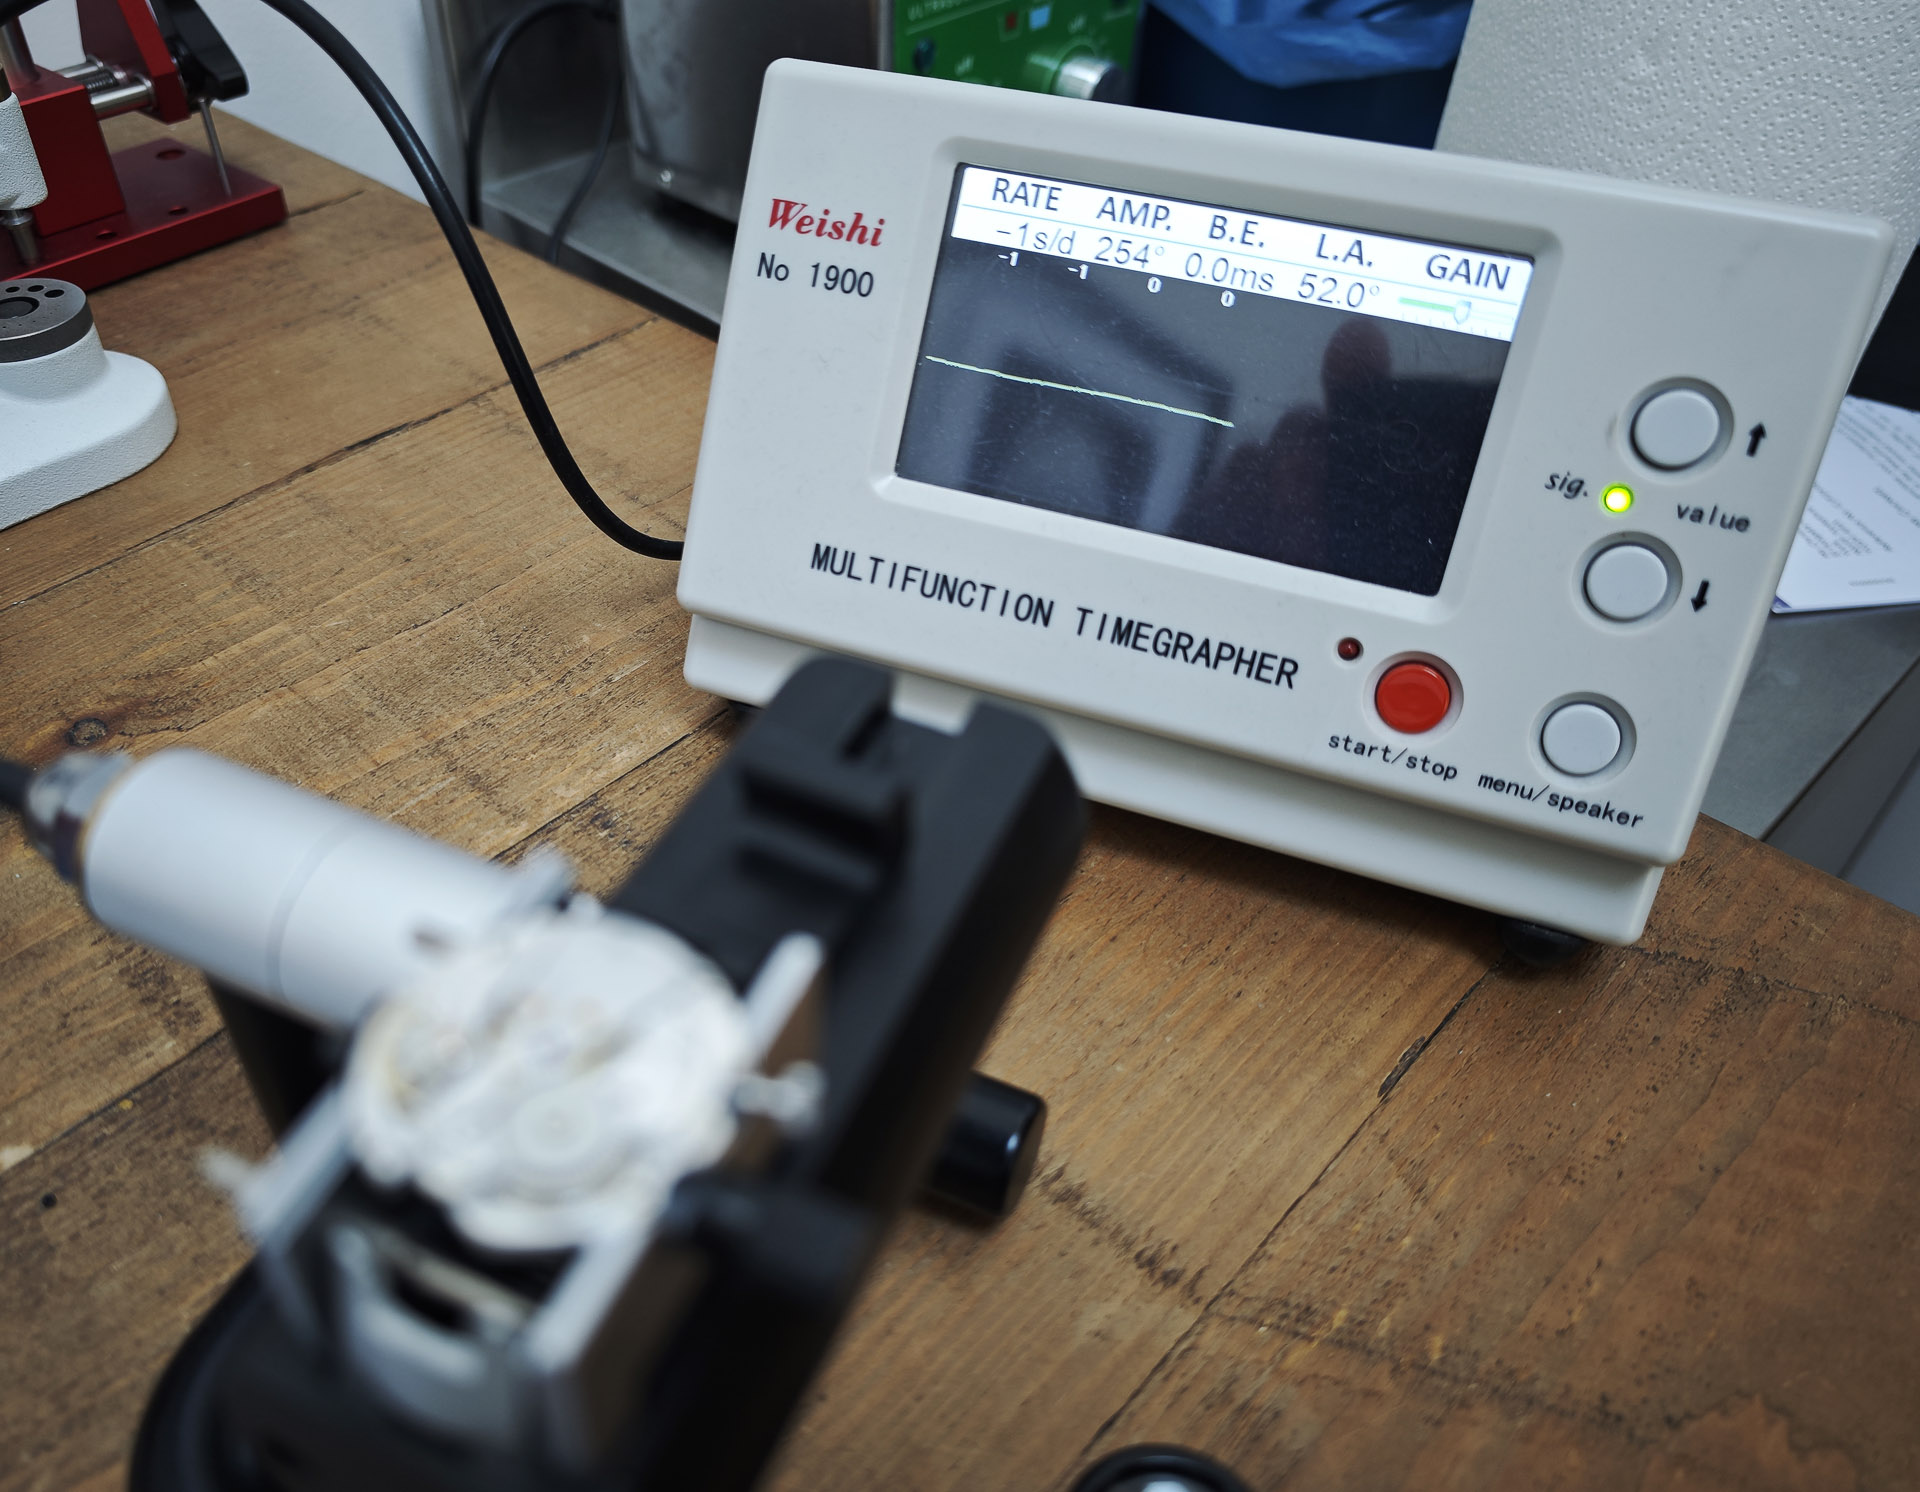
Initially, the timing measurement showed a clean trace but with a large beat error of 1.8 ms.
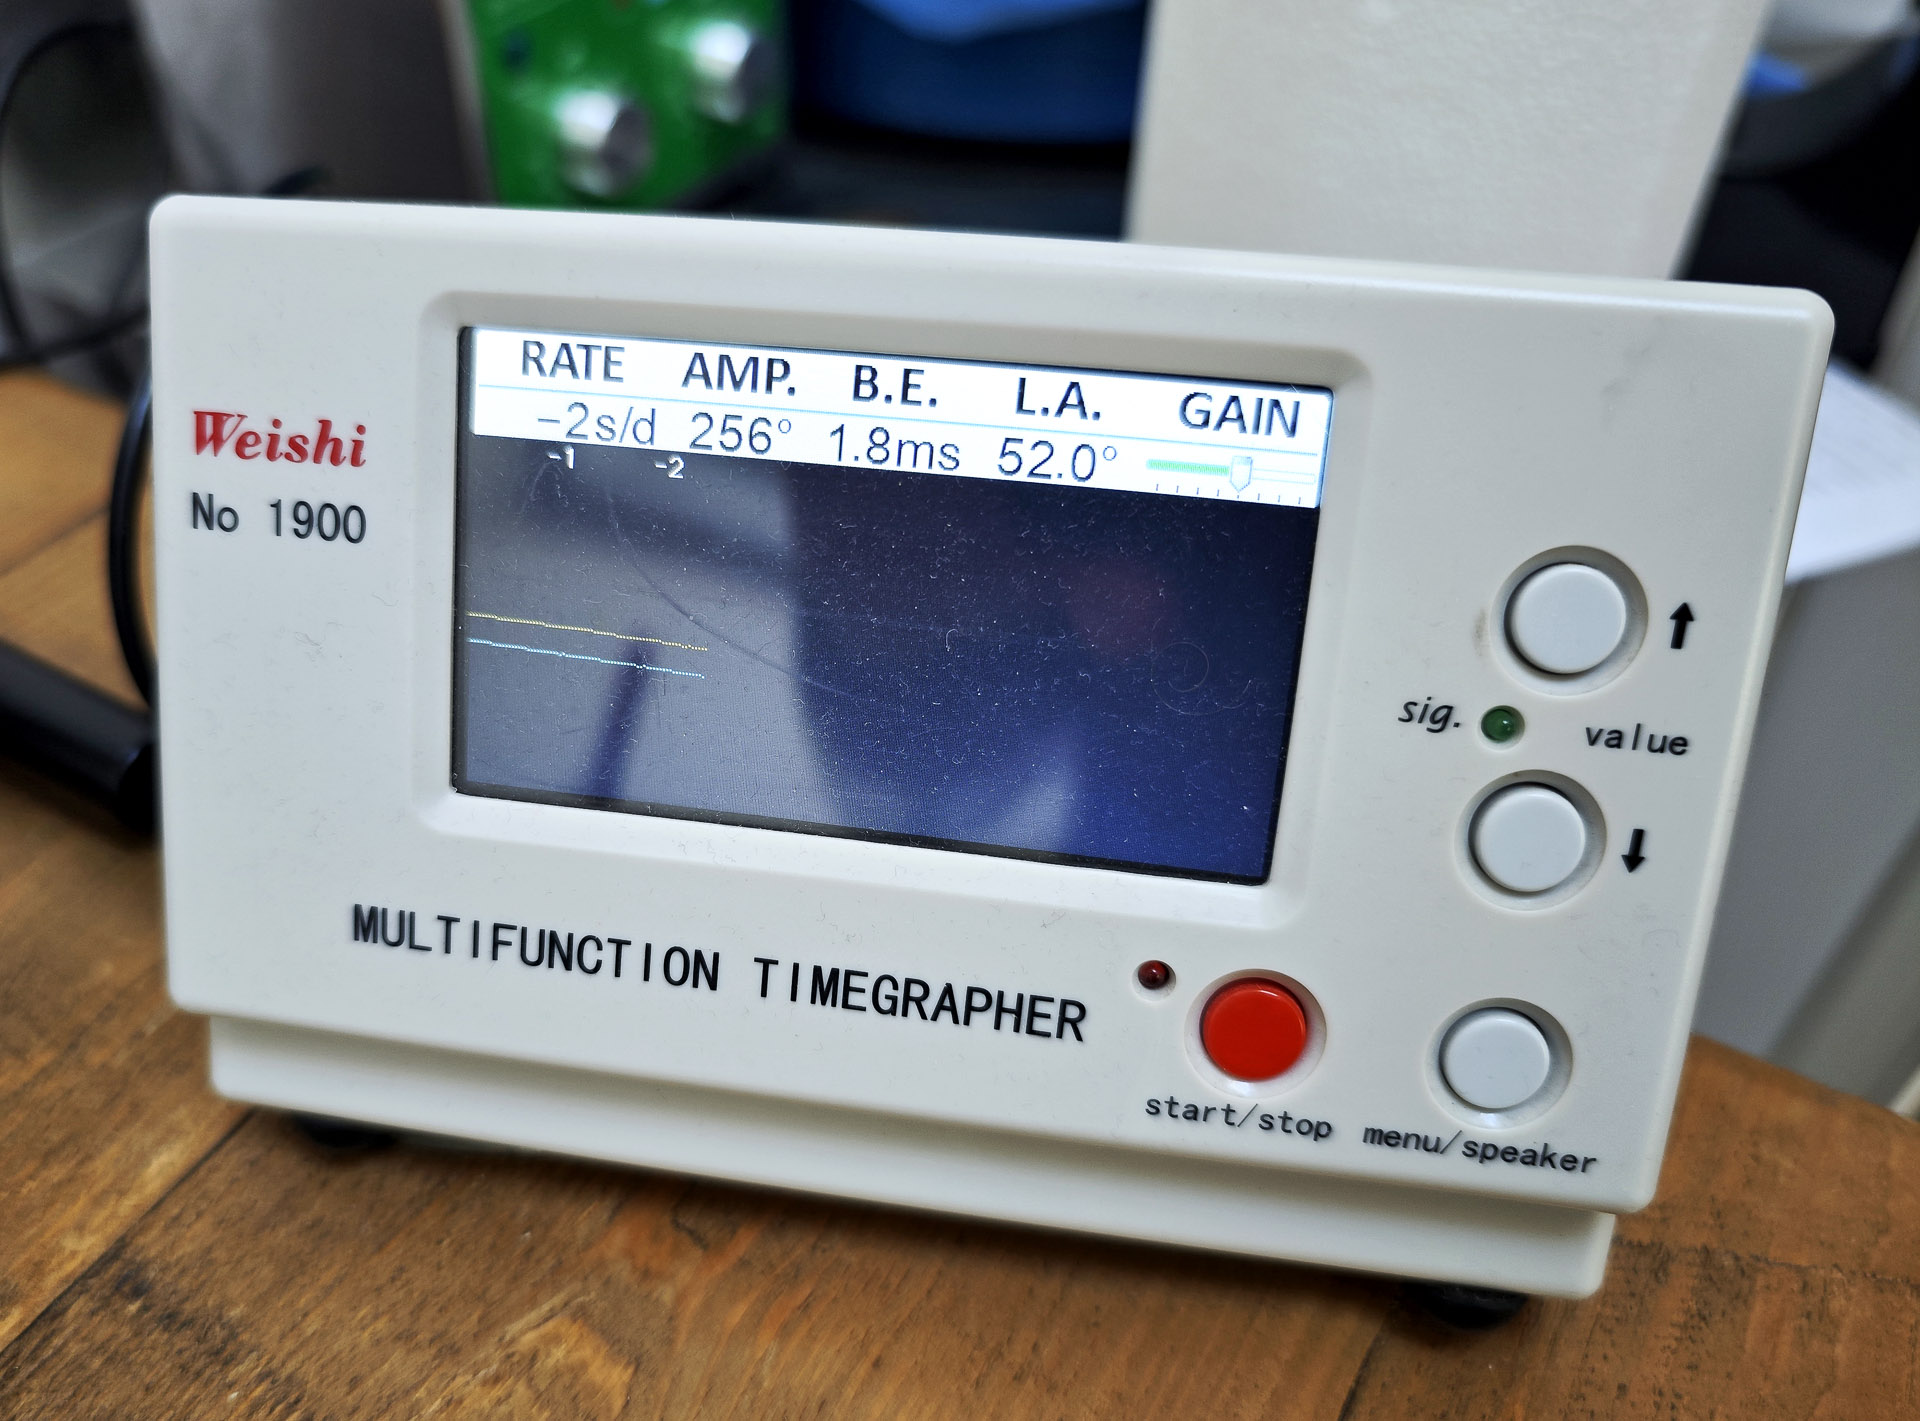
Unlike our last project where the absence of an adjustable stud holder meant that beat error could only be adjusted by serial iterative rotation of the balance spring on its arbor, in this case the balance cock has a moveable stud holder, and beat error adjustment is a doddle.
We now have licence to continue assembling the movement. The quickset mechanism is next, followed by the day and date driving wheel.
The date disk, its guard and retaining screw bring us to a convient point to reassemble the autowinding mechanism.
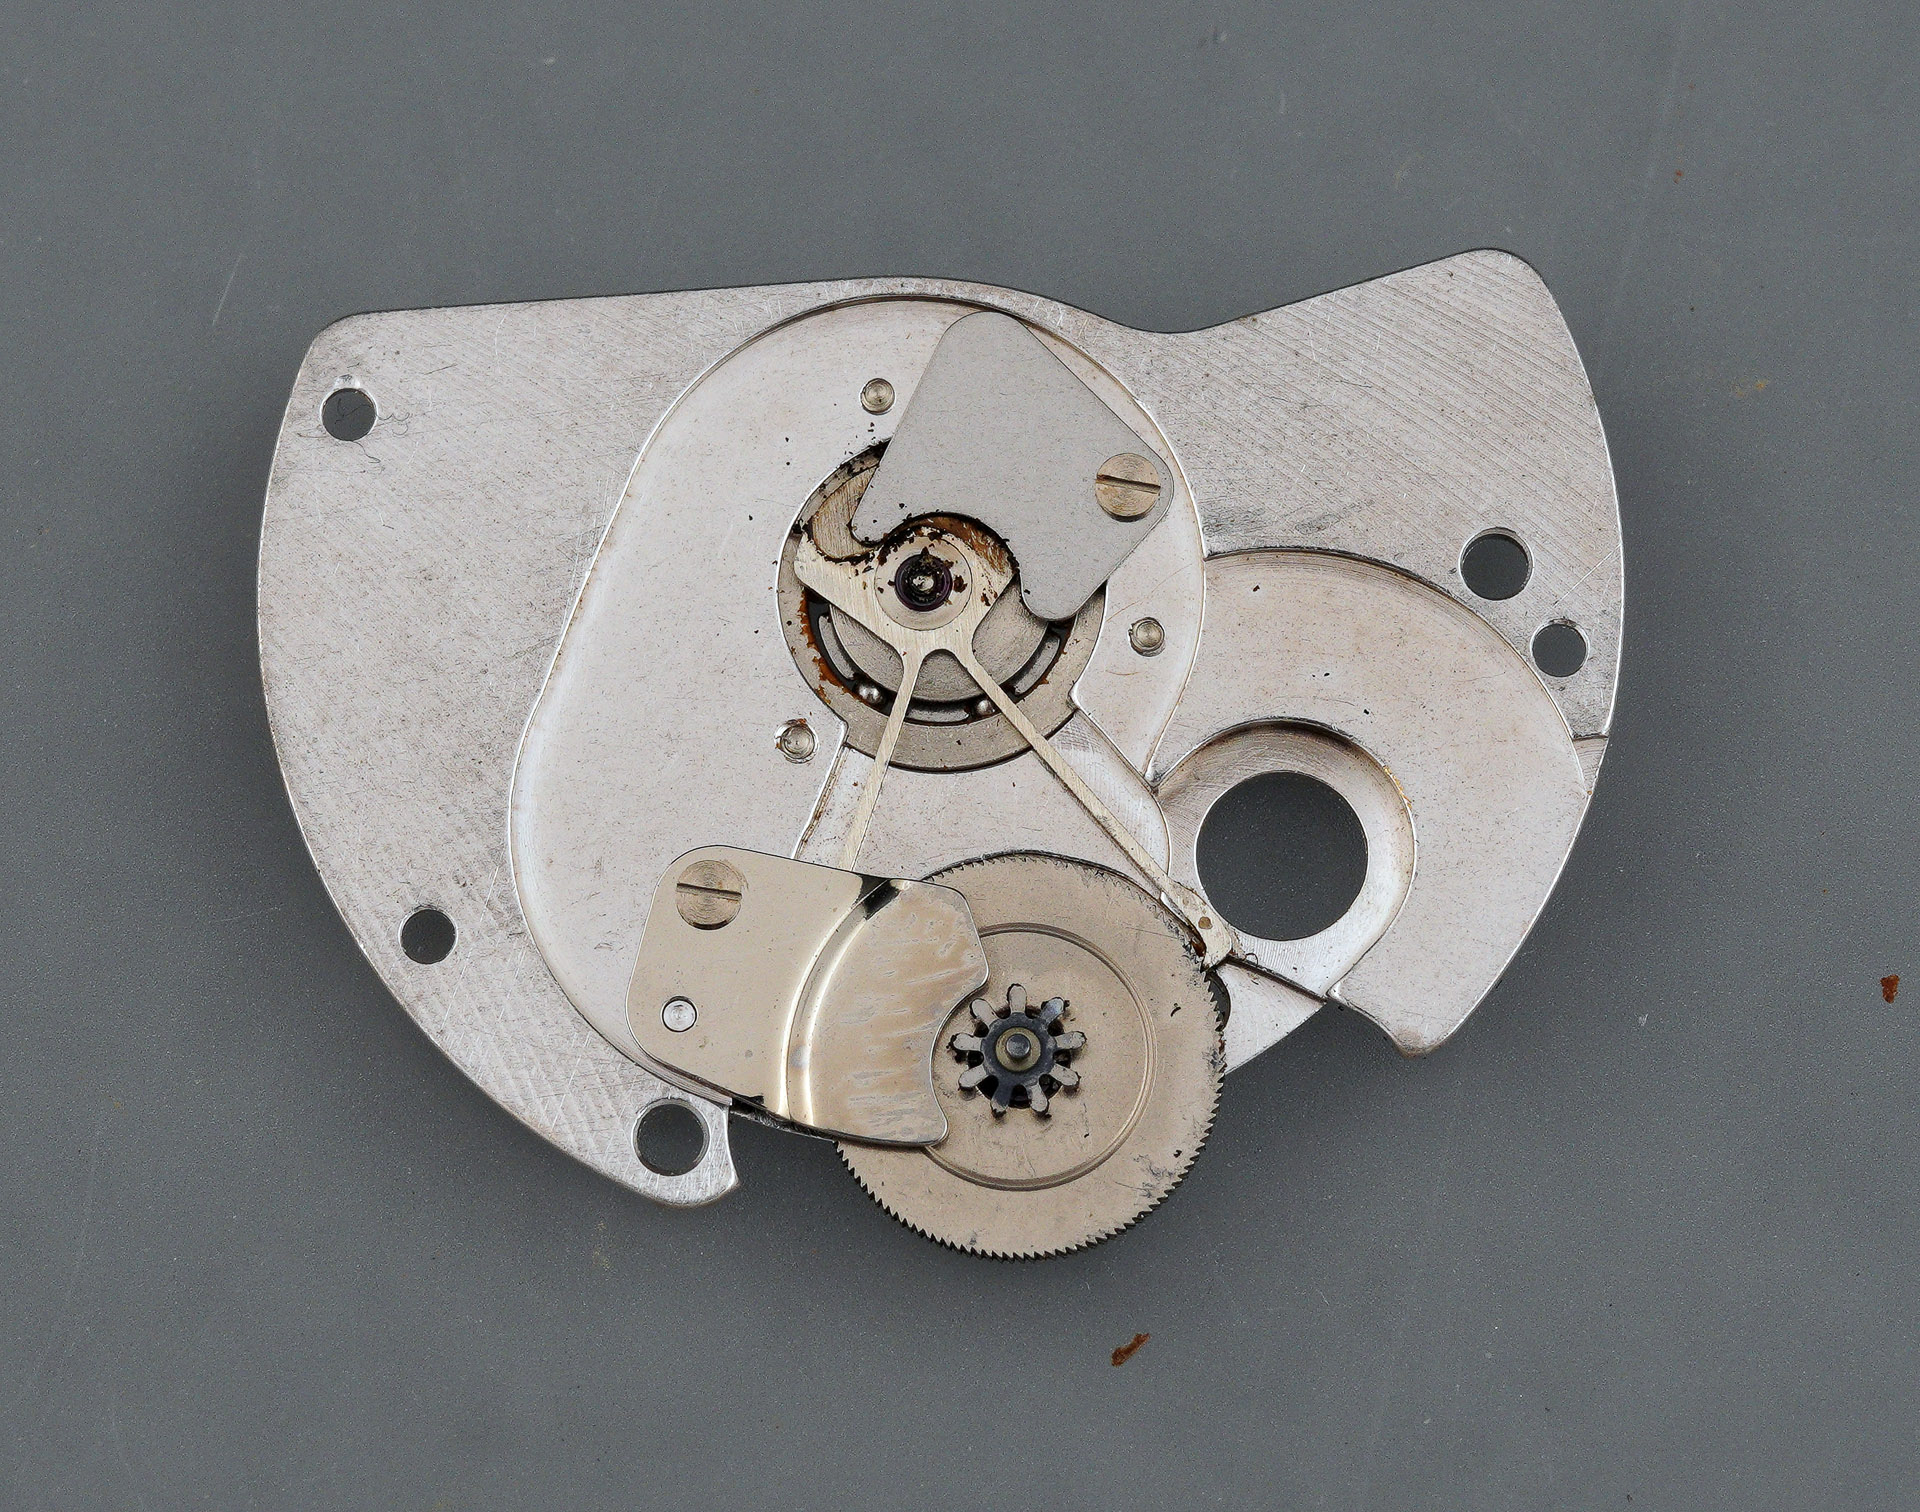
The design of the autowinder mechanism is essentially the same as that fitted to the Seikomatic, complete with replaceable bearing assembly and pawl lever componentry. It all looks a very great deal more presentable now than it did at the start of the process.
The day disk is fitted next, requiring a little minor gymnastics to get the day jumper to engage with the star to its rear.
The day disk is then captured once the dial is fitted, now sporting its replacement hour marker at the 2-position.
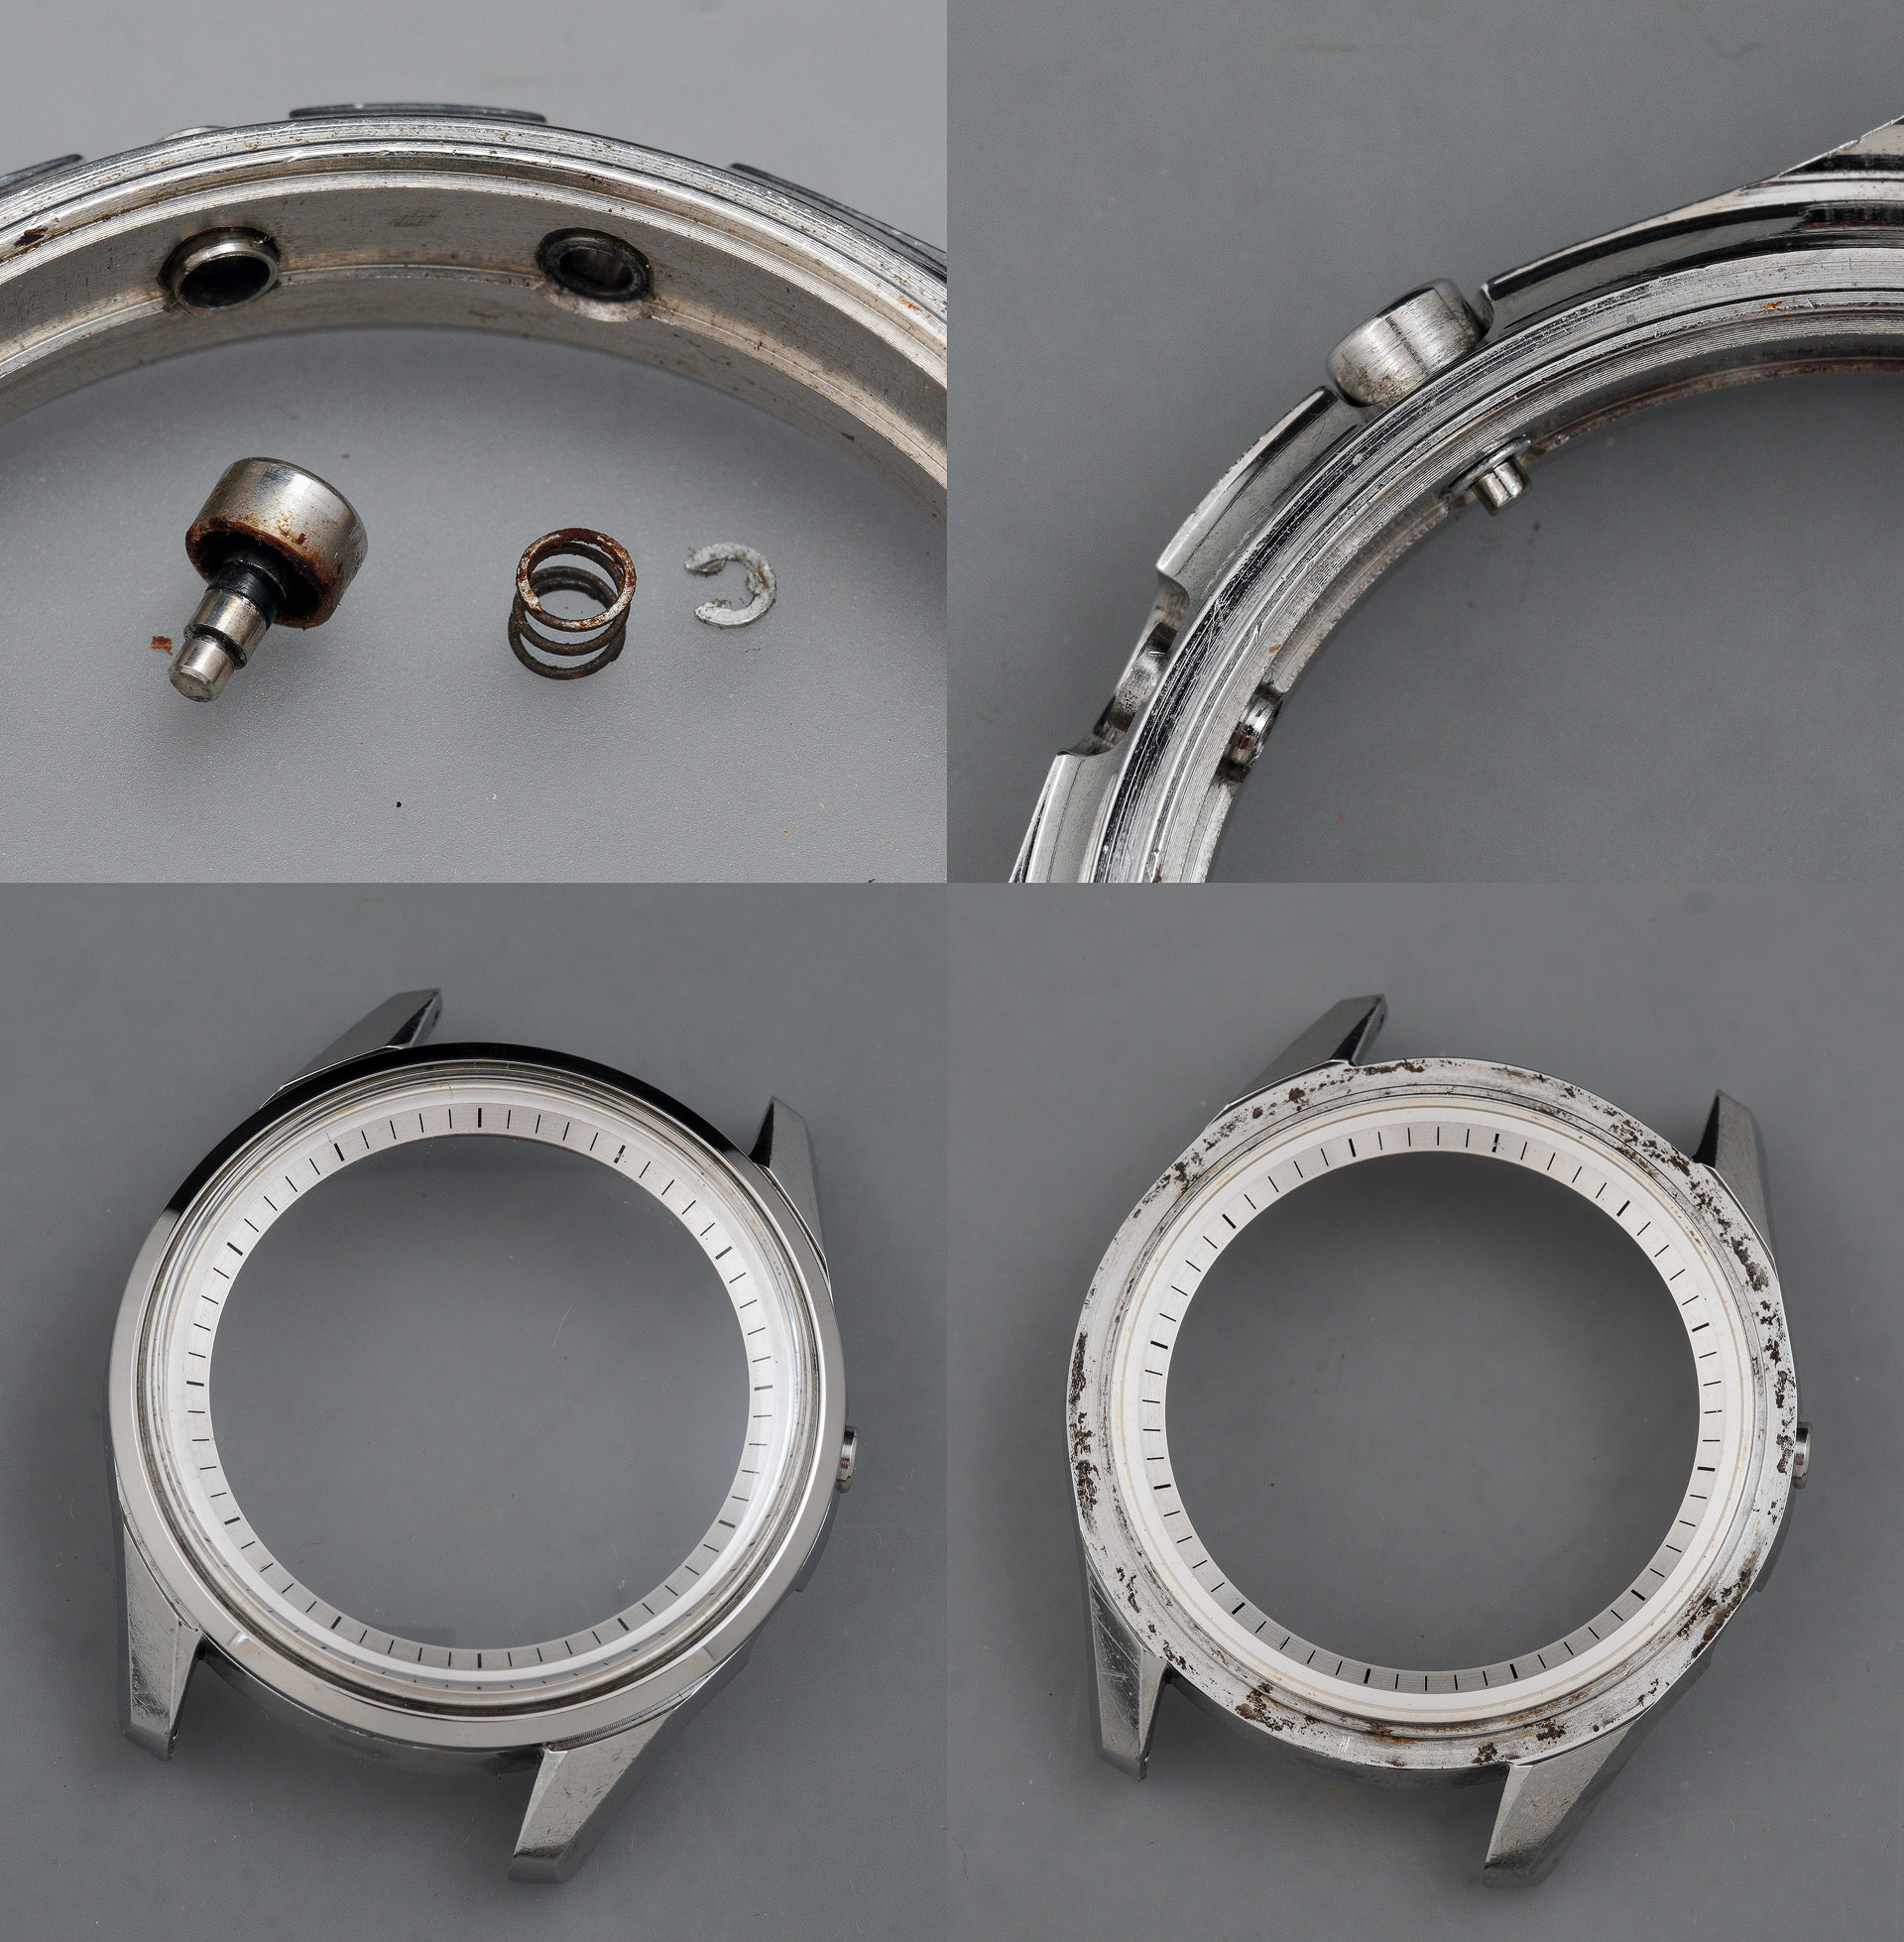
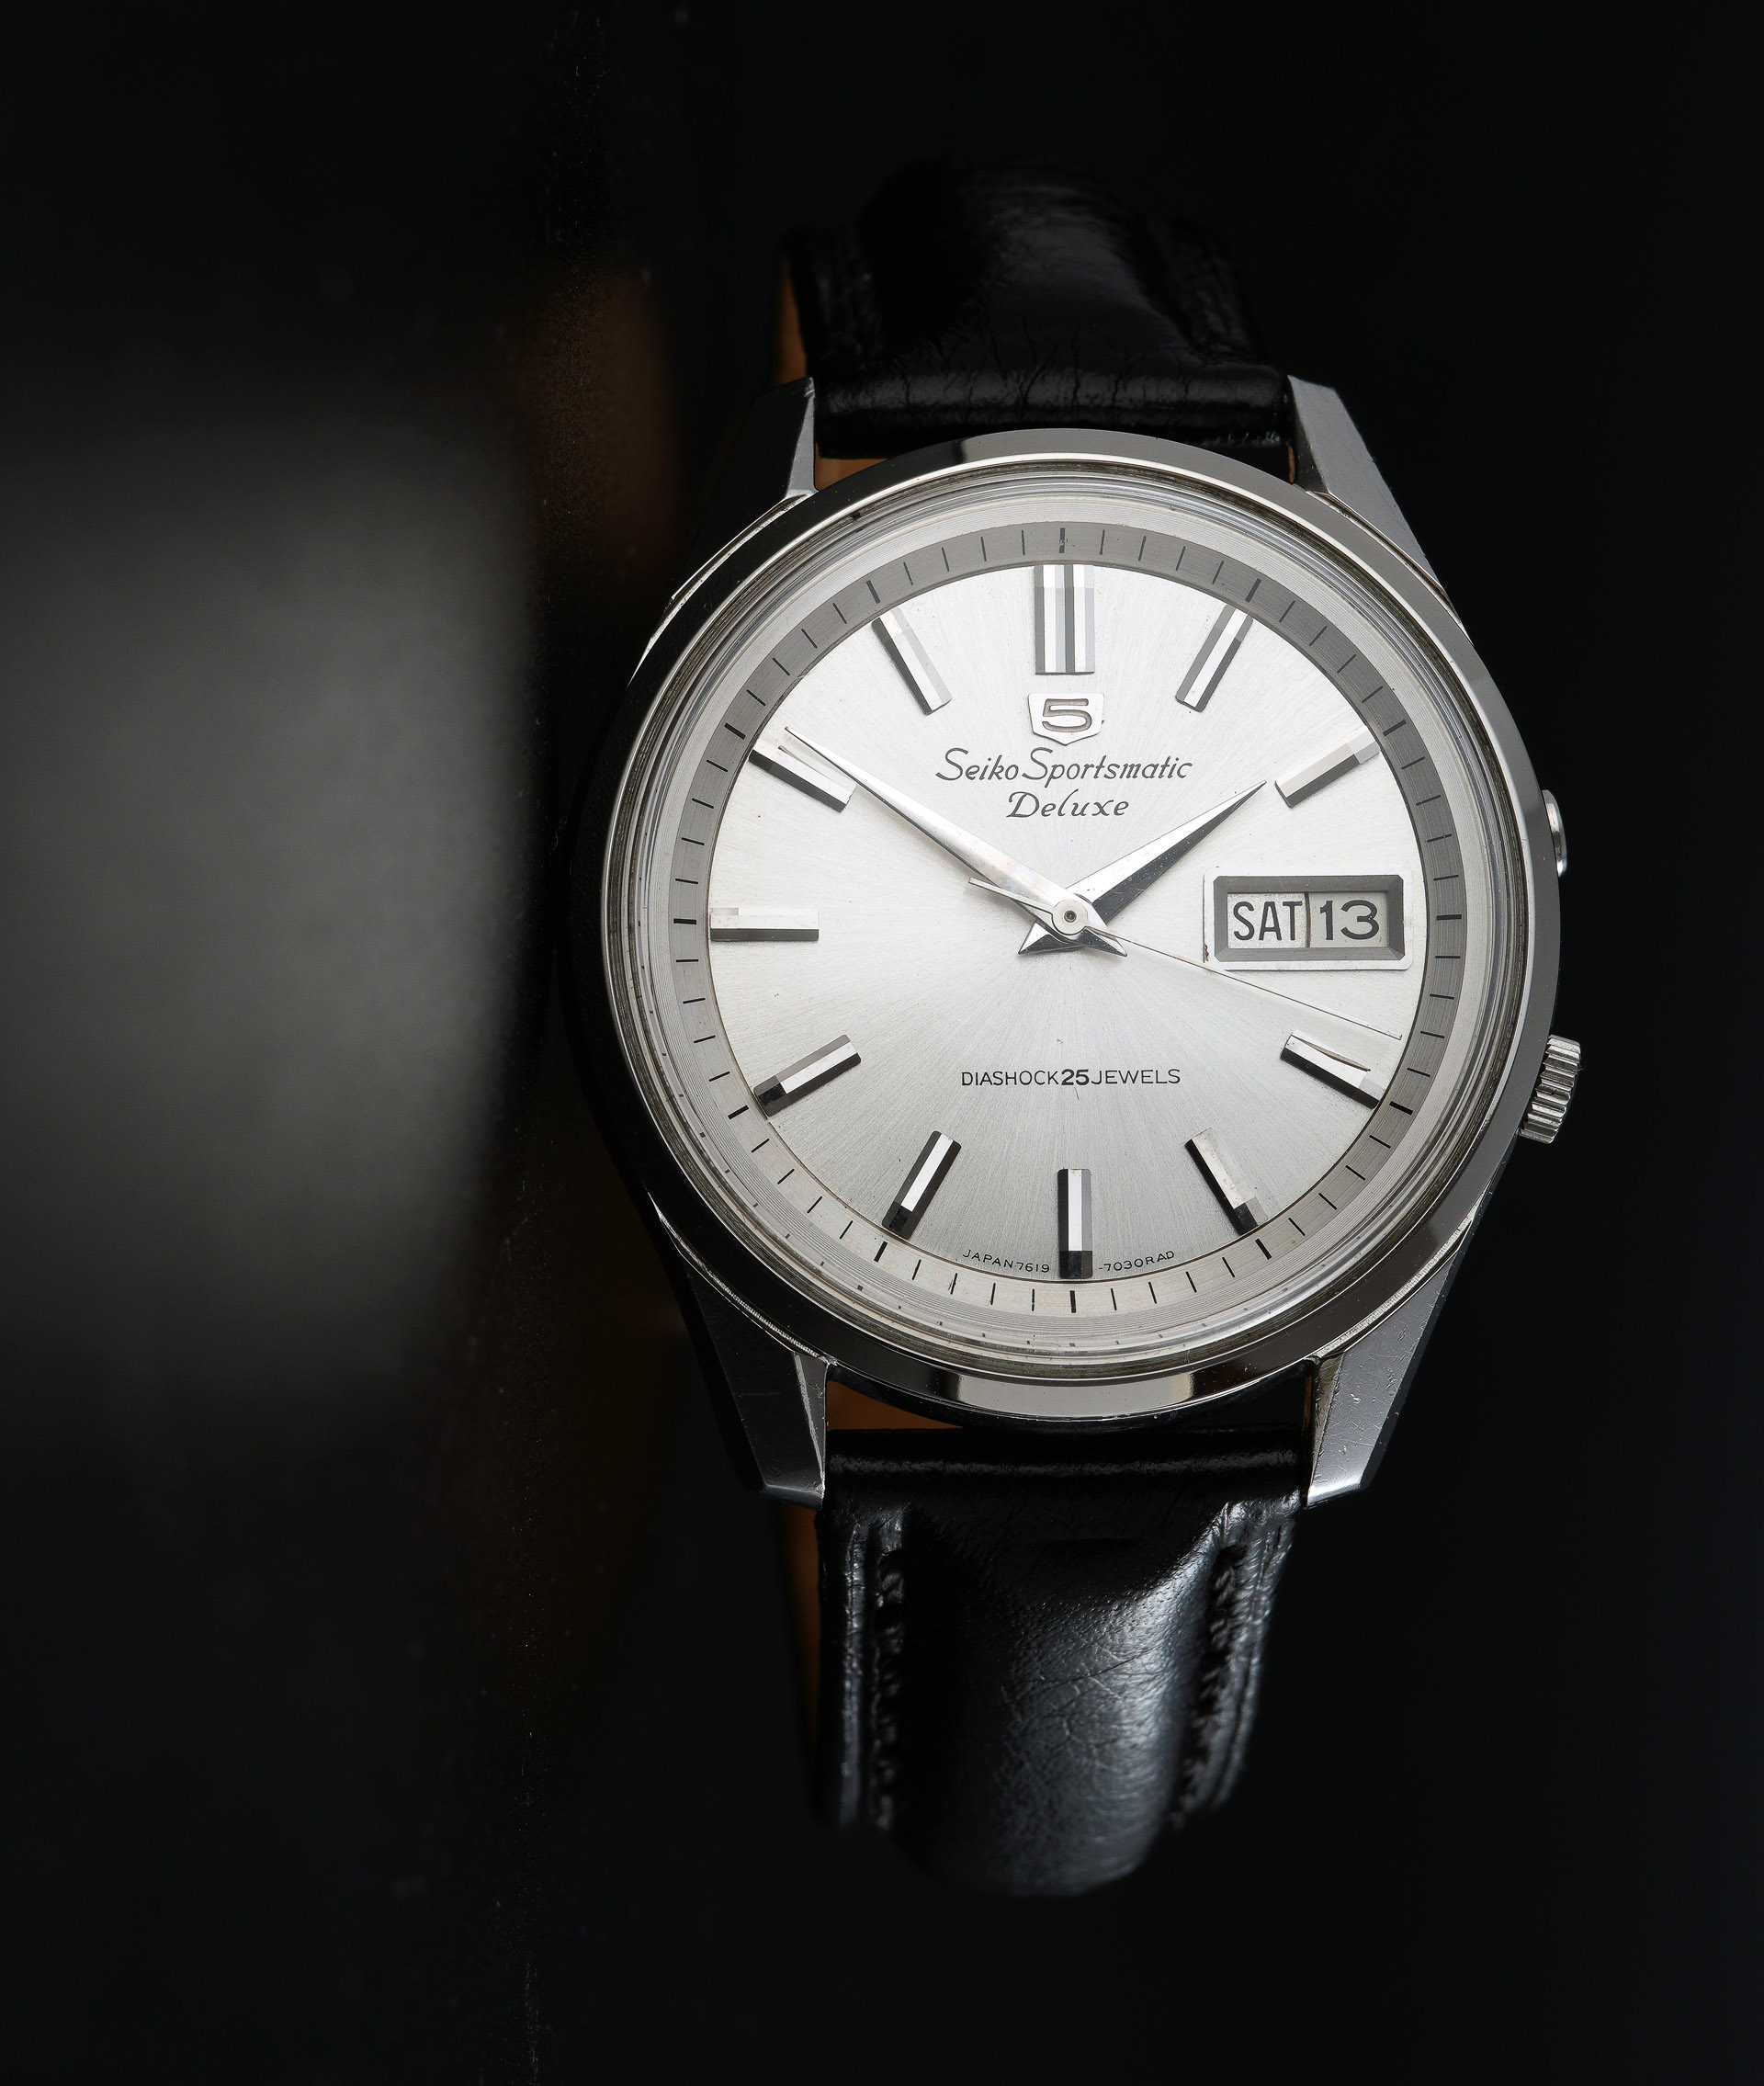
With the movement more or less wrapped up, I can attend to the case, starting with the quickset push button, which is filthy and in need of a fresh gasket. The case needs a thorough clean, with particular attention required to the surface corrosion on the mating surface between mid-case and the bezel. With that all sorted, I can fit a new crystal which is then secured by the new, smooth, and wholly incorrect for this case, bezel.
The case is ready to receive the movement, but I still need to fit the hands and case ring before reuniting the two.
In practice, it’s easier to fit the movement first, aligning the tab at the two o’clock position with the slot in the chapter ring, refit the crown and stem and then fit the case ring.
With a fresh caseback gasket in position, we can batten down the hatches and fit the caseback (and a strap).
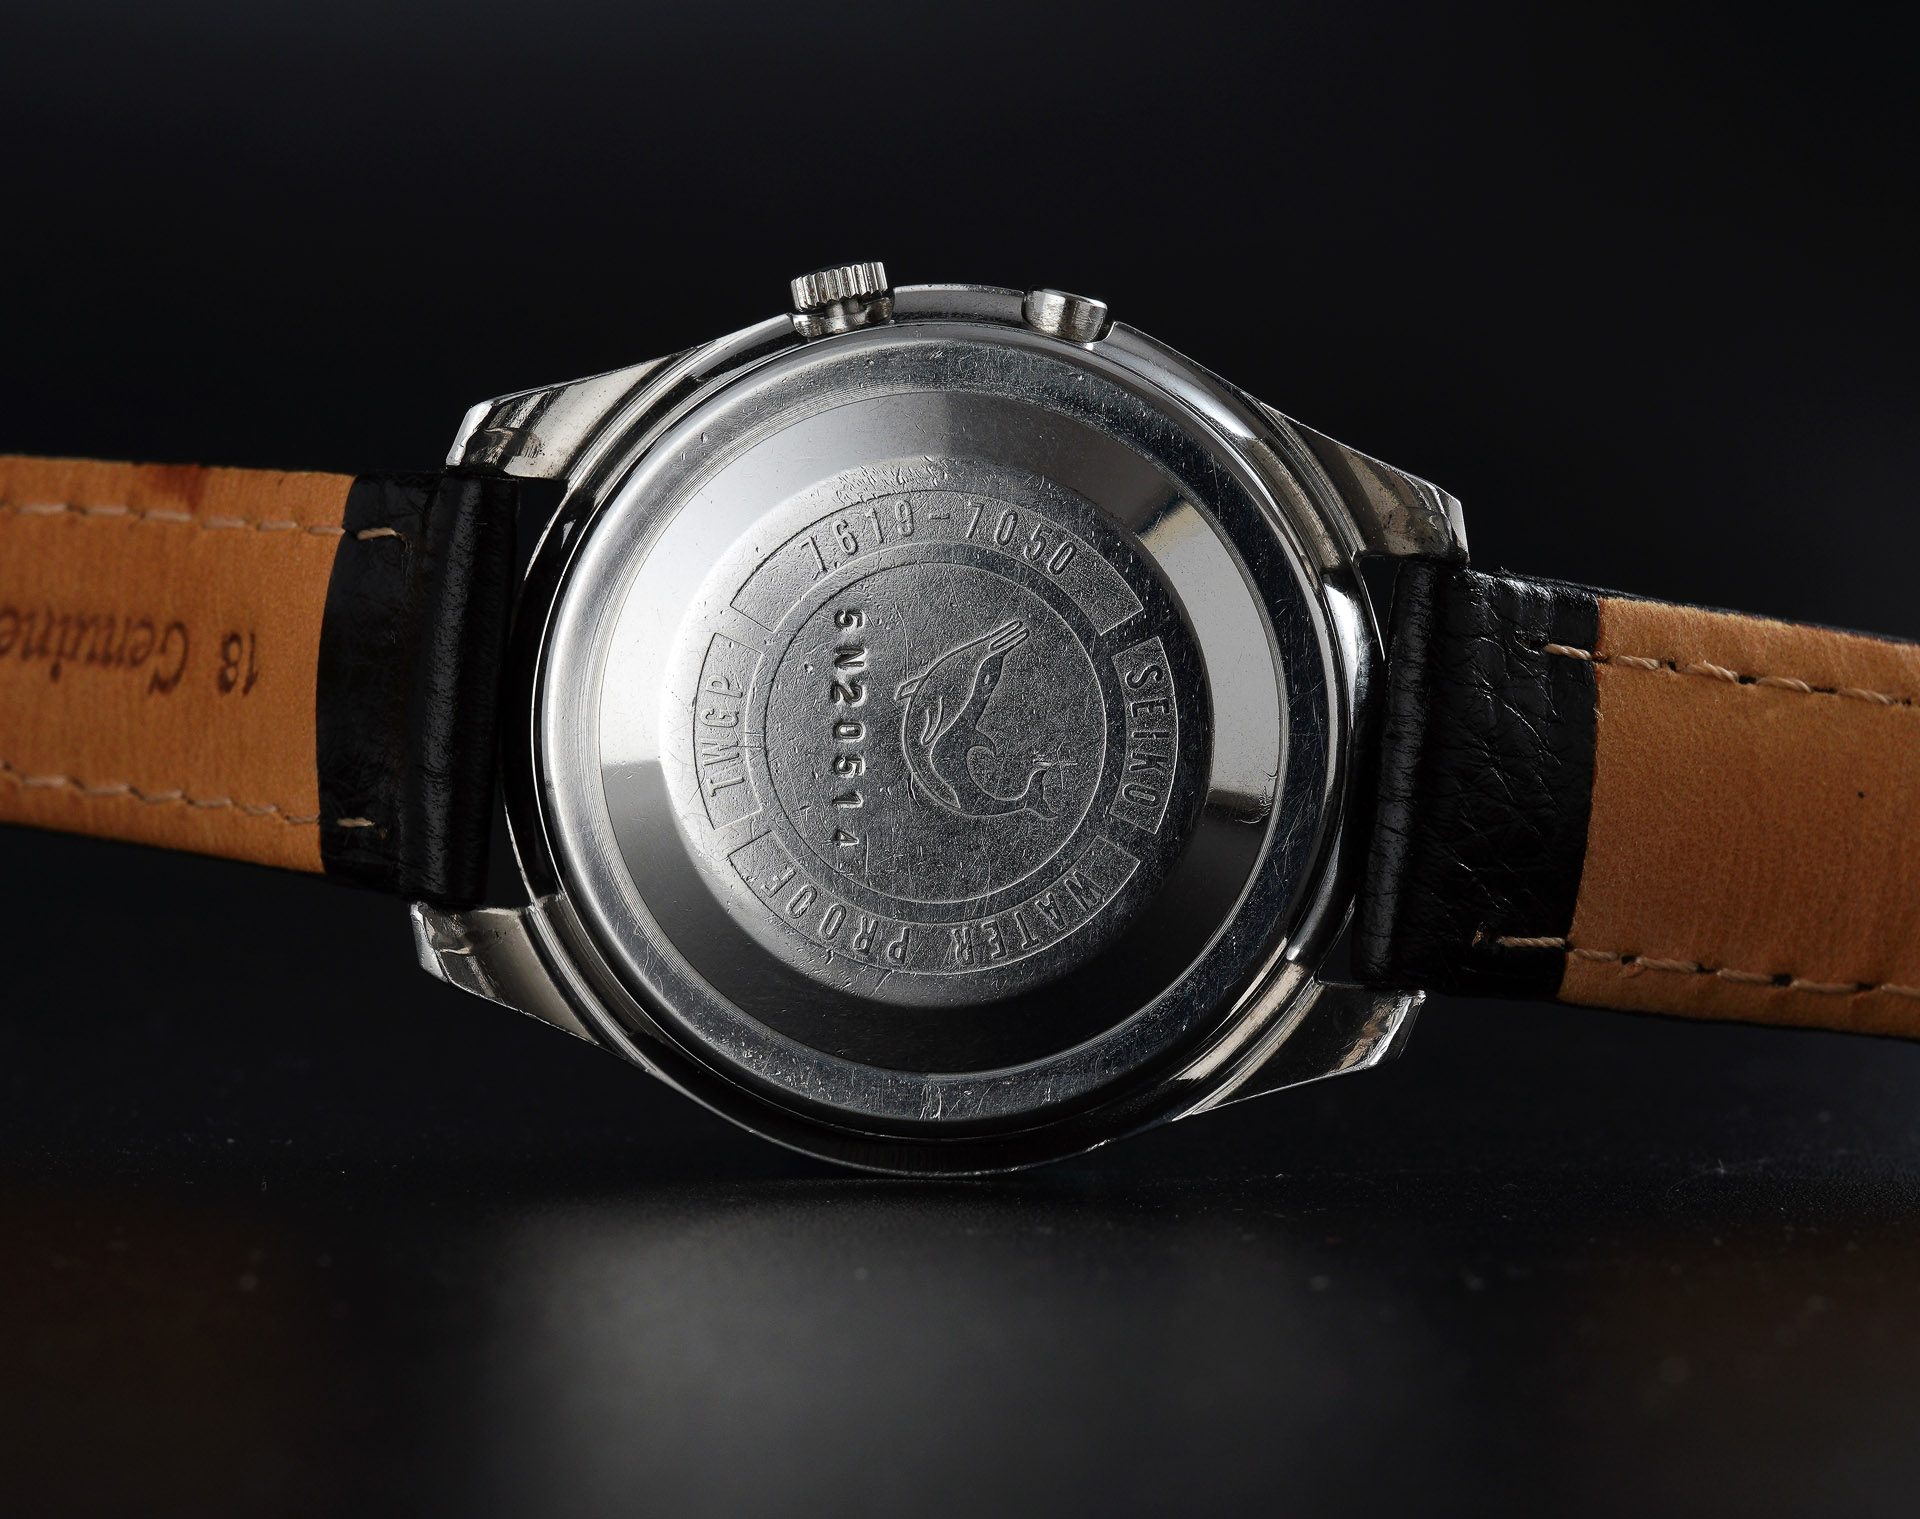
The embossed TWGP no longer has any relevance to this particular watch, but the bezel substitution has converted this from dog-eared outsider to rather smart contender.

A true work of art, this restoration, as always I am full of admiration for your work, a hug
Thank you!
Nice work as always. The Sportsmatic are very pretty watches. I much prefer the simple bezel. Can’t stand fluted bezels!!
Thank you Chris. There are also ‘having cake and eat it’ models with a fluted inner bezel and smooth outer!
I picked up one of these as part of a trade. I thought I knew Seiko but had never heard of this watch. I’ve passed it on as like you, I thought it was not a quality watch. I might have kept it if I had read this before I let it go.
I have learned over the years that even the more humble of Seikos often have qualities that shine through when you look closely at the effort that has gone into their creation.
Lovely write up Martin, nice to see it come back to life. You just have to find all the parts to restore the other two donors now…
Yes, and on and on it goes. Buying whole watches as donors creates a perpetual cycle of irresolution. Sometimes, parts donors just need to be left as just that! I should add though that the 7606 NOS case does need to be put into service at some point. It is too nice to be left.
Fantastic work! Also, do you happen to know if the hands are on similar sizes with modern 4R series and if they are interchangeable? I am new to horology and I couldn’t find any donor from the same model in my country. I want to replace them since they have noticeably aged, and I’d be honored if you can give me some advice.
Hi Zack, the hand hole size is 1.50 x 0.90 x 0.20mm, which is shared by a great many Seiko calibres, including the modern NH/4R/6R generation.
I hope that helps
All the best
Martin