
Tags
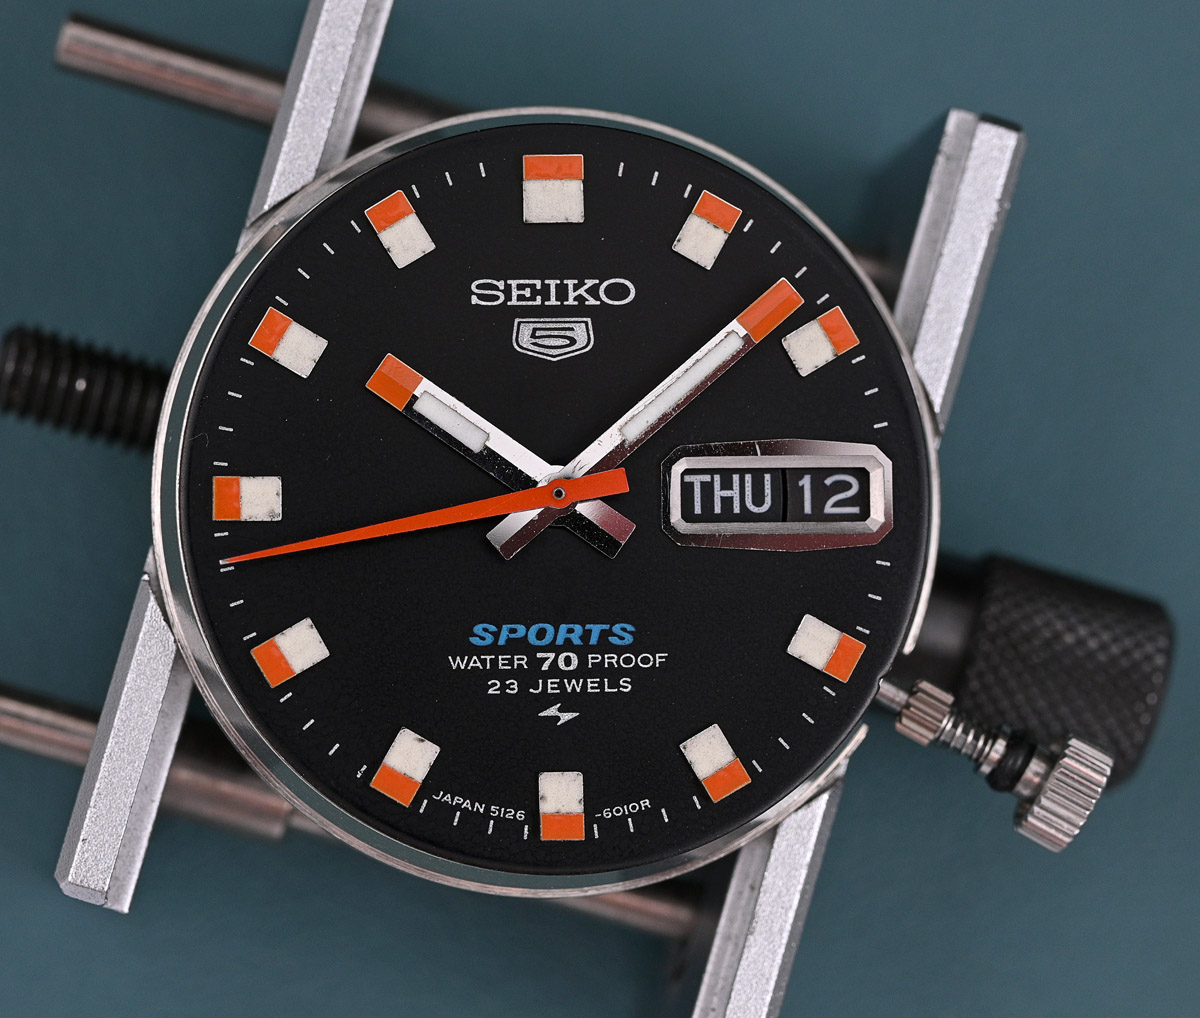
Let’s get right into it, the introductions having been made in the previous entry. In this, the second in a three part series, we are going to focus our attention on a Seiko 5 Sports 5126-6010 dating from May 1969. This model was one of a number of freshly minted designs that formed part of the second wave of Seiko 5 Sports models that hit the Japanese domestic market at the end of the 1960’s.
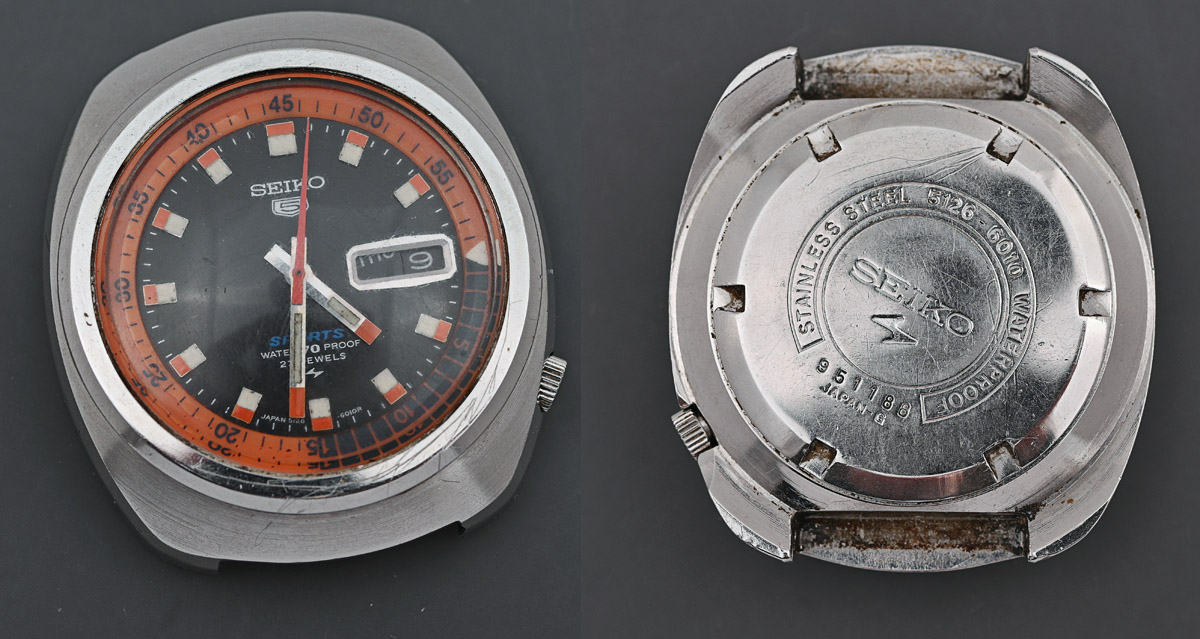
The zigzag emblem on the dial marks this watch as a product of the Daini division, whose early contributions to the 5 Sports range were fitted with the newly designed 51 series of automatic movements. The 5126A as fitted to this model runs at 19800 bph and features a day/date calendar with date quickset operated by depressing the crown. It lacks the seconds hacking, instant date change and hand-winding facilities of the big brother 5106A but that is as you might expect given its relatively lowly position in the pecking order.
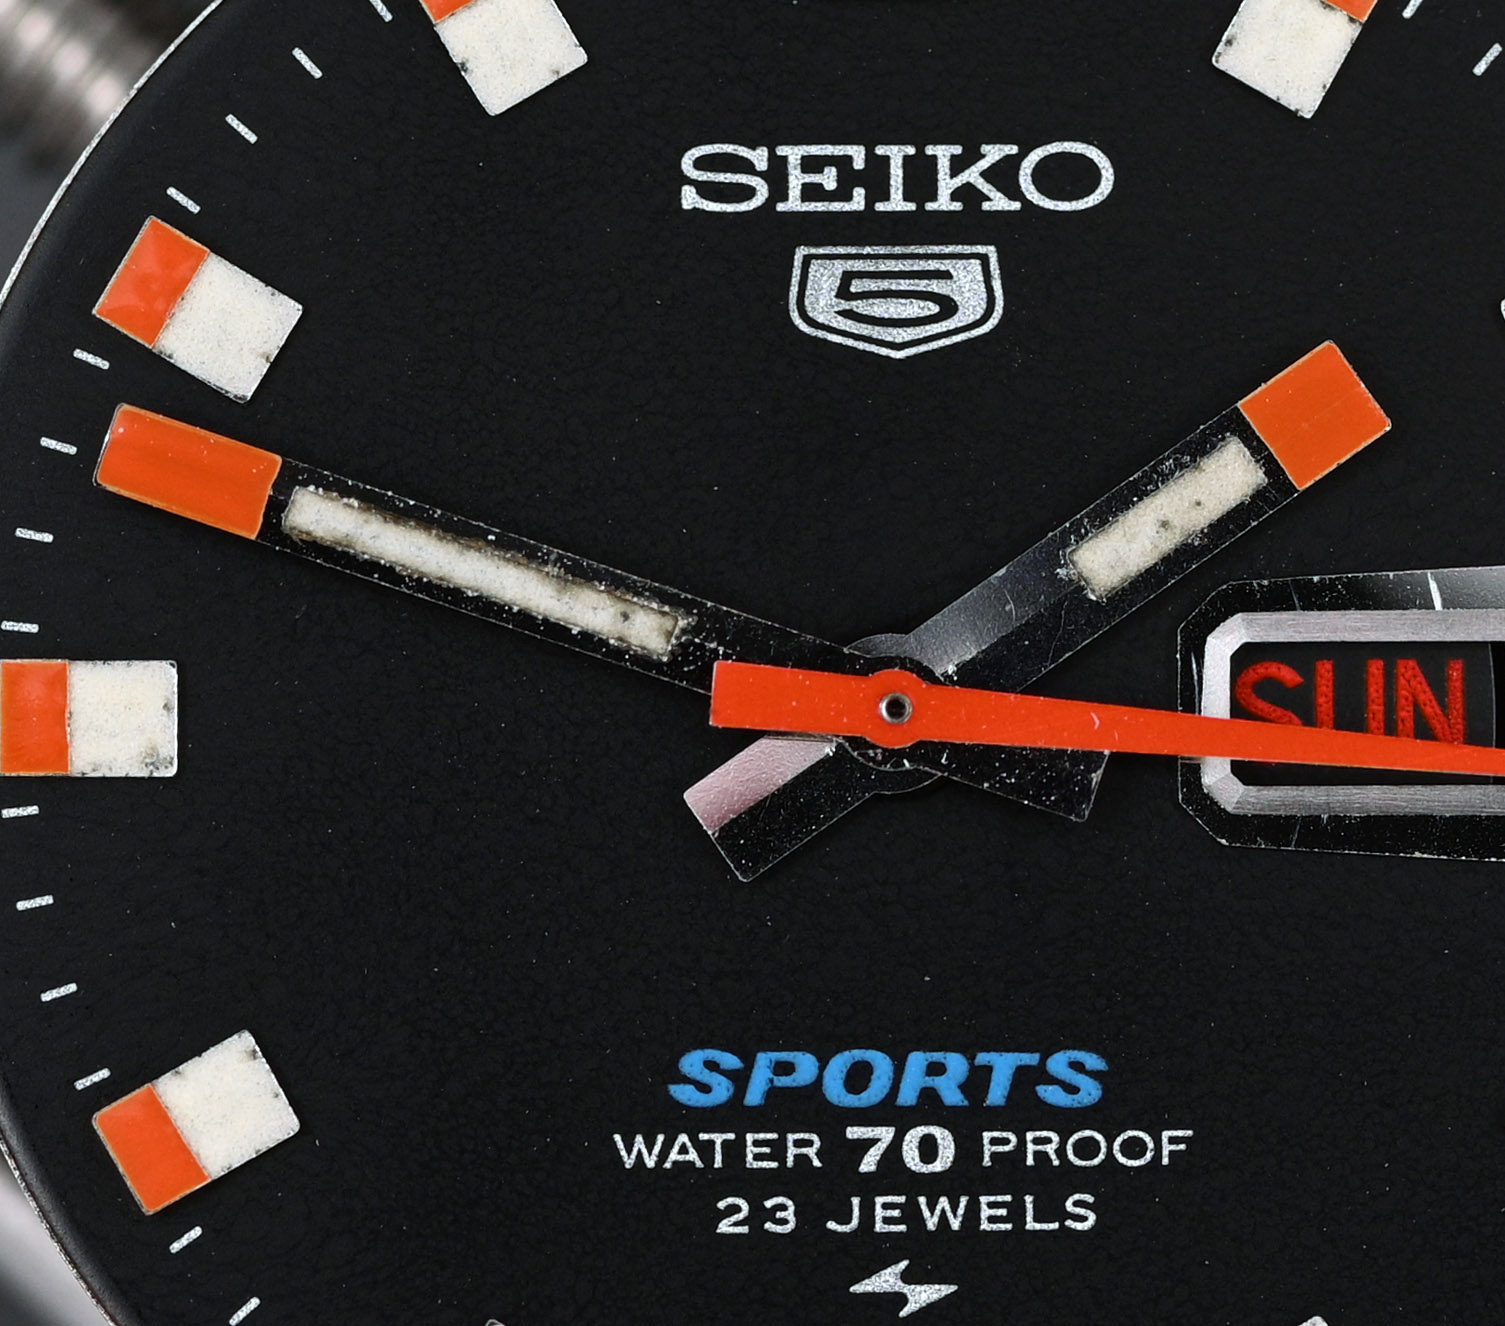
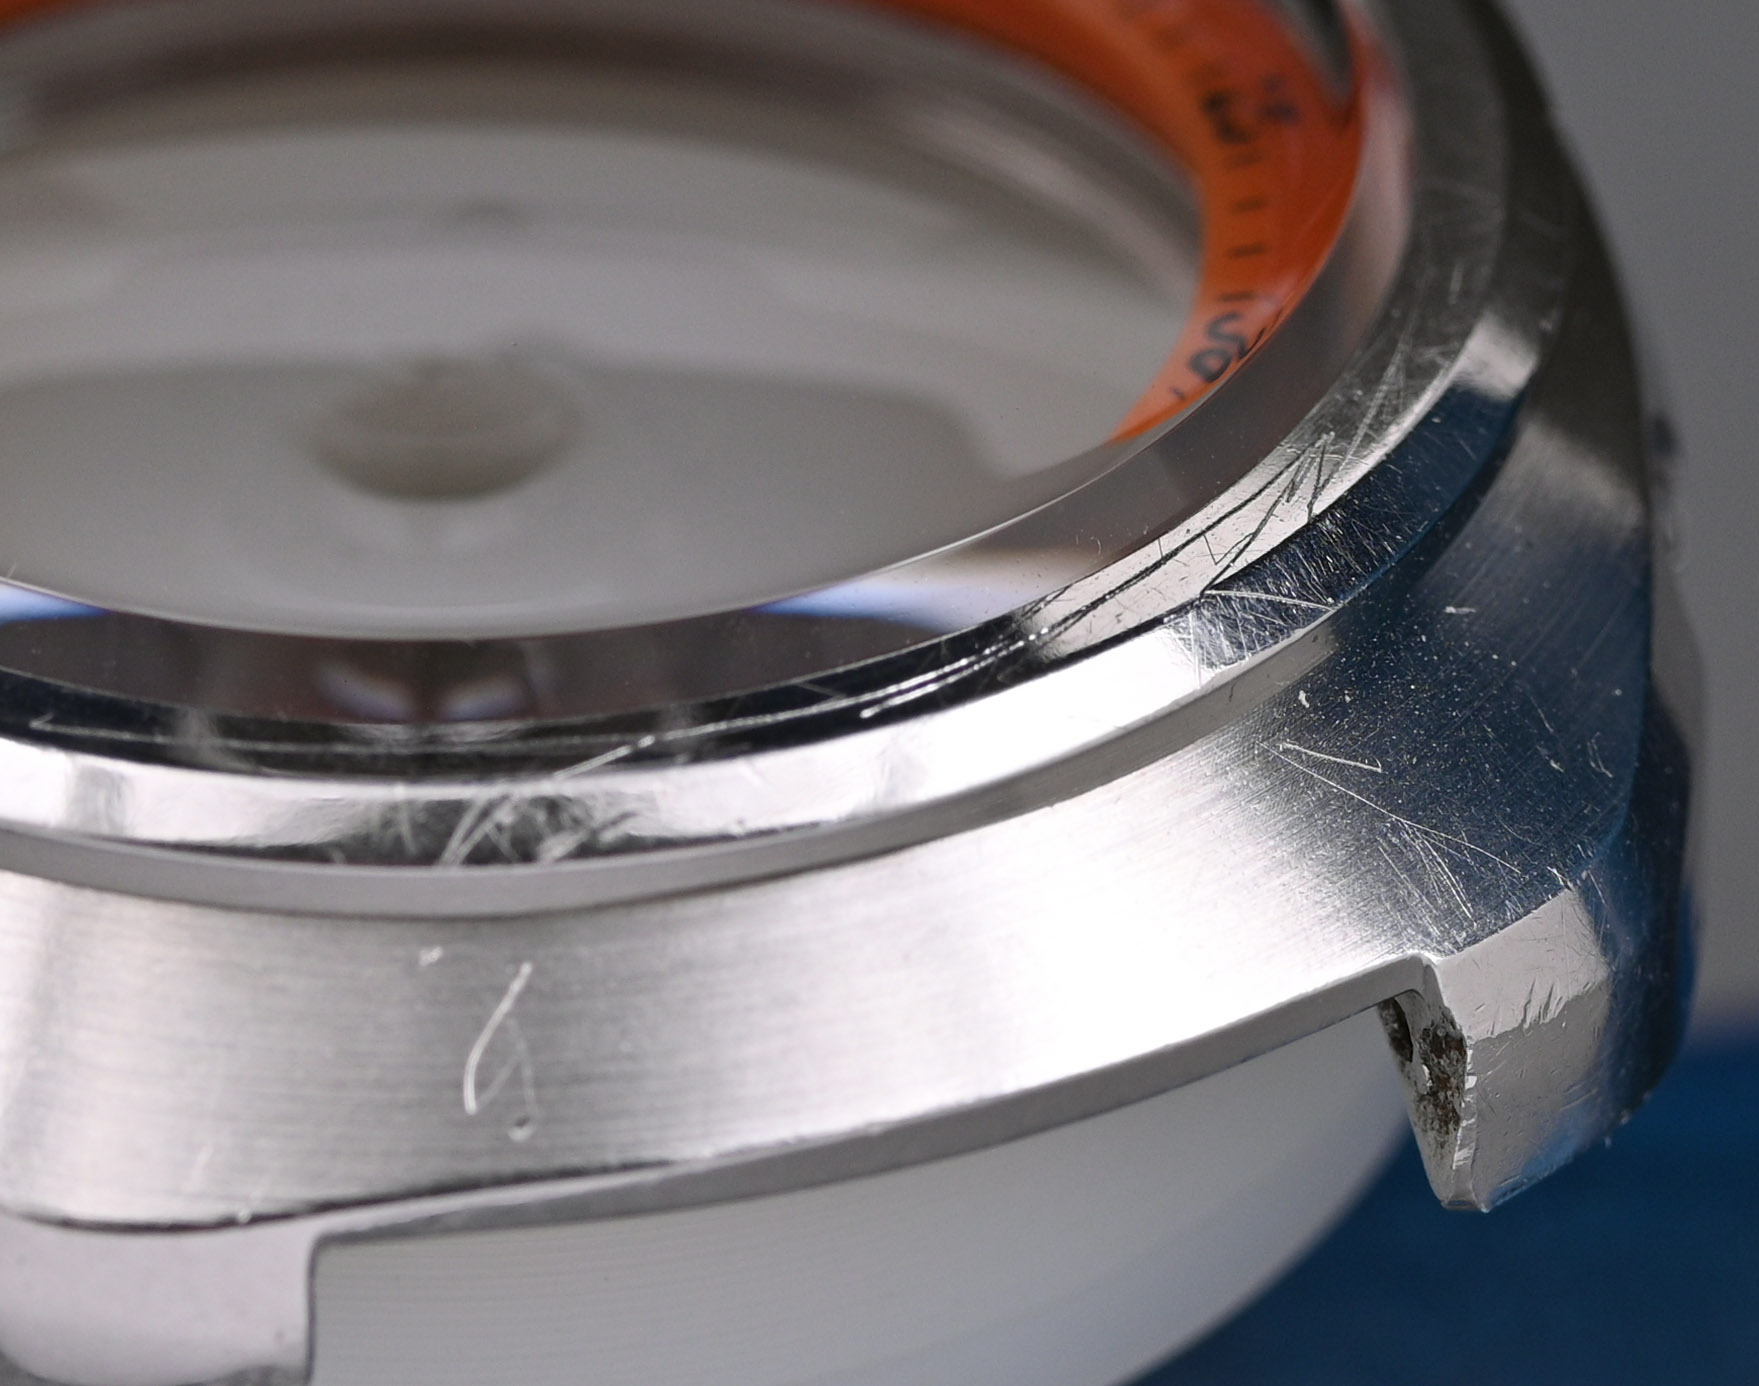
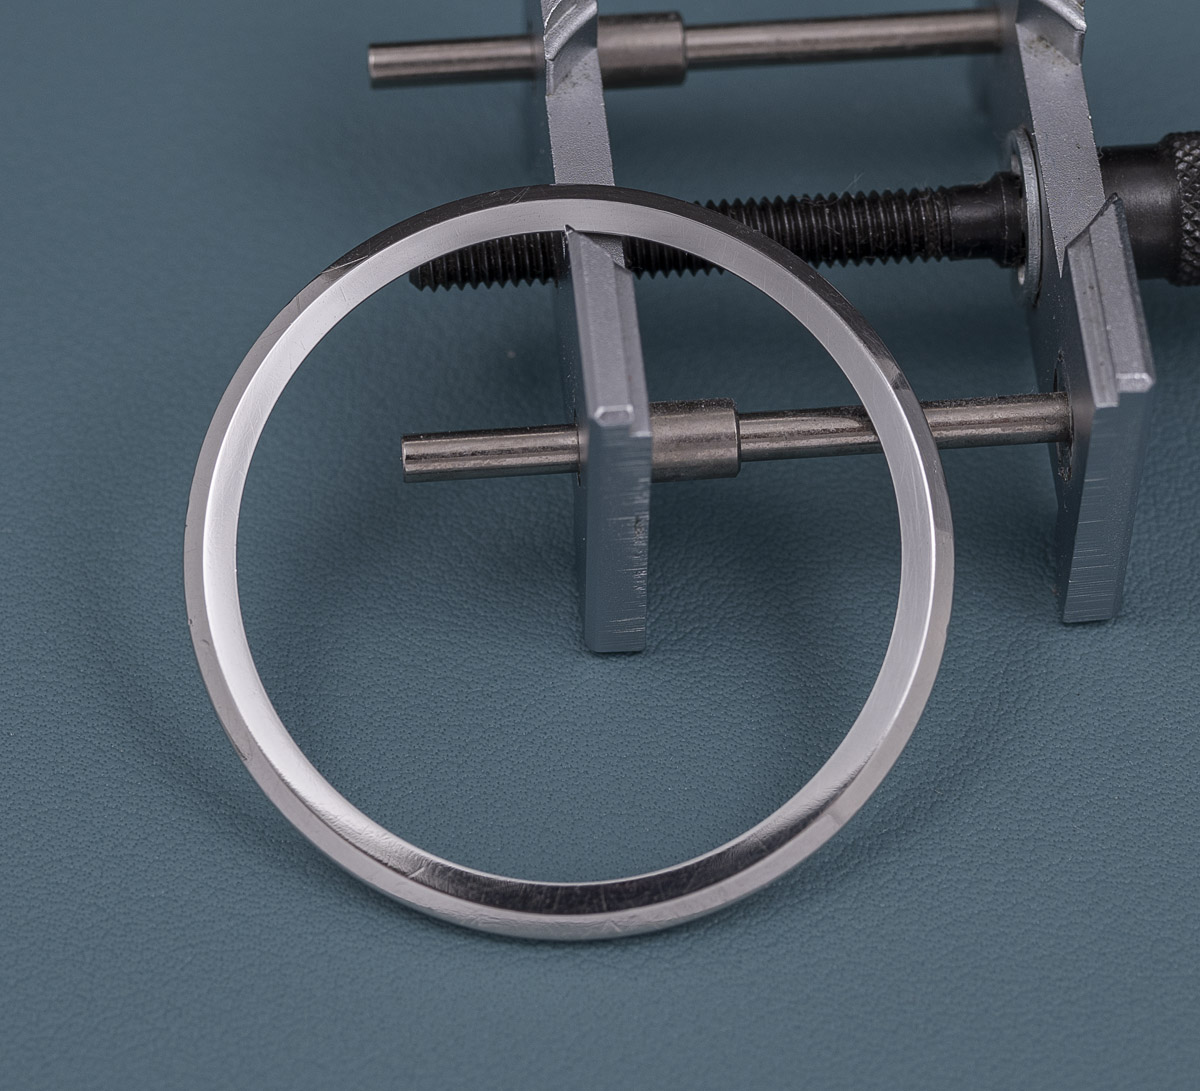
A couple of points to note before we dive in: the lume on the hands is ugly; the internal rotating bezel is cracked between the 21 and 43 markers; the external bezel/crystal retaining ring is badly scored around its lower part; the calendar is stuck.
The movement looks in the sort of condition you might expect given some of the external signs: it is grubby but looks otherwise unmolested.

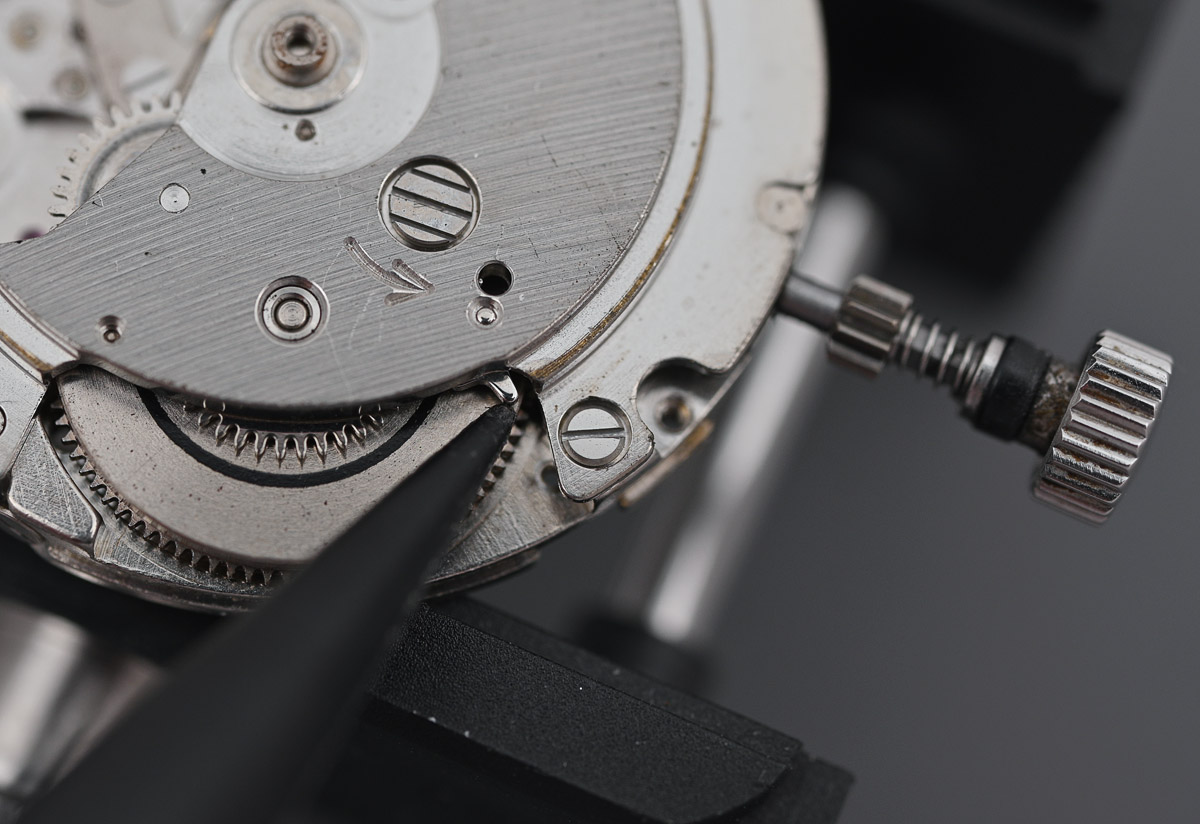
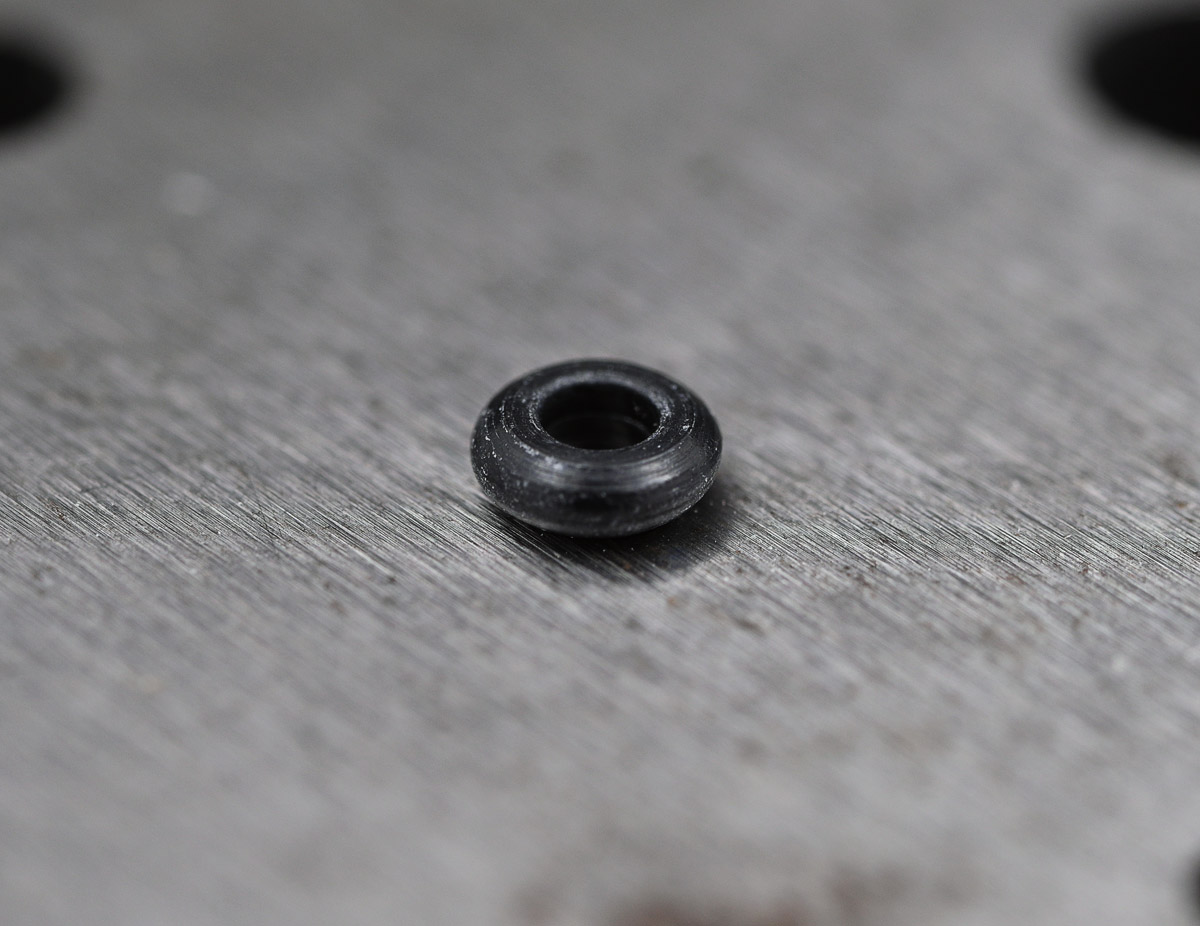
Depressing the setting lever axle (indicated) allows the release of the crown and stem and we can note the presence of the gear and spring necessary for the operation of the internal bezel as well as the flattened and hardened state of the crown gasket.

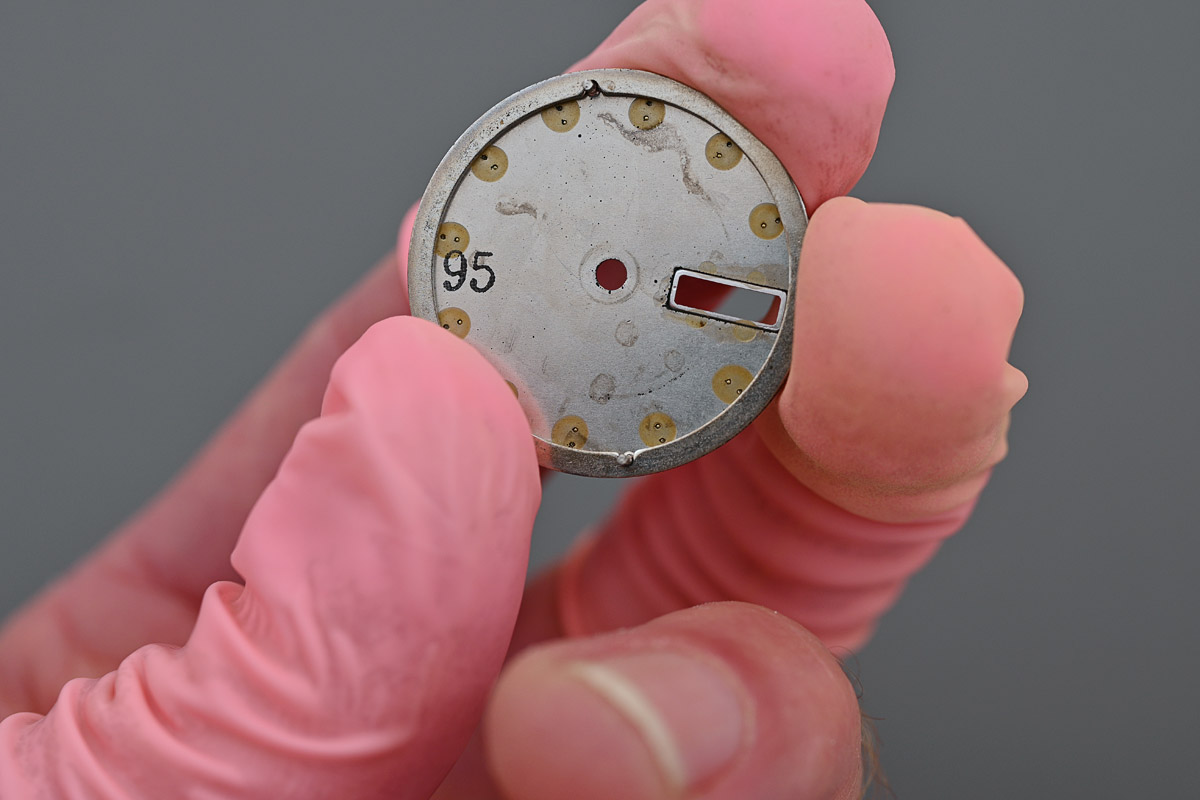
In spite of the evidently tarnished condition of the hands, the dial itself is in excellent shape, excepting some minor ingress of mold to the lume of some of the hour markers.

The date stamp to the rear of the dial is perfectly consistent with the serial number: 95 = May 1969.
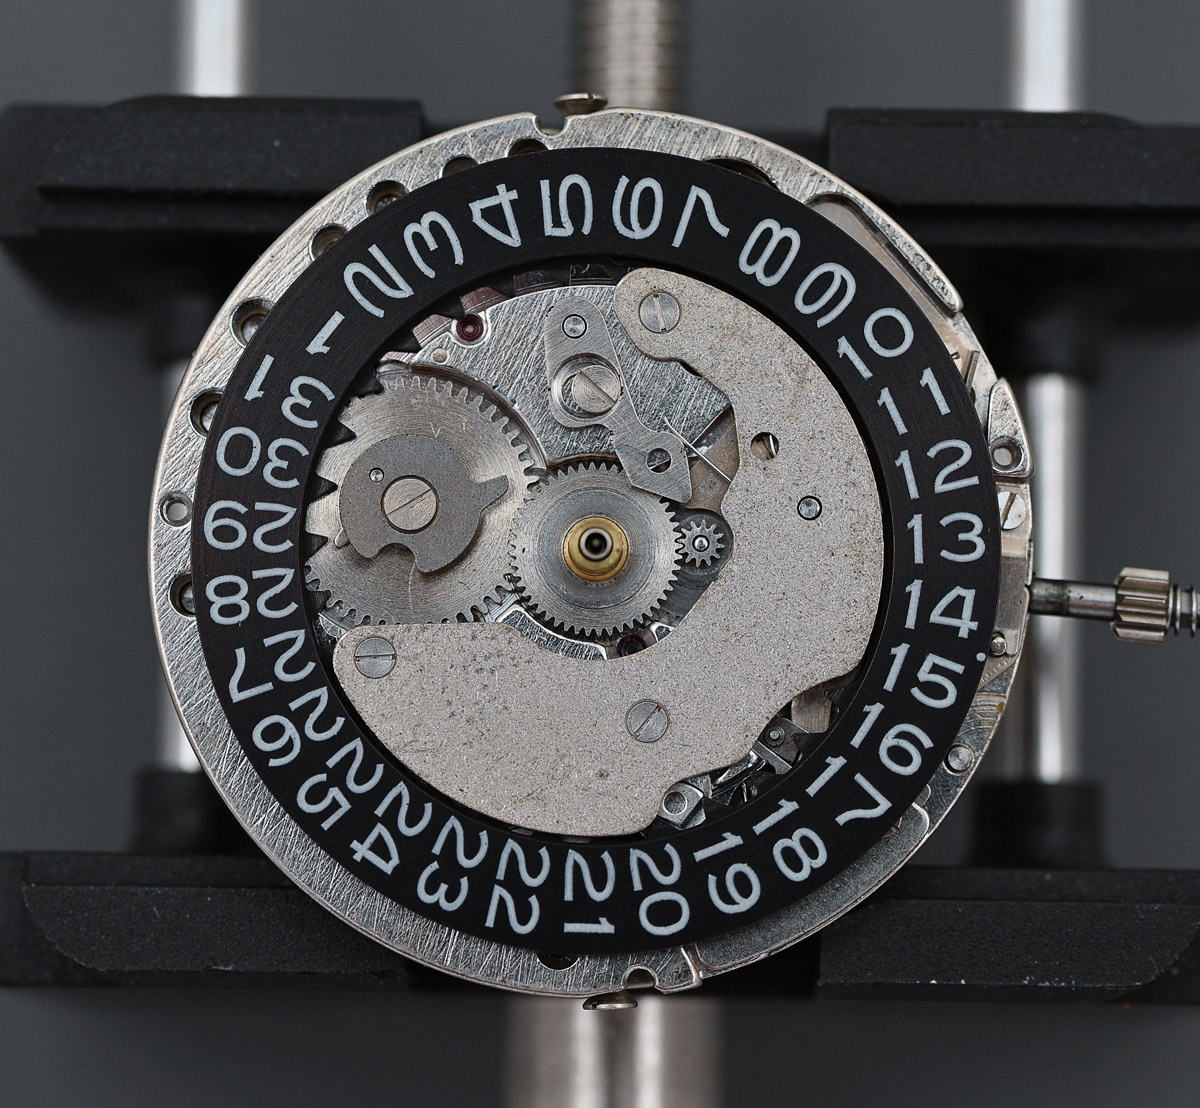
The day and date disks are in excellent condition. I will get to the bottom of why the day disk was stuck shortly.

With the day disk removed, we are presented with a rather workmanlike finishing to the date dial guard, again commensurate with this, the budget end of the 51-series line.
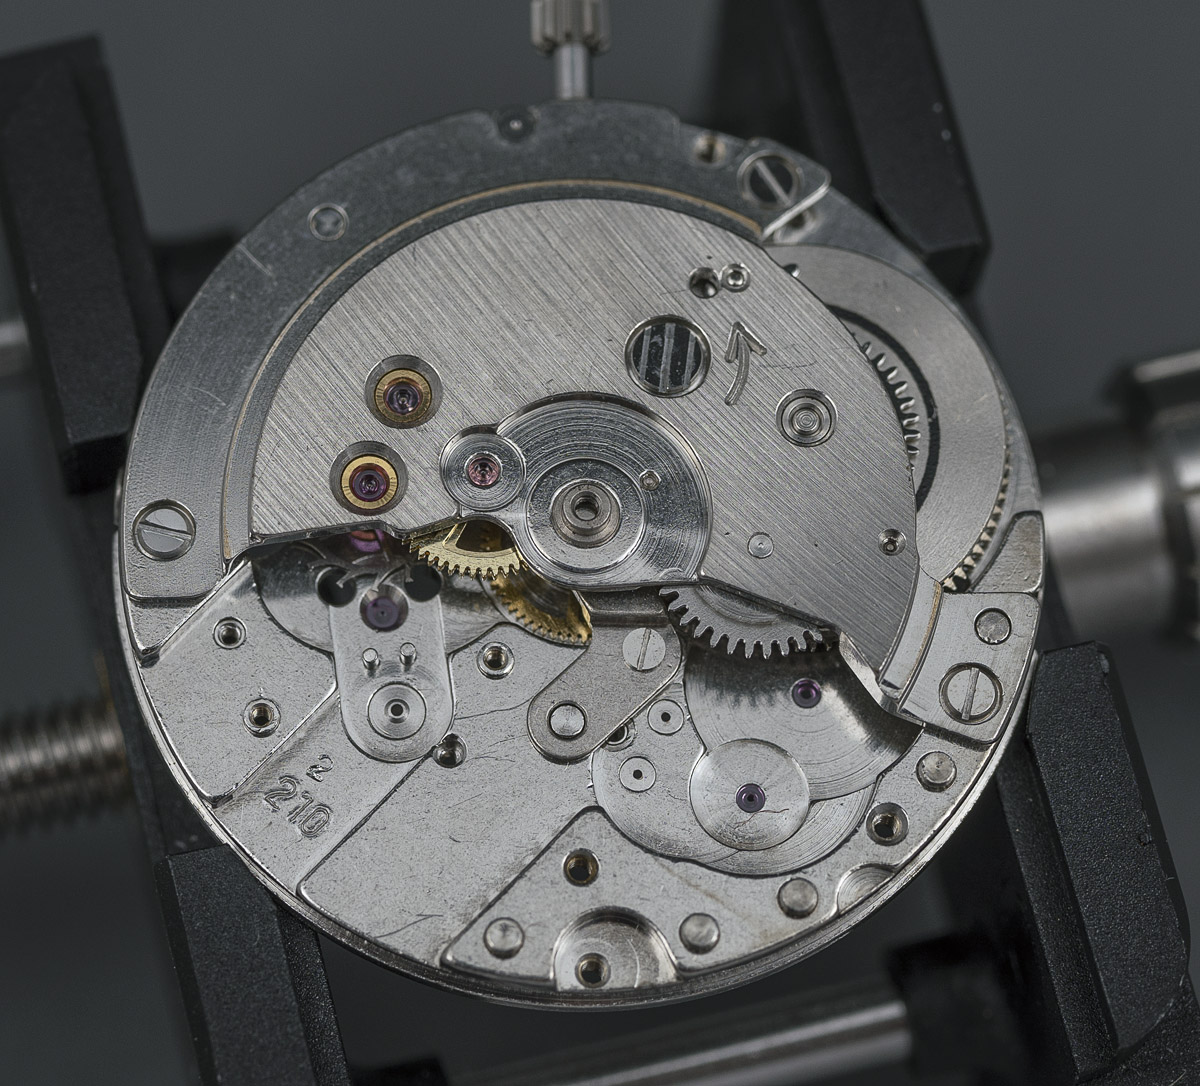
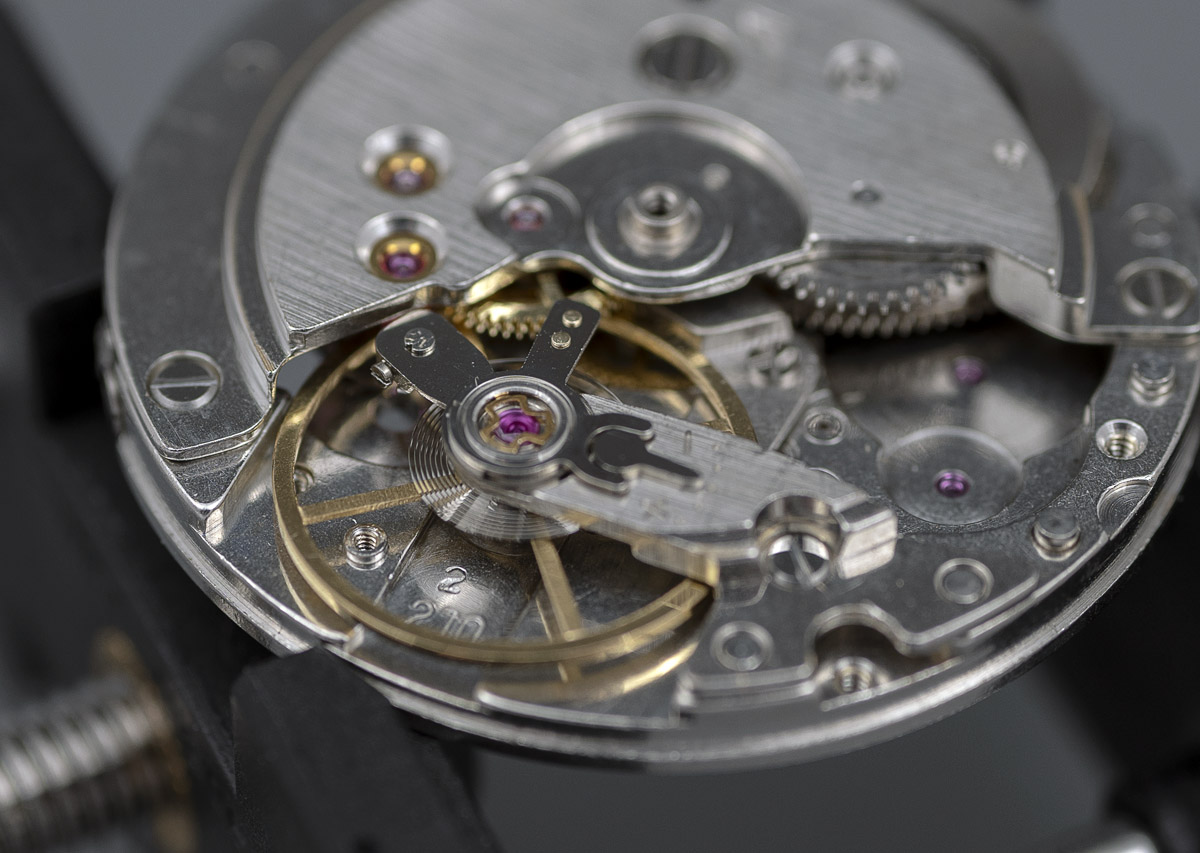
Let’s shift over to the balance side and take a gander.

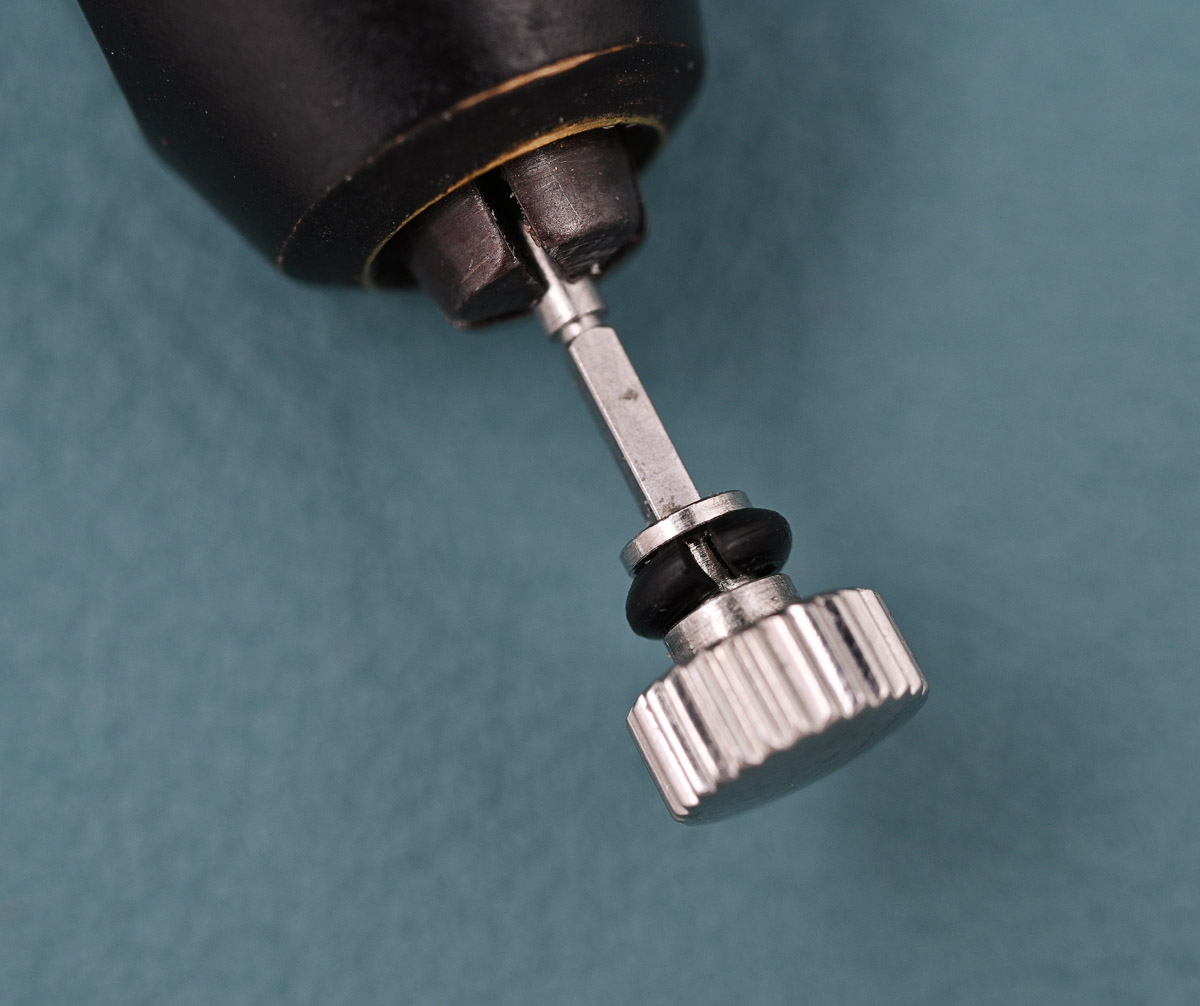
The triple-headed screw indicated in the photo above is there to allow power to be wound manually into the mainspring for the purpose of testing when servicing or at first assembly. This is, after all, a movement designed at the outset to incorporate hand-winding but in this detuned specification that facility is deleted in favour of this pragmatic inclusion. You will see that I have removed the rotor to aid our view, but we will need to reattach it to facilitate disassembly of the framework for the automatic winding mechanism.

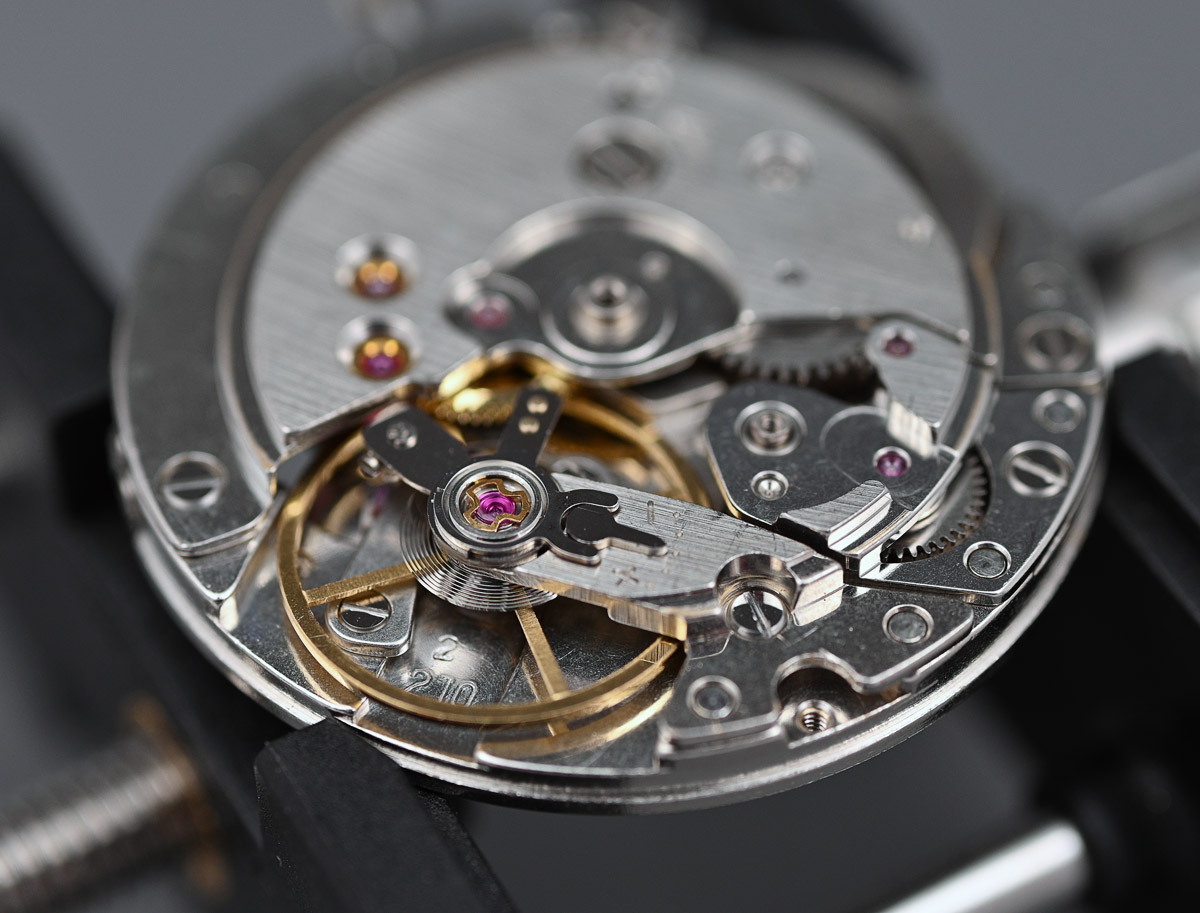
The only way to gain purchase on the transmission wheel screw is to reinstall the rotor and hold it while loosening and then removing the screw. From that point, the autowinder bridge is removed, exposing the differential and associated reduction wheels. You will notice that I have also removed the balance at this point to aid access (and to keep it free from harm).
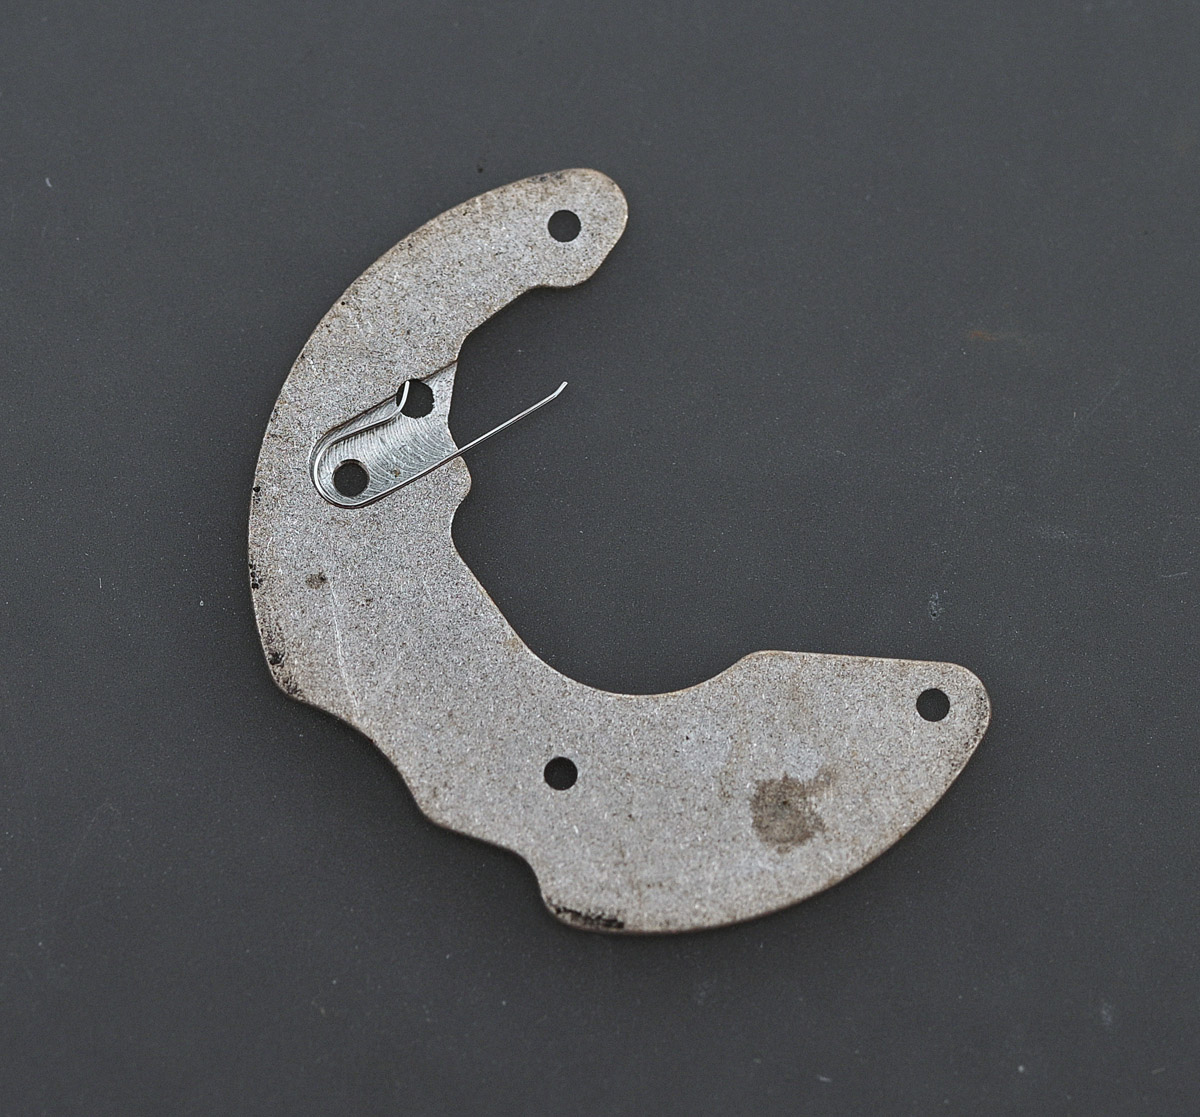
Back to the calendar side and I removed the date dial guard, taking care not to lose the day jumper spring, captured to its rear.
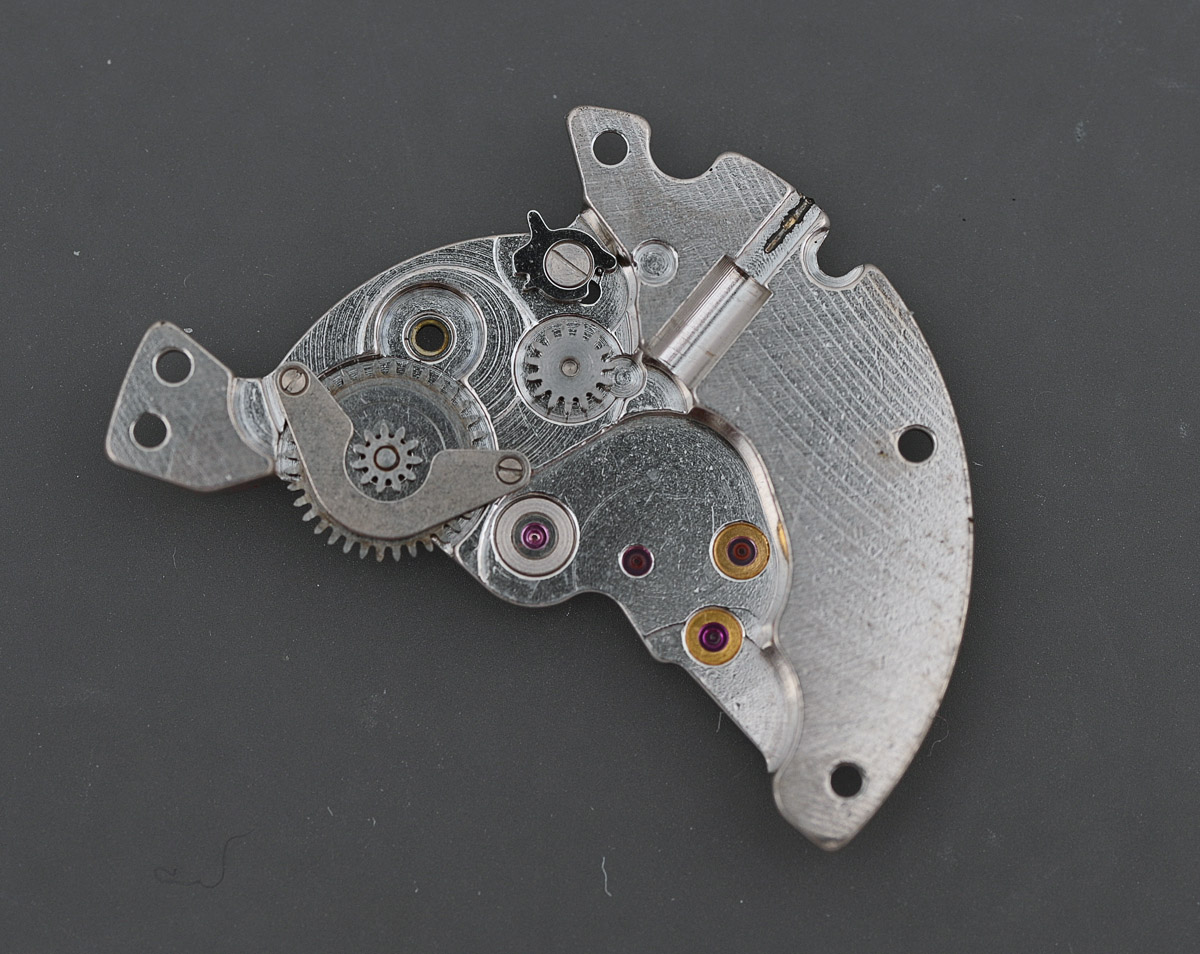
At this point we can compare this partly disassembled 5126A with that of the vastly more complicated 5106A at a similar point in its deconstruction.

The complexity in the latter derives largely from the machinery required by the instant date AND day changeover. In both movements, the quickset date mechanism is identical and quite a bit more complicated than the similarly actuated process in the 6119 and 6106.

Depressing the crown causes the date corrector lever to pivot to the right, with the date corrector then coming into contact with one of the inner teeth on the date disk, moving the disk anticlockwise, thereby advancing the date. Both the lever and date corrector operate against the opposing force of the date corrector spring.

One might occasionally garner the impression from the Daini division that they were always doing their very best to show off.

Rewinding momentarily, I wanted to address the question of the non-functioning calendar. When I came to remove the date driving wheel, I noticed that it was stuck solid. Loosening its screw relieved some force and the wheel would rotate freely again.

I will be investigating further once I’ve stripped the main plate of all its remaining parts.
Turning our attention back to the train side, our next job is to remove the barrel and train wheel bridge but that requires that the power is released from the mainspring. This is accomplished by pushing in the click while taking up some of the tension using the winding wheel screw.
The rear of the bridge houses the click, the winding wheel screw and the second reduction wheel, the latter part of the autowinding mechanism.
The gear train is essentially the same as in the 5106A, including the unfamiliar go-and-back sweep second system driven by one of two third wheels, both of which mounted on a common shaft.

With pretty much everything now stripped, we are left with just the centre wheel and its elegant L-shaped bridge.

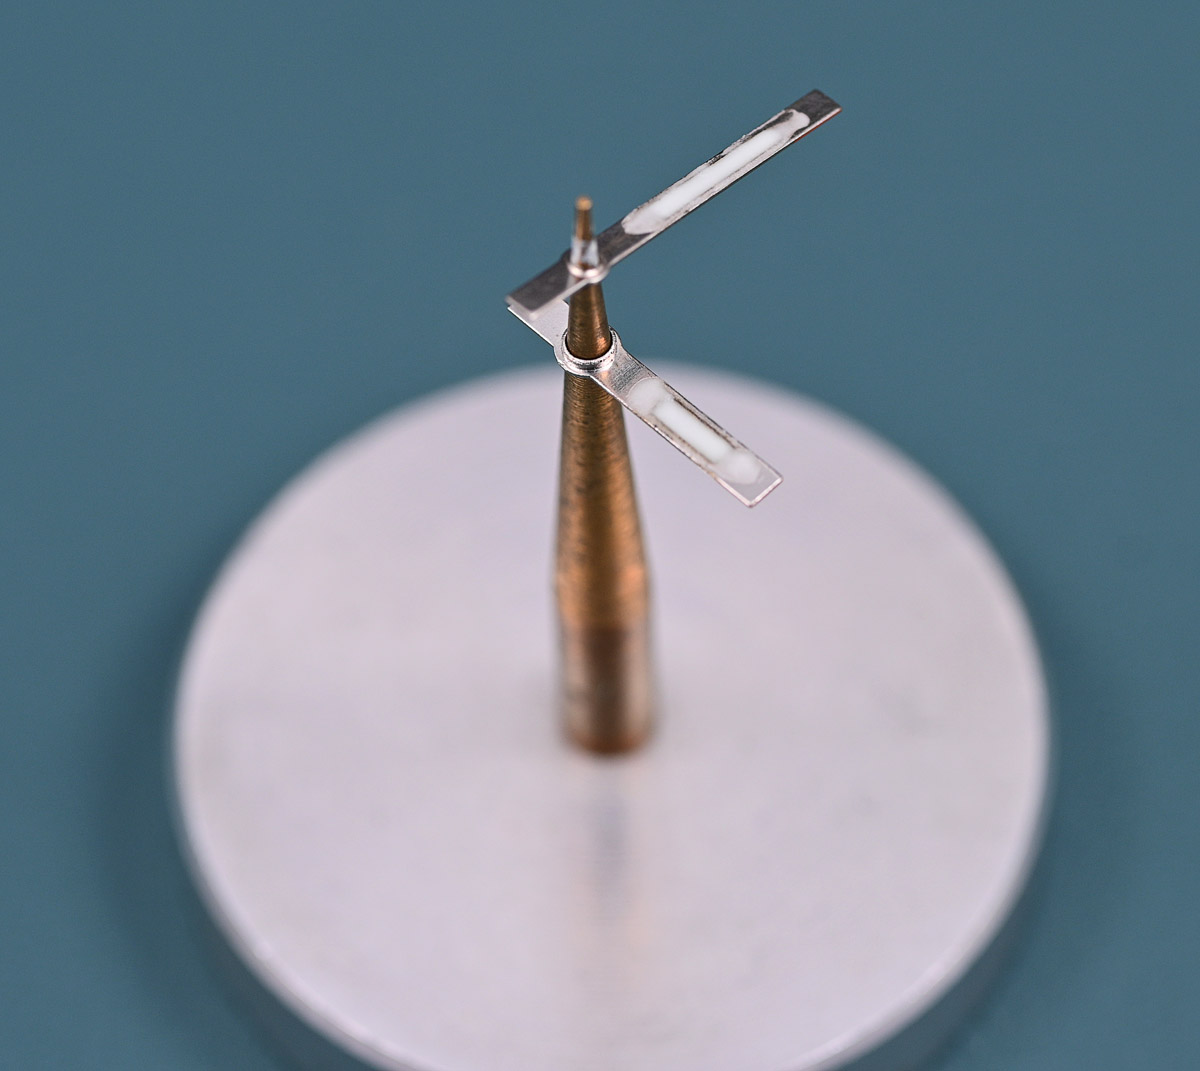
Let’s take a look at the date driving wheel post. You may be able to discern from the photo below that the post is partly out of its hole.
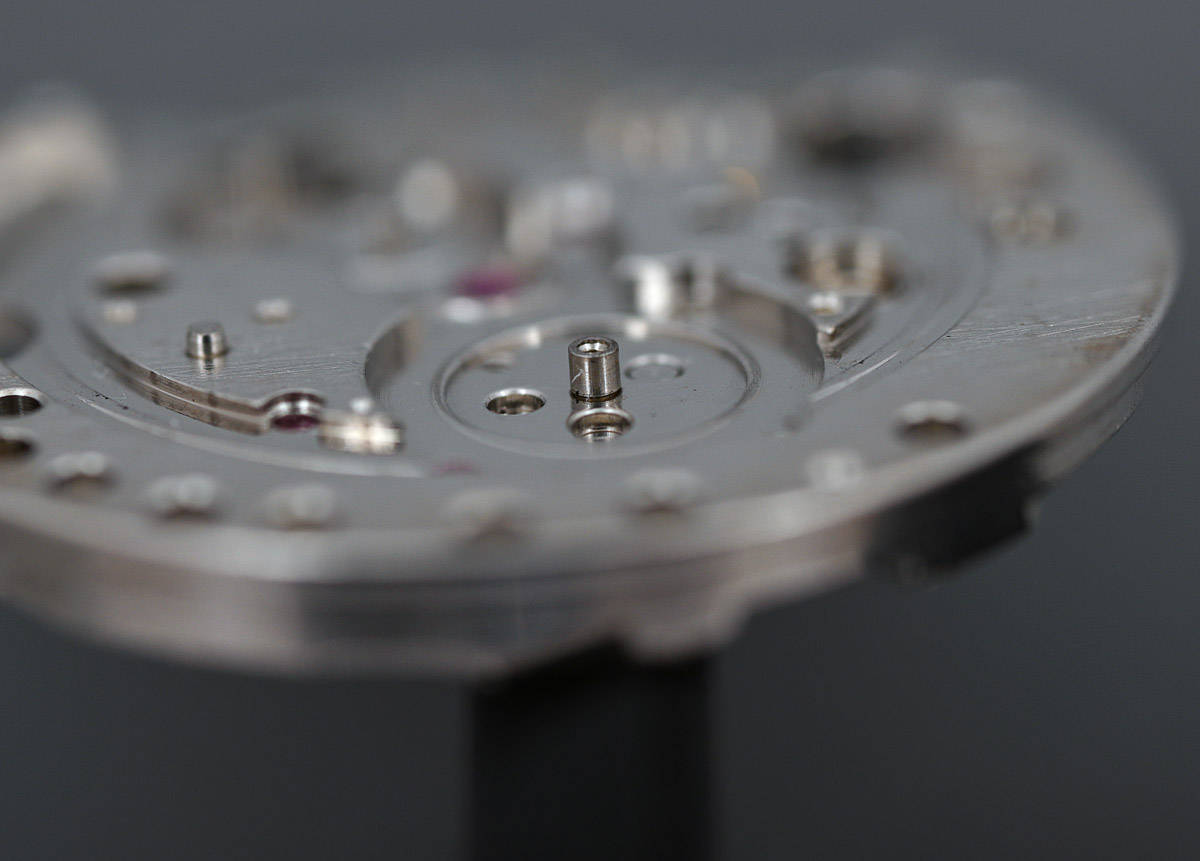
The act of tightening down the screw has lifted the post upwards, causing it to come into contact with the wheel, and thereby preventing it from rotating freely. My options are either to attempt to replace the post with one sourced from one of my spare 5126A movements OR to abandon this mainplate and use a spare instead. I opted for the latter because I was unsure about whether the fault lay with the post or the hole and I would rather not risk sacrificing another mainplate just for the sake of transferring the post. However, having selected and stripped a candidate, I noticed a problem.

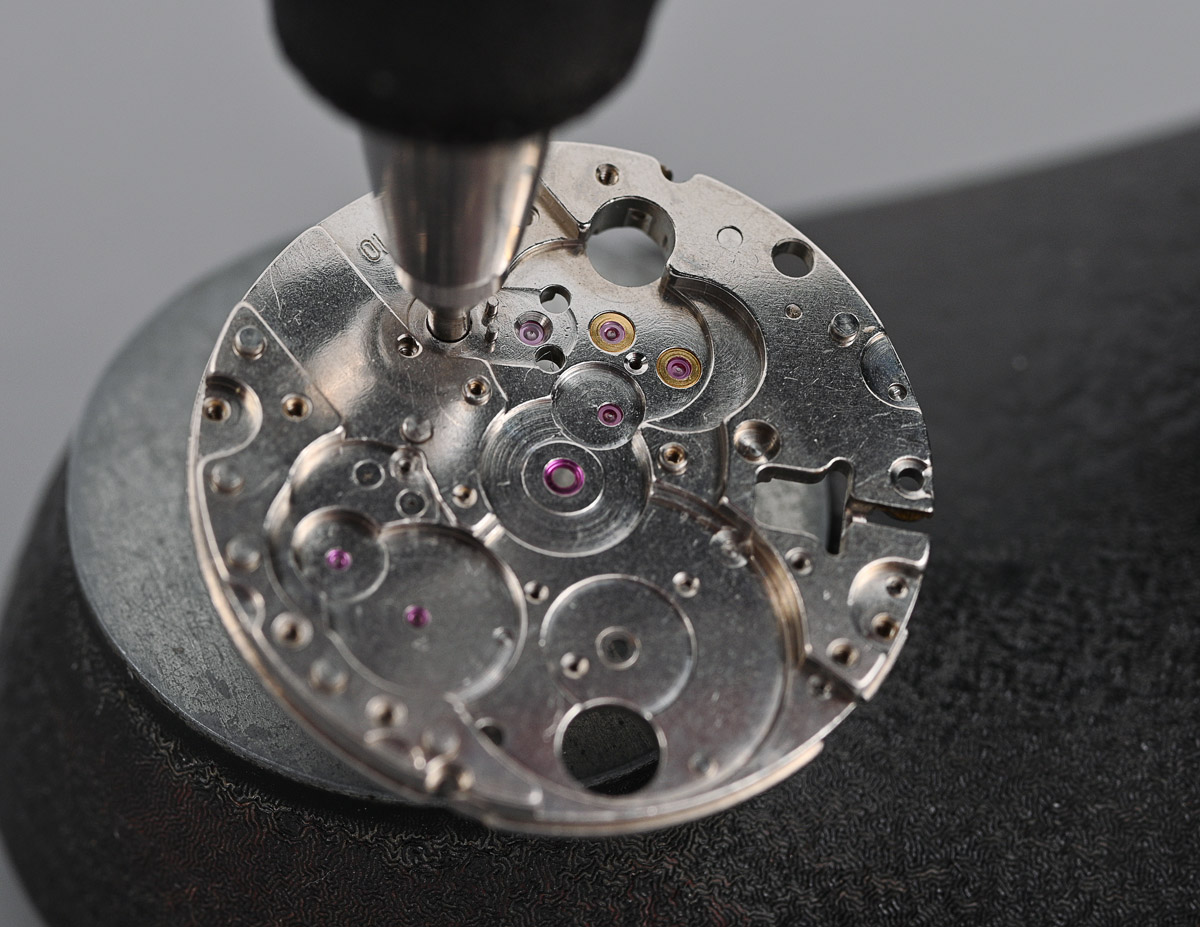
Rather extraordinarily, the Diashock setting had been scored out, and was therefore damaged beyond use. Fortunately, this part is straightforwardly replaced with the equivalent part from the old mainplate. We start by pressing out both settings, the good one from the original mainplate and the damaged one from the replacement.
And then transferring the original Diashock setting to the ‘new’ mainplate and pressing it home from the dial side.

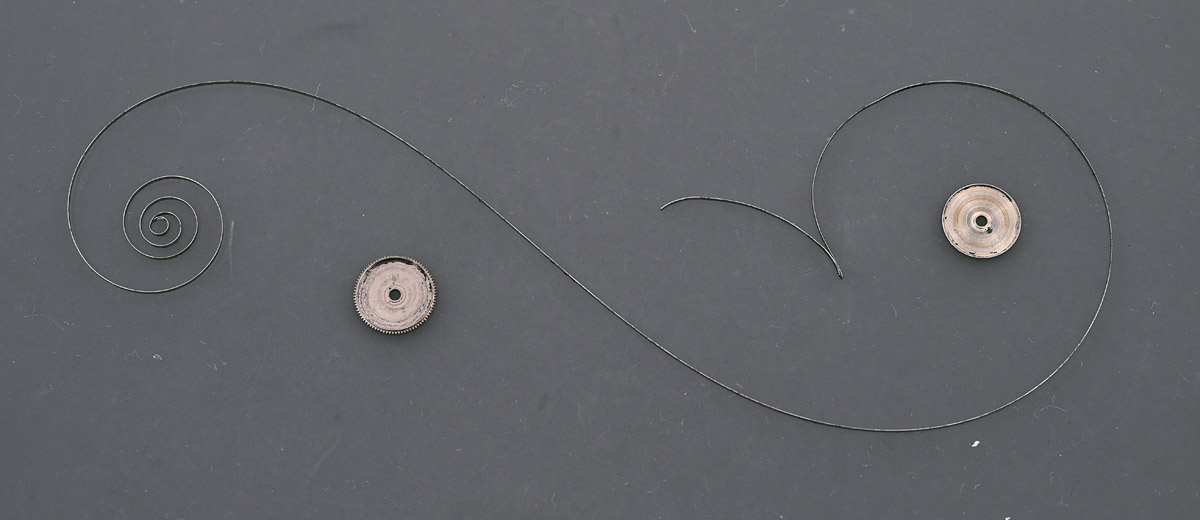
I will most probably need to adjust end-shake later when I come to refit the balance. The last order of business before cleaning is to assess the condition of the mainspring and then to release it from the barrel.

This looks pretty much exactly what you might expect of a 52 year old mainspring that has not seen the light of day since it was last inside the Daini factory in Tokyo. Lashings of molybdenum grease and all the better for it! The spring itself, when unfurled, looks to be in excellent condition.
While the movement parts were cleaning, I took the opportunity to dismantle the case with a view to inspecting that split rotating ring. The case dismantles in conventional fashion, the crystal sealed against an L-shaped rubber gasket that in turn sits on a sprung gasket holding ring with the rotating ring sitting at the bottom of the pile. The ring, once removed, is clearly badly split but I will attempt a repair in due course with the aid of some Superglue. The case is in very good condition, largely free from corrosion.

Depress the clutch, select reverse, locate the biting point and we ease into the return leg of our journey which starts with the assembly of the complicated setting and quickset mechanisms, followed by the centre wheel, its bridge and then the cannon pinion.

The eagle-eyed among you may have noticed that the mainspring mounts into the barrel with a right-hand wind which means that we will need to wind it into the mainspring winder drum left-handed. Unfortunately, the nub of the winder handle shaft refused to find purchase on the inner coil of the mainspring and so I had to resort to cunning. I opted instead to wind it right-handed using one of the newer handles from my Bergeon winder.

Next, I positioned the drum with the mainspring fitted against the equivalent drum from the Bergeon winder.

You will notice that the Bergeon drum is a tad larger than my no-name-branded item and this facilitated the safe transport of the mainspring from one to the other.
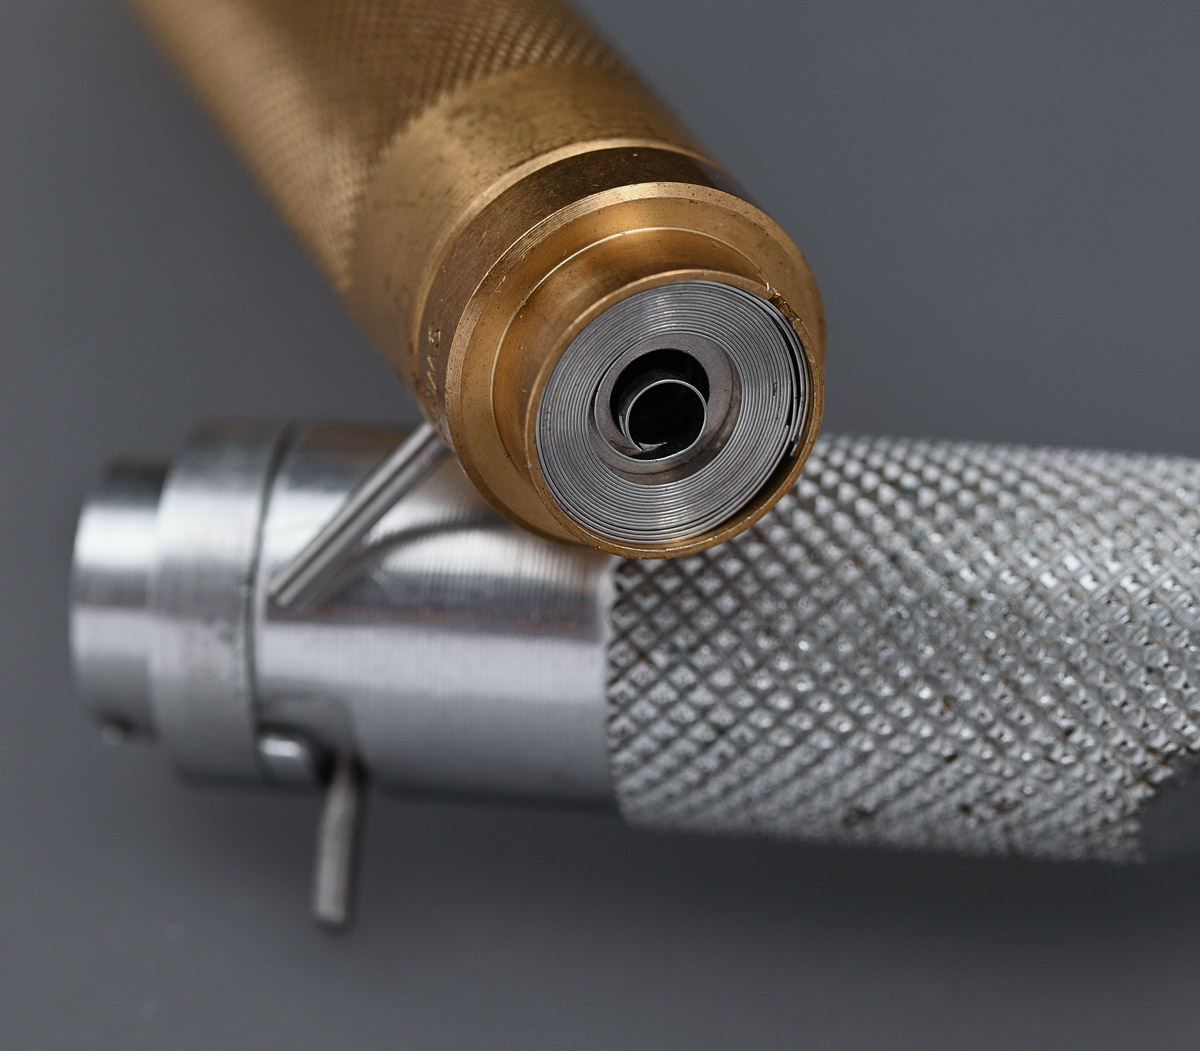
We see that the mainspring is now oriented with its wind counter-clockwise which means that when we transfer the mainspring into its barrel, it will be correctly oriented with its wind clockwise.
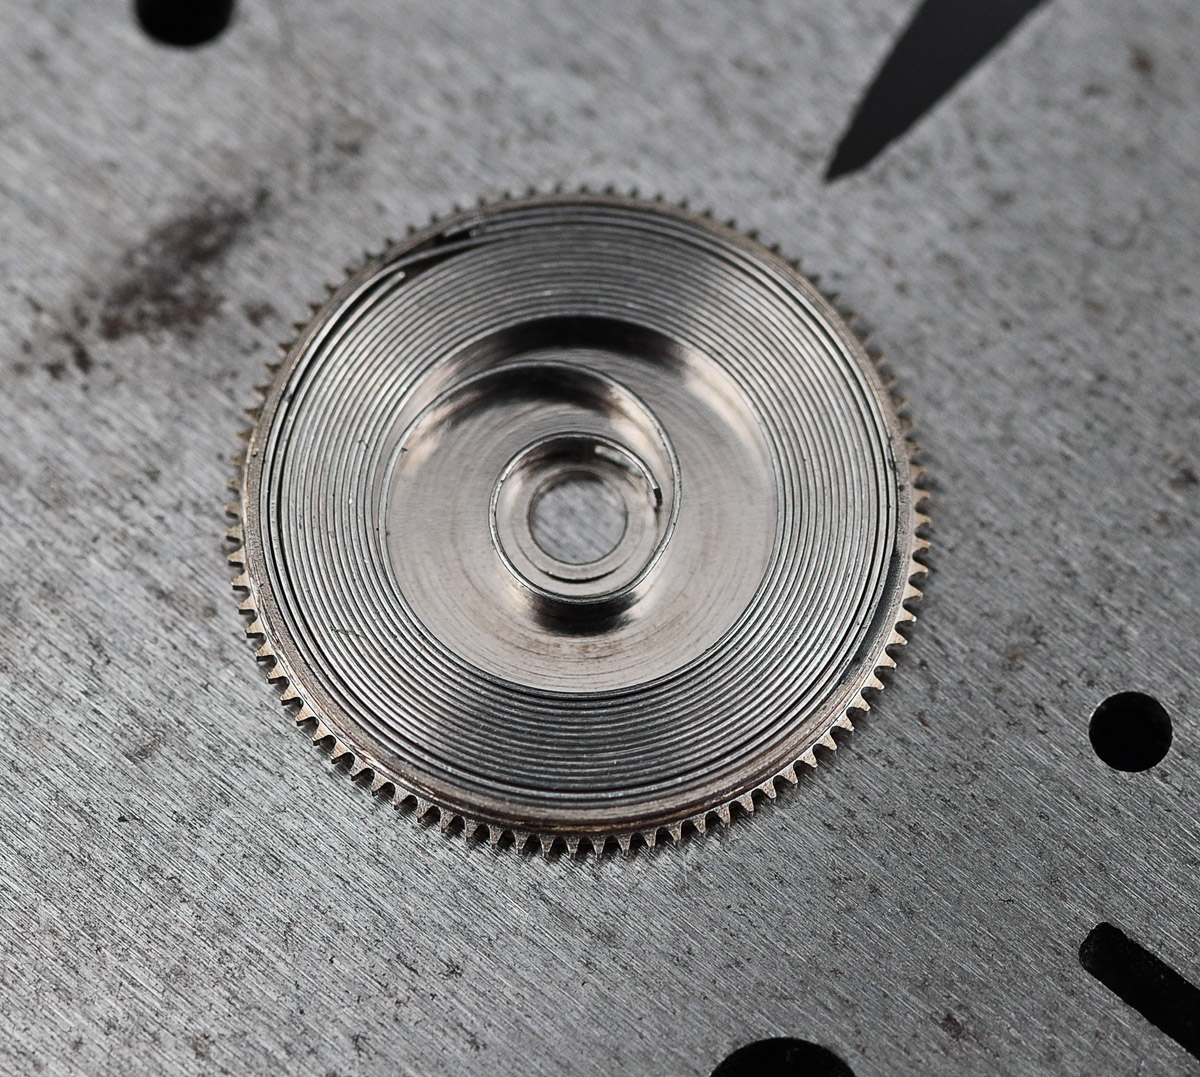
There being no fiddly Diafix settings to contend with on this movement, we can proceed to refitting the complete barrel and gear train.

The photo above provides a good view of the double-decker third wheels which act to transmit power from the centre wheel via the top-most third wheel to the sweep seconds pinion and thence via the freely rotating lower-tier third wheel to the fourth wheel then on to the escapement. Having reassembled the components fitted to the underside of the barrel and train bridge, I can now refit that, ensuring as I do so that all of the gear train runs freely.
I was conscious at this stage that the position of the freshly fitted Diashock setting may not yet be properly set for correct balance end-shake and so I chose to test fit the balance before fitting the pallet and its bridge.
You will notice that I’ve chosen to fit a balance from a 5106A. I did this simply because the balance hairspring looked in better condition. I was glad to have checked the fit at this point because it was clear immediately that the Diashock setting was mounted just a little bit too far into its hole and was preventing the balance from swinging freely. I removed the balance, and then used my jewelling tool to make a small adjustment to the position of the setting.

With the adjustment complete, the balance now swings freely and I can fit and lubricate the pallet fork and its bridge and refit the balance, at which point the movement swings into action.
The calendar calls, and I jump to attention, rattling through the process of fitting the calendar parts, noting as I do so, the unhindered rotation of the day and date driving wheel.

We have arrived at the point of refitting the dial and hands and I do so but with my mind not yet made up about whether to relume the hands.
Although they may not look too bad in this photograph, in live view, so to speak, the hands look pretty grotty and have the potential to let the side down when the watch is completely assembled. Decision made. Off they come and the old lume consigned to oblivion.

I made up a small batch of Bergeon lume, mixing white with yellow in matt lacquer to achieve a hue that is reasonably close to that of the hour markers. With the hands inverted, the luminous gloop is drawn along the aperture in the hands, the surface tension allowing the gap to be bridged with a continuous layer.
Once the lume was dry and I was satisfied that there were no high spots that might contribute to clearance issues, I refitted the hands to the dial.
The colour match is not perfect but to my eyes, the overall effect is much more satisfactory. There remains one final aesthetic eyesore that needs sorting. The steel bezel is badly scratched around a quarter of its circumference.
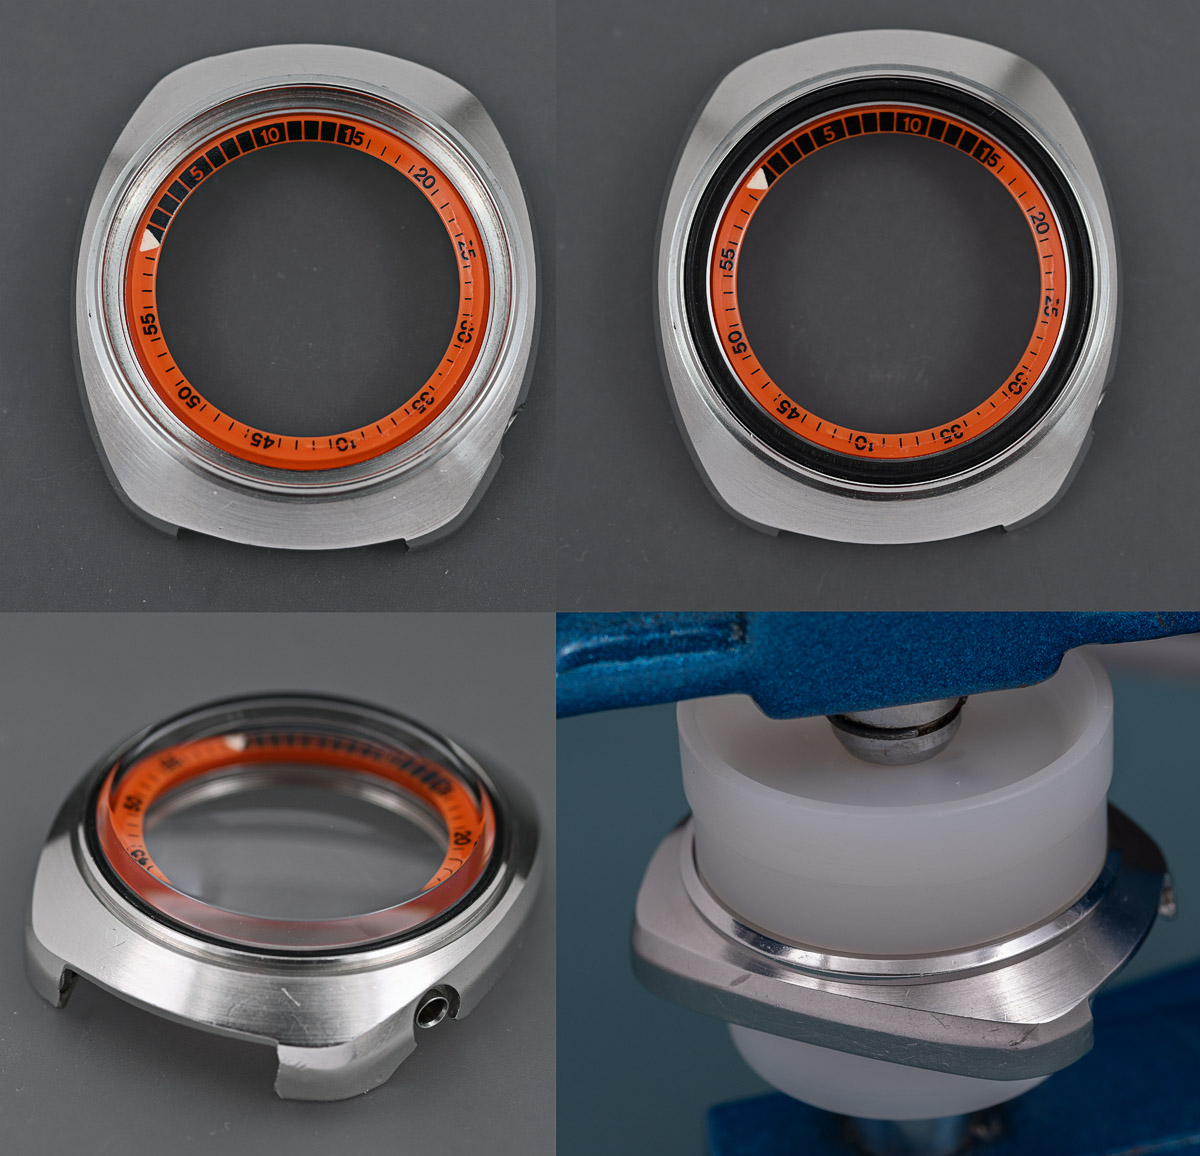
Given the overall patina of the watch, any refinishing to the bezel does not need to be perfect – it just needs to remove the blemishes and maintain the sharp transition from the top to the bevelled side. So I set about rubbing down the top of the bezel against increasingly fine-grained sand paper on a flat surface and slowly but surely the scratches fade away. A polish and it looks presentable once again.
The case and its parts have had a thorough clean and so we can begin reassembly, starting with the repaired turning ring, followed by the spring, gasket ring and gasket before fitting a fresh crystal and pressing home the newly polished bezel.
One last snag remains. The crown gasket on these watches (DK0125B) is not of a common size, either between Seiko models or as generic standard. The original part is not available from local watch parts suppliers but I did find a source from an eBay seller in Spain at an eye-watering £9 per gasket. The part arrived swiftly enough but as soon as I removed it from its packaging I knew that it was not fit for purpose.
The gasket had hardened with age and even if it could have provided some sort of seal, it was never going to be pliable enough to fit onto the stem.

Nevertheless, I gave it my best shot but with predictable consequences.
To the seller’s credit, they refunded me instantly when I reported the condition and so I moved on to consider other options. In the end, the closest I could get to a reasonable match was a gasket from a Bell-matic push button. With that last problem resolved, I fitted the movement into the case, attached the winding weight, tightened the transmission wheel screw and fitted a fresh case back gasket.

With the case back tightened down, we can take our first look at the completed watch.

This watch came without a strap or bracelet and so I decided to have a forage through my supplies to see what might suit it best. After some (but not much) deliberation, I settled upon a vintage 19mm tropic strap that I had previously fitted to one of my 62MAS dive watches.

I think this strap suits it brilliantly. This watch has required quite a lot of effort, throwing up a number of unanticipated challenges, but as usual, I emerge the better man for the experience.

In my opinion, the final result has been worth the effort. I like this watch far more than I anticipated at the outset and have been wearing it every day for the past couple of weeks. I like it not just because it is handsome and colourful and most emphatically of its time, but because it has survived some trauma, some of which still on view, and yet still capable of fully performing its intended function

Nice job on a tricky timepiece.
Is the 5106 balance the same part as that of the 5126? If I recall it uses a thicker cap jewel on one side, perhaps related to spacing of the Diashock setting that you were adjusting.
Good call on the relume. Judging from the close ups on your previous post, the hands themselves where also very tarnished. Can you elaborate on how you cleaned them up prior/post removing the lume?
Hi Jake, the balance wheels and all of the Diashock parts are the same between the two movements, including the thicker cap jewel on the balance side.
As for the tarnishing on the hands, all that required was Rodico. It was just a surface glazing and the hands then got a further clean with lighter fluid when I removed the lume.
Great job Martin, as always; thanks and bye
What a gorgeous seiko, great job on the restoration, if seiko ever done a reissue of this I would buy it in a heartbeat .
Hey Martín,
Back again to this article. I just began the restoration of a 5126-6010, so your article is of much help. However I’ve been trying to get my hands on a technical sheet with no luck…. Does it exists?
Thank you again for your help
David
PS. Still dealing with tv’ge mainsprings by hand (cry)
Hi David, I am not aware of any 51 series technical guides in circulation I’m afraid. I certainly don’t have any and I’ve not seen anything online, not even Japanese language.
Hello Martin,
Amazing job and beautifully made article/pictures. Always a pleasure to read, thats I share with whoever might be interested.
I just got a second 5126-6010 to restore so this helps a lot. However most of my projects are in much rougher condition. I enjoy the journey, will come back for sure when I got back my tools and can sit on the bench ince again.
Now in the meantime I have a question you might be able to help me with : I’ve been working on upgrading all my tools to more professional ones, when the budget allows me to. The one I am looking for right now is a set of mainsprings winders from Bergeon, but I have trouble deciding which one to get. I would like to cover most situations but it is difficult to decide. I work mostly with seikos as well, but I’ve been getting sole vintage Tissot on the way as well as a couple of swiss chronos like the Valjoux 7733.
I know it is a large choice but maybe you can point me to the right direction, since it is quite an important budget I would like to do the best out of it.
Thanks for sharing youe passion and for all the help you’ve already largely provided
David
Hi David, I am pleased to hear that you are finding the blog useful and enjoyable. Thank you. On the subject of mainspring winders, I have actually found the Bergeon winders to be not so useful with Seiko calibres, with perhaps just one drum and handle in reasonably regular use. I find my old vintage set much more useful and even with that, I find that I only ever use one of two sizes. The problem with the Bergeon winders is that the shafts on the handles are profiled for specific calibre mainsprings and don’t necessarily work well with other similarly sized mainsprings. If you are planning on regularly working on Swiss calibres then it may be worth the investment but if only rarely, then you might want to look for a used set or even perhaps consider one of the Chinese sets available on AliExpress (or maybe eBay). I have no personal experience of the Chinese winders though so it may be worth doing some research first. Sorry not to be of more help. Do let me know how you get on. All the best Martin
Hi Martin
Thank you for your answer. Do not worry, on the contrary it is of much help. That gives me an idea on where to look or what to try. I just don’t want to buy blindly and get a set which is gonna sit unused for the most of it. I will let you know if I find a working method. Kind of tired of doing it by hand alwsya with tbe risk of damaging the mainsprings.
I would love to keep asking you questions, but don’t want to flow the comments here 😛 ….. In time.
All the best. David
No problem, ask away! I would say that it is absolutely worth investing in a mainspring winder – it is just that the Bergeon winders are quite expensive and don’t necessarily suit Seiko mainsprings especially well.
Hey Martin,
I am back again to your article and with another question. So I did my job with my 5126-6010 and with the help of your article and lots of pictures I worked my way through the movement without issues. Very interesting mechanism, and definitely well made. On this occasion I also did my first try on reluming. Now that’s where, when talking to some friends, the question came : did you verify if there is any radioactivity on the original Lume?
Obviously I didn’t taking a risk without even knowing. Now after that I checked and the dial code has an “R” after the code, others have “T” and trying to find answers some speculate on the web the stand for Radium or Tritium (which would have been normal) but someone did some extra research and wrote Ina forum that those codes appear in vintage as well as modern watches and even I some without Lume which led him to think they are not of an indication of a placed fabrication – either Suwa or Raining factories. So no clear answer. Do you have any information about that particular issue?
Thought of sharing and asking here since itmight be useful for other readers.
Thanks again for your help and patience.
Best
David
My understanding is that the R and T in Seiko dial codes have nothing to do with the constituents of any luminous compound on the dial. They may have used radium in world war two military watches (and I’ve seen a suggestion that they may also in a later military watch) but I think it’s safe to assume that any vintage Seiko made after about 1960 will not contain radium.
Thank you Martin. It is also what I got from my research. It is reassuring. However I think I will still be trying to setup some safeguards when taking over re-lume again. 🙂
I have a Seiko Sports 5 5126-6010 964187 with a missing crown.. What crowns are compatible with this watch?
Hi Vincent, the part you need is 45M03NS.
Pingback: Watches for sale | Adventures in Amateur Watch Fettling