
Time for a change of scene as I turn my attention to the case and the four completely seized pushers. The reasons for their seizures might reasonably be anticipated as the combination of solidified gaskets and an accumulation of gunk in crevices but in this case those issues are augmented by some corrosion affecting, in particular, the start/stop and reset pushers. The pusher assembly comprises a threaded pusher, a spring and the separate cap fitted with a rubber gasket. The pushers are fitted by inserting them into the pusher tube from inside the case, fitting the spring into the cap and then screwing the pusher into the cap from the inside, the inside end of the pusher being slotted for a screwdriver. Extracting them, in theory, requires the reverse of that process, subject to the cooperation of the pusher.
The start/stop pusher was heavily encrusted with corrosion and put up a considerable fight before I was able to make headway and eventually extract it from the case.

It is glistening because it’s been contaminated with the oil that has covered everything else. This makes me wonder whether the wholesale coverage of oil throughout the case interior might be the result of an attempt to free-up the pushers using penetrating oil. Who knows. Perhaps that doesn’t matter. We can’t turn back time (an observation that is particularly pertinent to a community of idiot savants obsessed with the operation of devices whose purpose is the charting of its forward progression).
The reset pusher was somewhat less encrusted with corrosion and consequently a little less difficult to remove.
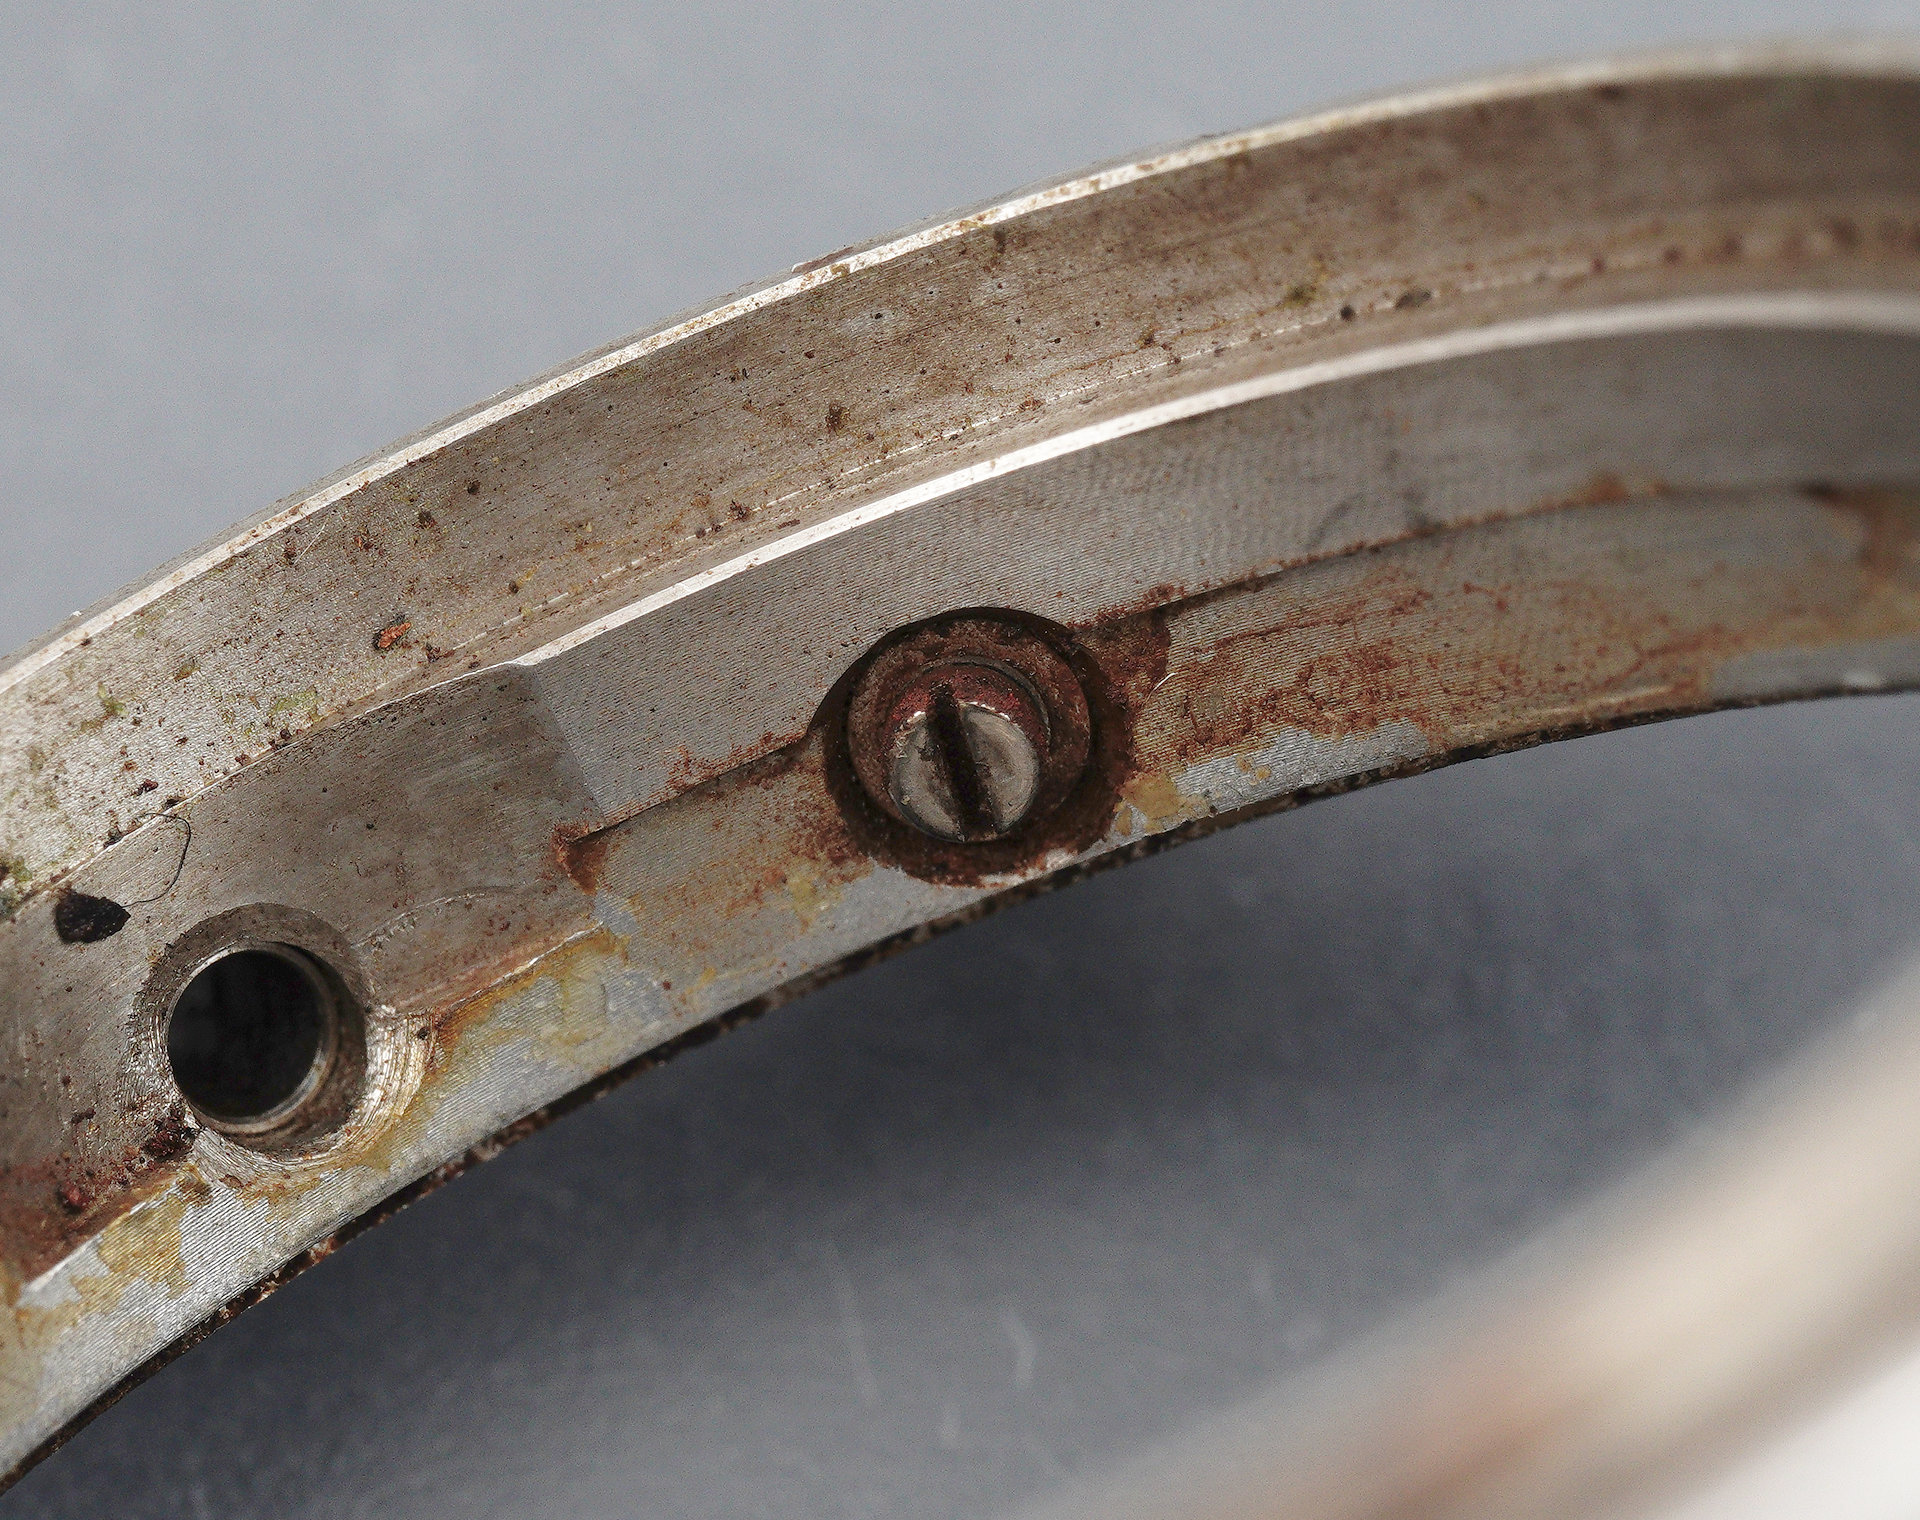
Once extracted, the pusher assemblies should look something like this.
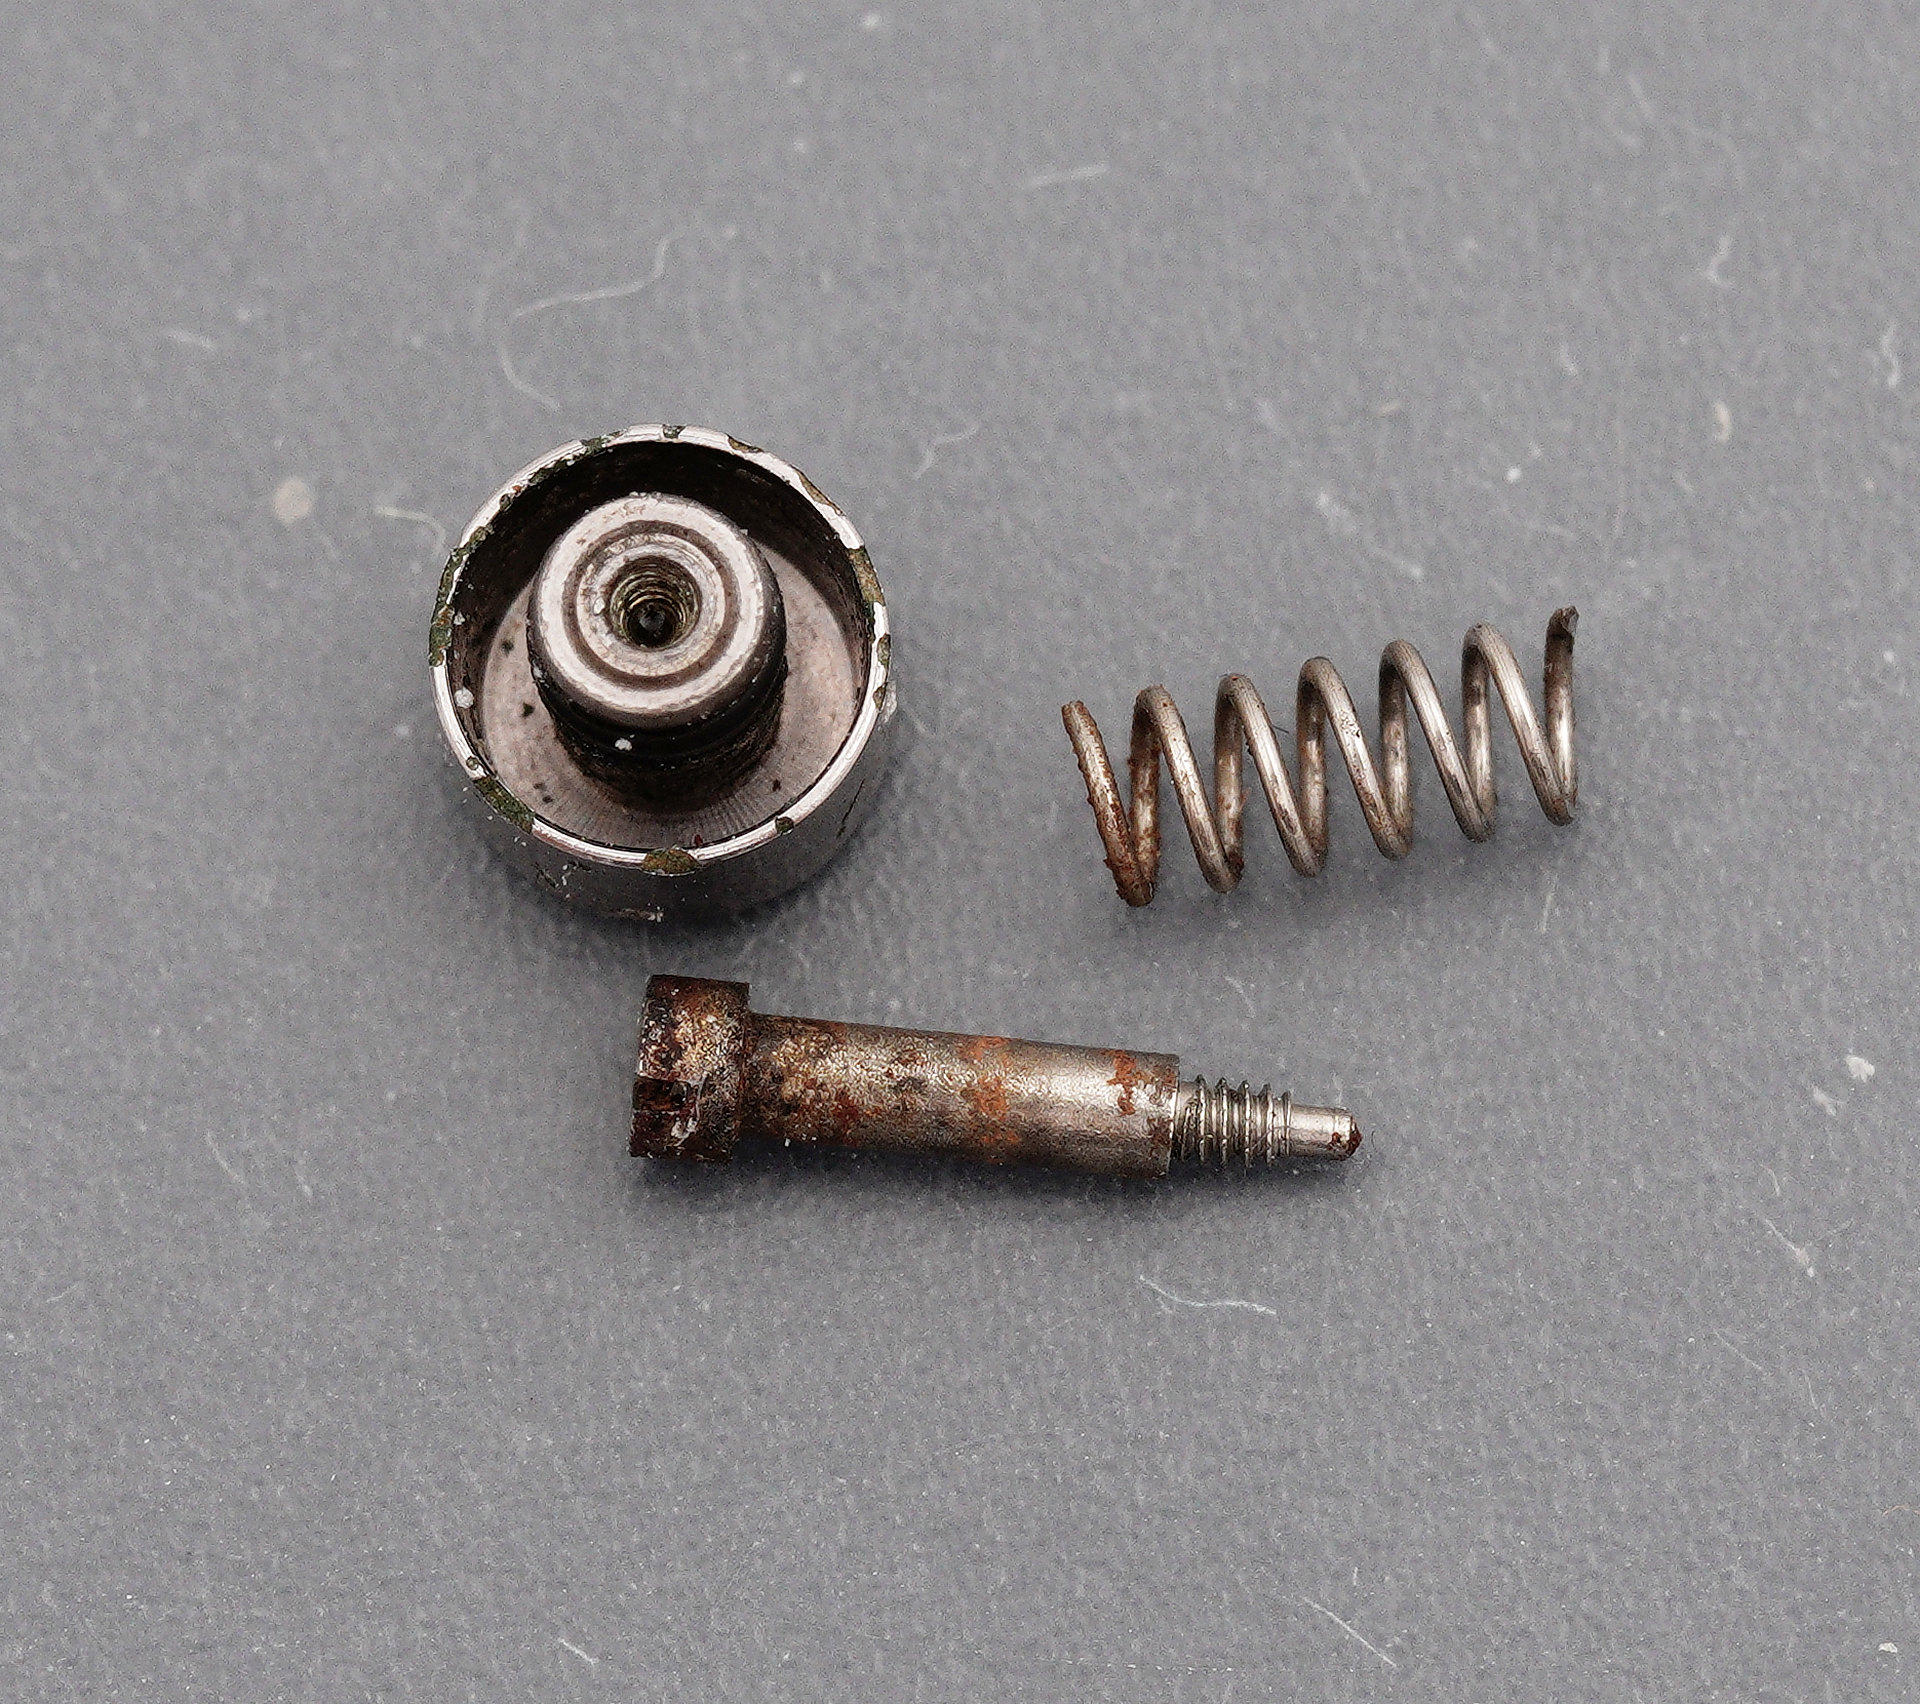
The lap counter pushers have a different design, with the pushers held in place by c-clips.
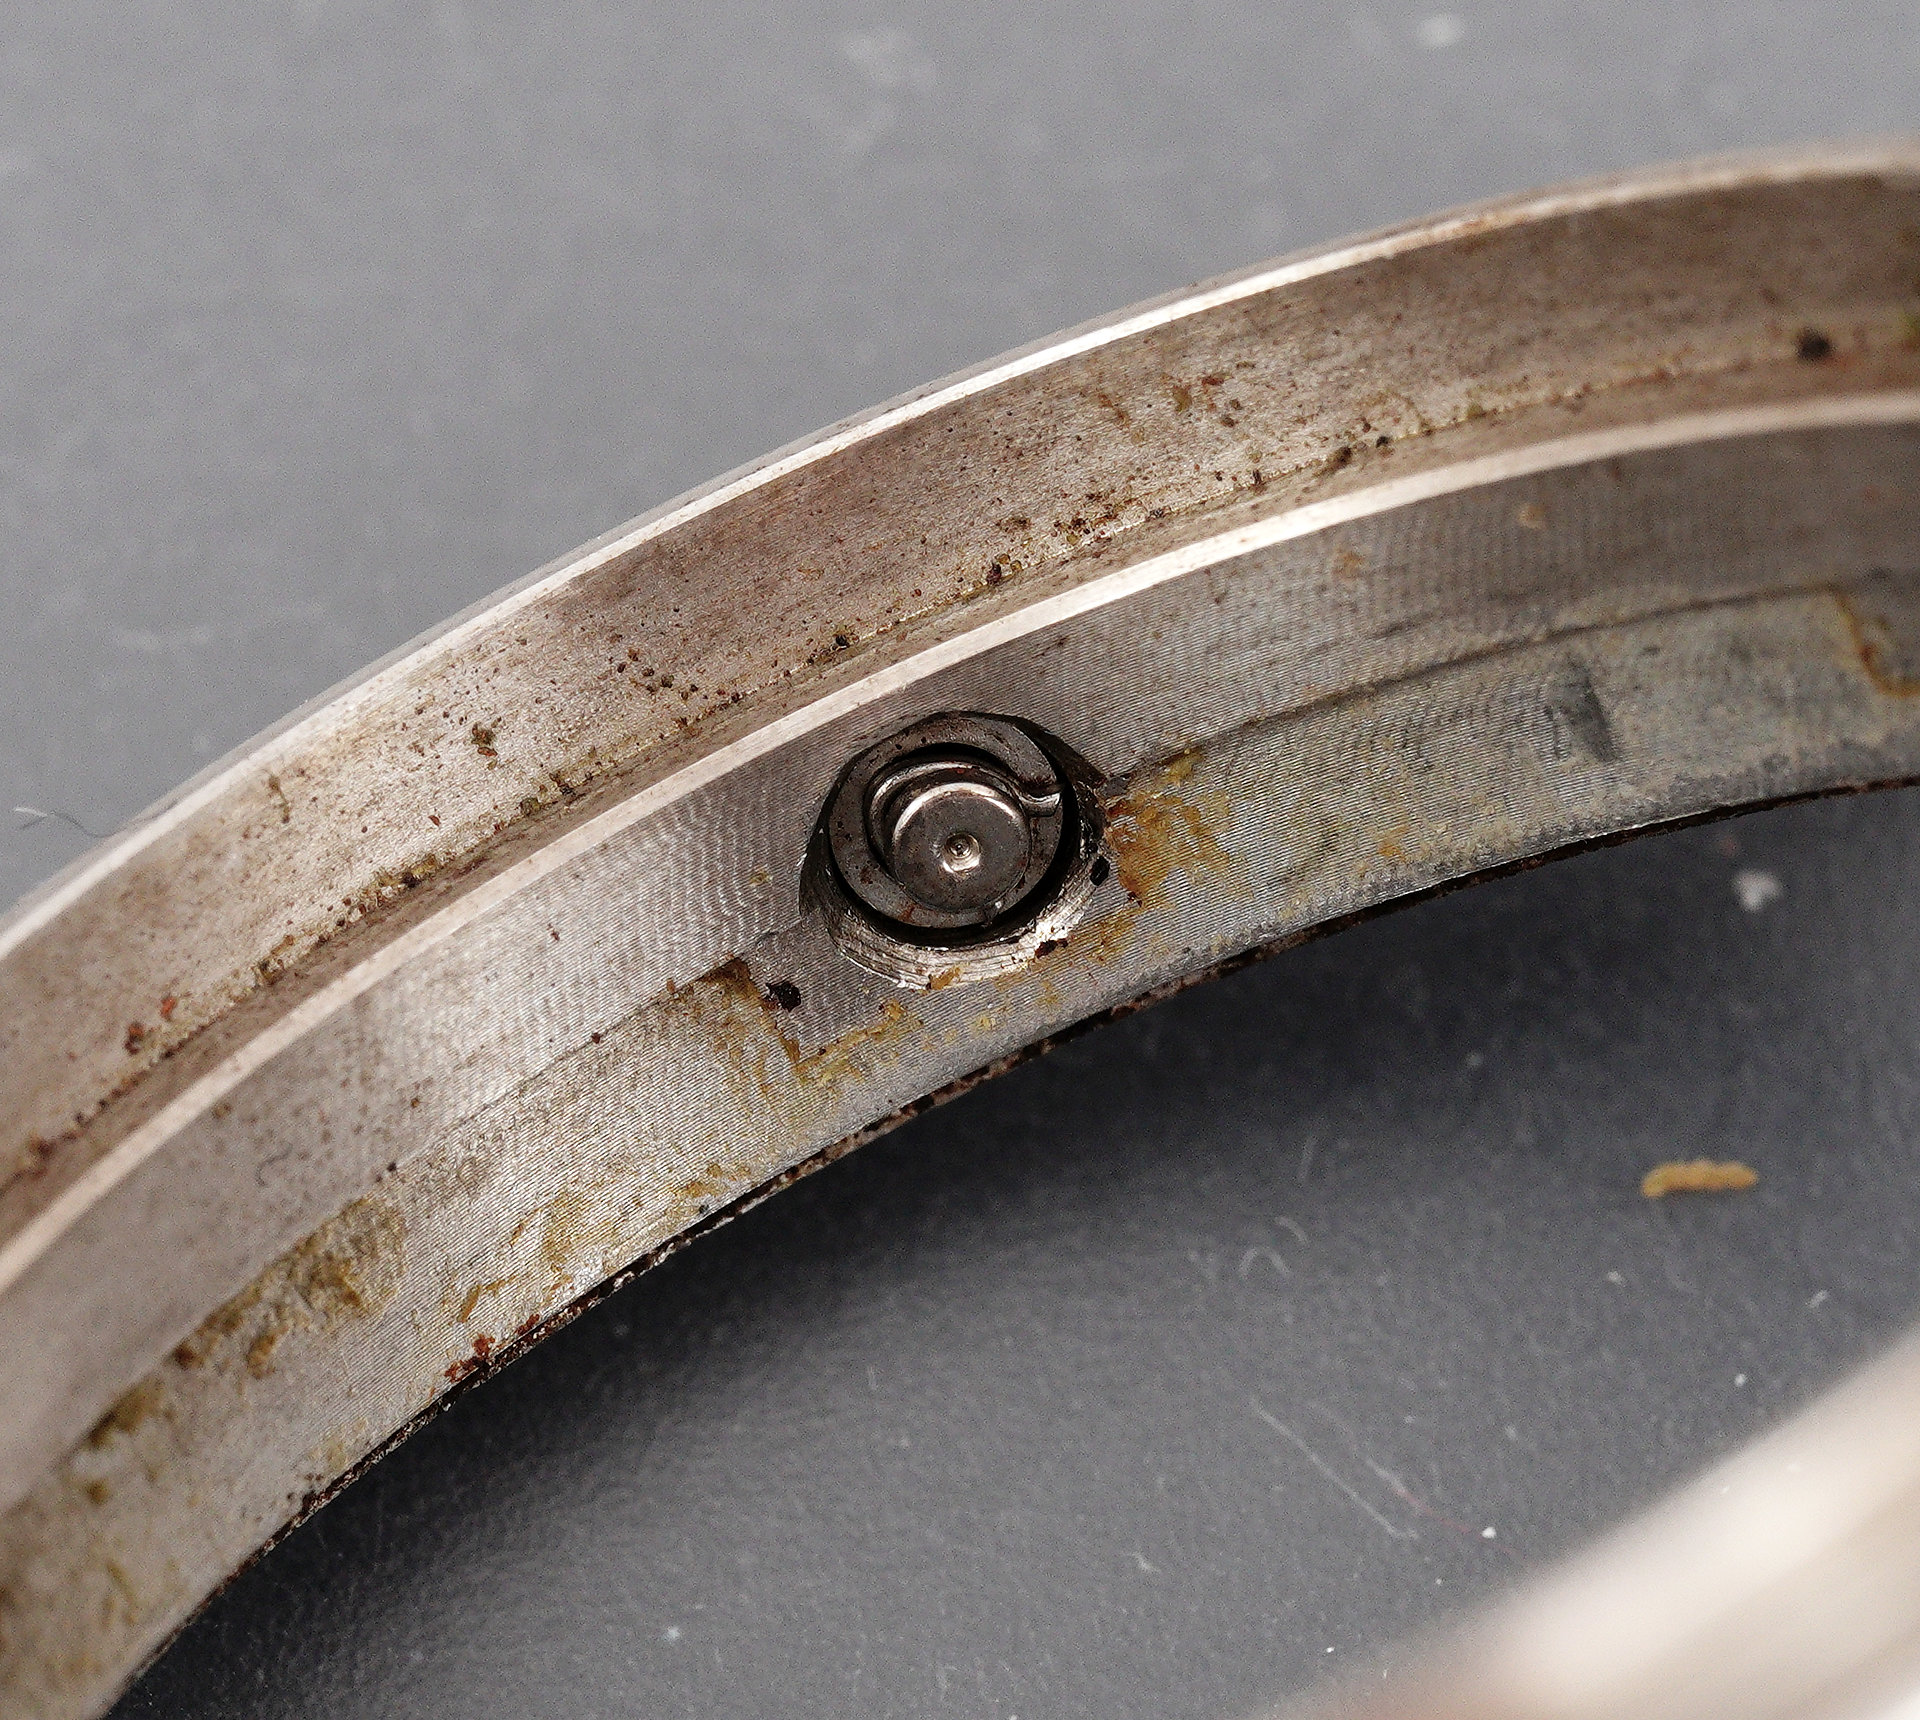
My paranoia about the consequence of losing parts that are bespoke to this model meant that I took additional precautions to avoid losing either one of the two c-clips securing the lap counter pushers. In this case, risk management extended to taping over the top of the case with Sellotape, the sticky side facing into the case so that when I pushed the c-clip from around the pusher end, it dropped onto the sticky stuff rather than bouncing off the hard surface of the bench top and into oblivion.

With the c-clips removed, however, the pushers showed no inclination whatsoever to budge. I’ve forgotten now how I persuaded them out of the case (perhaps the trauma has erased the experience from my mind) but eventually they did emerge.
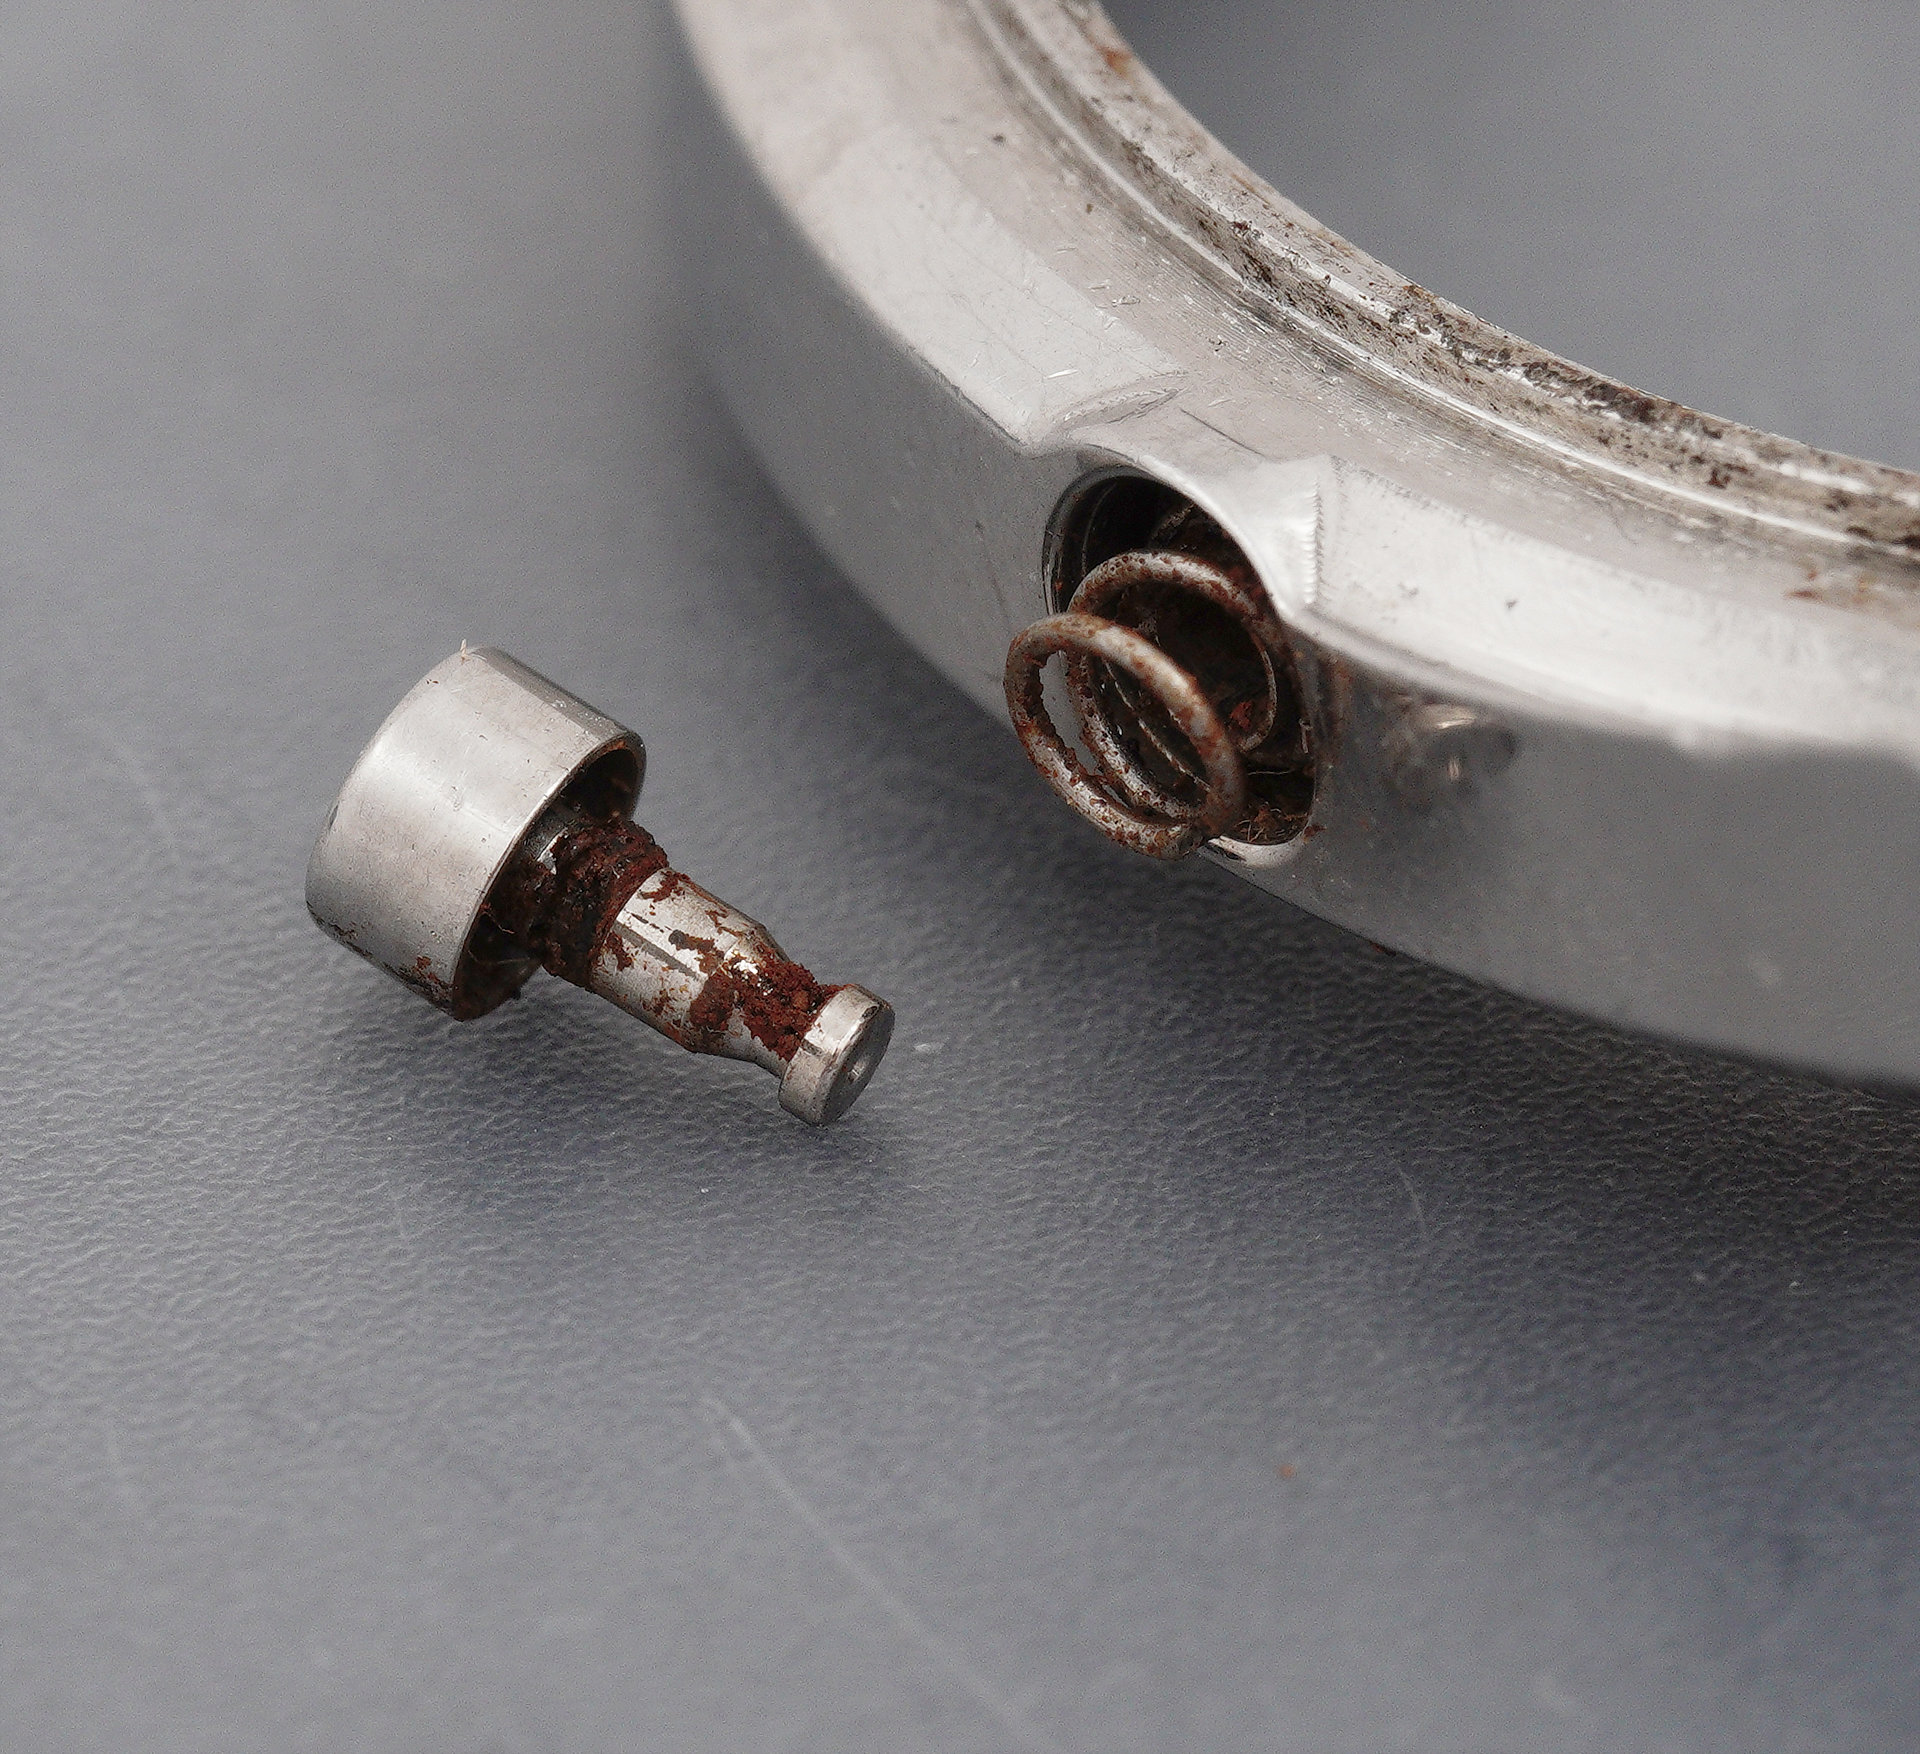
Their reluctance to emerge is evident both from the condition of the pushers but, in particular, the state of the interior of the pusher tube cavities.

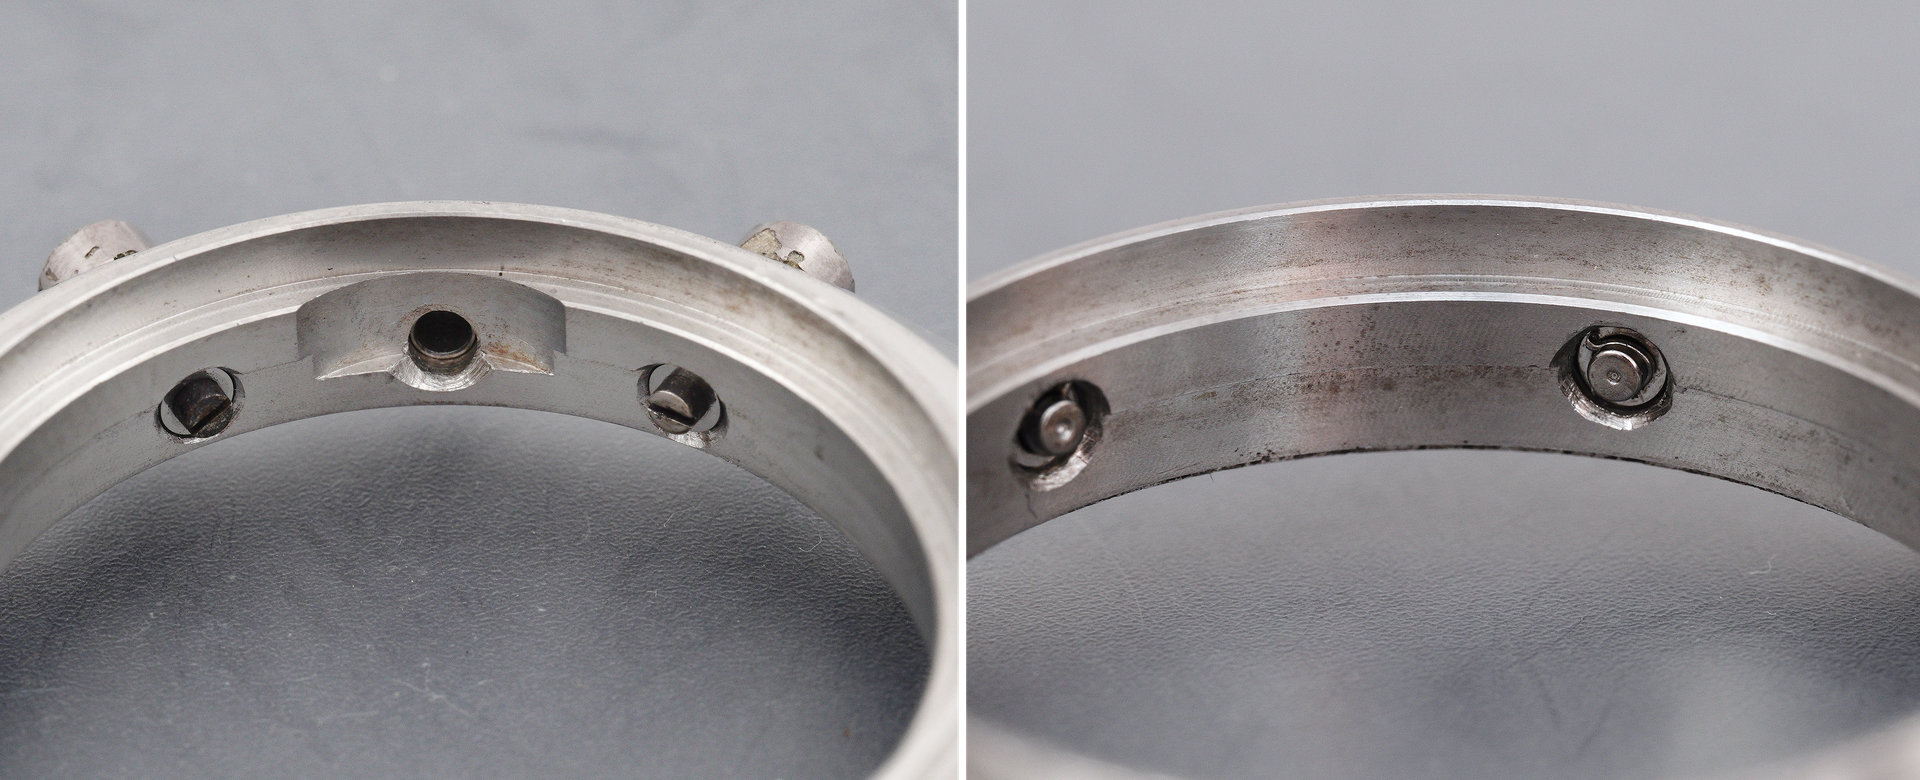
Needless to say (and I won’t bore you with the details), some time later, the pushers and case were fit to be reunited, with fresh gaskets all round. Interior shots of the right- and left-hand sides shows the progress that has been made compared to the ‘before’ photos above.
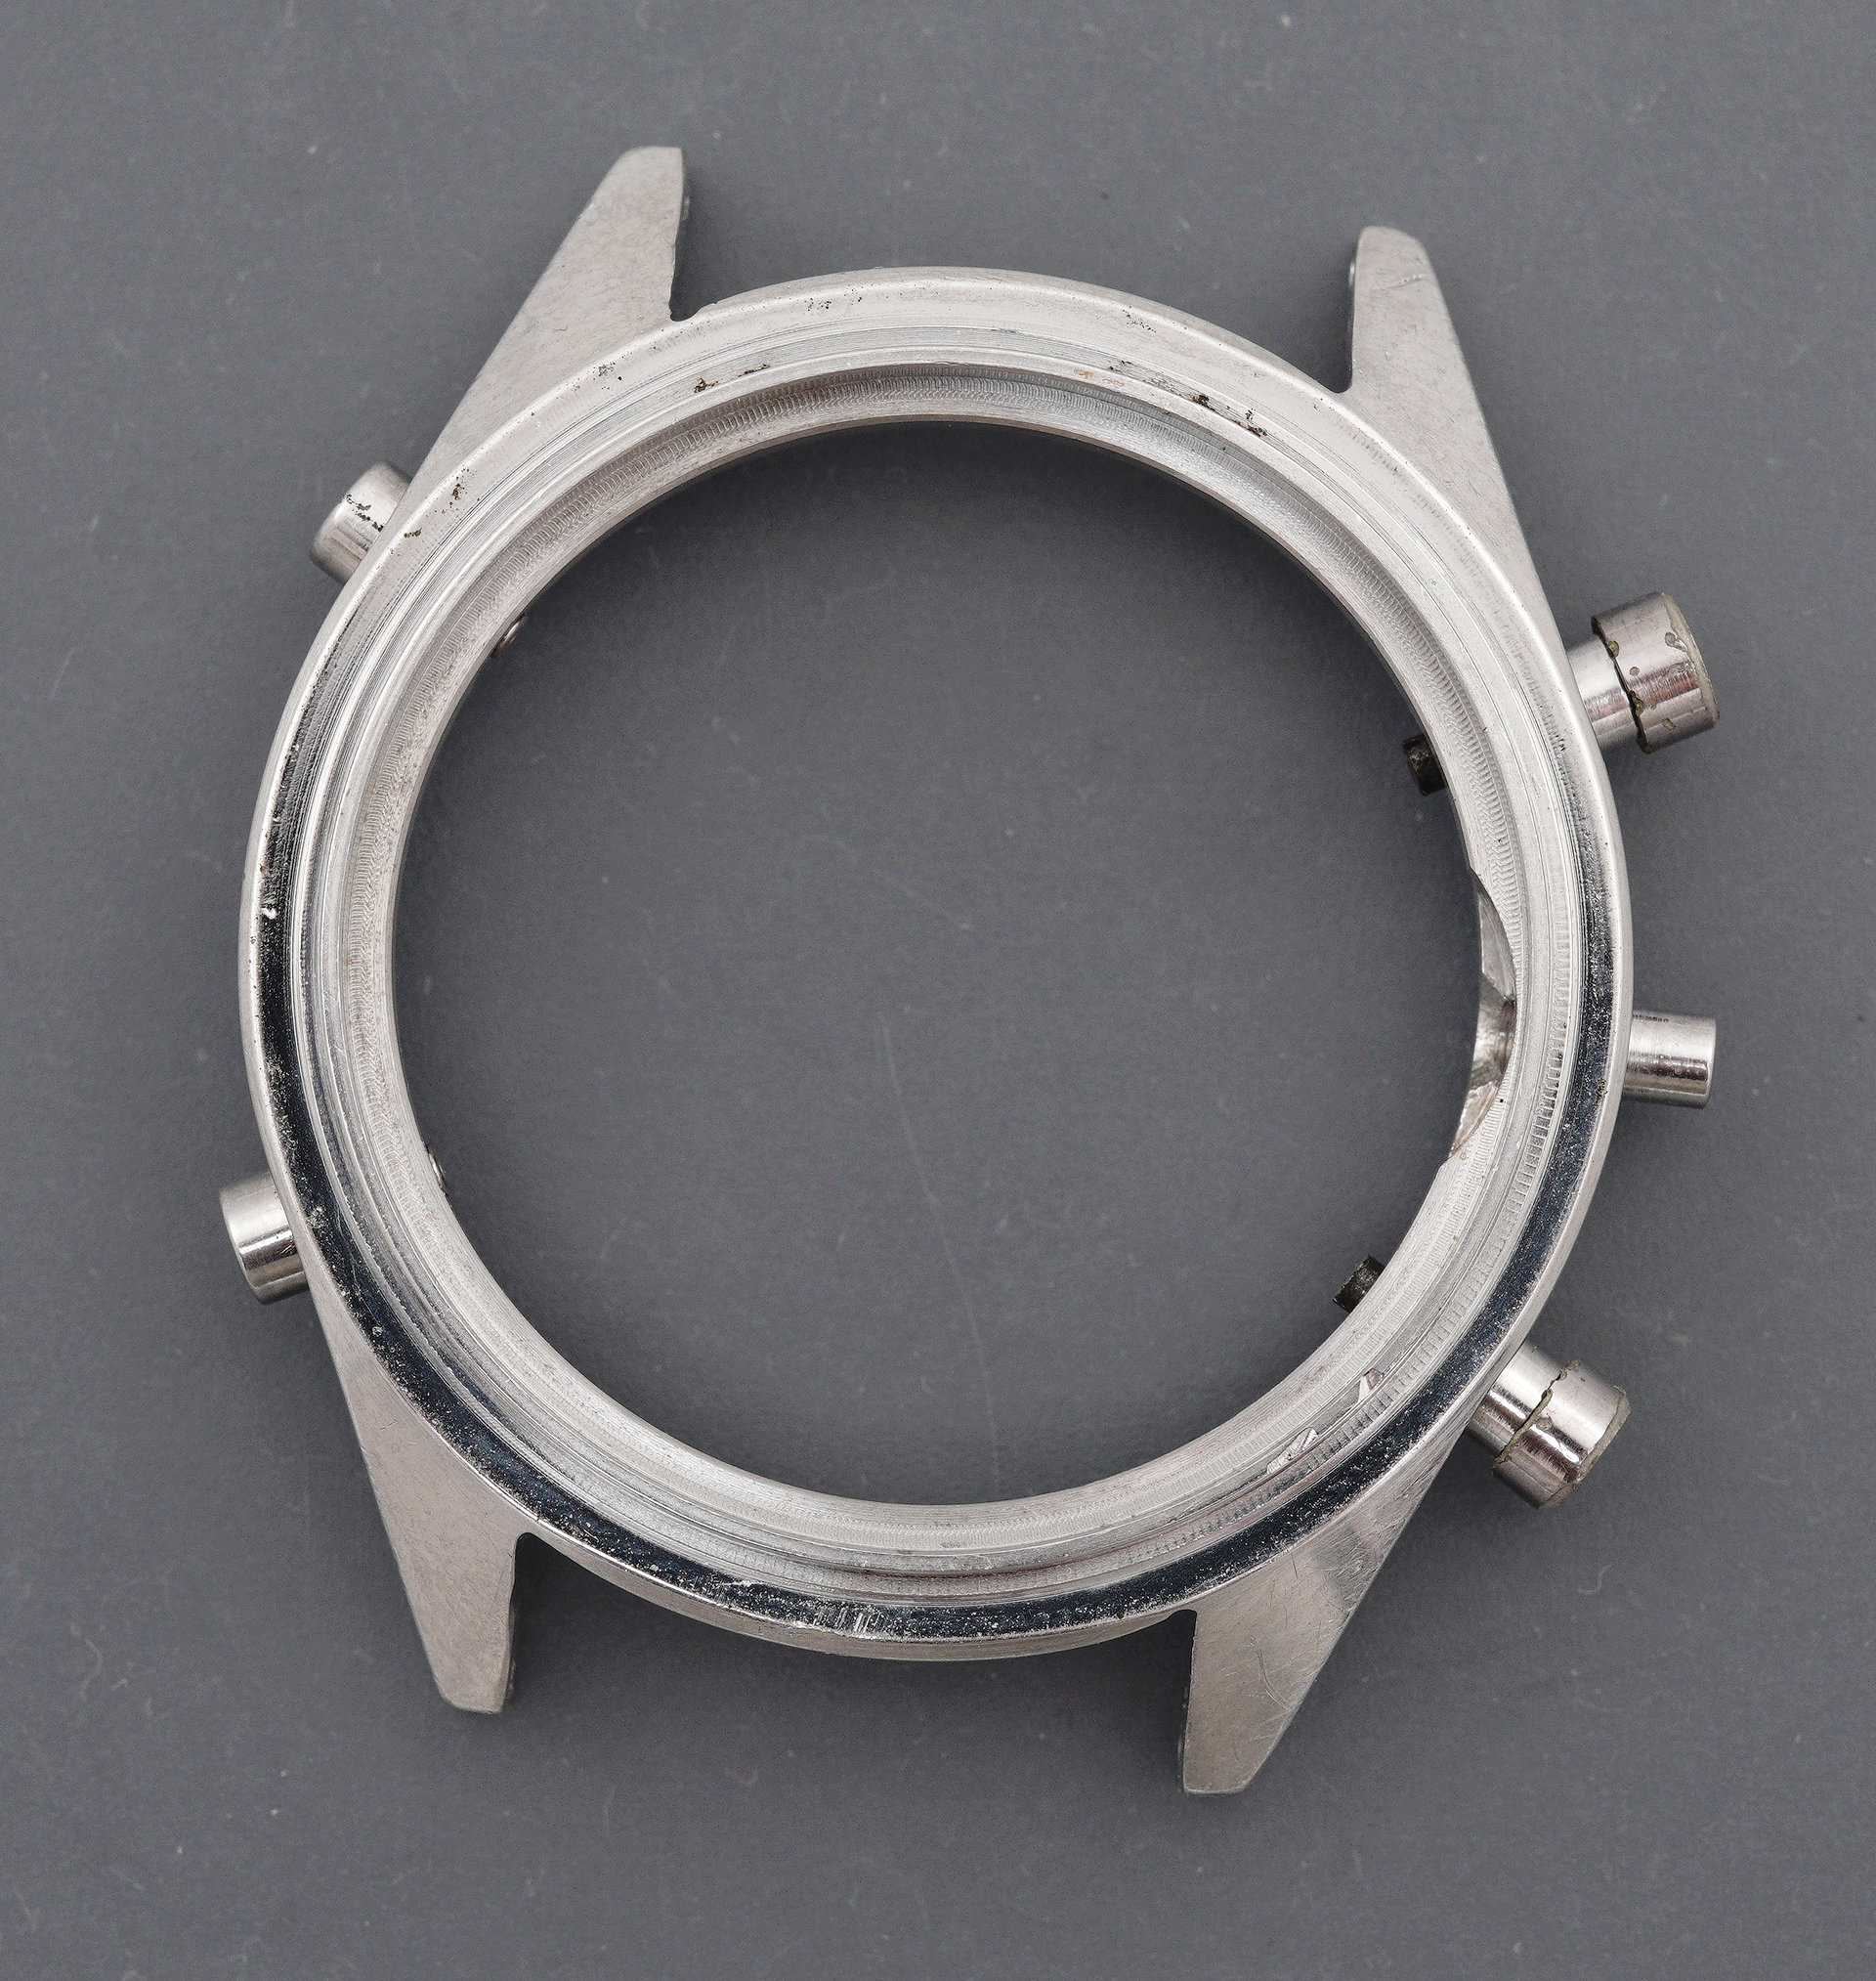
A bird’s eye view of the case with all four pushers refitted sets the scene in anticipation of the closing stages of the project.
We do, however, still have a number of hurdles to overcome, or at least stumble over. The first of these requires us to revisit the two rather sorry-looking lap counters. You will recall from earlier that the printed numerals on the left-hand disk were sitting higher than those on the right-hand disk in their normal ‘sitting comfortably’ state. The resting position of each disk is determined by the alignment of the triangular tooth of its jumper with one of the inner vertices of the star mounted on the back of each disk.

Closer examination of the front of the 10-lap counter revealed the reason for, if not the cause of, this misalignment.
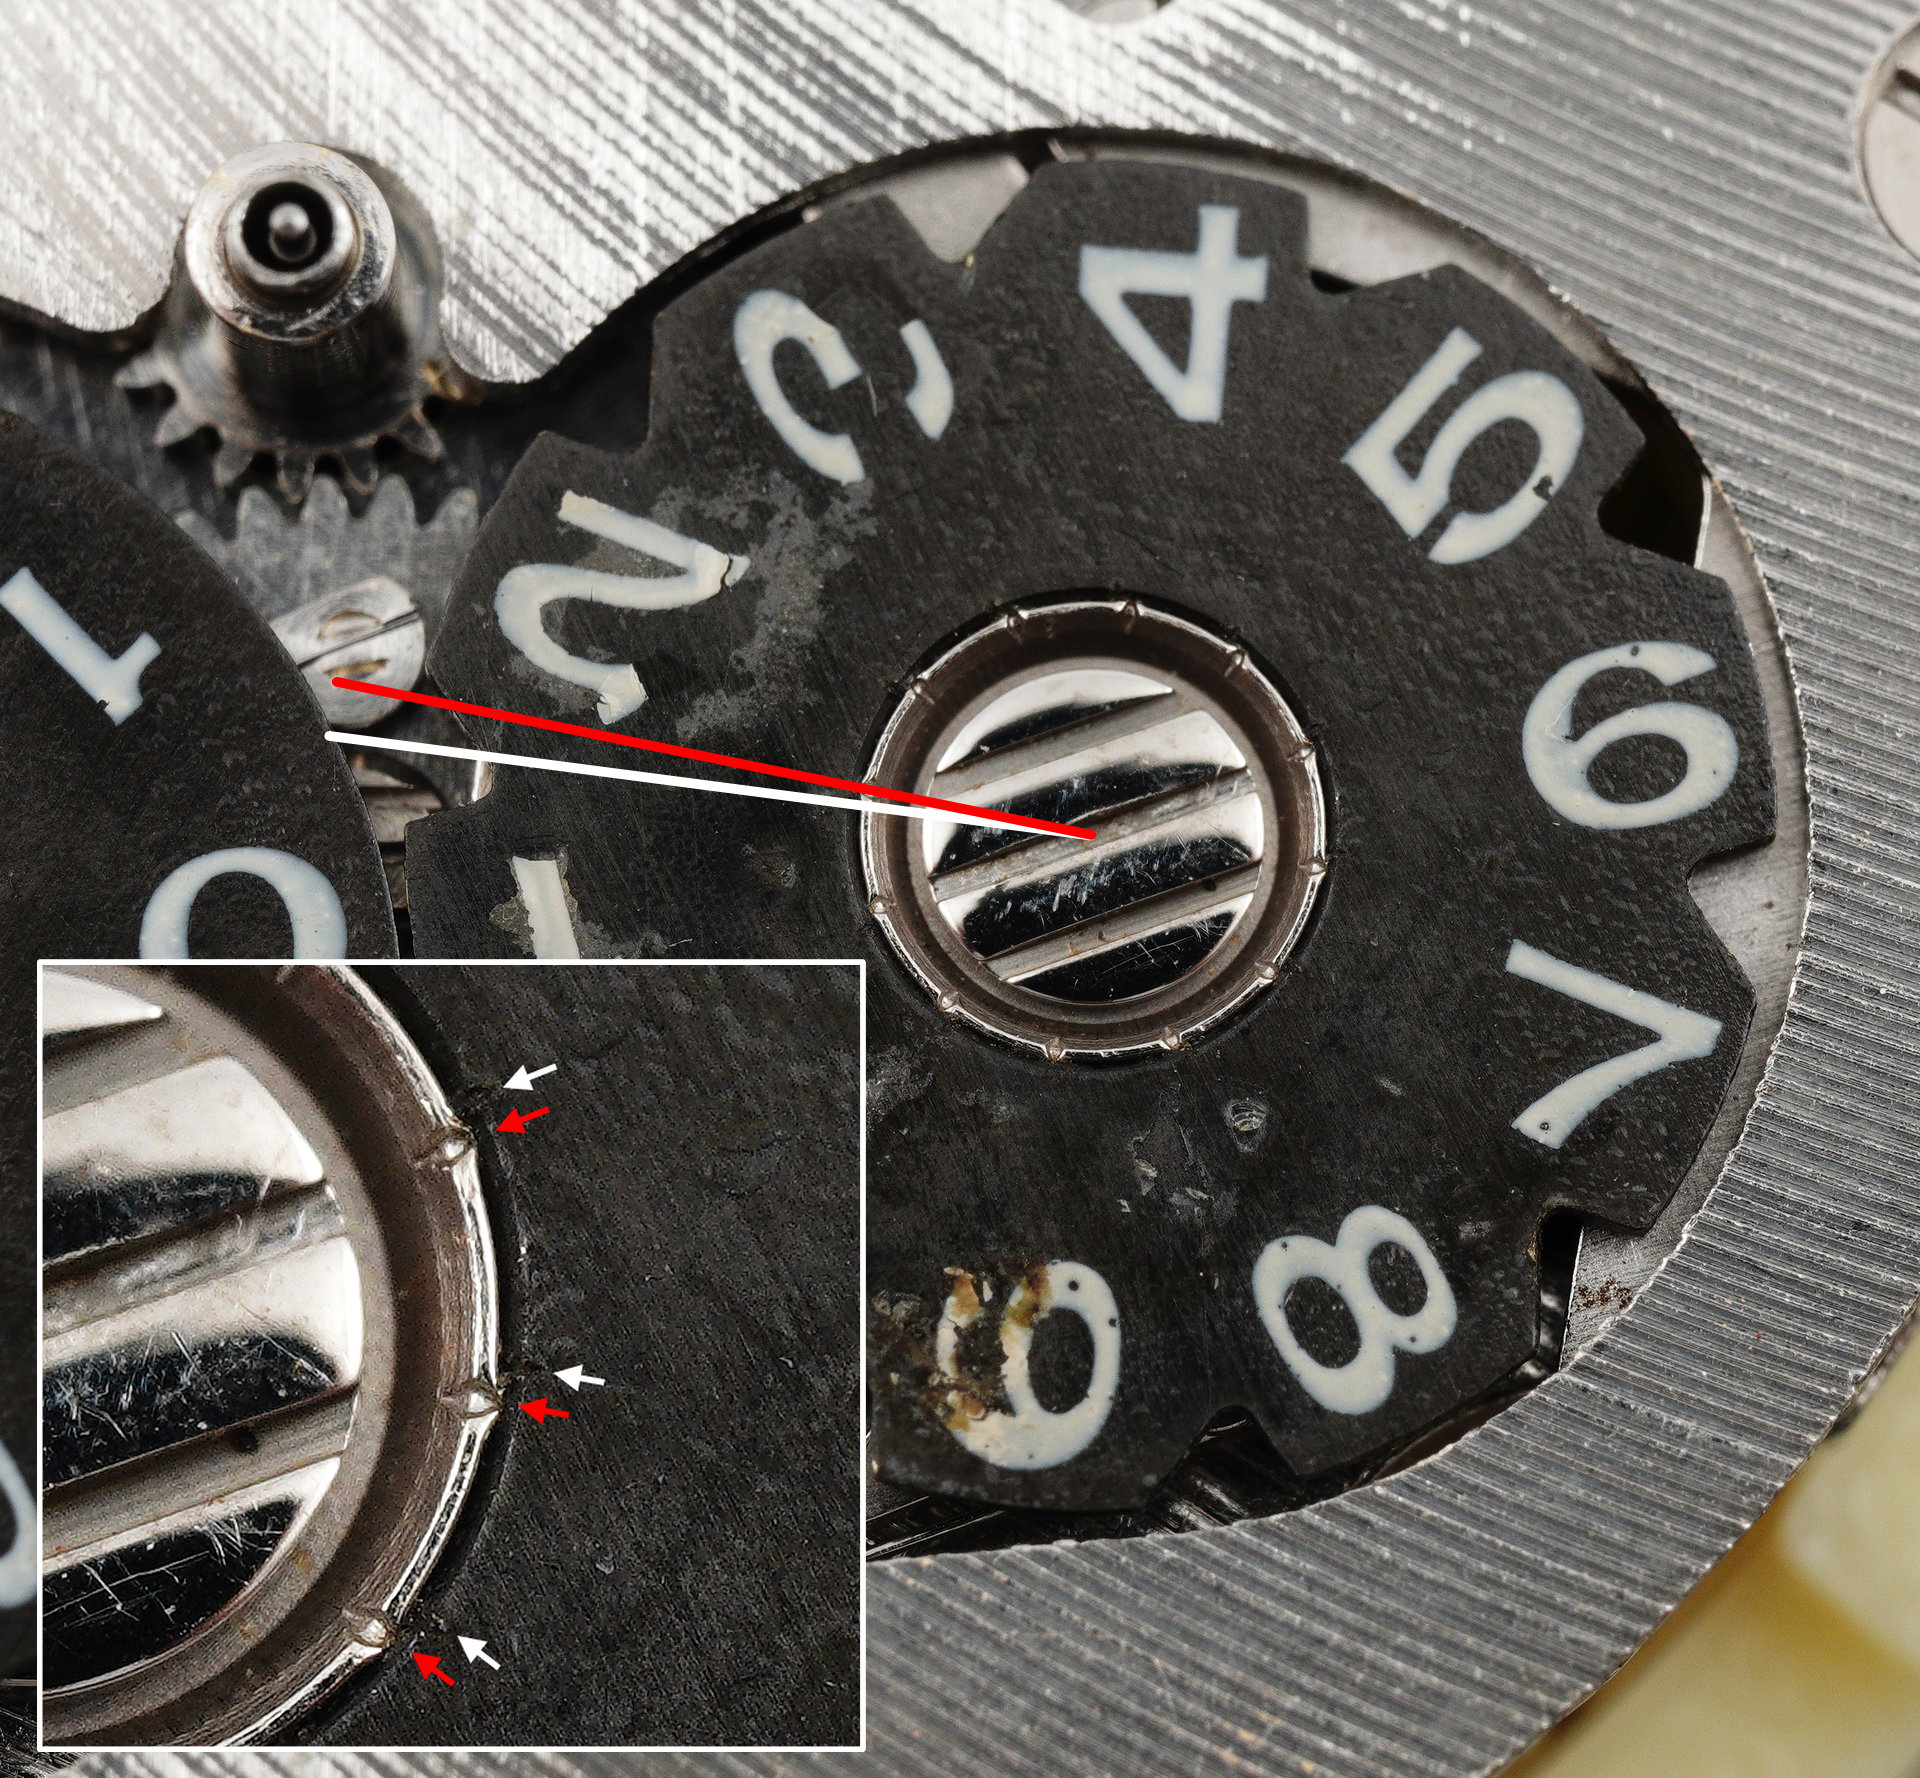
When these disks were originally manufactured, the star would have been staked to the disk and crimped to secure the fit. You can see twelve crimp marks around the circular lip in the centre and if you look carefully (see the inset, lower left), you should be able to make out their partner marks on the black surface of the disk. These marks should be aligned but they are clearly not. At some point in its history, the star has been forcibly rotated relative to the disk, resulting in the disk sitting out of alignment by about 5 degrees. I can only speculate about how that might have happened because the two parts appear to me to be well and truly at one and there is no way I can see to correct the misalignment without inflicting damage either to the disk or, especially, to the print. Perhaps someone tried to force the advance of the counter manually as the date driving wheel was in the process of doing the same. Whatever the reason, this did not happen on its own. It was likely the result of an intervention from someone with a very limited sense of mechanical sympathy.
The main source of initial dissatisfaction with this issue is aesthetic: the misalignment creates a disturbance in the force. Unfortunately, there is an operational consequence as well: the single-lap counter has a triangular-shaped arm emerging from its edge between the 0 and the 9 and this engages with one of the recesses on the edge of the 10-lap counter once every rotation. That engagement occurs either if you press the upper-left button repeatedly until the arm locates into a recess, or if you wait for the calendar function to do the same. In either scenario, that happens once every full rotation of the unit-counter disk. The operational problem is that when the triangular arm moves into one of the recesses, it fouls because the recess is not sitting where the arm needs it to be, causing the two disks to lock together (the white arrow in the photo below highlights a point of contact where there should be none). The disks can be freed by lightly pressing the lower left advance button (and hence jiggling the 10-lap counter to free it from its contact with the other disk) but if left to their own devices, the locked disks will cause the watch to stop once every 10 days.
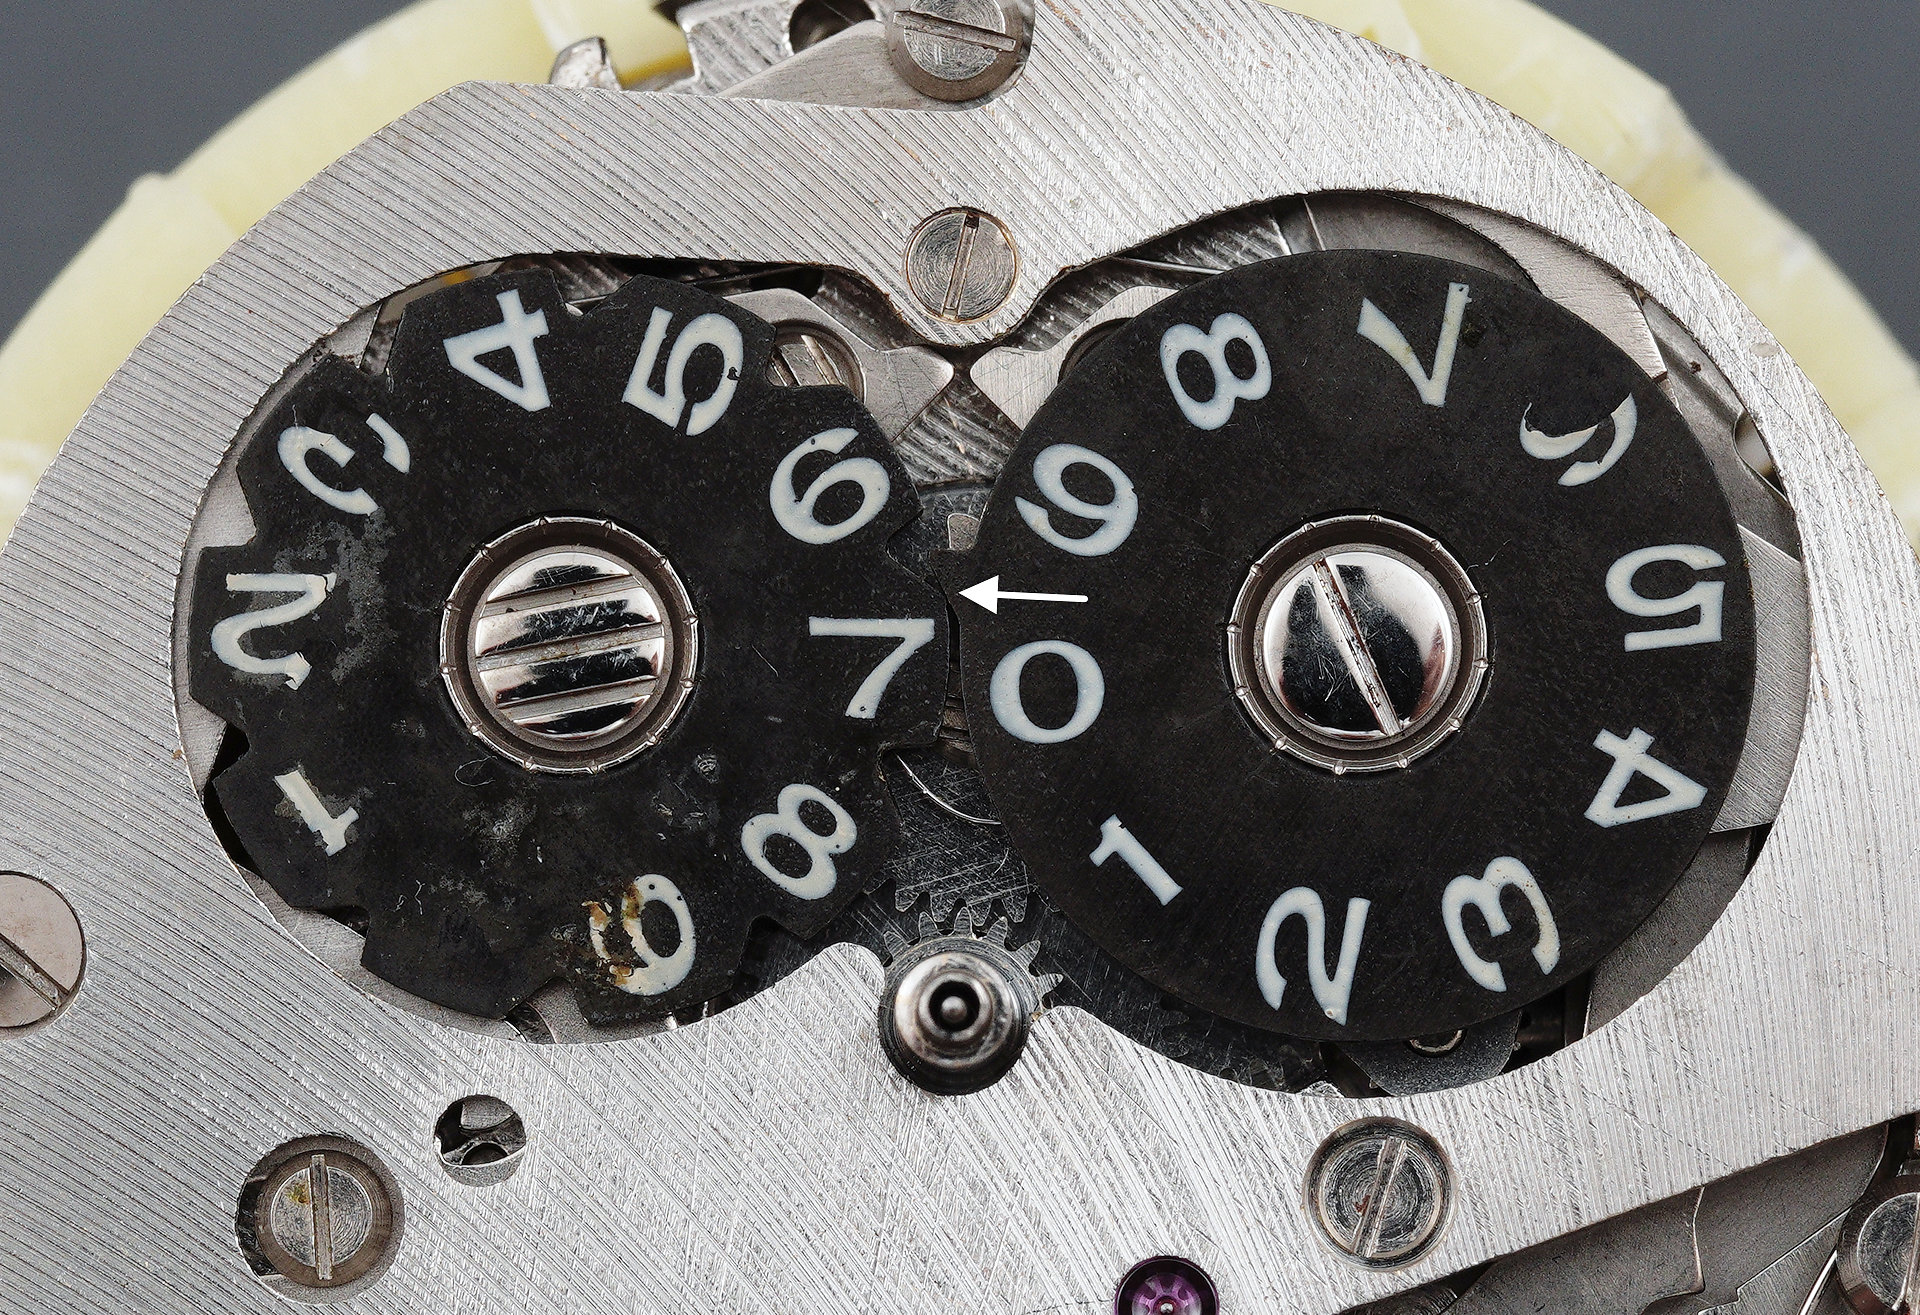
There is no remedy to this issue other than to view it as a quirk and anticipate the glitch on the 9th, 19th or 29th of each month.
Time to tackle the dial. Of all of the vital, forward-facing components to have been spritzed with penetrating oil, the dial faired relatively well and tolerated my mop-up operation quite well, barring one or two small areas the full extent of whose delicate state I only discovered as I was gingerly working my way from splodge to splodge: specifically, some of the tick marks on the sub-dial between the 5 and 10 and one or two just shy of the 20 became casualties of the process. You will also notice that the plating on the 5 marker had been irretrievably damaged and flakes lifted away with the oil droplets as I cleaned that marker. All of the other markers tolerated the cleaning process without protest.
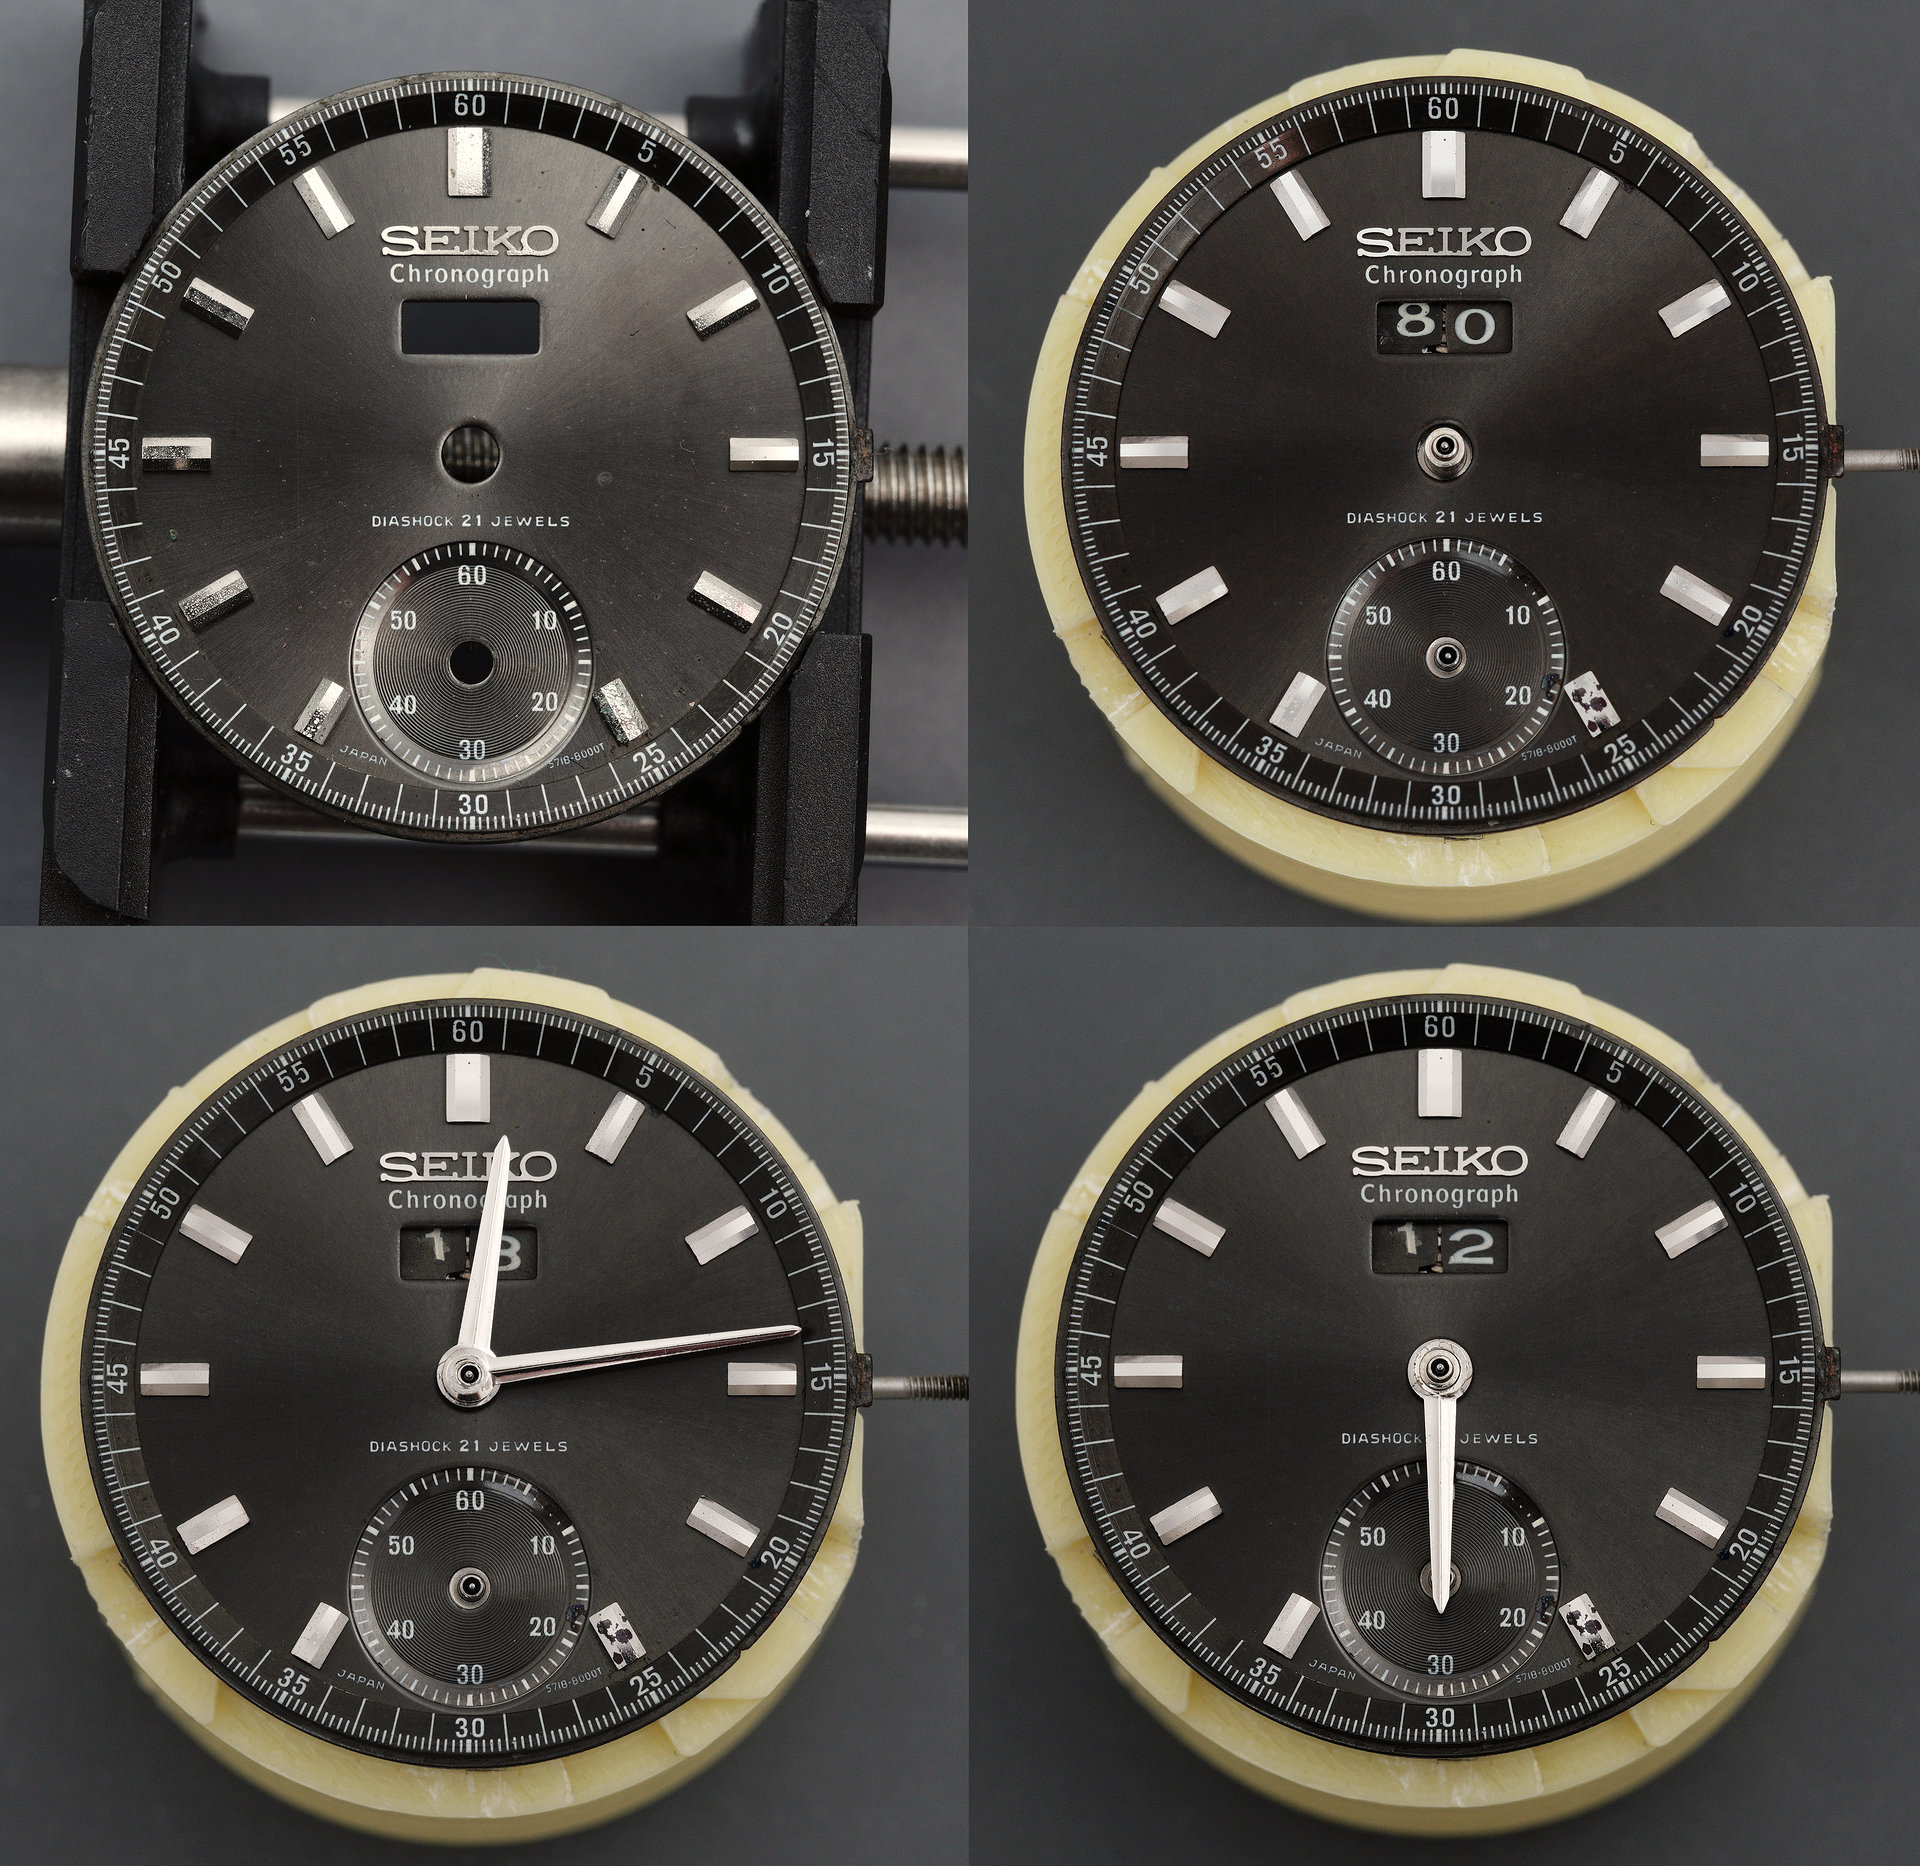
The image above starts with the uncleaned dial, top left, and then works from there to the hands installation, following the clean-up (top, right), fitting the hour hand (bottom, right) and then the minute hand (bottom, left).
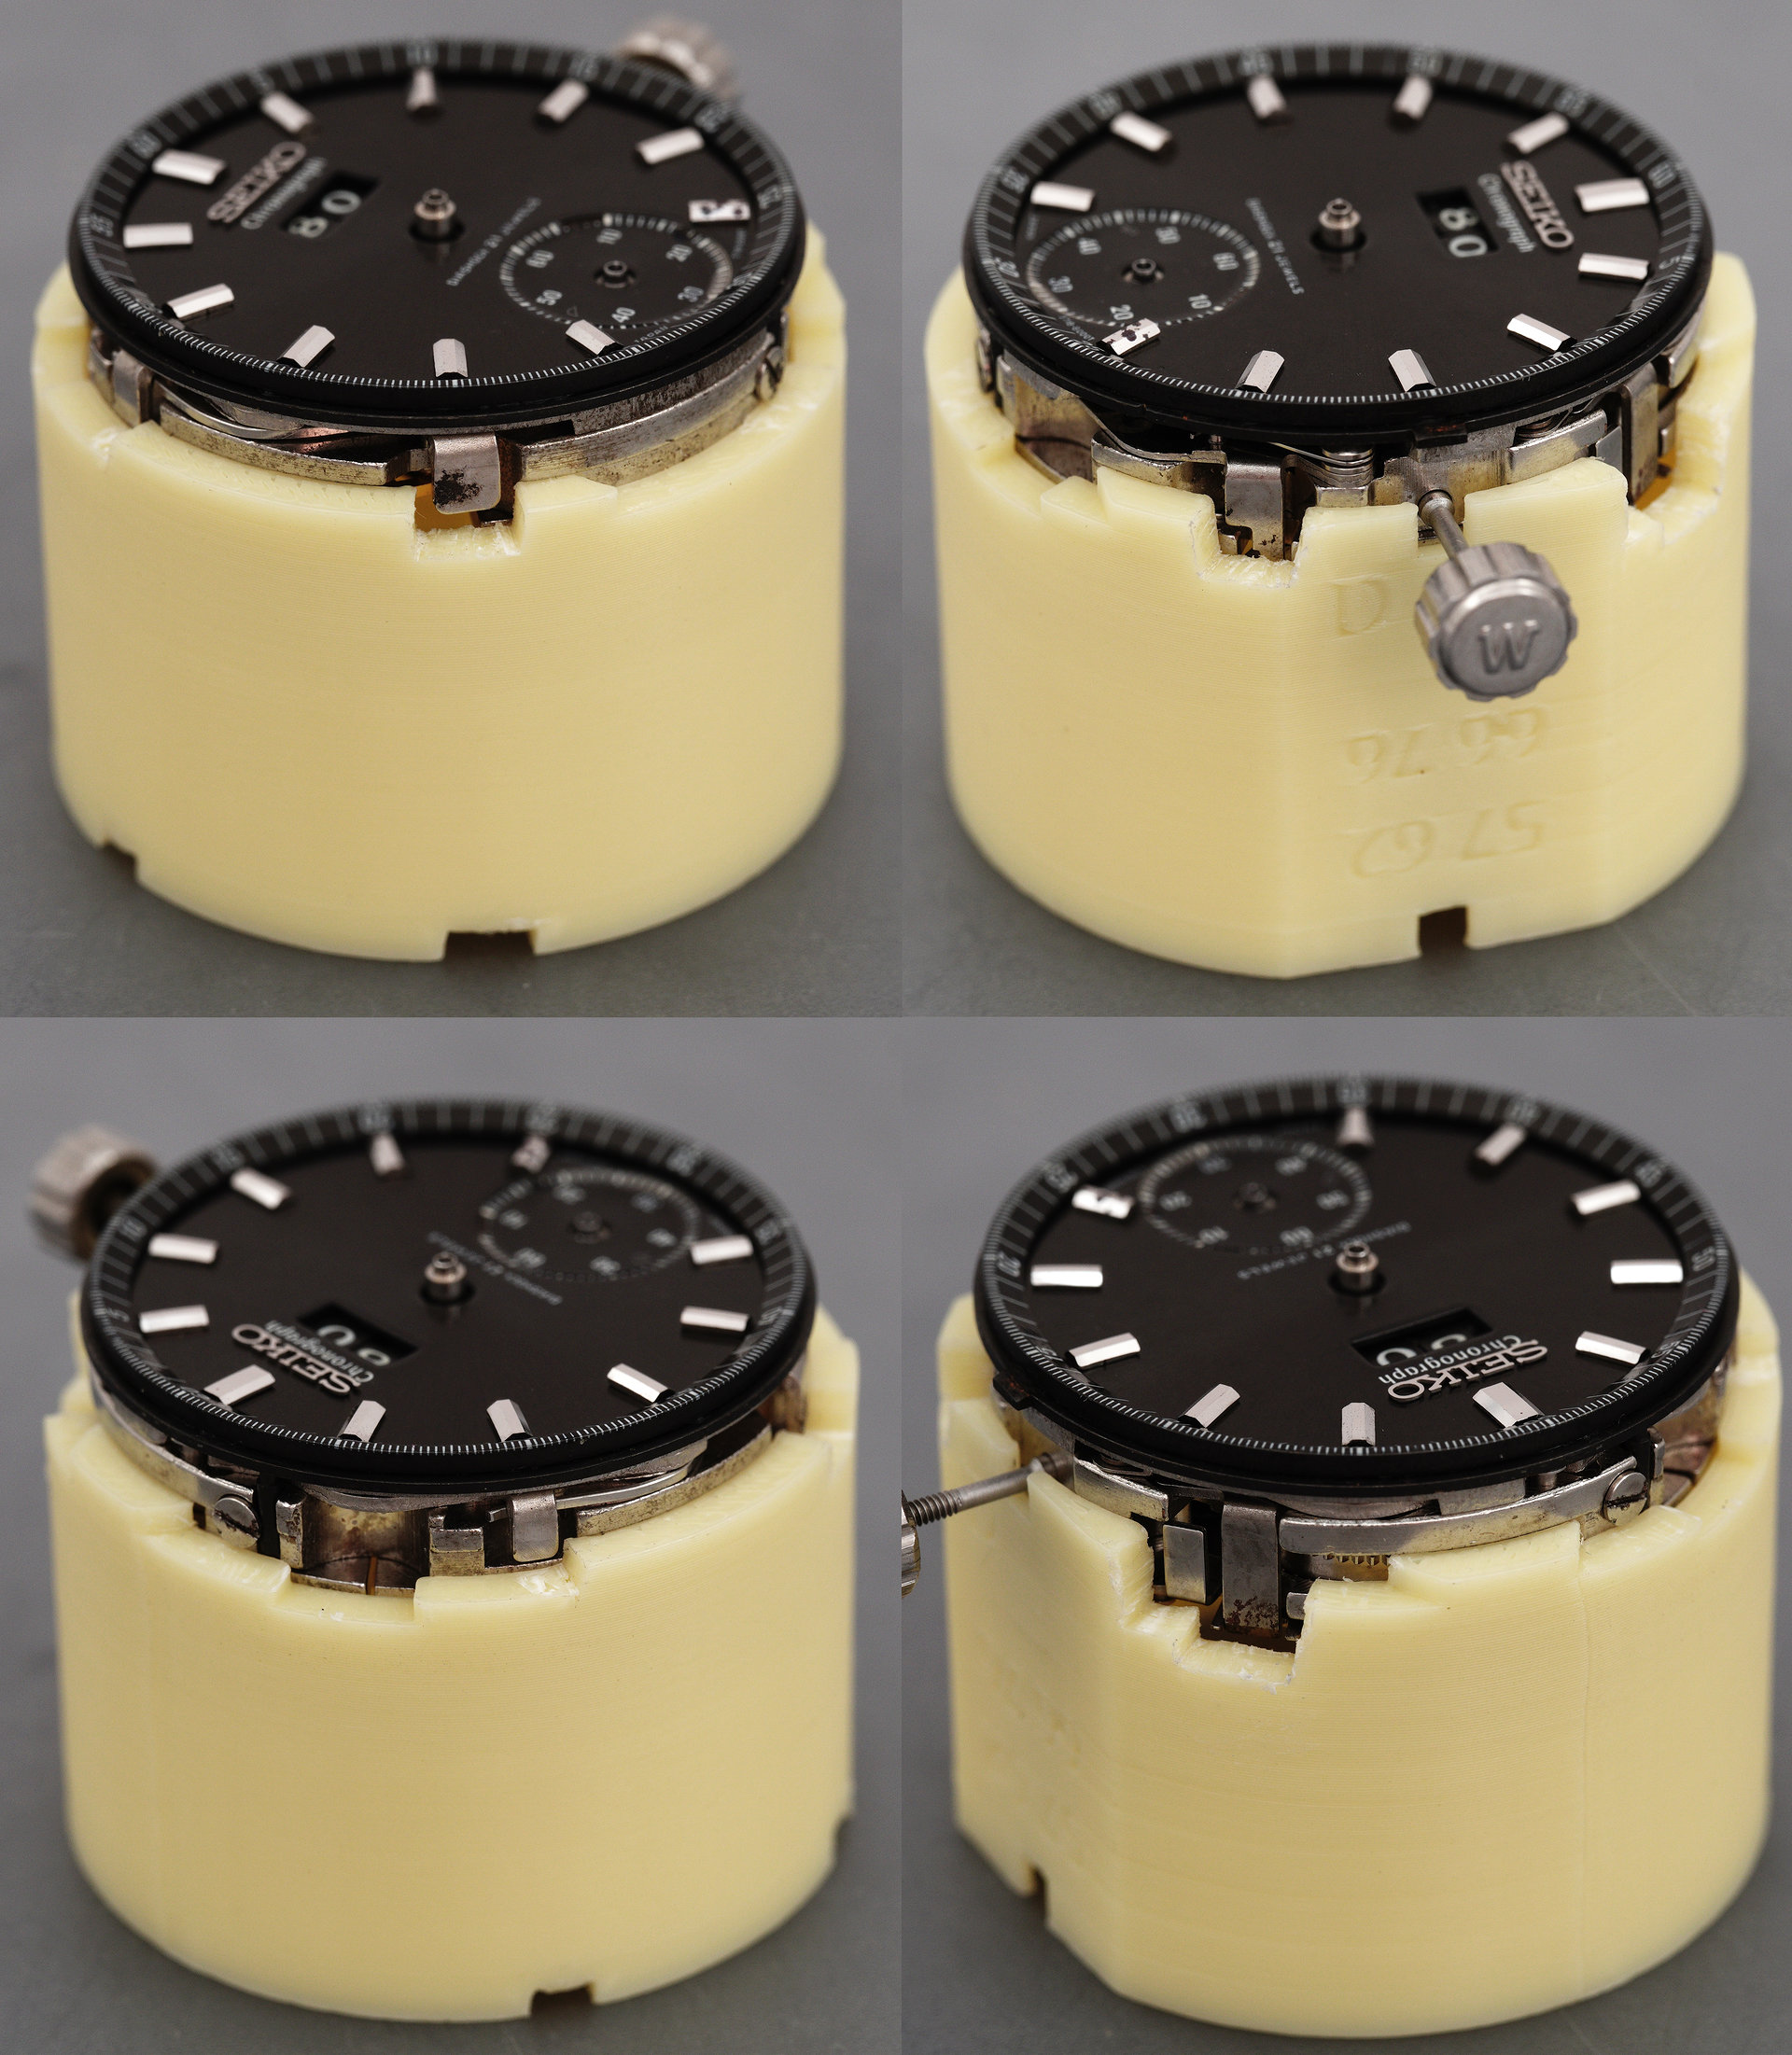
Sidebar: The importance of having a stable platform upon which to work on the movement and then test it with the dial in place prompted an ongoing series of iterative modifications to my 3D-printed 57-/62-/66-/76-series movement holder to accommodate all of the additional levers and protrusions present in this calibre compared to the other 57-series movements. The result was a rather extraordinary skyline of dips and escarpments carved into the existing profile.
Fitting the hour and minute hand sits squarely in the comfort zone and for which correct alignment does not present particular challenges. However, the hands that are devoted to the timing functions of any chronograph need extra special care with their alignment to ensure that they sit bang on with their zeroed positions when the chronograph is reset. Before being in a position to worry about alignment, both the chronograph seconds and elapsed minute hands needed some tender loving care to restore their cosmetics to something approaching presentable. The problem with both hands was that original off-white paint had discoloured, and then crumbled and neither were in a state suitable for re-installation. The owner of the watch had supplied a new replacement chrono seconds hand and I was happy to use that (although it was a touch too long and would need trimming slightly). The elapsed minute hand though is a part for which no substitute is, or was, or would be available and so I quickly realised that I would need to strip off the old paint and repaint it to match the colour of the chrono seconds hand. This turned out to be an extremely time-consuming process involving purchase of an assortment of different matt acrylic paints in different hues, experiments with the effects of trace amounts of tints to alter the colour and then further experiments with application techniques to leave a finish and coverage that resembled the original. I left the paint to dry for 24 hours before then applying a layer of satin varnish, thereby hopefully achieving the correct quality of light sheen to the paint. That process is summarised pictorially as follows:
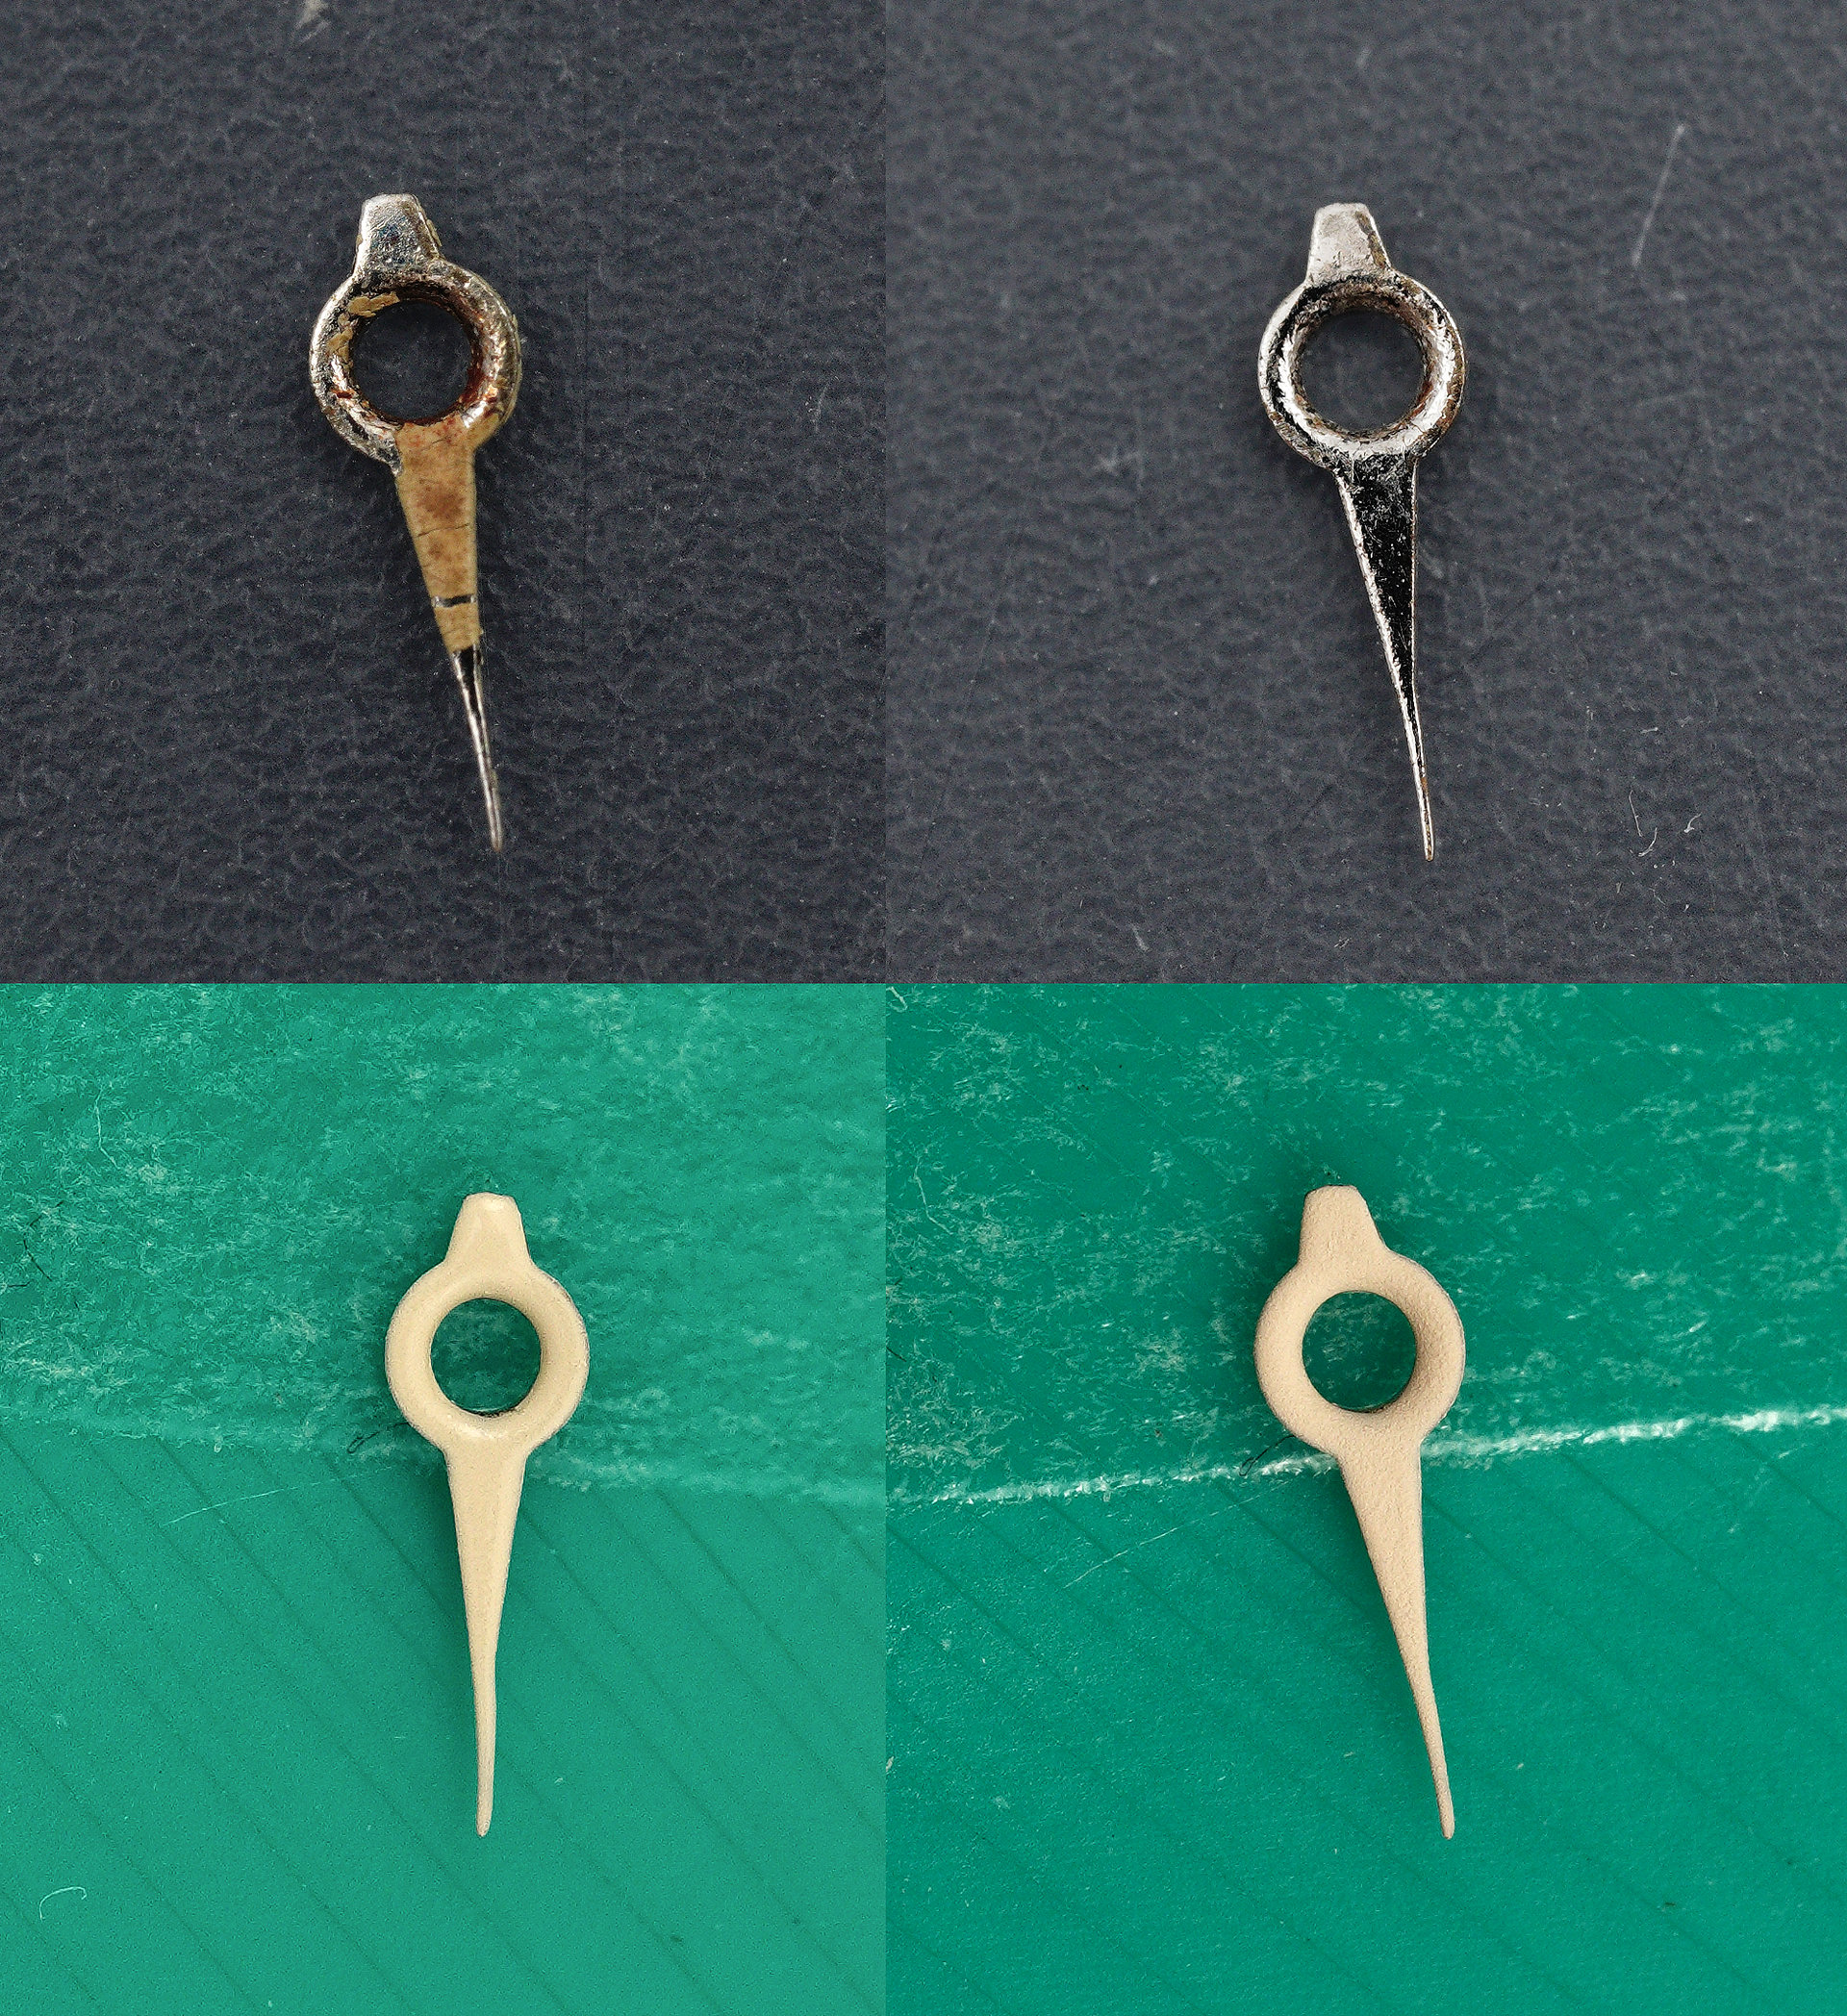
The paint application process involved using the tip of an oiler dipped into the paint (and subsequently the varnish) and then dragging the droplet across the surface of the hand, following which any temptation to further interfere needed to be resisted at all costs. Once the paint and then varnish had fully hardened, I fitted the seconds hand (trimmed), then the elapsed minute hand and finally the co-axially-mounted running seconds hand.
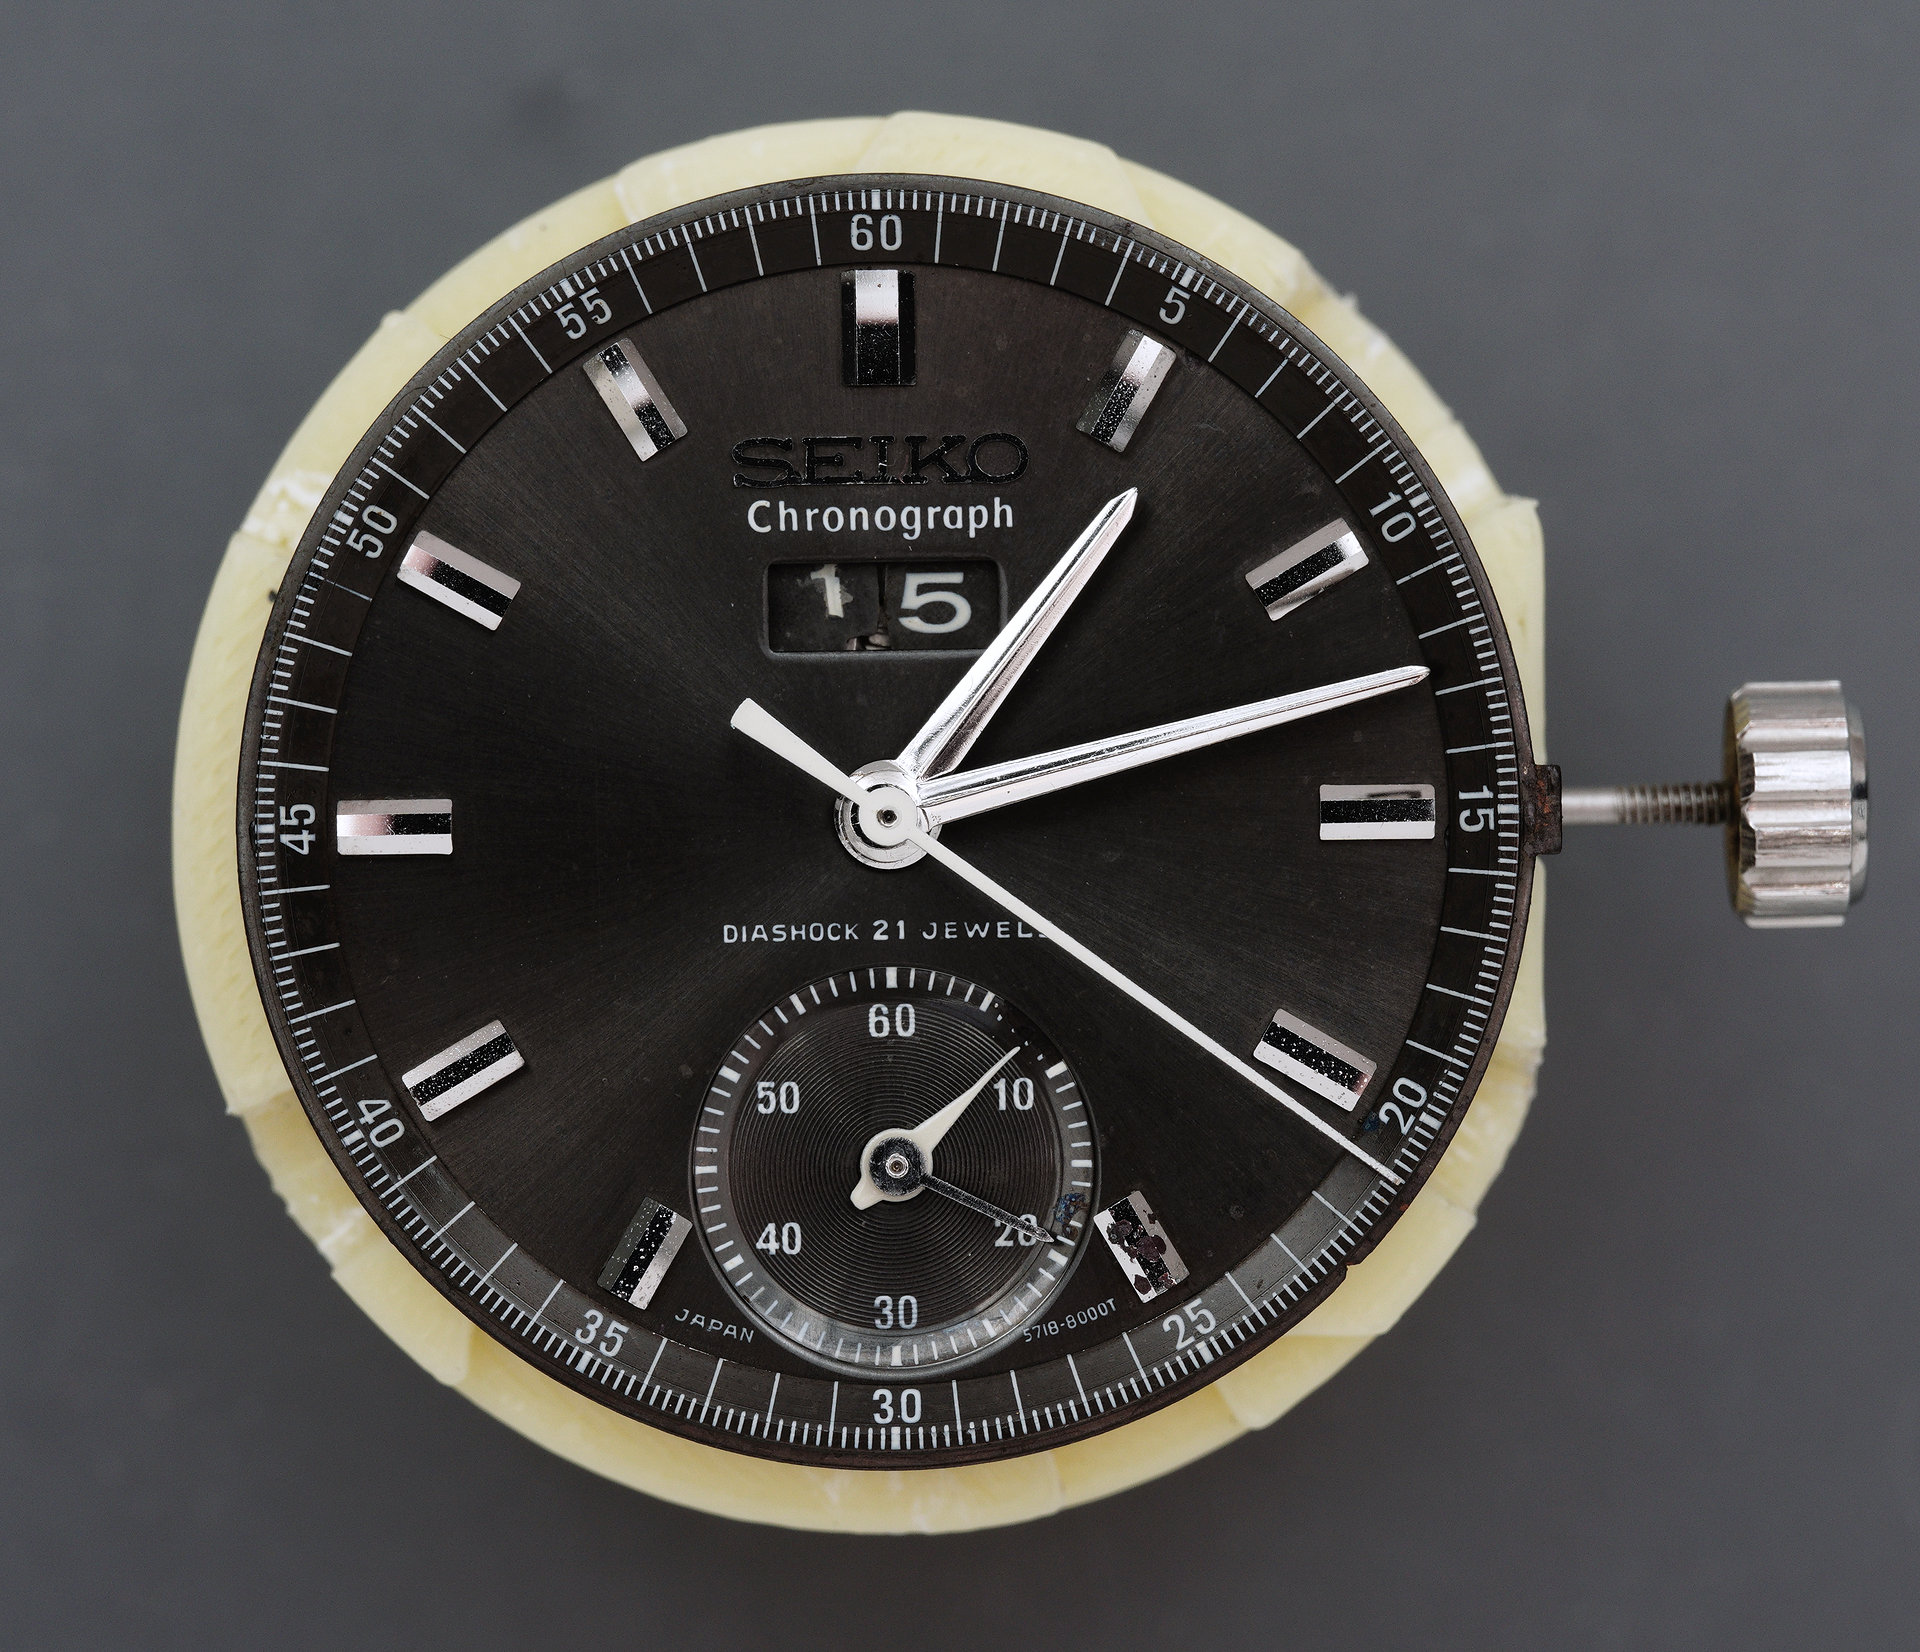
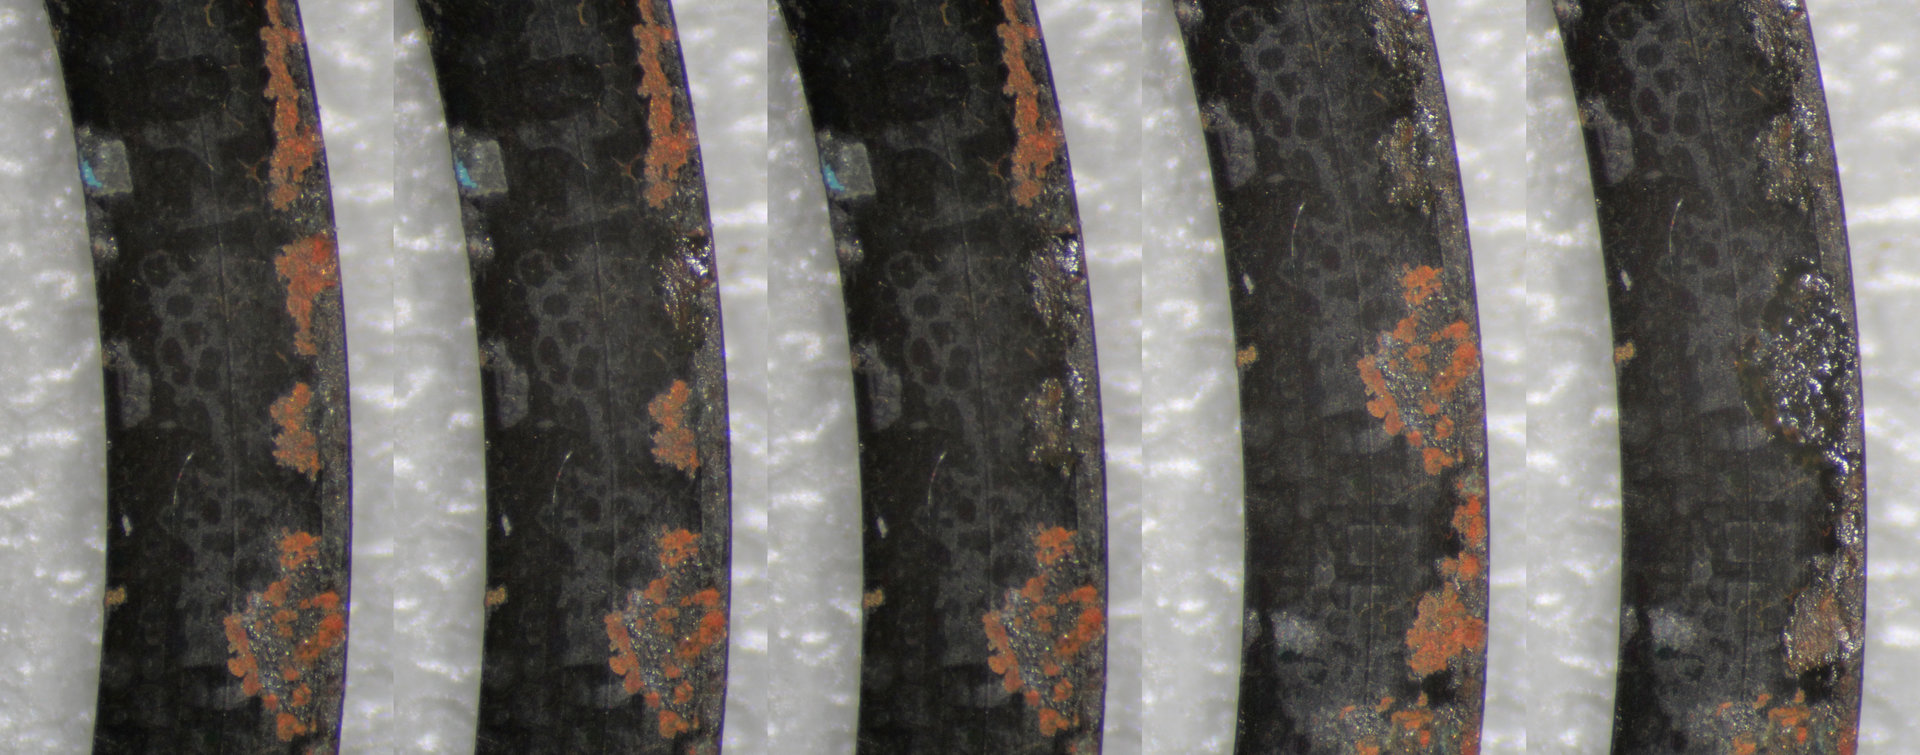
There is one final cosmetic niggle to which I feel I have to attend: the ruined tachymeter ring could be rendered ever so slightly less ruined if I could purge it of most of the ‘rust’ spots where the copper in the brass had leeched through the anodised surface. The idea to which I referred earlier to make these patches of orange/brown less conspicuous relied on the correctness of my assumption that it was indeed copper. There are two products available to either darken or blacken copper: one is Liver of Sulphur and the other is a product called Brass Black whose active compound is selenious acid. I experimented with both and the one that worked the best was Brass Black. My approach required lightly dabbing the affected areas with the end of a sharpened piece of pegwood dipped in the solution and once the desired effect had been achieved, cleaning the treated area of any remaining solution. You can see the effect in this series of photographs taken under the stereo microscope.
With that finished, the tachymeter ring could be reunited with the case.
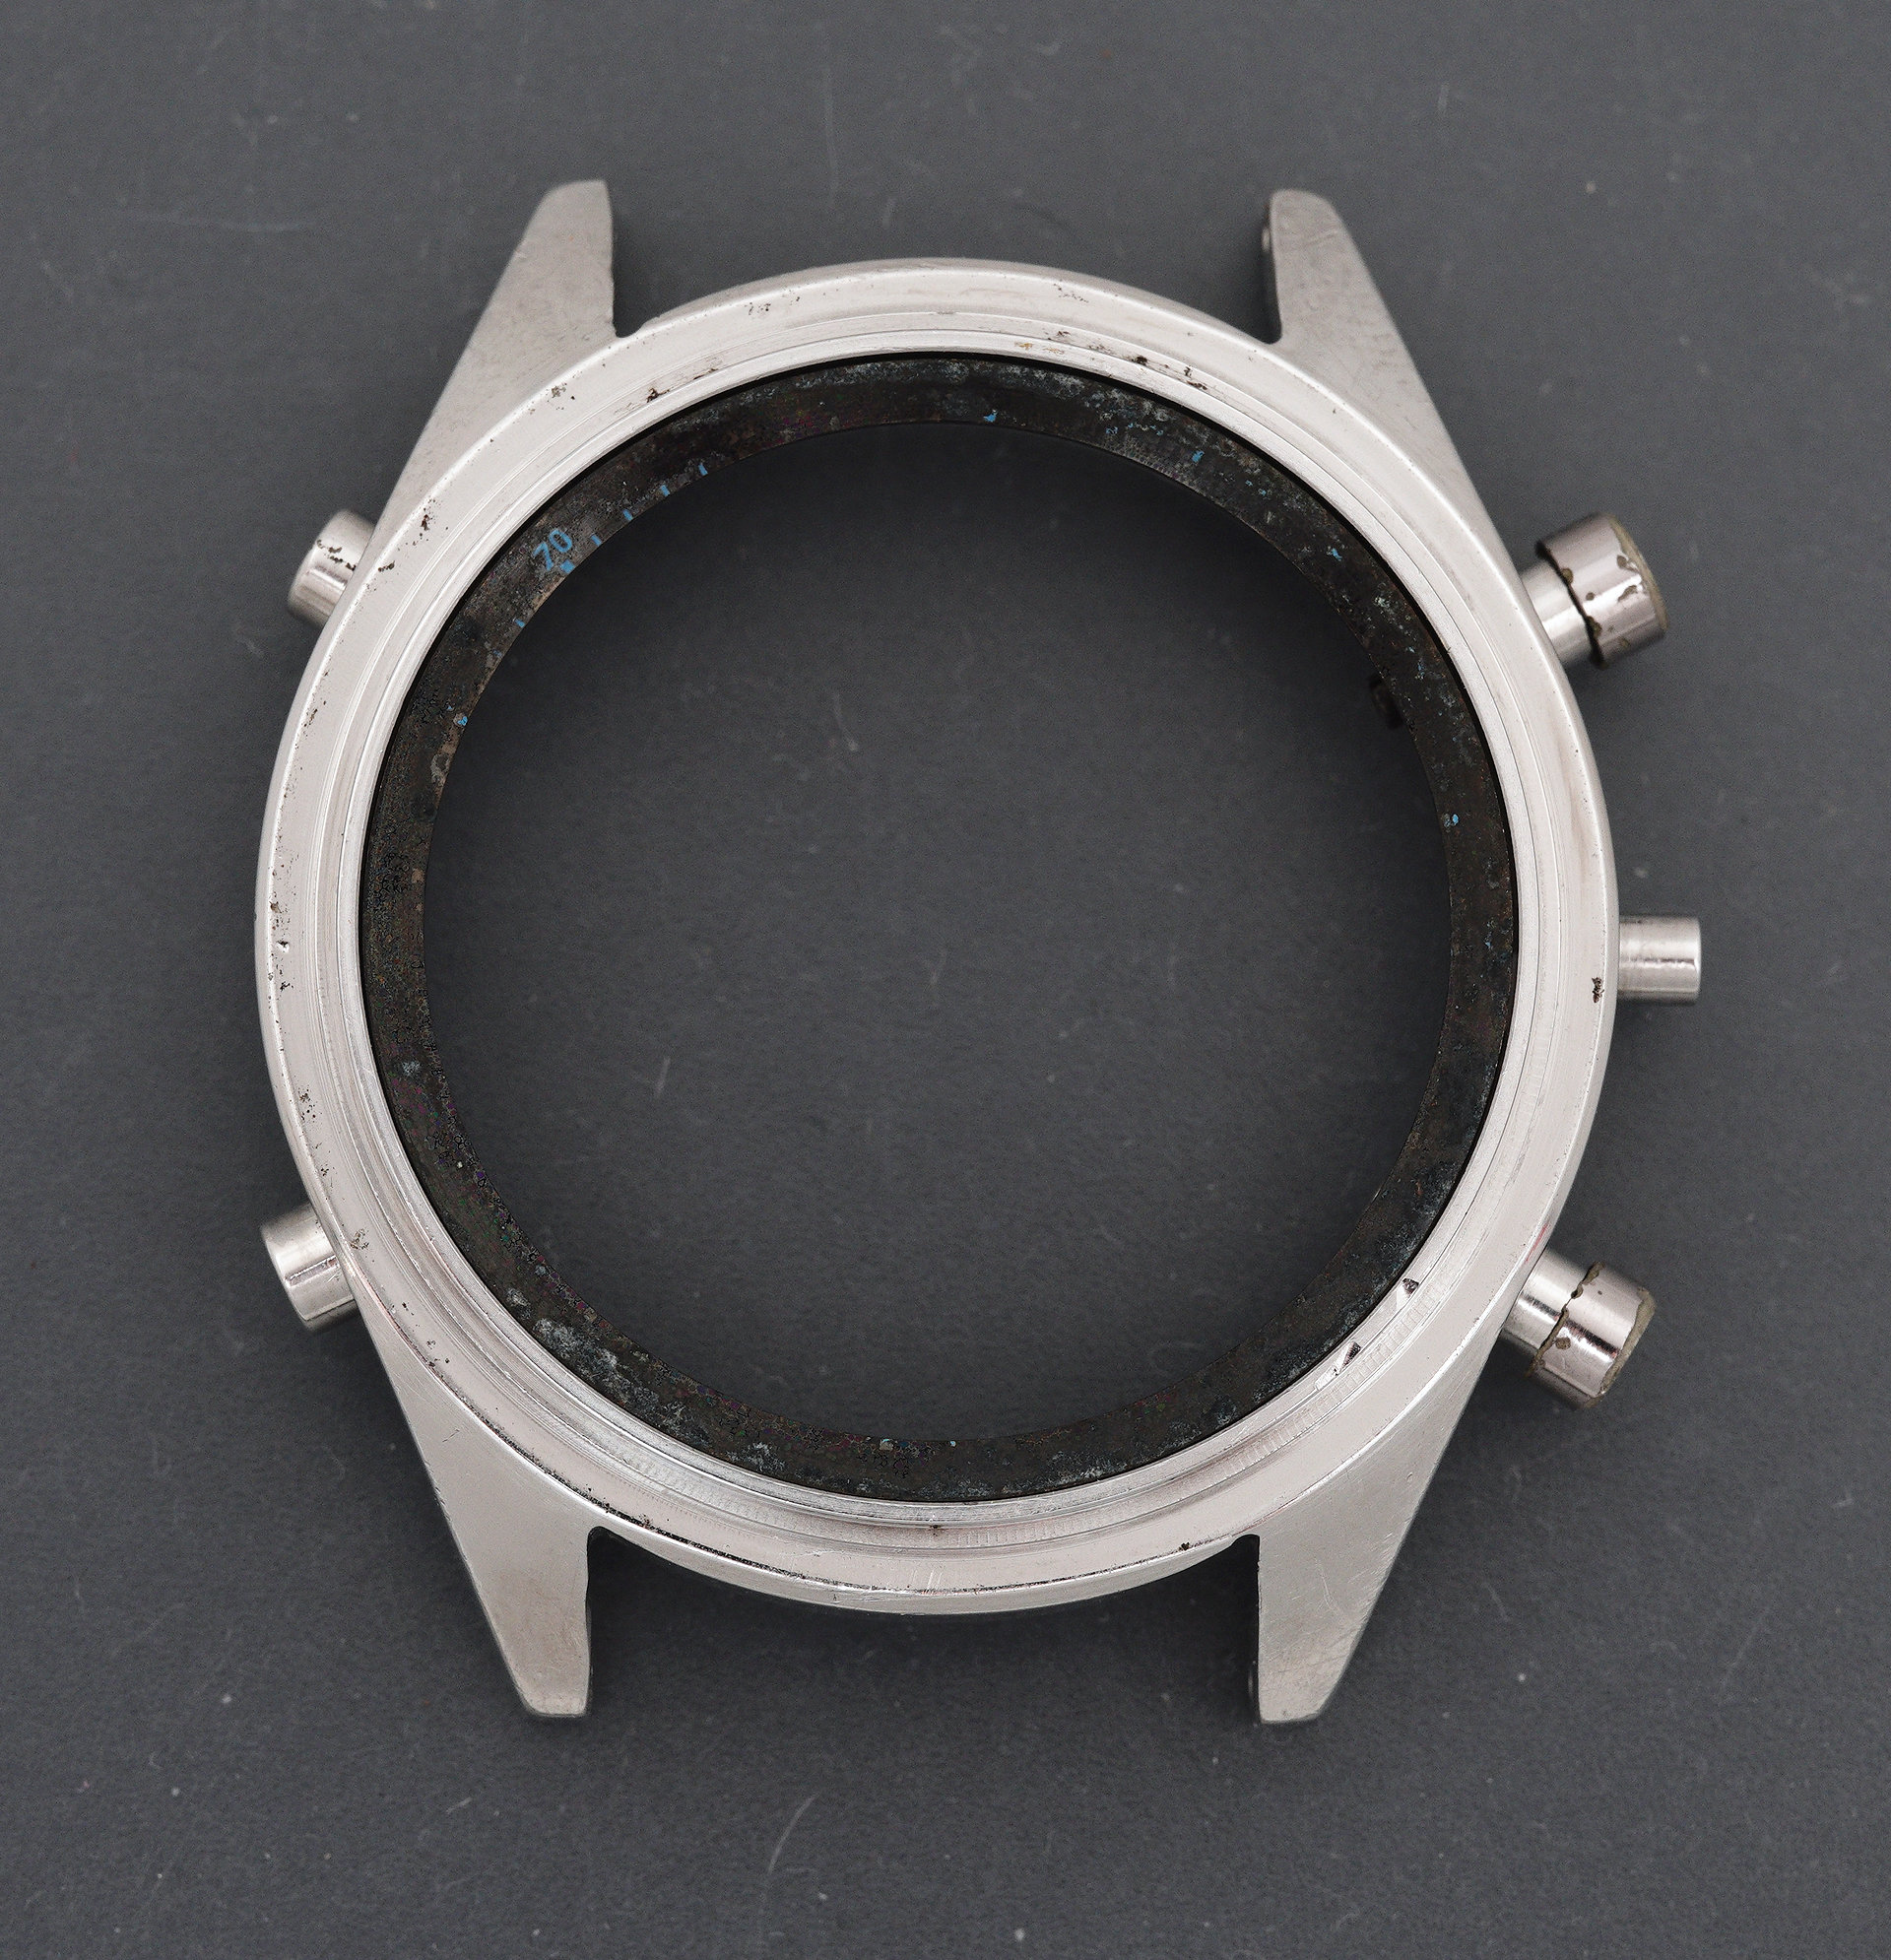
This case uses a top-type acrylic crystal that sits over the lip on the mid case and is then secured into position by the bezel. The force exerted by the bezel onto the external circumference of the crystal is what provides the water proof seal. The next question was: what is the correct crystal? There being no casing information available for this model, I had to measure, deduce and experiment to find the correct part. The owner had supplied a crystal that turned out to be completely incorrect in both diameter and type. The Seiko top-type crystals use the part code 3xyWabAN (for diameters greater than 30 mm) with the outer diameter specified by the xy and the profile and inner dimensions, including any internal relief dimensions, codified in the ab component. I measured the outer diameter (based on the inner diameter of the bezel) to be around 34.2mm and the inner diameter (based on the outer diameter of the case lip) to be about 32.8 mm. Two candidates emerged from perusal of the Sternkreuz catalogue: the 340W06AN and the 341W02AN. I tried the first one first and this fitted very nicely, if perhaps a tad tight around the case lip, had the correct external profile BUT it failed to restrain the tachymeter ring vertically which meant that the ring could decouple from the dial and rotate in the case when the watch was inverted. The second crystal, however, fitted perfectly in every sense and so it was the 341W02AN that found its way permanently onto the case (Sternkreuz product code: XS 343.439).

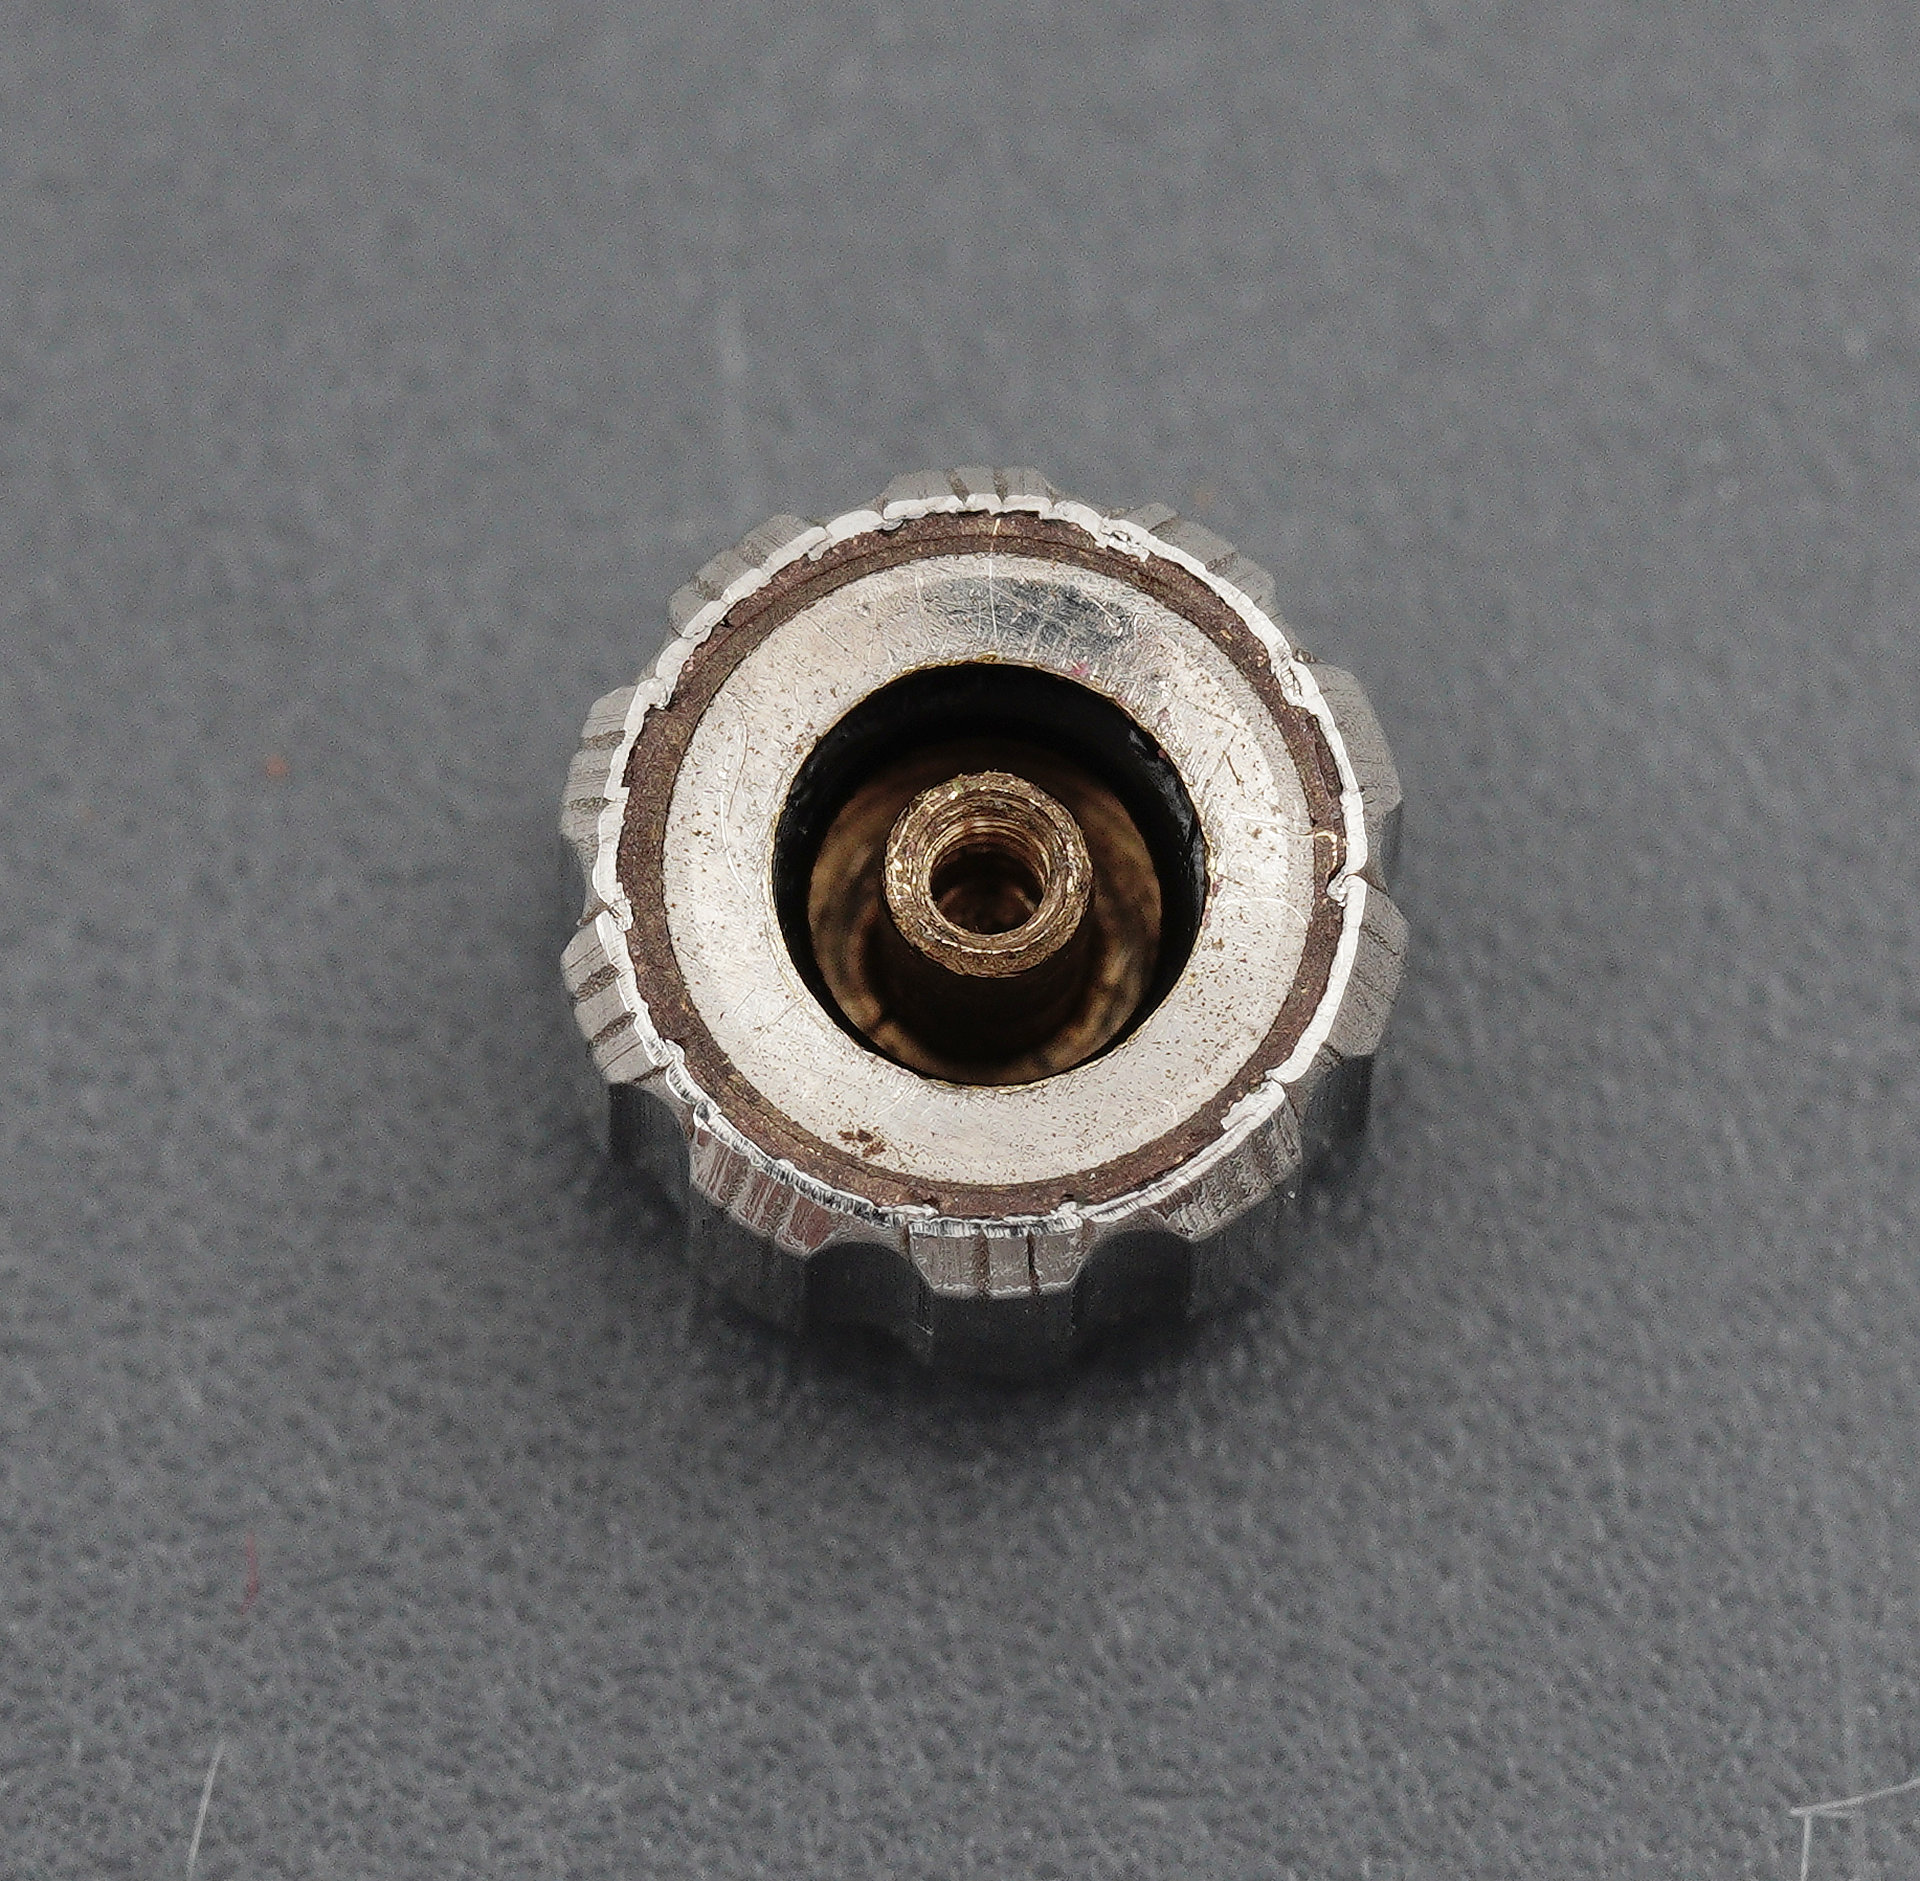
The final little job to complete before wrapping this up was the crown. The crown fitted to this particular watch is incorrect but in other respects is of the correct type and dimensions as the original and so it will find its way back in service, but fitted with a fresh captured gasket.
The case is ready at last to receive the serviced movement and provides a more secure environment in which to properly test the operation of the watch and all of its functions. Note that the hammer c-clip had not yet been replaced when I took this photo because I was still awaiting its arrival.
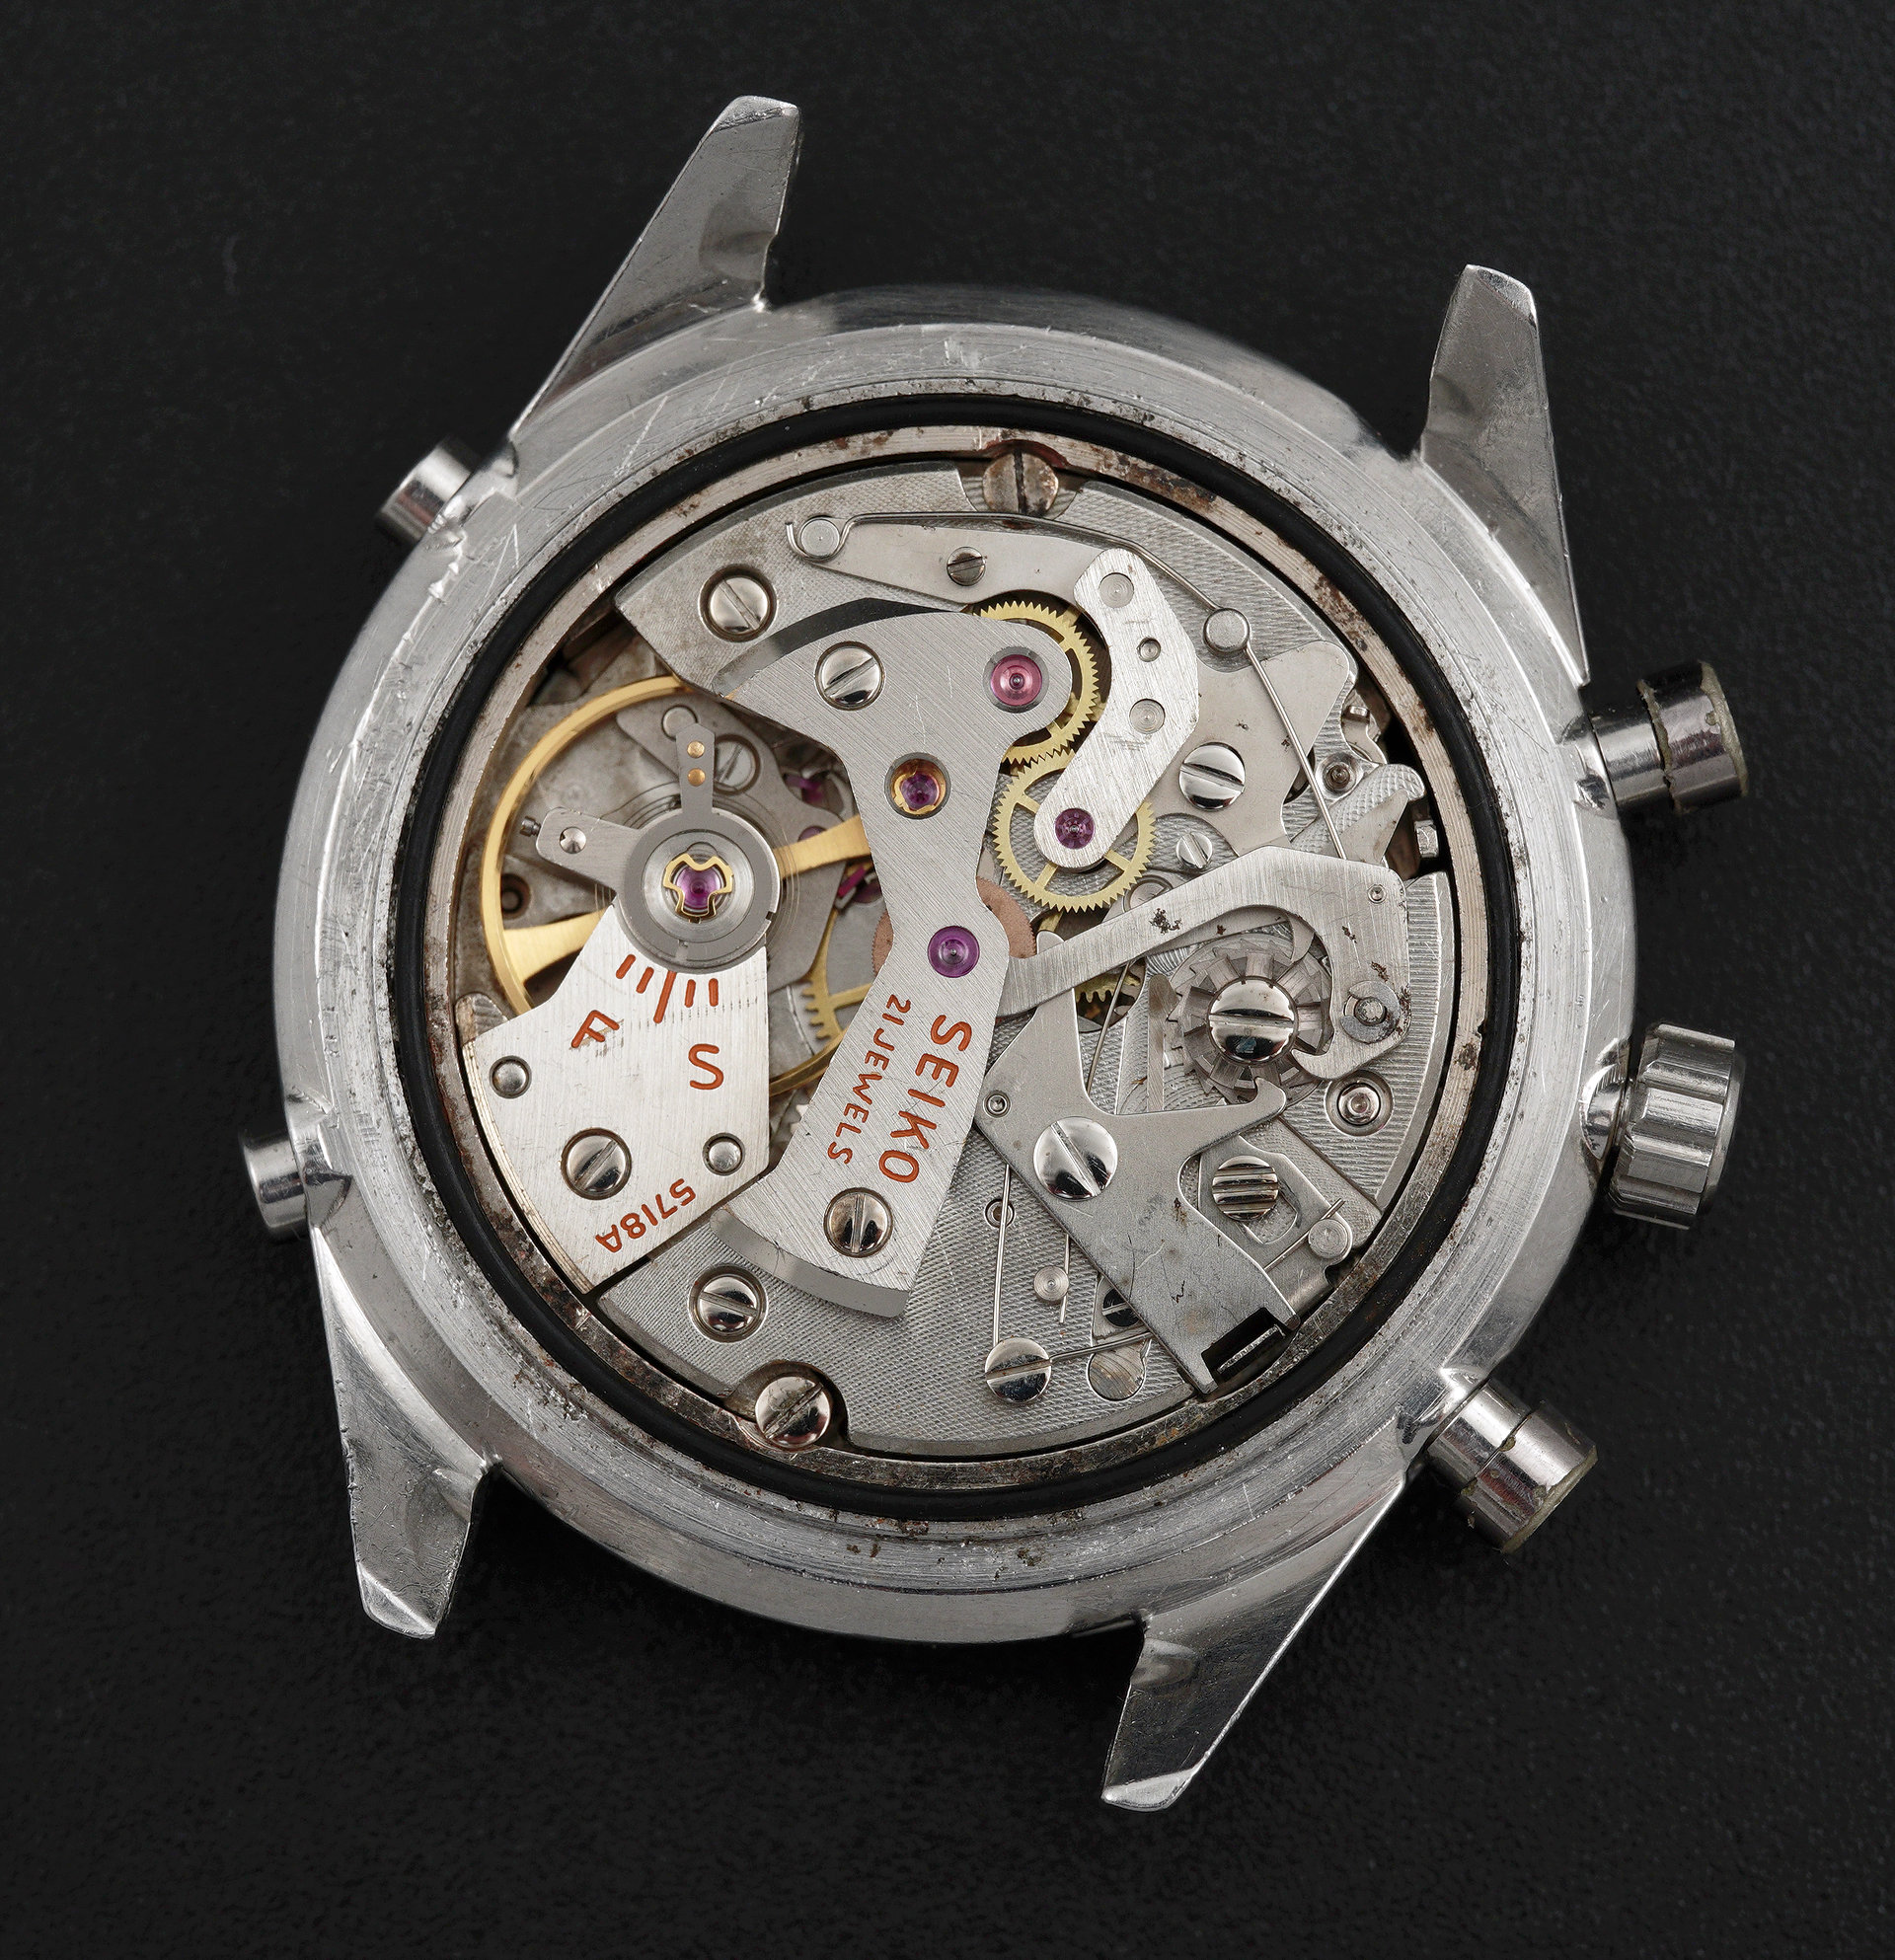
In completing this seemingly endless and extremely challenging undertaking, there remain a couple of minor operational quirks. The first of these is the issue with the alignment of the lap counters. The only way to resolve that would be to fit a new 10-lap counter disk (and preferably a new unit-lap counter with it) but that seems like an impossibility unless someone at Seiko sees this, knows of a secret repository of 5718 parts and takes pity on the owner! A replacement tachymeter ring too please. The other quirk that I noticed but which seemed to have resolved on its own with use, was that the elapsed minute hand was drifting for between 60 and 90 seconds with the chronograph stopped and the hand reset. This suggested that the brake lever might not have been exerting quite as strong a grip on the elapsed minute wheel as it should in the reset position but would then find purchase a few tens of seconds later. As can generally be the case with freshly serviced movements, a bedding-in period often sees such issues resolving, and that seems to be the case here.
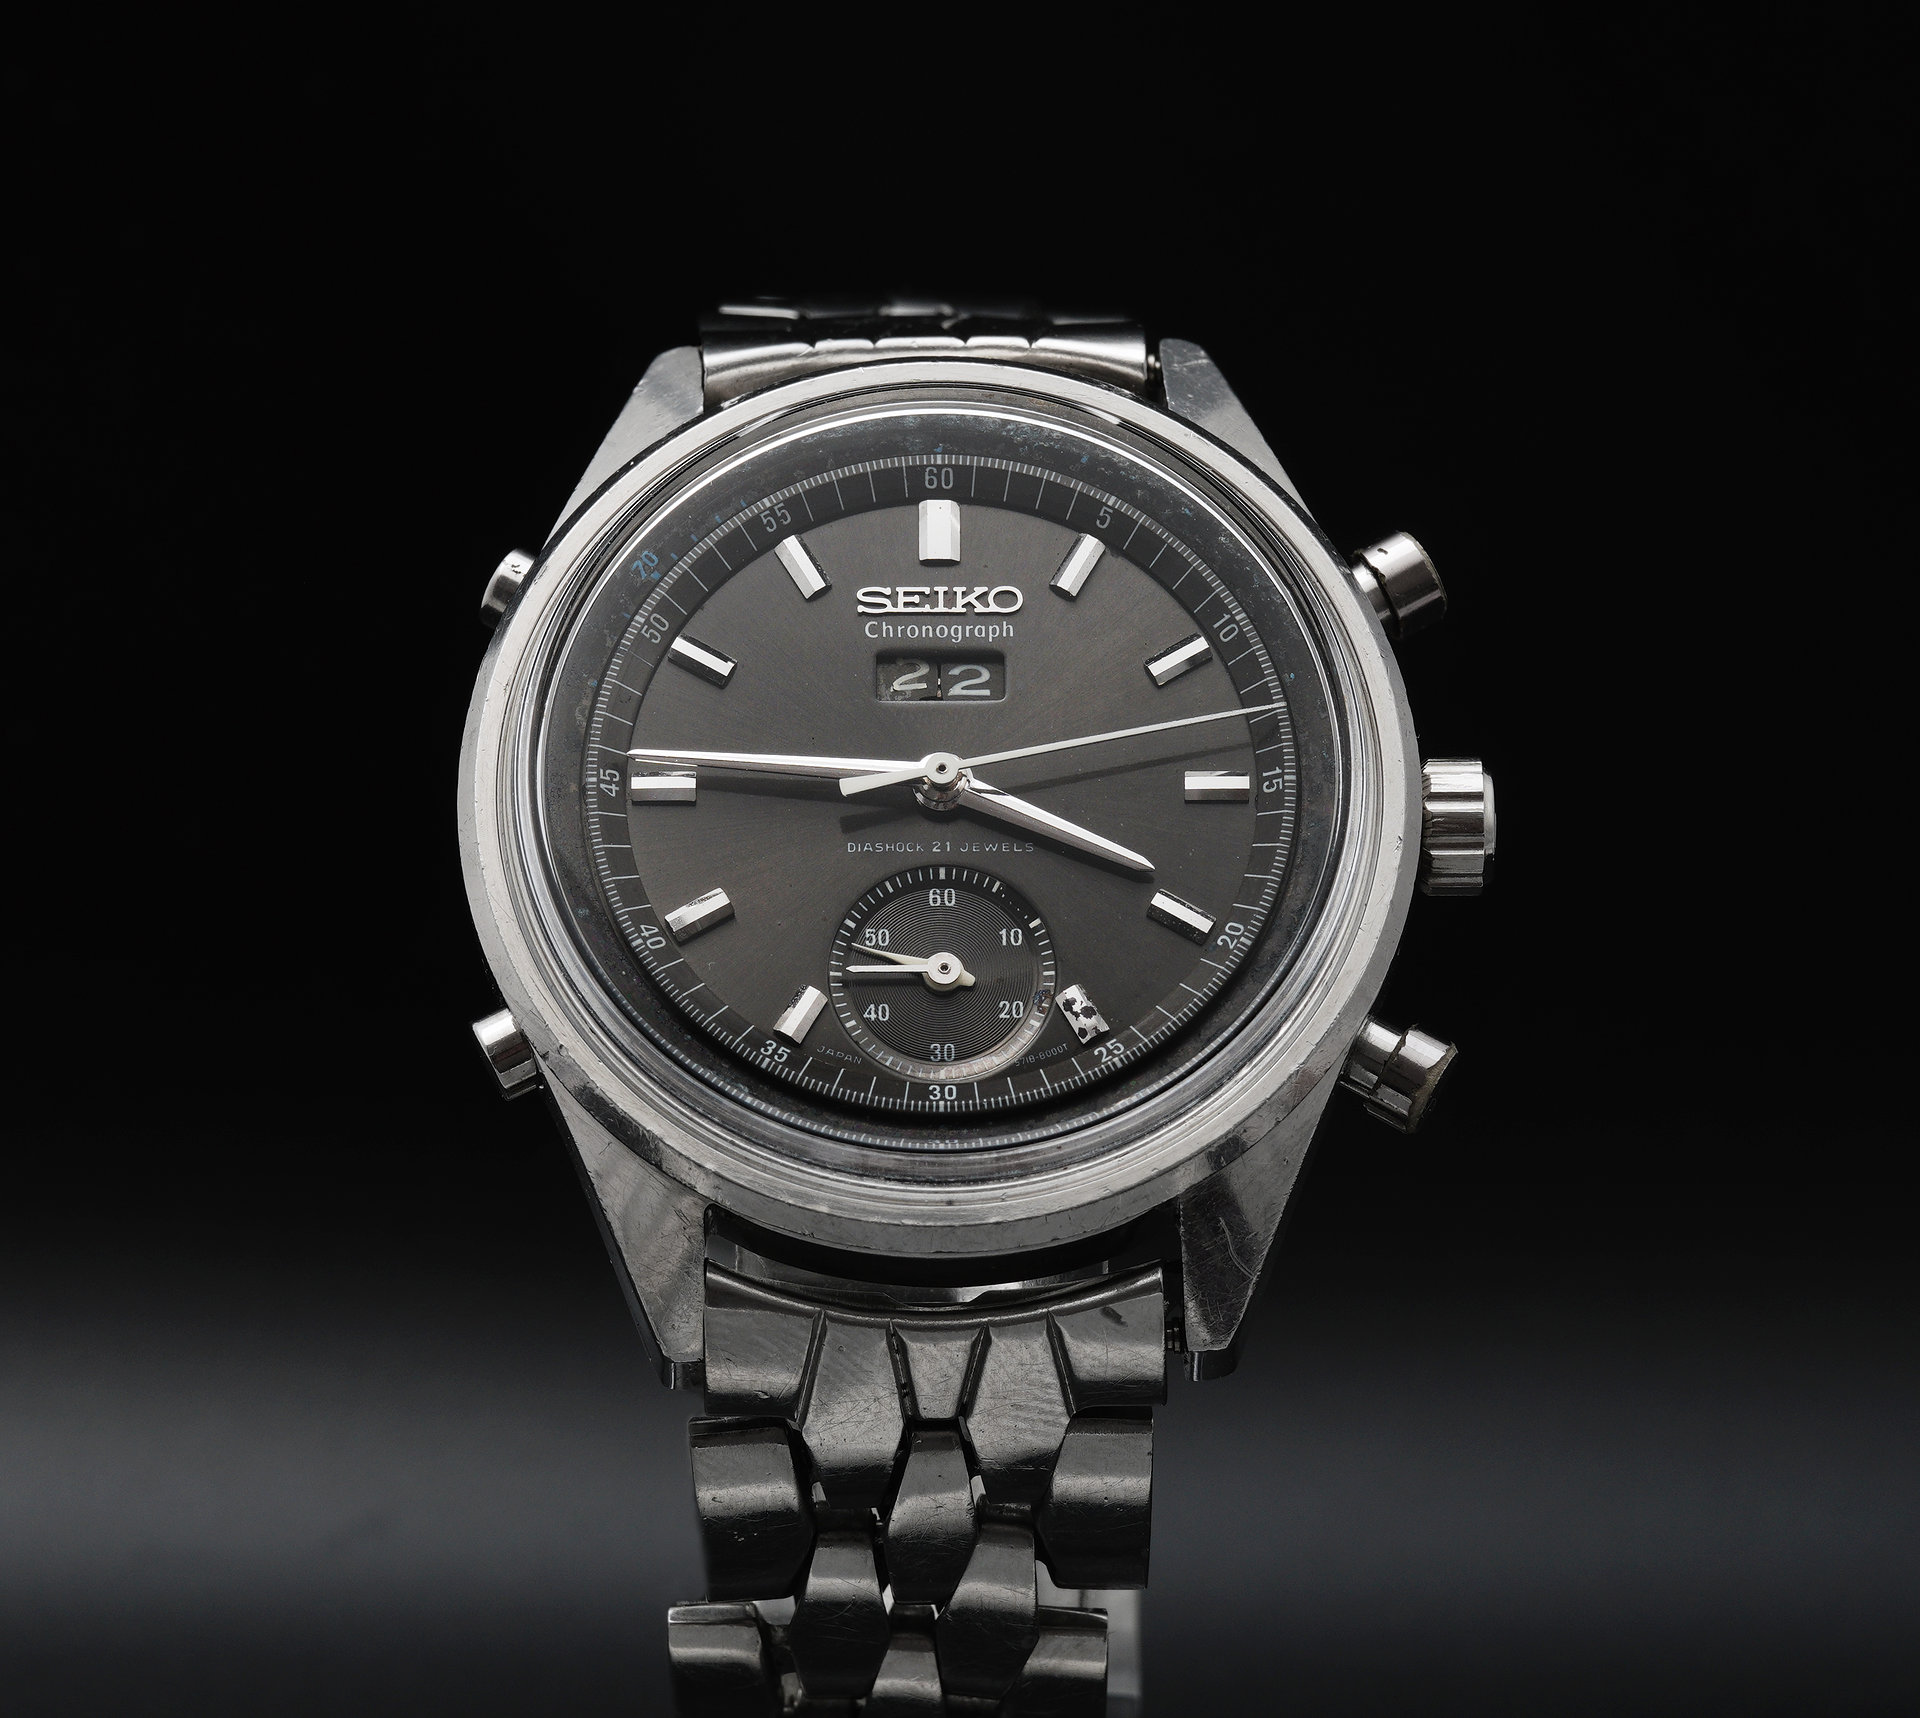
This is an example of a magnificent and very special watch that has seen some life, that has been through the wars and emerged a survivor. As I write this, it has ticked past its 62nd birthday, and in many respects the impact of those years and the way in which it has been treated is undeniably on display. In others, however, it belies the traumas to which it has been subjected. I feel privileged to have had the opportunity to test my mettle with this watch but feel I could now do with a period with a little less excitement in which to recover.


Wow. What an adventure. I would not believe that the before and after pictures are of the same watch had you not shown us the entire process. Sure, it would be nice to own this watch in pristine condition, but your work has created a piece with far more gravitas and a helluva story. Amazing work. Thank you for taking the time to share the adventure.
I have immensely enjoyed this series of articles. Your craftsmanship and humor (yes, we actually spell it correctly
Thank you! I am very happy to hear that you have enjoyed it and appreciate you taking the time to say so!
Wow. What an adventure. I would not believe that the before and after pictures are of the same watch had you not shown us the entire process. Sure, it would be nice to own this watch in pristine condition, but your work has created a piece with far more gravitas and a helluva story. Amazing work. Thank you for taking the time to share the adventure.
Thanks so much for this. I really appreciate it!
Martin, thank you. A privilege to be able to follow your work on this one so closely. A superb result from an unpromising patient – albeit a very special patient, I doubt I will ever see one in real life.
And posting the four parts in August no less! You rarely post in August (only three prior August posts, none for four years – I admit that I feel like a bit of a stalker knowing this). My only request would have been for two more rebuild photos. Not because you are missing anything, far from it, but the total was 98 images across the four episodes haha! About 90 odd of those were images that nobody has ever posted before as far as I know so I can forgive the non-rounded number 🙂
OCD? Me? No idea what you are talking about.
TLDR: Thanks for posting this amazing story. Loved it.
Well, thanks to you Pip for all of your support over the years. As you have observed, August has typically been a slack month for posts, but this year, with two grown up kids and with my schedule changing so fundamentally, I have used it to write up this big, big project. I’d not realised that I was just two images short of 100 but I have totted up the words and I think it’s slightly north of 10,100 over the four posts! Anyway, I’m so pleased you enjoyed reading about this story and I hope there’s plenty more to come. Maybe I might even make a dent in the backlog of my own watches!
Well done Martin, and many thanks. I think that this project has been an outstanding success, especially considering that you went in “blind”, and without the opportunity to source parts unique to this model. Best regards.
Thank you Ross. It was certainly an experience that I am very pleased to have had. Thank you for the support!
Well done on a detailed write-up of an extensive restoration!
You write:The Seiko top-type crystals use the part code 3xyWabAN (for diameters greater than 30 mm) with the outer diameter specified by the xy and the profile and inner dimensions identified by the ab. I measured the outer diameter (based on the inner diameter of the bezel) to be around 34.2mm and the inner diameter (based on the outer diameter of the case lip) to be about 32.8 mm.
I’ve always regarded the ab numbers to simply be arbitrary model numbers – how does the successful candidate’s 02 designation tie it to the inner diameter of 32.8?
Hi Jake,
That’s why I used the word ‘specified’ in relation to the xy but then ‘identified’ with respect to the ab. There is no way to correlate the values given by the a and the b to the inner diameter on their own. It’s just a model number as you say. In this case, the only way to determine the inner diameter is to buy one and measure for yourself! The Sternkreuz catalogue helpfully provides both dimensions though.
Thanks for the comment – it’s always helpful to work through these things in a little more detail.
All the best
Martin