
In part 1, we made our introductions and rendered one rather beautiful Citizen Ace Parawater into its constituent parts. Most of our attention in part 1 has concerned the movement and so let us now turn our spotlight onto the case. This being an early example of a Parawater, Citizen’s first waterproof watch, it seems fitting that we should attempt to imbue it with some degree of water resistance, at the very least sufficient to resist day-to-day splashes and unintentional dunks. To achieve this, we need to attend to two areas: shoring up the defences against water ingress via the crystal and case back, and ditto with respect to ingress via the crown and crown tube. As we saw in part 1, the case itself comprises three main parts: the mid case, a press-fit case back and a press-fit bezel whose functional role is to secure the acrylic crystal. In addition, there is a case ring that sits on top of the dial when the movement is installed and whose job is to provide part of the platform for the crystal gasket.

Two immediate obstacles presented themselves in achieving our aim of water-proofing the mid-case: the difficulty in identifying the correct replacement crystal and, in particular, gaskets, and the near-impossibility of obtaining, in particular, the latter. I failed in my attempts to find either as OEM replacements and so I turned to aftermarket solutions: the crystal conundrum was easy enough to resolve because Sternkreuz make suitable replacements for this bowler-hat-style crystal and having measured the out-going original, I was able to confirm the U Sternkreuz 32.4×29.0 as a potential suitable replacement. As for the gasket, my initial measurements suggested 29.4 x 31.4 x 0.6 mm for the crystal and 28.6 x 30.6 x 0.6 mm for the case back. For the former, I think you might be able to ease out the diameter a little but these two seemed to fit well enough.

The next task was the crown, whose original gasket had hardened and was most emphatically not up to the task originally envisioned for it. I had prepared myself for an extended archaeologic dig involving determined chipping away at the old gasket until I had a small pile of rubber particulate in front of me but, having removed the stem and following some initial reconnoitering, the retaining washer just popped out, revealing the largely intact old gasket beneath (clockwise from top left, below).

The final photo, bottom left, in the mosaic above, shows what I propose to fit as a replacement for the outgoing gasket. That exercise involved a thorough clean of the crown, packing it with silicone grease, fitting the new gasket and then topping the package off with the retaining washer, dished initially to fit within the lip in the crown and then flattened and spread with a staking tool.

With the stem cleaned of most of its corrosion, I reunited it with the crown, ready for a test fit to the case and thence a water resistance test of the case sans movement.
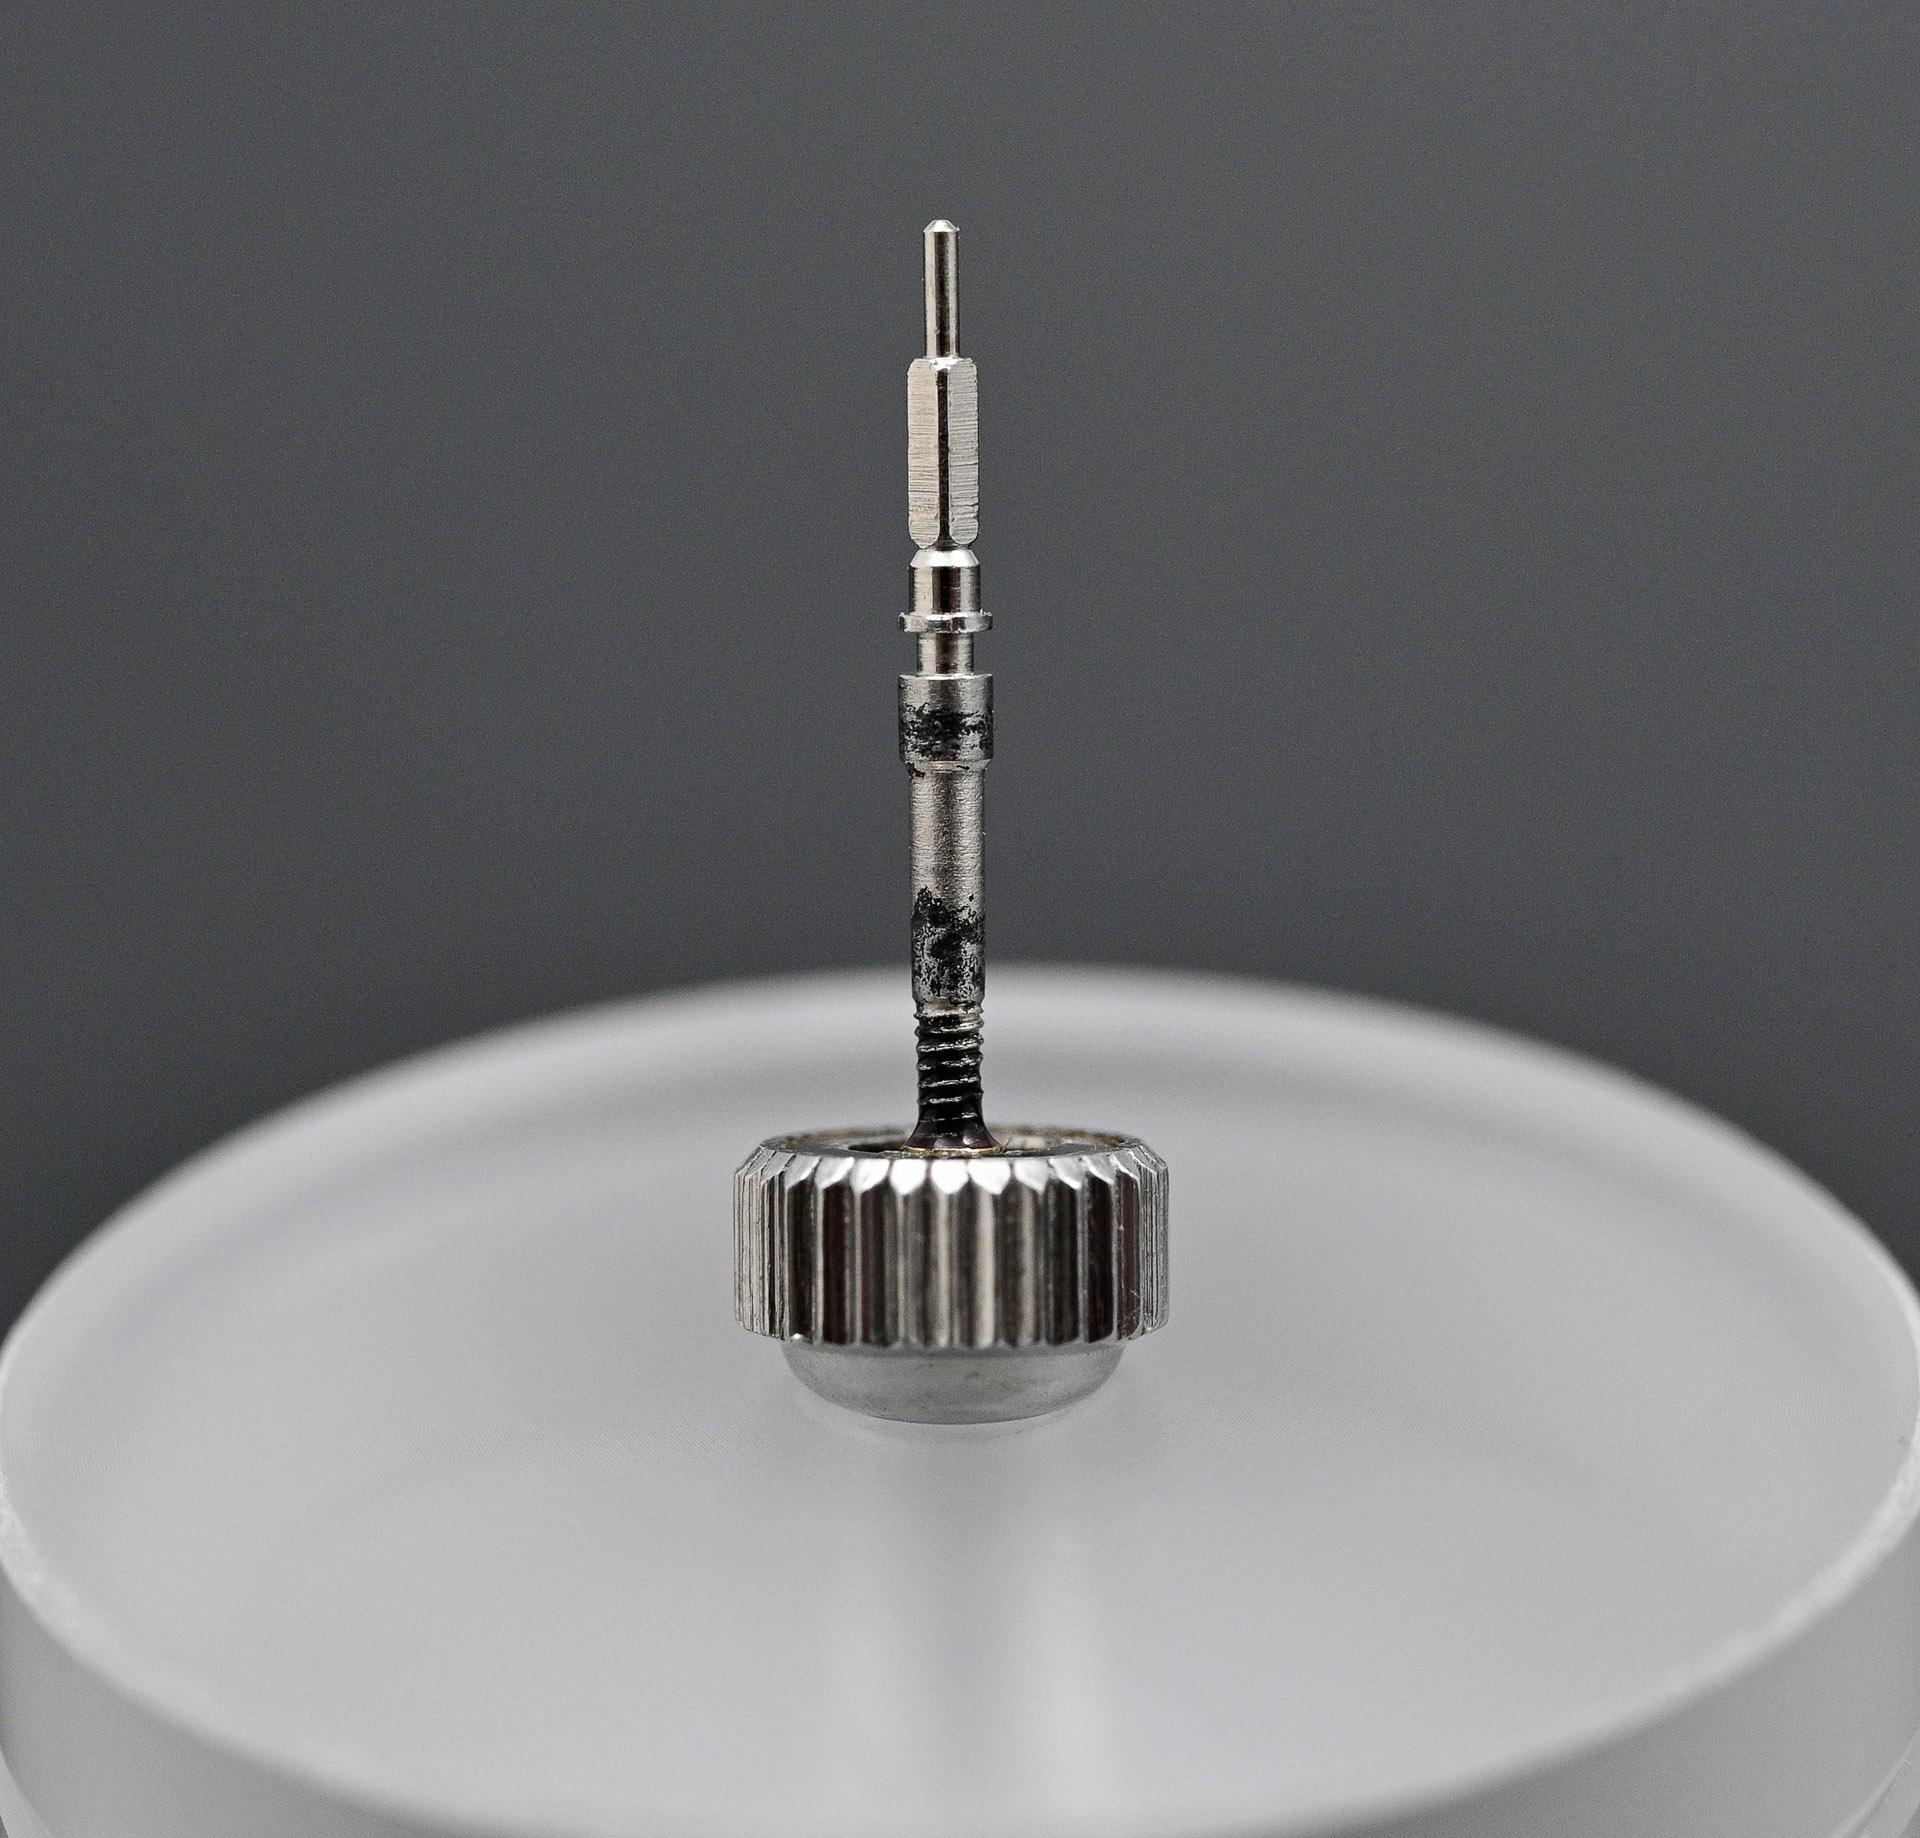
My pressure tester can operate up to about 6.5 bar but I didn’t see a great deal of point in testing this case beyond about 3 bar. I just wanted to be satisfied that it could be worn with confidence under the usual conditions that one might wear a watch. Here is the complete case with the crown fitted but without the movement.

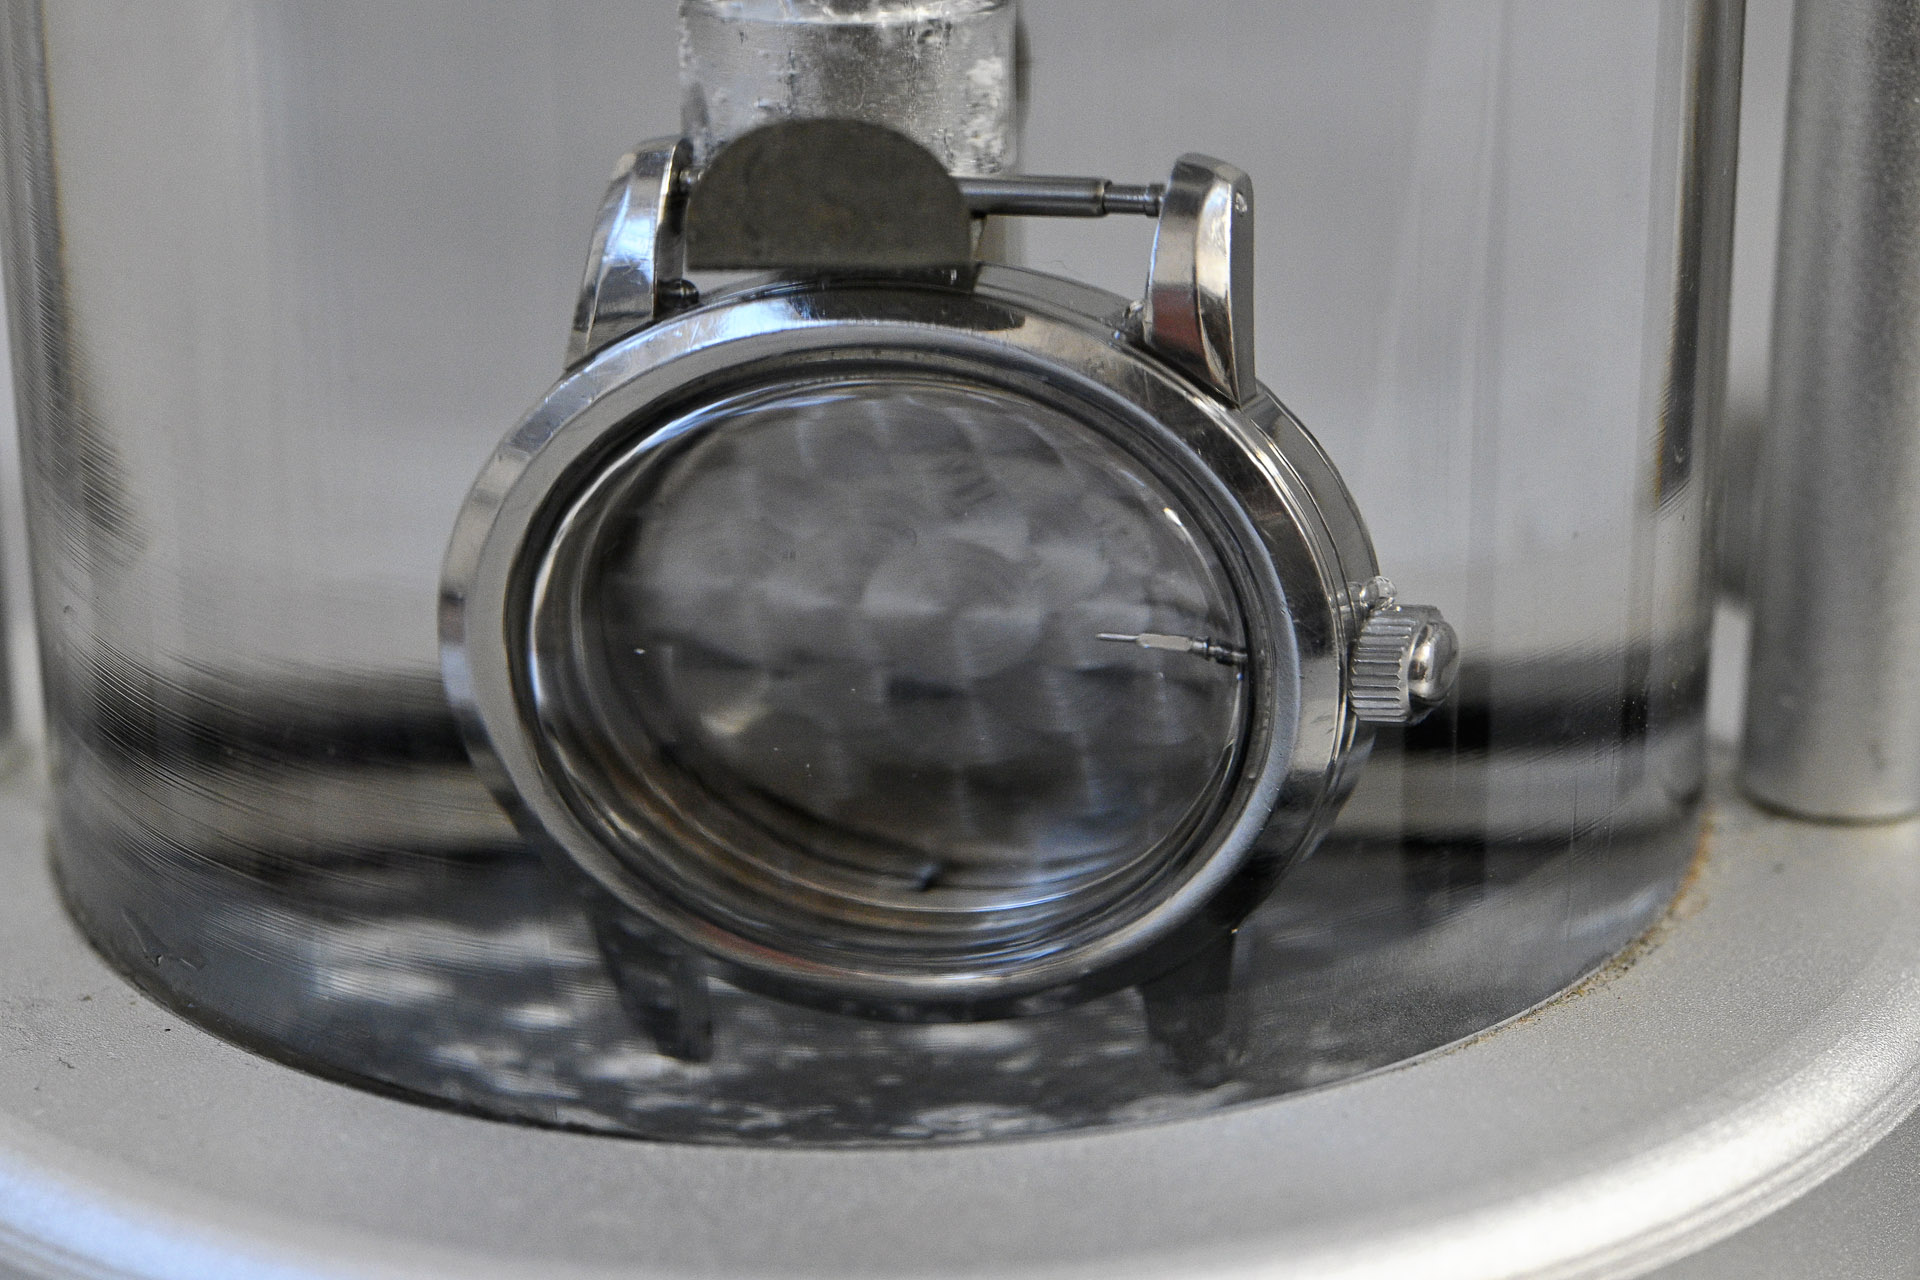
The pressure tester works as follows: the watch head is suspended above a volume of water in a pressure sealed Perspex tube and the pressure inside the tester increased to the required level. In this case, I pressurised the vessel to 3 bar (30 m).

The watch is left in this state for 5 to 10 minutes, during which time any insecurities in its gasketry will allow air at its elevated pressure to work its way inside the watch case, whose internal pressure will have been at 1 bar at the start of the exercise. At this point, if the watch is air-tight, then its interior pressure will remain at 1 bar. If it is not air-tight, then its interior pressure will have established an equilibrium with that of the vessel. At this point, the watch is submerged beneath the water and the pressure relief valve on the top of the tester depressed. This lowers the pressure progressively back to atmospheric pressure and if the watch had become pressurised during the waiting period, the air will make its way out by way of the route that it made its way in. My first attempt revealed the crystal gasket to be a point of obvious lack of integrity.

The arrow indicates the stream of bubbles emerging from the bezel at the 3 o’clock position. Clearly the crystal is not sealing adequately against the gasket. I am pleased with myself for having performed this test without the movement in residence! When I installed the crystal, I noted that the bottom surface of the bowler hat rim was marred with some manufacturing flaws. I had hoped that the gasket would nevertheless have enough pliability to make an effective seal but evidently not. So I removed the crystal and flattened off its bottom surface using some very fine wet and dry sandpaper until I was satisfied that I had a better mating surface to work with. A reinstallation and retest resulted in a pass at 3 bar.
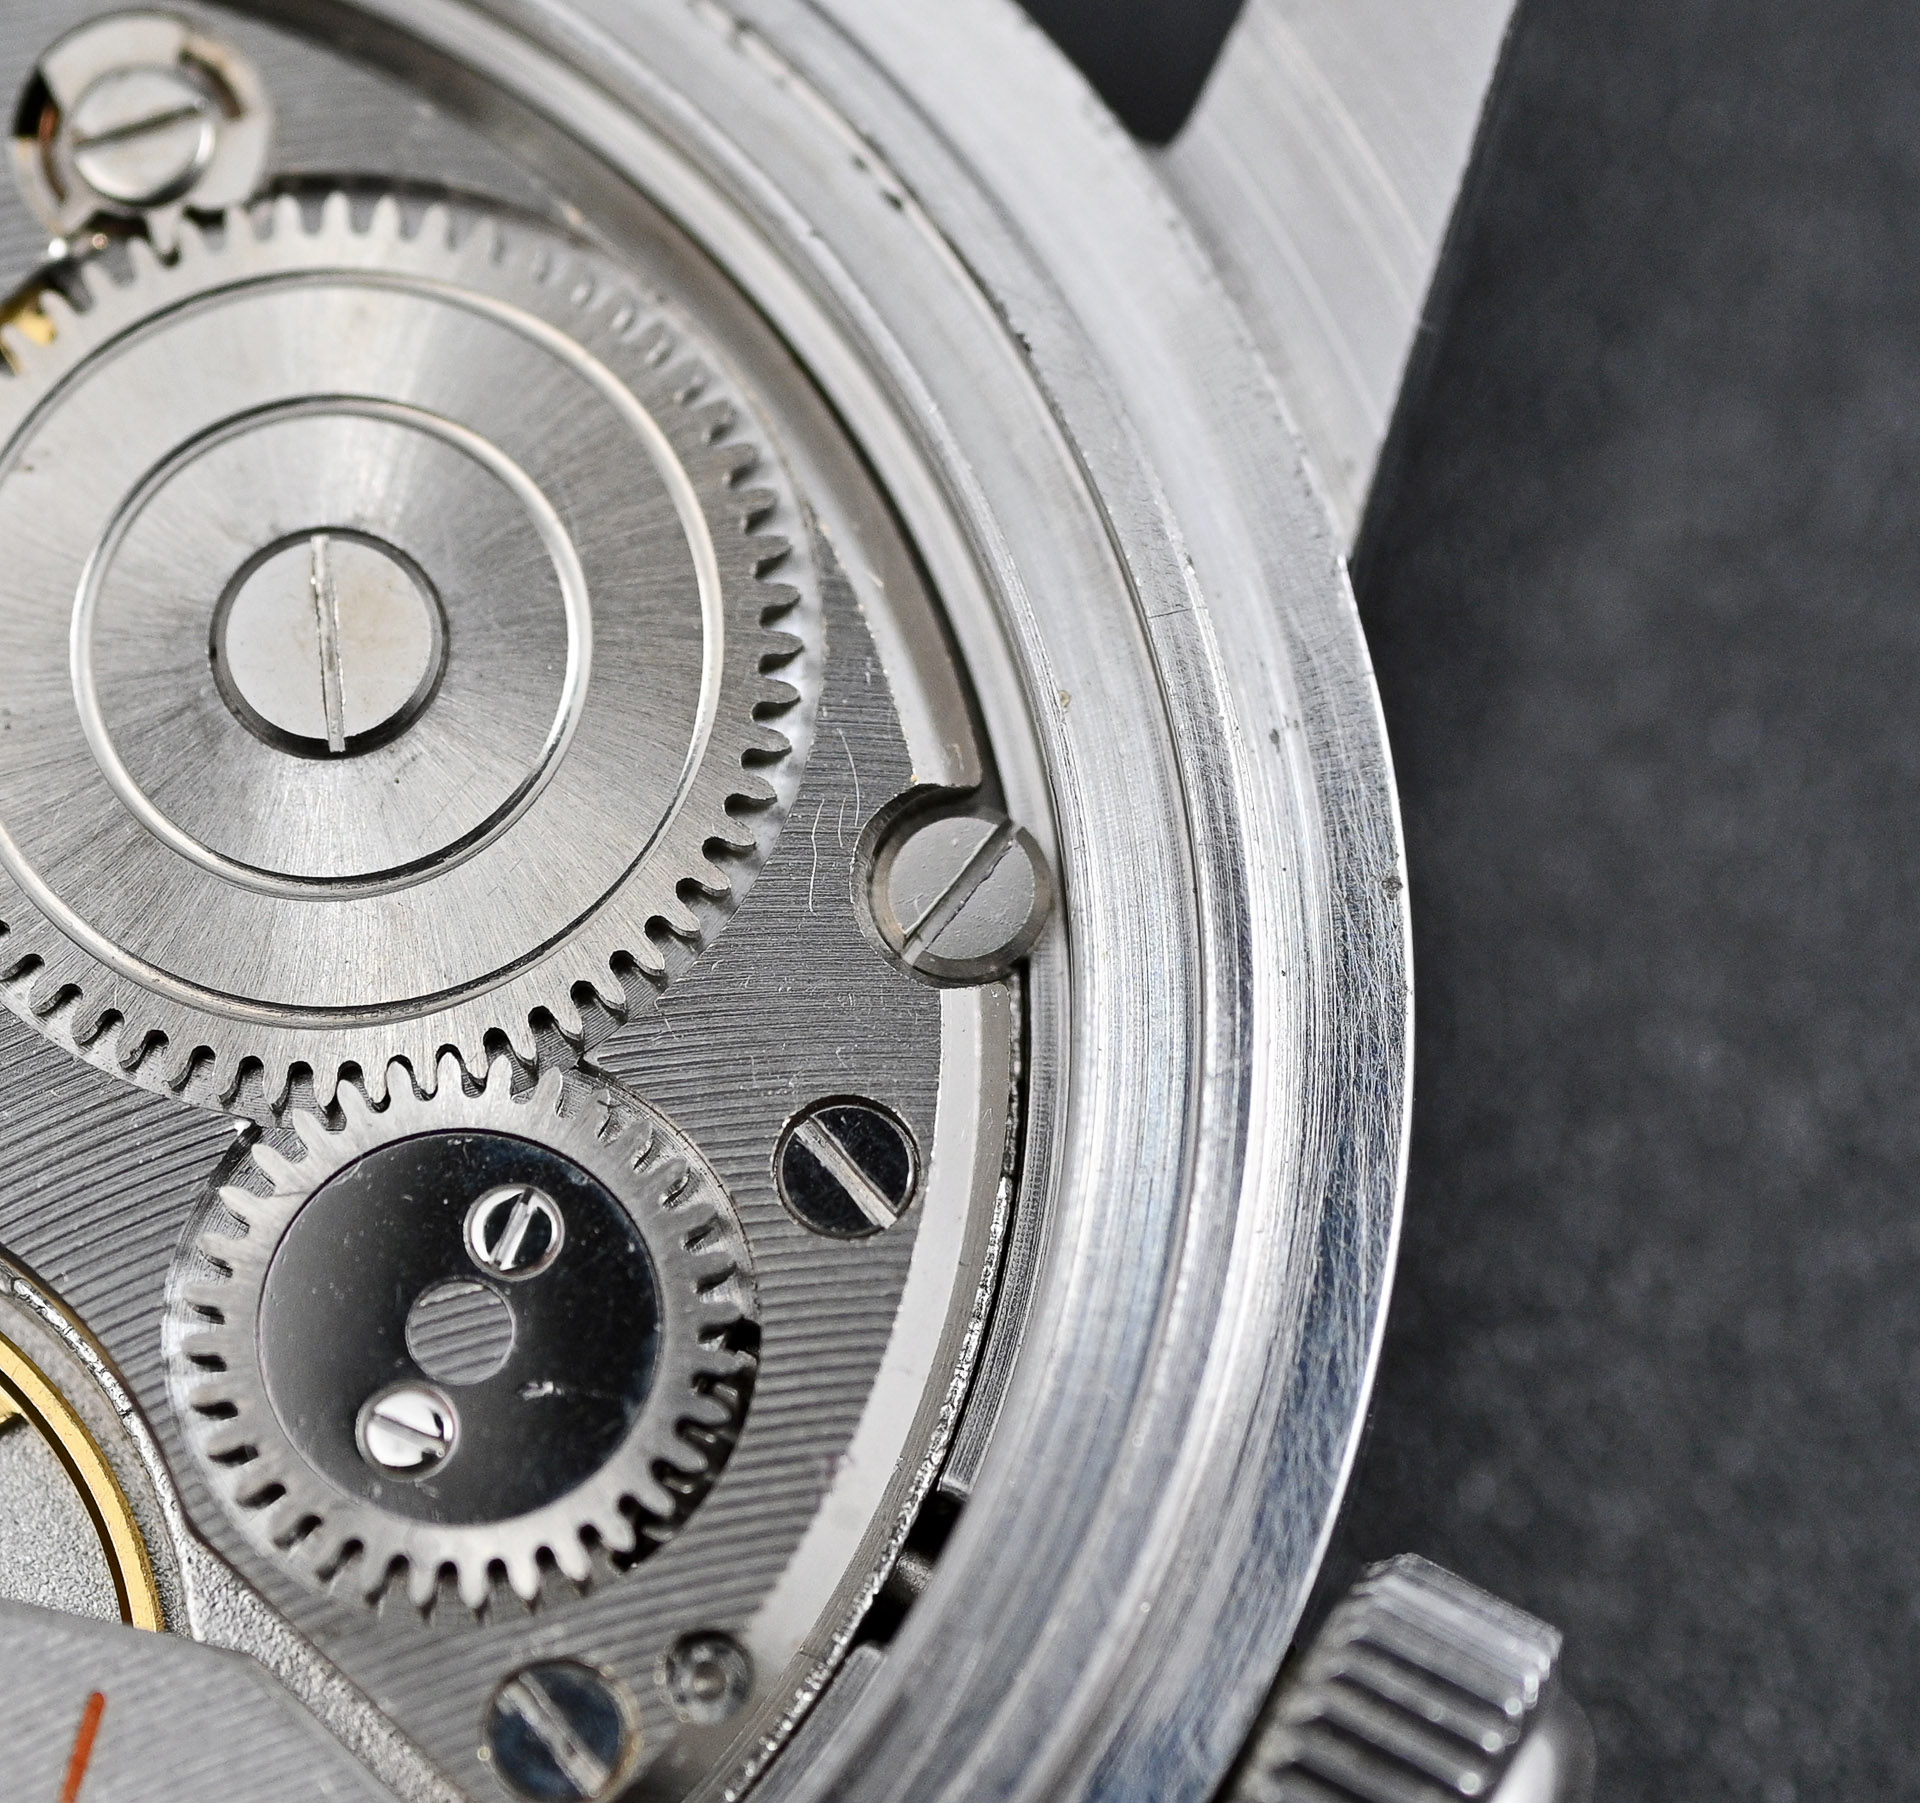
Let’s return to the movement, fresh from its cleaning cycle, all parts dry and ready for reassembly. We start with the setting parts, there being no capped jewel bearings to deal with on the main plate.

In keeping with my general approach to get the fiddliest bits out of the way first, I next tackle the two Profix settings on the train bridge. This turned out to be pretty straightforward.

Next, we fit the cleaned mainspring into the waiting barrel.

The going train is fitted into place, piece by piece, starting with the barrel, followed by the escape wheel, fourth wheel, double-third wheel and the second wheel.
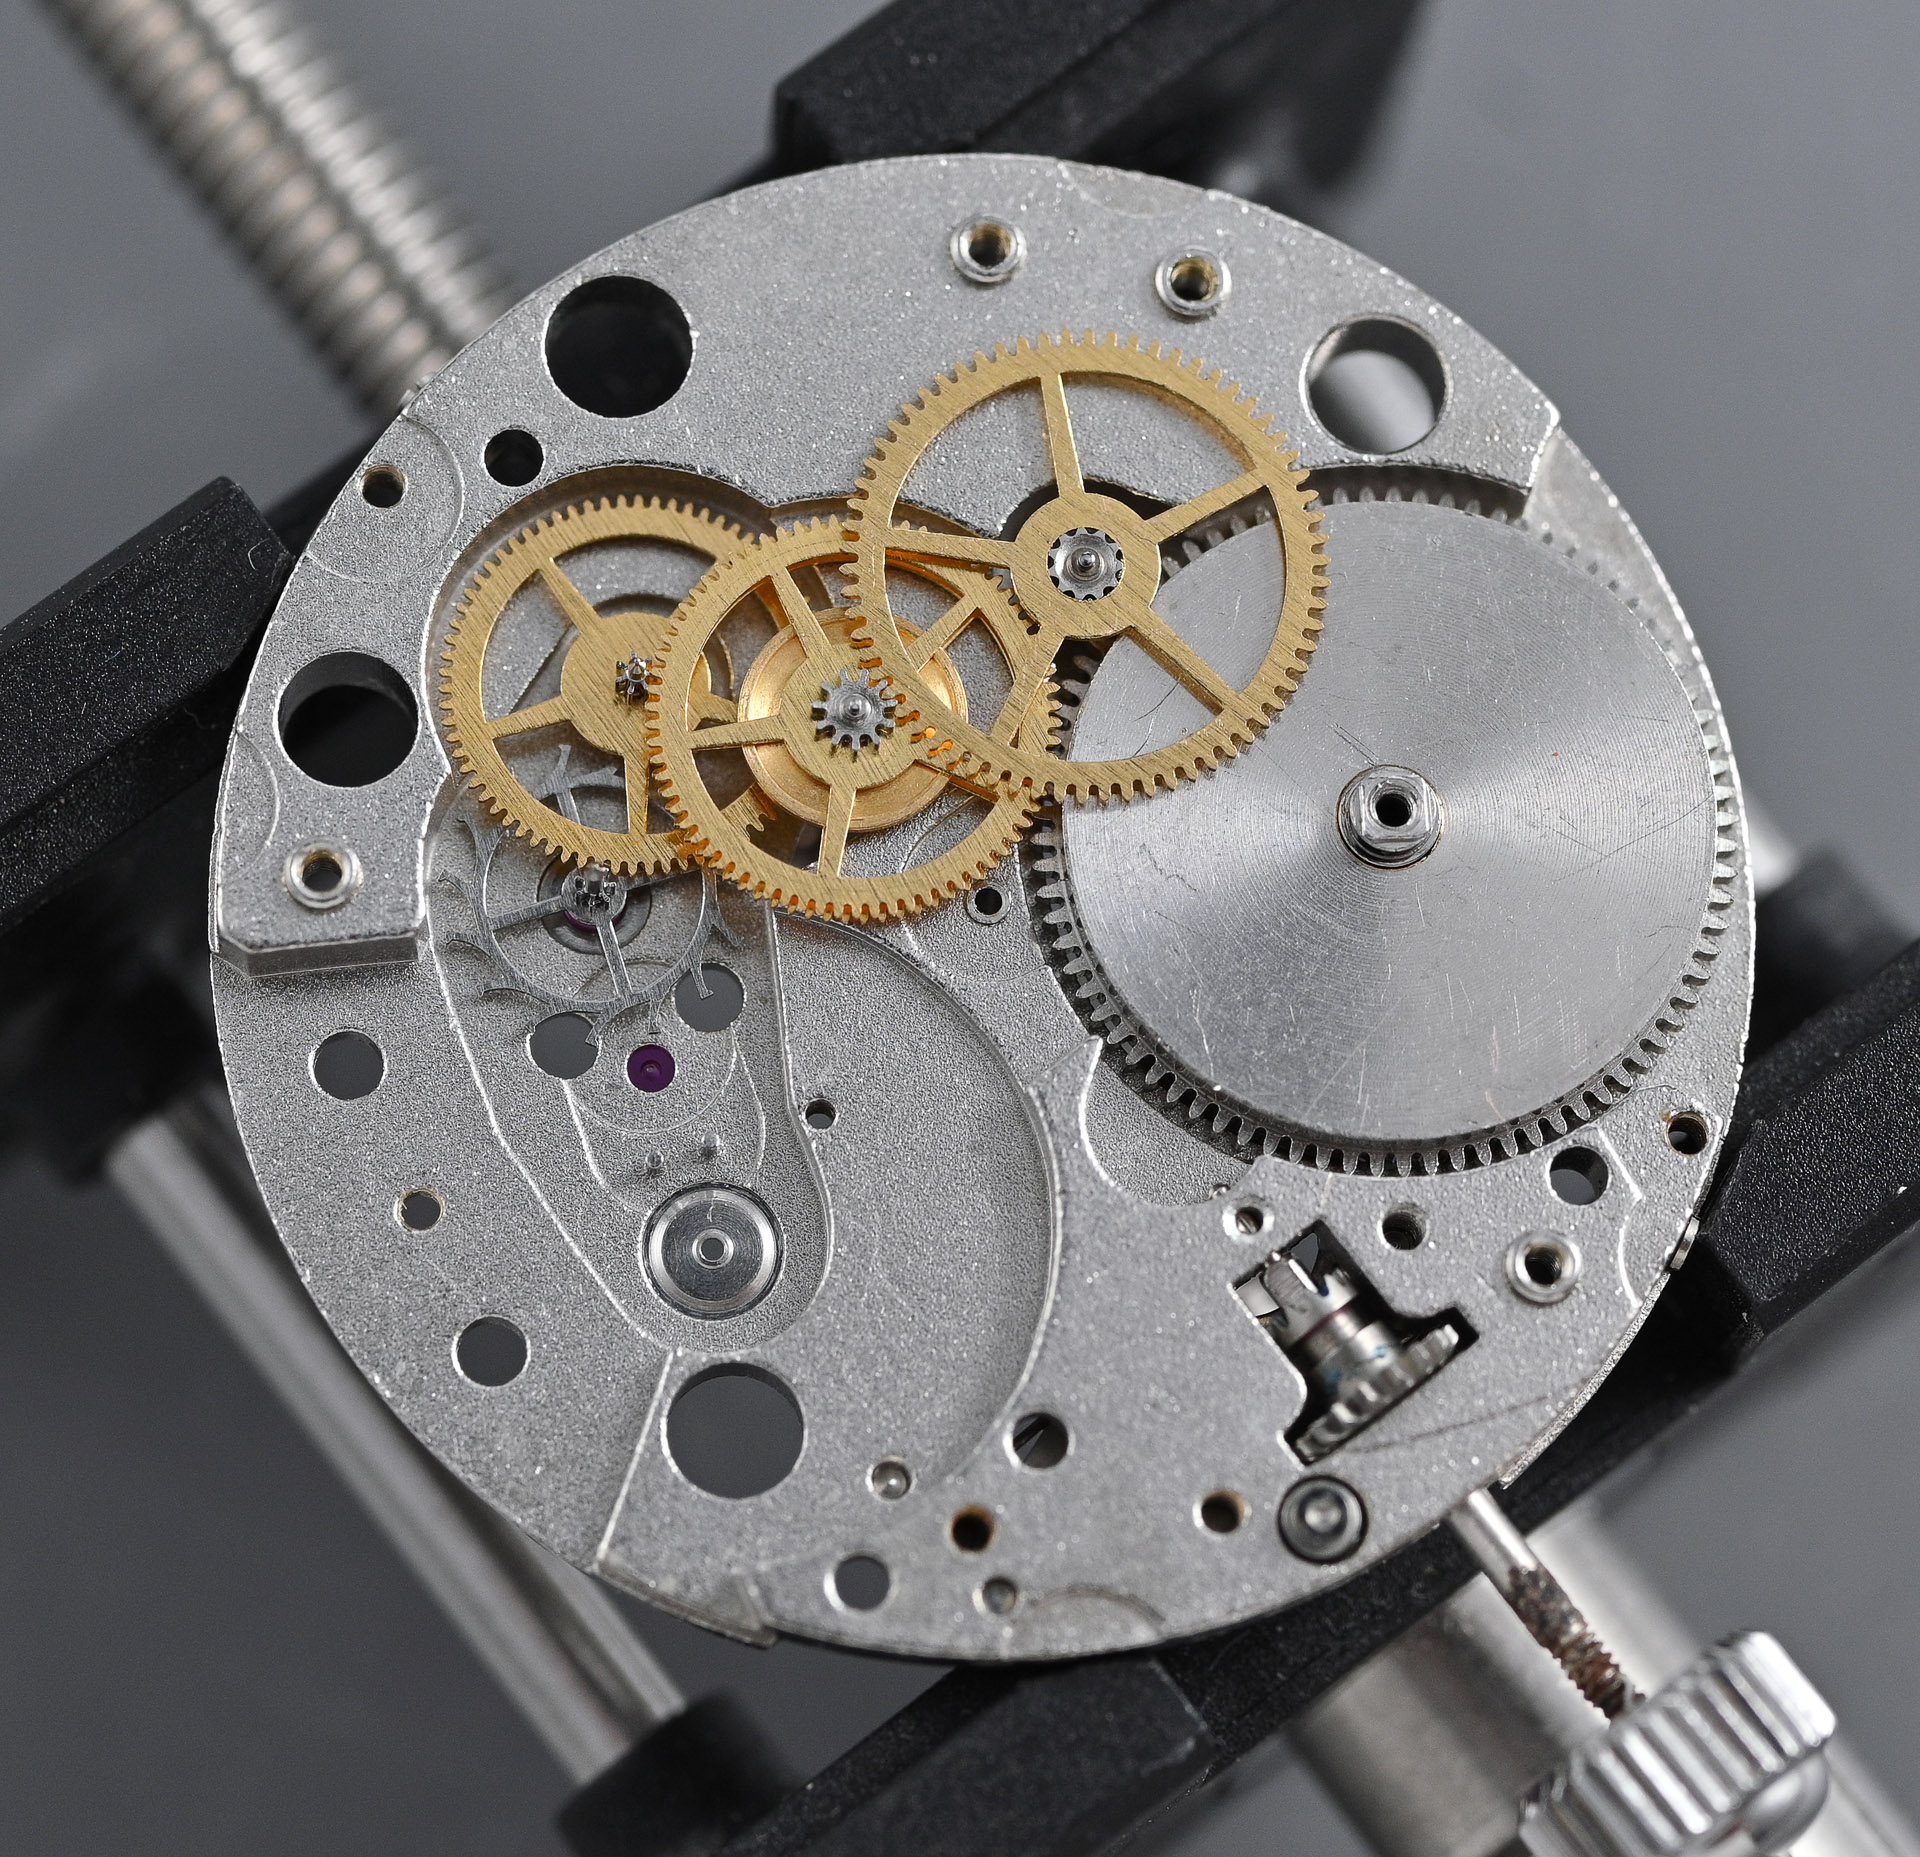
The escape, fourth and third wheels are secured into position by the fitting of the train bridge.

You will notice that at this point, I have fitted the now straightened sweep seconds pinion, prior to fitting the barrel bridge.

The pallet fork and its bridge come next, at which point its under the stereo microscope for lubrication of the pallet jewels.

Before we can fit the balance, the Parashock jewel assembly on the dial side of the movement needs to be assembled.

The balance is refitted, and lopes into action, impatient for me to fit the second of the two Parashock settings.

At this point, we have a working movement but it is worth observing that the balance cock has a fixed stud holder with no built-in beat error correction. My initial timing machine measurements revealed serious beat error and this could only be corrected by serially removing the balance wheel from its bridge and adjusting the position of the hair spring on the balance wheel.

Four or five such iterations essentially eliminated the beat error but it is a very time-consuming and tedious process, fraught with potential for disaster. The resulting timing curve is basically fine but I am mildly frustrated at the slightly uneven timing curve. I may come back to this in the future when I’ve worked my way through a couple more examples of this movement.

With the watch running satisfactorily, I set about fitting the driving wheel and cannon pinion on the fixed centre tube, making sure to correctly mesh the teeth of the driving wheel with those of the second wheel below. The minute and hour wheels follow, secured in place with the minute wheel plate and topped off with the copper film washer whose job it is to keep the hour wheel properly planted under the force exerted from above by the dial.

Speaking of the dial, that comes next.

The hands needed a good clean before refitting and in the case of the minute hand, some reshaping to correctly follow the curve of the dial and to avoid interference with the seconds hand.
With all three hands fitted, we are getting perilously close to the finish line.

All that really remains is to reunite the movement, dial and hands with the case. The sequence by which this is accomplished requires first that the movement is inserted into the case aperture from above with the crown and stem following.

The movement is secured to the mid-case by two casing screws. You will remember that the originals were mis-matched and corroded but I have sourced two clean replacements from one of the parts watches.
Turning the case over once more, we can fit the dial ring and fresh crystal gasket.

The replacement crystal is seated onto the gasket and fastened into place by pressing the bezel into position using a crystal press.

The case back gasket is lubricated and fitted into the circular channel around the movement.

We seal the deal by refitting the case back.

The finished article is a striking thing.

It’s ready for action but I am momentarily short of ideas about what strap I should fit. Probably, a rubber tropic would work well but I think these watches may originally have come on a metal bracelet. At this point, I remembered that I have a chrome-plated Seiko Sportsman fitted with a polished steel bracelet that would probably do the trick nicely. I remove the bracelet from the Sportsman, confirm that it looks to be in very sound condition and give it a thorough clean.
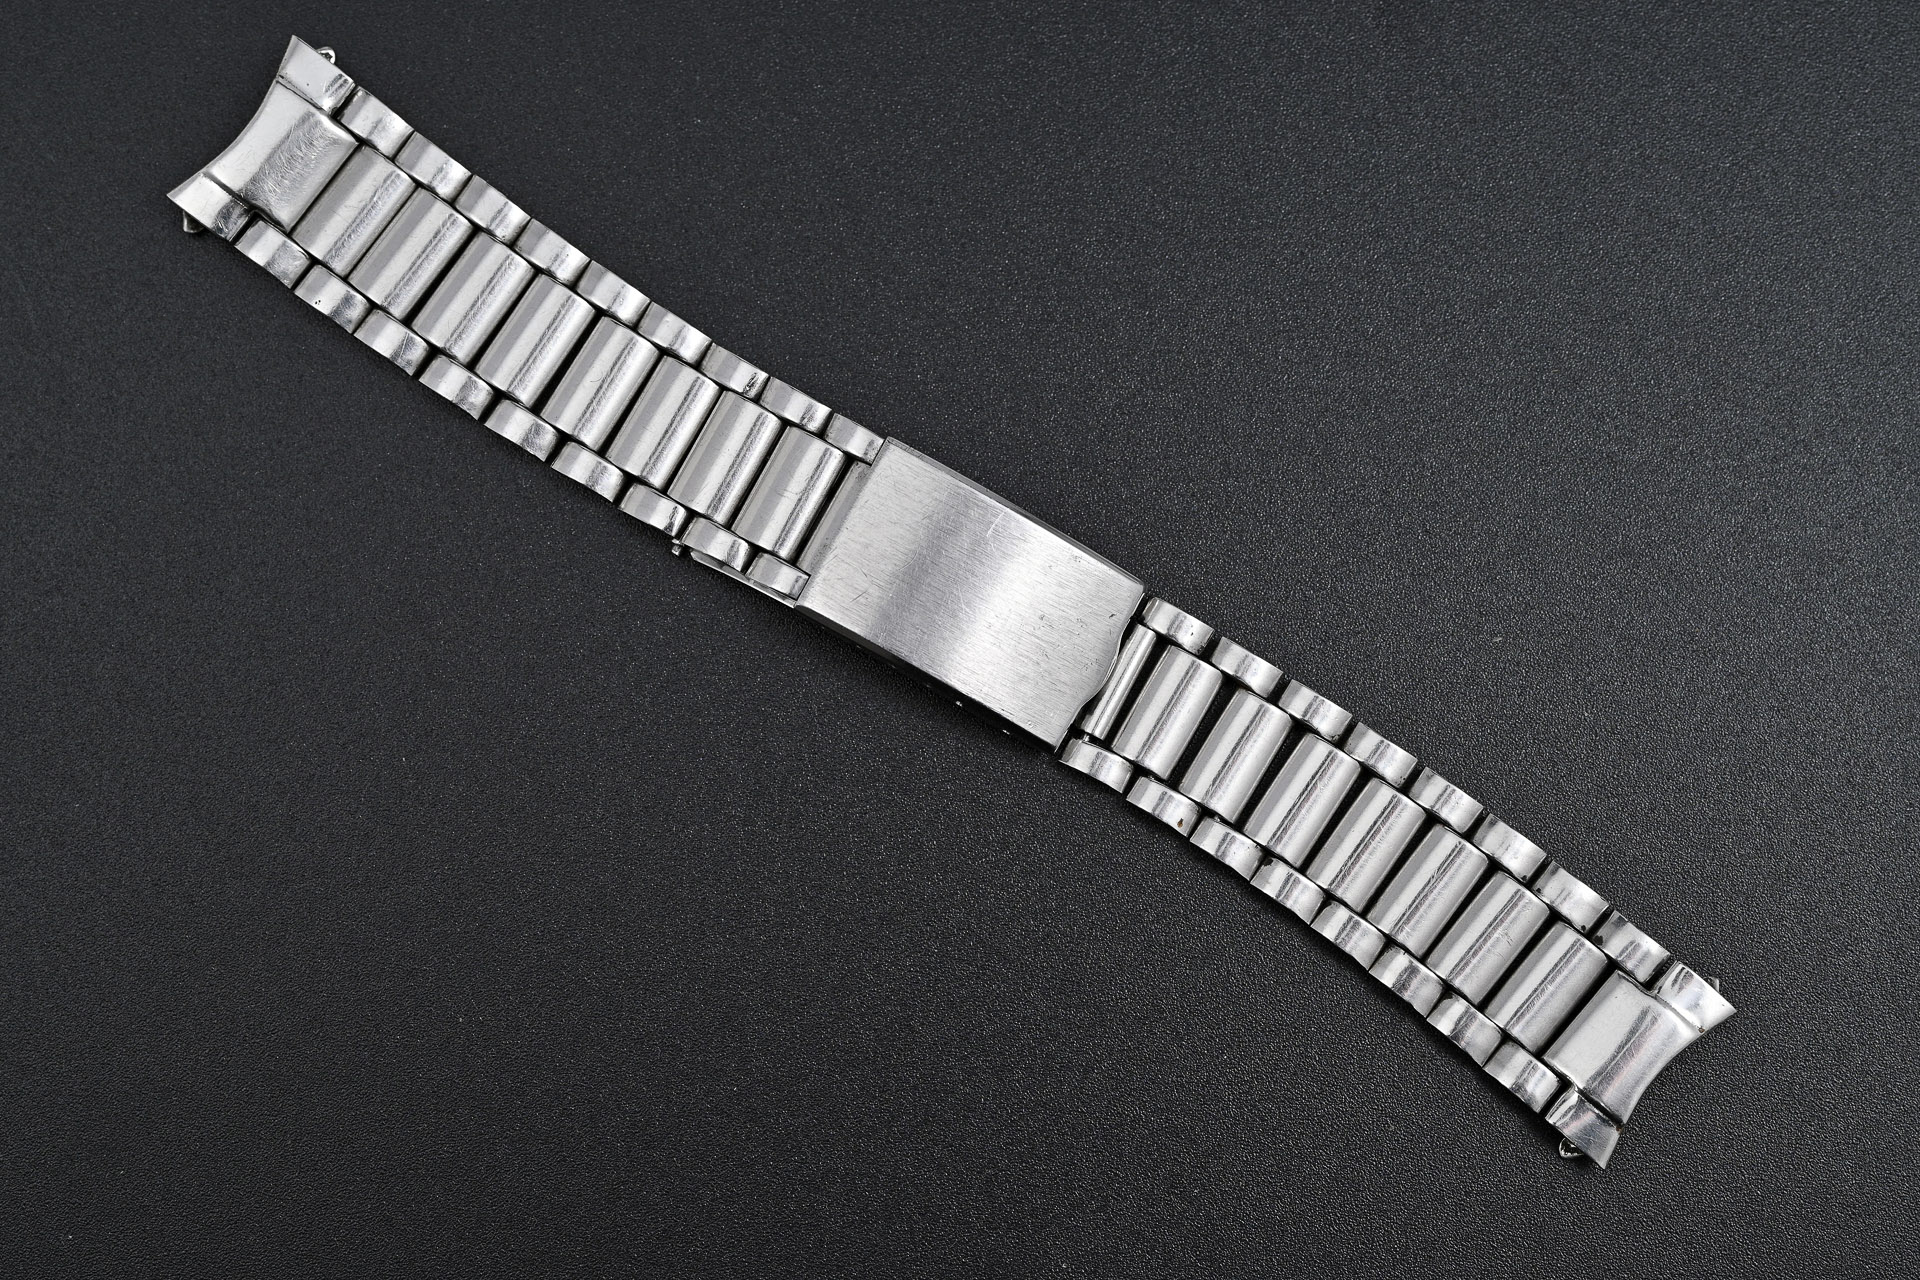
The bracelet fits well enough and does a pretty convincing job of looking like it was supplied with the watch from new.

There are very obvious parallels between the Citizen Parawater and the Seiko Cronos Seahorse. Both appeared within a few months of each other. Both occupied the same position in identifying as the first water proof watch in their respective stables. They are also uncannily similar in external appearance, if not in engineering design.

Both use hand-wind, three hander, 21 jewel movements running at 18000 bph. They each have luminous hands and dials. It is in the details though that their differences reveal themselves. I would say that the Citizen’s is the more sophisticated movement, although I see no particular differences in terms of performance. The Citizen used a more substantial crown and a rubber gasket to seal the crystal but it uses a press-fit case back. The Seiko uses a compression fit acrylic crystal, the compression force provided by the external bezel but notably, a screw-down, two-part case back. Swings and roundabouts.
To my eyes, both are striking, beautiful watches but the glossy black dial, larger crown and more assertive bezel, for me, sees the Citizen pulling marginally ahead. In other respects, it’s neck and neck.


Martin
Great article…I was beginning to think that there was nobody out there still with any enthusiasm for old watches….bit you have enlivened me again.. Keep doing what you do..
David Wall
Thank you David. I have no choice but to continue to do what I do if I have any hope of working my way though the embarrassment of old riches that I seem to have accumulated over the years. But thanks for the encouragement!
I undertake the odd clock and pocket watch repair. None of those have an easy adjustment for beat error either. What I do is completely wind down the mainspring so that the balance runs free, and rock the movement a few times and look to see where the balance comes to rest, and specifically, the relationship of the roller jewel or pin to the lever (how many mm off centre the balance comes to rest, and to which side of centre). If you repeat that several times, it gives a good idea of the beat error, and how to correct it at the balance so that, hopefully, the precarious operation only has to be done once.
Does that technique not scale down to a wristwatch? Just wondering!
Thanks, Andrew
Oh, and I should have said, the trick works best if you take the lever out, and use the banking pins to see how far off beat the roller jewel comes to rest…..
Hi Andrew, yes, it does scale down exactly as you describe but I’d not realised how bad it was until the watch was up and running. It is much easier to do what you describe before assembling the gear train, when there is room to see the relationship between roller jewel and pins. I was hoping to avoid dismantling the movement – hence the trial and error approach.
It’s astonishing to see your workmanship. Thank you for doing such a great presentation.
Thank you very much. The whole process is a pleasure for me and I am grateful that the effort is appreciated.
Martin, Thank you for yet another a masterly tutorial, with text that is so far from being prosaic as to be poetic about the living watch (“The balance is refitted, and lopes into action, impatient for me to fit the second of the two Parashock settings”), and fantastic photography. As an aid to better understanding watches and their repair your way with words and your explanations covering the ‘what’ ‘why’ and ‘how’ of each step is second to none.
Kindest regards
Keith
Keith, thank you so much for that. I really do appreciate your appreciation. Martin
Great article as always! I have a question about the going train. Is there any particularly advantage or disadvantage to the lack of center wheel? It seems like a pretty clever layout, particularly how it drives the second pinion along the way. I could see the driving wheel on the dial side is mildly inconvenient, from an assembly and main-plate-machining perspective. Am I missing anything else? Thanks!
Hi Steve, sometimes I wonder if different movement designs necessarily offer real benefits or whether they are just a demonstration of engineering ingenuity. I would say that the centre wheel arrangement is more straightforward in terms of sequencing the reassembly and at least in terms of my limited experience of having serviced both Cronos and Ace movements, I have found the former easier to extract a really good performance from. There doesn’t seem much else in it between the two approaches.
Thanks Martin, that makes sense.
Tangentially related, have you ever worked on Citizen quartz movements? I just picked up a Citizen with a 7100 series movement and I may pick your brain if you have.
Hi Steve, the only quartz Citizens that I’ve worked on have been modern Ecodrive models. I am on the lookout for a vintage quartz or two but nothing has yet pushed my buttons.
No worries, I found a technical manual and think I understand things. I also discovered it’s actually a 7340E movement once I popped the caseback off, despite 7100 being on the dial. The old quartz Citizens are every bit as nice as comparable Seikos, so I’d definitely suggest picking one up!
Hi Steve, Great post! I wonder if you might share the O ring size you used for the crown packing. I’m doing one now and this would be very useful! Thanks!
The gasket I used was Cousins part number G30875 but I note that they don’t list this size any more. If you go onto their site and look at G30874 and G30876 you may be able to figure out the dimensions.
Thanks! I was able to find the dimensions in an older catalog for G30875. They are: 2.15 x 0.75 x 3.65mm. Love your work! PS- sorry for the name mixup. Coffee deficiency…
No problem!
For anyone else who may need this, It looks like the G30875 was replaced by a Cousins branded O ring, G61432, of the same dimensions.
Hi – just curious. Are you doing the crown restoration on an old Parawater? I have an old X-Case Parater Jet that is my favorite watch and am trying to get it back to some degree of waterproofness myself.
Superb workmanship!
Thanks!
I love the way you were willing to tackle the problem of the crown seal. That seems to be the main obstacle for returning these old Parawaters to some degree of water resistance.
It just doesn’t seem right to leave a watch named Parawater without the means to deal with a bit of moisture. Thank you!
Well, I am impressed. As far as I know, you are the only person to work on the Parawater crown gasket . I have a few of these old Parawaters and no watchmaker I have ever contacted has been willing to take it on – they seem view the crown as a single replaceable/non-repairable unit (which are, of course, no longer available). Yet it actually seems pretty straightforward. This could well serve as a template for others to follow.
But I very much agree that a Parawater needs to be water resistant – I love those stories of them hanging beneath buoys in the Pacific for months, and still watertight when found.
I’ve just got into the habit of trying to rebuild them having got to grips with the Seiko 6105/62MAS crowns. Once you’ve done a few then it becomes part of the routine.
Hi Martin,
Great article. I do love these old Parawaters and I’ve got a few of my own to service. One question if I may – is there a lubrication guide for this movement anywhere that you know of? Im curious to know if that double third wheel is lubricated between the wheels, and if so, which oil is used?
Thanks!
Hi Mickey,
I don’t have a technical guide for this movement, just a parts list, but I do have the guide for the 52 series that also uses a double third wheel. That guide simply instructs that the top and bottom pivots of the third wheel be lubricated with synt-A-lube. I hope that helps.
Do you have any early 1960s Citizen catalog or advertising that would show all the Ace models? What color dials did they offer? I think I’ve only seen silver and black.
I’m afraid not. Vintage Citizen watches are a new direction for me and I am by no means an expert nor do I have any sort of repositary yet of information about Citizen watches from this period. I anticipate that this will accumulate with time as I work on more Citizens but for the moment, not.